
Macs have a snipping tool that makes capturing and recording your Mac’s screen a breeze. The snipping feature is easy to use; you just need to press Command + Shift + 4 simultaneously and then drag a box around the section of the screen you want to capture.
I’m Jon, a Mac expert, and owner of a 2019 MacBook Pro. I use Mac’s screenshot tool all the time and made this guide to help you become an expert.
This article reviews Mac’s snipping tool, how to use it, and some tips and tricks. So continue reading to learn more!
How to Use The Mac Snipping Tool
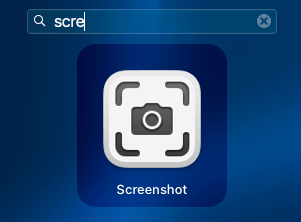
Mac’s Screenshot toolbar is easily accessible using Launchpad or keyboard shortcuts. Users can use keyboard shortcuts to quickly snap their screens or open the toolbar for more options.
Here’s how to use Mac’s Screenshot tool:
Snipping Keyboard Shortcut
The closest match to the Windows snipping tool shortcut (Windows Key + Shift + S) is Mac’s shortcut to capture a screenshot of a section of your display.
To use Mac’s shortcut, just press Command + Shift + 4 at the same time, then use your mouse to drag a box around the area you want to screenshot.
This method is the most similar to the Snipping Tool on Windows computers. It also allows you to edit and markup the screenshot afterward.
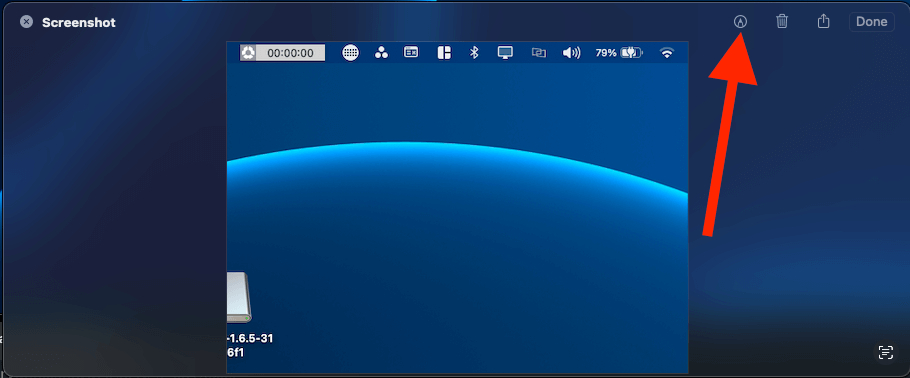
You can click the icon near the top right corner to add text, shapes, arrows, etc., to the image.
Open The Snipping Toolbar
You can use a few keyboard shortcuts to open the snipping toolbar. Open the snipping toolbar by pressing Shift + Command + 5. Alternatively, use Launchpad to open the Screenshot toolbar.
Choose a Capture Option
Once you open the snipping toolbar, you’ll have five capture options (listed from left to right):
- Capture a screenshot of the whole screen
- Capture a selected window
- Capture part of the screen
- Begin video recording the entire screen
- Begin video recording part of the screen
Alternatively, you can use keyboard shortcuts to capture your screen and avoid opening the toolbar altogether. To take a screenshot of your entire screen, simply press Shift + Command + 3.
Of course, you can still use Shift + Command + 4 to capture a selection of your screen. If you have a MacBook featuring a Touch Bar, you’ll need to use a different keyboard shortcut to screenshot the Touch Bar. Press Shift + Command + 6 to include the Touch Bar in your screenshot.
Change The Settings
To change the settings on your Screenshot toolbar, click the “Options” button in the toolbar. Although screenshots usually save to your desktop, you can adjust where you want the snaps to go after you capture them.
In addition, you can set a timer to allow you to manipulate the screen before the tool captures your screen. Or, select additional options as necessary, such as “Show Floating Thumbnail,” “Remember Last Selection,” or “Show Mouse Pointer.”
Use Third-Party Snipping Tools
Alternatively, you can always use a third-party snipping tool instead of Mac’s Screenshot Toolbar. Various apps offer extensive snipping tool functions by simply adding them to your Mac.
Of course, you can always stick with Mac’s native snipping tool, but if you prefer a different tool, consider installing an app designed for this function. However, I recommend Apple’s built-in tools since they are native and very simple to use.
FAQs
Here are some common questions we get about using the snipping tool on Macs.
Where Does My Mac Save My Screenshots?
Generally, your Mac automatically saves screenshots to your desktop. Once you capture your screen, the image should pop up on your desktop.
If you can’t find it, check your Screenshot settings by opening the Screenshot Toolbar and checking the selection under “Save to.”
How Do I Turn off a Screen Recording on My Mac?
Once you’re ready to end the recording capturing your Mac’s screen, press the square stop button. If the toolbar disappears, simply press Shift + Command + 5 to bring it back to your screen. The same process applies whether you’re recording your entire screen or a small part of it.
Why Is the Screenshot Tool Not Working on My Mac?
In some cases, the Screenshot function on your Mac might not work. If this is the case, it could be due to the screen you’re trying to capture. Certain apps on your Mac, such as the Apple TV app, might not allow you to capture or record their windows.
So, if you’re trying to record these windows, your Mac might not be able to complete your request.
How Do I Copy a Screenshot to My Clipboard?
You can easily copy your screenshot to your Clipboard for easy use by pressing and holding the Control key while you capture the screenshot.
For example, you can press Command + Control + Shift + 4, select the area to screenshot, then press Command + V to paste it.
Conclusion
Like most devices, Mac’s snipping tool is pretty basic, easy to use, and includes some excellent features. Using the tool is quick and easy, requiring minimal effort to capture or record part or all of your screen.
If you don’t like the app, consider downloading a third-party service. Whether you use Mac’s native snipping tool or a third-party app, taking screenshots is straightforward and fast.
What is your favorite method to take screenshots on your Mac? Let us know in the comments below.