
Importing videos into Adobe Premiere Pro is a simple process. Open Adobe Premiere Pro and go to “File” > “Import.” Select the video and click “Open.”
My name is David, and I’m a video editor. I’ve worked with many brands taking movies and audio projects. I use Adobe Premiere Pro for all my projects.
In this article, I will explain how to import videos into Adobe Premiere Pro, import videos from YouTube and Google Drive, re-import a lost video clip, and finally explain why MOV files are not opening in your Premiere Pro.
Table of Contents
How to Import Videos into Adobe Premiere Pro
There are several ways to do things in Adobe Premiere Pro; you go for what works best for you, the one you enjoy the best. Let me take you through some methods.
1. Using Project Window
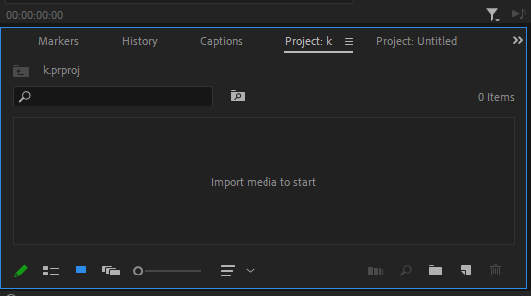
Go to the Project Window, and double-click anywhere in this box to launch a window where you may find the footage or files you want to import. Select one or more clips and press the “import” button.
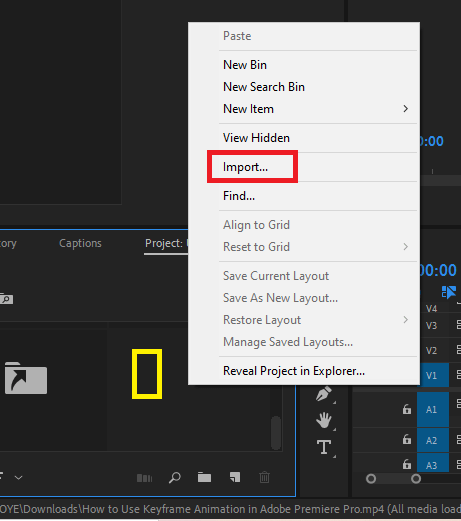
You can use the same import option by right-clicking on any empty space in your project window and selecting “Import.”
2. Using The File Tab’s Drop-Down Import
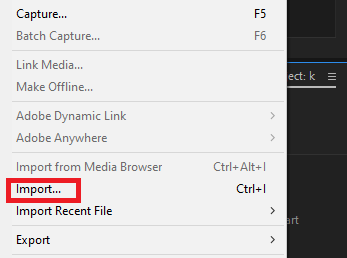
Select “Import” from the top menu bar of Premiere, and a browser window will appear, allowing you to choose the files you want to import into Premiere Pro. Choose the files you want to import and press the “Import” button to add them to your project.
3. Using The Launching Media Browser
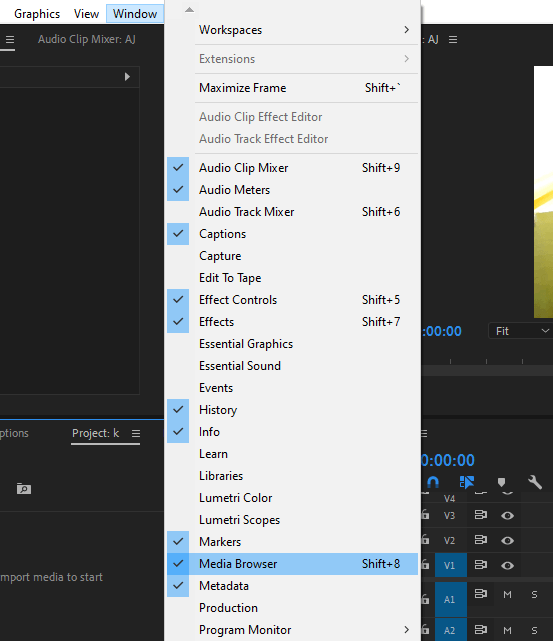
Select “Window > Media Browser” from the top menu or use the shortcut command Shift + 8.
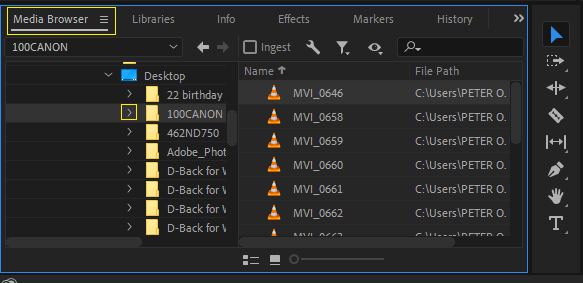
The Media Browser window appears, and you will see a list of folders on the left. You may choose between list and thumbnail views.
Click the triangles next to folder names in the Media Browser’s list of hard drives and folders to access them. Choose one or more files from the list.
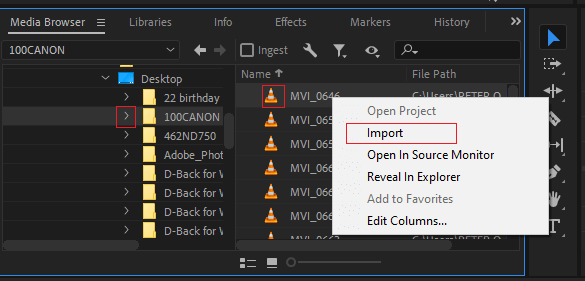
You can double-click on the file to open the clip in the Source Monitor. Right-click the file in the Media Browser to import the clips and choose Import.
You may either drag the file from the Media Browser into the Project panel or drag it into a Timeline. The Media Browser will now import the file into the Project panel.
4. Using the Finder Window & Drag and Drop Files
This method is cute. You can import directly from another location on your PC. Open a finder window and navigate to the files you want to import. Select the files you wish to import and drag them into Premiere Pro’s project panel.
How to Import YouTube Videos into Adobe Premiere Pro
The video format and specifications cause all import errors in Adobe Premiere. All we need to do before attempting to add YouTube video to Premiere Pro is to convert the incompatible file into a format that Adobe Premiere Pro supports. But how do you do it?
Download the YouTube video you wish to edit in your Premiere Pro. Then, you can import the videos into a Video Converter to convert them to the correct format. You can download a YouTube video using Internet Download Manager (IDM).
Import the YouTube video. Simply go to File > Import and select the video you downloaded. The video will now be available in your project panel.
You can drag it down to the timeline and start editing once the video is imported. You can add effects, transitions, and other elements to the video to make it look more professional.
MOV File Not Importing into Adobe Premiere Pro?
There could be a few reasons why a MOV file is not imported into Premiere Pro. First, make sure you are using the latest version of Premiere Pro. Try updating to the latest version if you are using an older version.
Also, ensure the MOV file you are trying to import is not corrupted or damaged. If it is, try re-exporting it from the source.
Lastly, check that the video codec encodes the MOV file and is compatible with Premiere Pro. You can also try converting the file to other formats like MP4 if the problem persists.
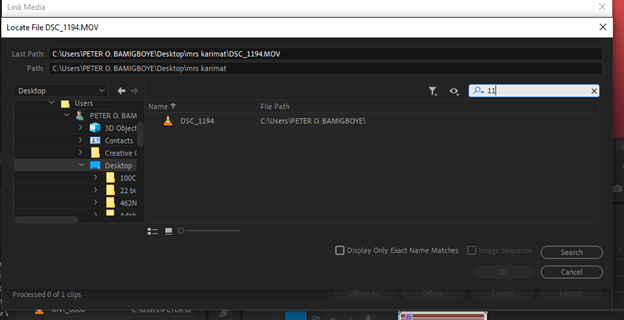
How to Re-Import a Lost Video Clip into Adobe Premiere Pro
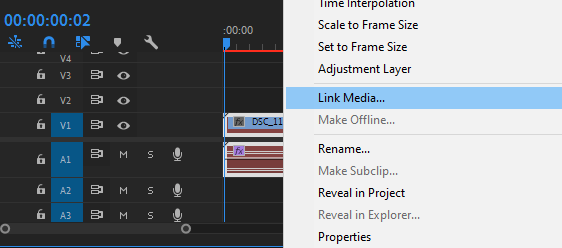
To reimport a lost video file or offline media, just as Adobe Premiere Pro calls it, we use a solution called “link media.” To do so, right-click the missing clip on the timeline and select “link media” from the menu.
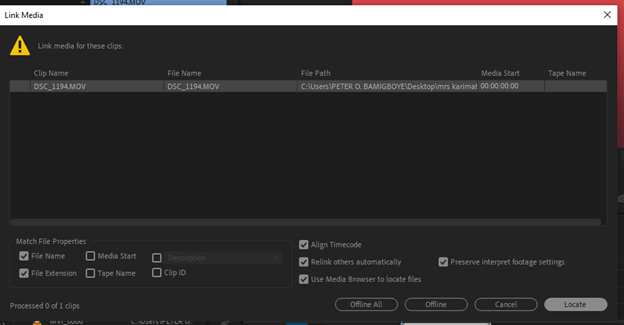
Locate the missing clip from your window explorer. If you know the name of the missing clip, you can use the “Find” feature in your operating system to locate it. If you do not know the name, you can use the “Search” feature to help you locate the file.
You can copy it to the same folder in which your project is located. This will ensure that the clip is easy to find and import into Premiere Pro.
MP4 File Not Importing into Adobe Premiere Pro?
If an MP4 file is not importing into your Adobe Premiere Pro, the problem is definitely with the file. To resolve this issue, try converting the file to a format compatible with Premiere Pro, such as MOV, AVI, or even the same format – MP4.
Conclusion
Importing videos into Adobe Premiere Pro is quite simple. First, launch the program and create a new project. In the project window, select the “Import” option and select the video file you want to import.
With Adobe Premiere Pro, you can easily and quickly import your videos for editing and production. You can also drag and drop the video file into the project window. Once the video file is imported, you can start editing and producing your project.