
InDesign is extremely complex in some ways, and yet in others, it can be extremely simple. Importing files for use in your InDesign document is always done the same way: with the Place command.
But there are a few extra things to consider when placing a PDF file in InDesign, so let’s take a look at how it all works.
Table of Contents
Importing PDFs with the Place Command
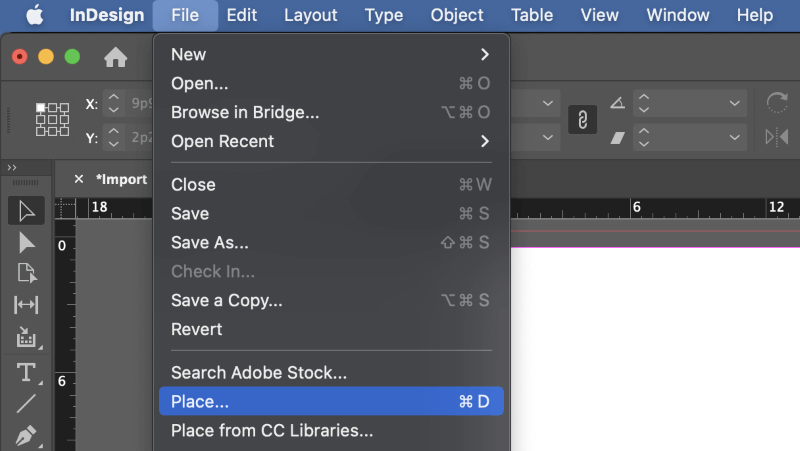
As I mentioned above, the fastest way to import or open a PDF to InDesign is with the Place command. Open the File menu and click Place. You can also use the keyboard shortcut Command + D (use Ctrl + D if you’re using InDesign on a PC).
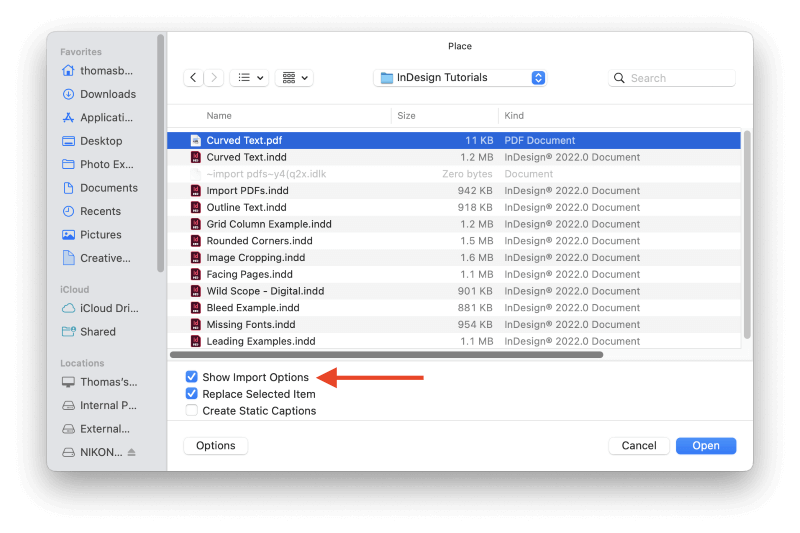
InDesign will open the Place dialog window. Browse to select the PDF file you want to import, then make sure that the Show Import Options setting is enabled, and click OK. Note: on macOS, you may have to click the Options button to display the Show Import Options setting.
Next, InDesign will open the Place PDF dialog window. This allows you to choose the page or pages you want to place, as well as a range of cropping options.
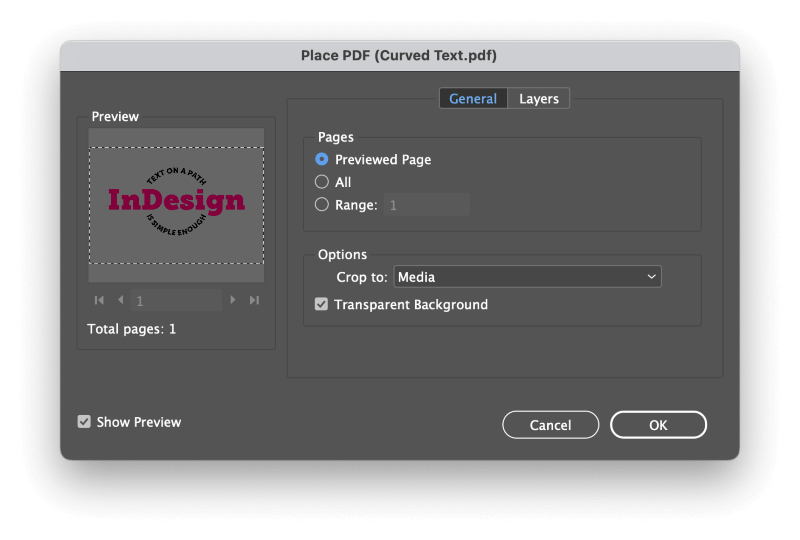
Customize the options until you’re satisfied, and click OK. InDesign will then give you a ‘loaded cursor’ showing a thumbnail preview of the object you’re placing. Click anywhere on your InDesign document page to set the top-left corner of the new PDF object.
If you selected multiple pages in the import options, you have to place each page separately. After you place the first page, the cursor will be loaded with the second page, and so on until you’re done.
This can quickly get tedious if you’ve got a lot of pages to place, but I’ll show you a trick if you read on!
Unfortunately, when importing PDFs in InDesign, none of the PDF content is directly editable in InDesign. InDesign treats placed PDFs as raster images, so they’re essentially no different than JPGs or any other image format you import into your document.
Importing Multiple PDF Pages to InDesign with Scripts
There is a faster way to place multiple PDF pages into a document at once, although you’ll have to go a bit out of the way to get there.
Like most Adobe apps, InDesign can have its features expanded by third-party plugins and scripts, but it also comes packed with a few premade scripts provided by Adobe, and one of them can place multiple PDF pages at once.
It’s a good idea to make sure that you have enough pages in your InDesign document to hold each page of the PDF before you start the import process and that the page dimensions are large enough to contain the PDF pages.
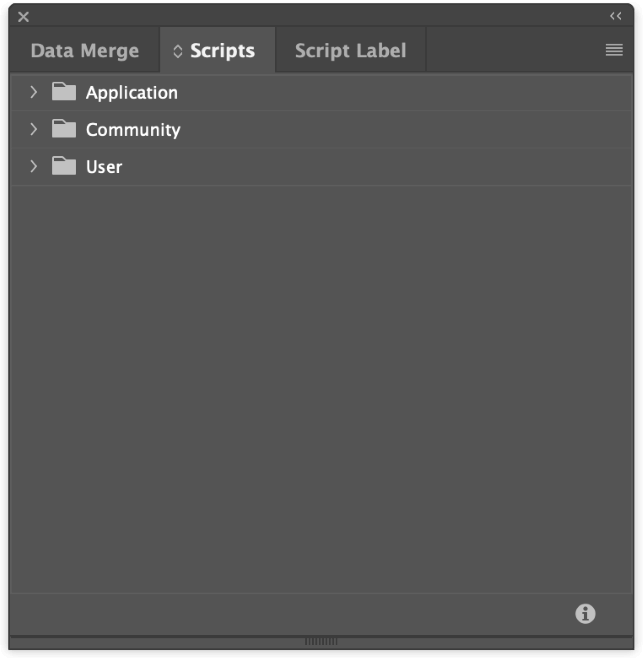
To get started using InDesign scripts, open the Window menu, select the Utilities submenu, and click Scripts. You can also use the keyboard shortcut Command + Option + F11, but you’ll probably need two hands to reach all the keys, so it’s not actually much faster than using the menu.
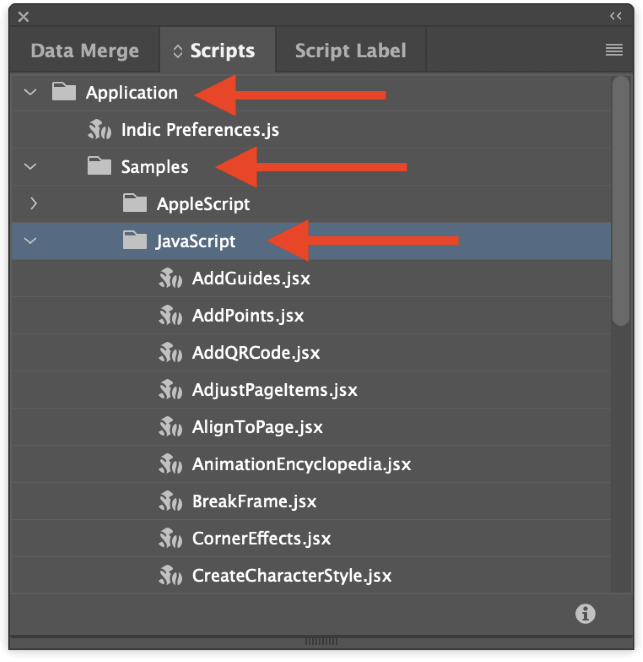
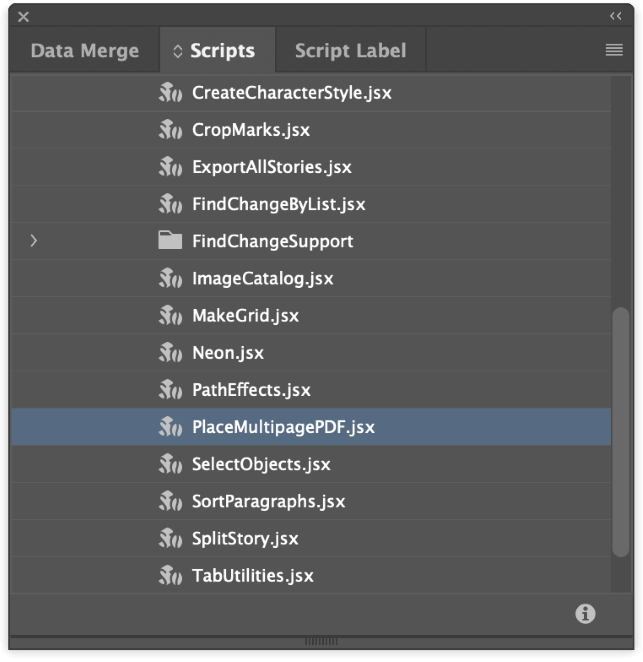
In the Scripts panel, expand the Application folder, then expand the Samples subfolder, and then expand the JavaScript subfolder. Scroll until you see the entry named PlaceMultipagePDF.jsx and double-click the entry to run the script.
InDesign will open a file browser dialog window. Select the PDF file you want to place, and click the Open button. In the Choose a Document dialog, select if you want to place the PDF file into a new document or one of your currently open documents.
Scripts don’t always provide the most polished user experience, as you’ll see next. Two more popup windows will appear to confirm your document selections without any options other than an OK button, so just click through them.
Next, the script will open the Choose a Page dialog window, prompting you to enter the page number where you want the PDF placement to begin. Make a selection, and click OK.
The script will begin to place each PDF page on its own InDesign document page, starting at the specified page number.
FAQs
Working with PDFs can be a bit difficult for new users who aren’t technically minded, so I’ve collected a couple of the most frequently asked questions from our readers. If you’ve got a question about importing PDFs that I didn’t answer, let me know in the comments below!
Can I edit a PDF with InDesign?
In a word, no. The Portable Document Format (PDF) is used to export documents for sharing online, presentations, and sending to print shops but is not intended for storing in-progress working files. It is technically possible to convert PDF files to editable InDesign files, but with mixed success.
How to convert a PDF file to an InDesign file?
Natively, there is no way to convert a PDF file into an editable InDesign file, but so many people have asked for this feature that there is now a third-party plugin available from a small development company named Recosoft. Rather than converting the existing file, the plugin appears to actively recreate the entire PDF file within InDesign automatically.
I’ve only tested the free trial, but it does seem to work acceptably well for very basic documents. Reviews of the plugin within the Adobe Creative Cloud marketplace only give the plugin a rating of 1.3 out of 5, although oddly enough, the Mac version seems to be rated at 3 out of 5.
You can explore the free trial from Recosoft, but don’t expect too much. Most reviewers seem to feel that the software is usable for simple documents but is too highly priced at $99.99 for a yearly license.
A Final Word
That’s just about all there is to know about how to import a PDF in InDesign, whether you’re working with a single-page PDF or a long multi-page document.
Keep in mind that PDFs will only be imported as raster images and not as editable content. It’s always a good idea to store your working files in the application’s native file format to ensure that you can edit them later as needed.
Happy importing!