
Grouping and ungrouping layers in Procreate is a beginner’s task! All you need is an iPad and the Procreate app.
In this article, we will show you a detailed step-by-step guide on how to do this. In addition, you will learn how to name your groups in Procreate as well.
Let’s get started!
Table of Contents
2 Ways to Group Layers in Procreate
After knowing how to group layers, you will be able to work on multiple layers at once on an organized canvas.
Method 1: Group selected layers
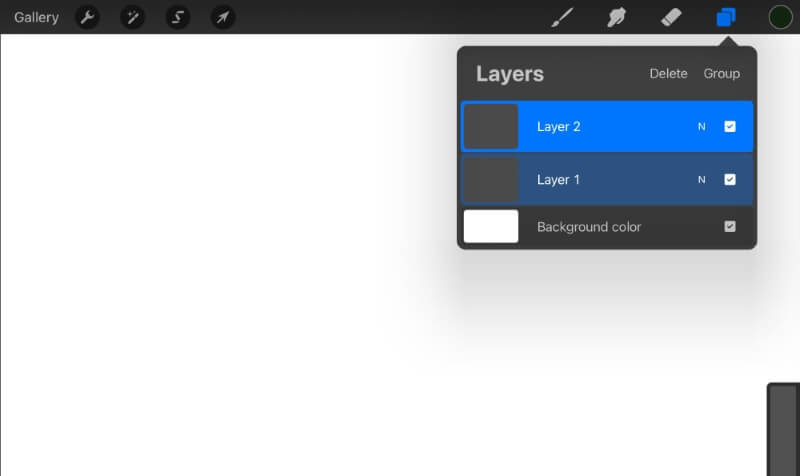
Step 1: Swipe right on each layer to select the layers that you want to group (the selected layers will become highlighted).
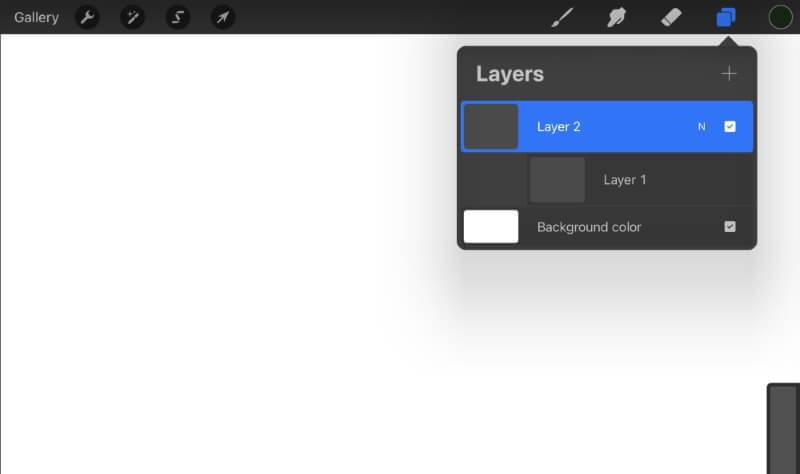
Step 2: Tap Group on the upper side of the Layers menu to group the layers.
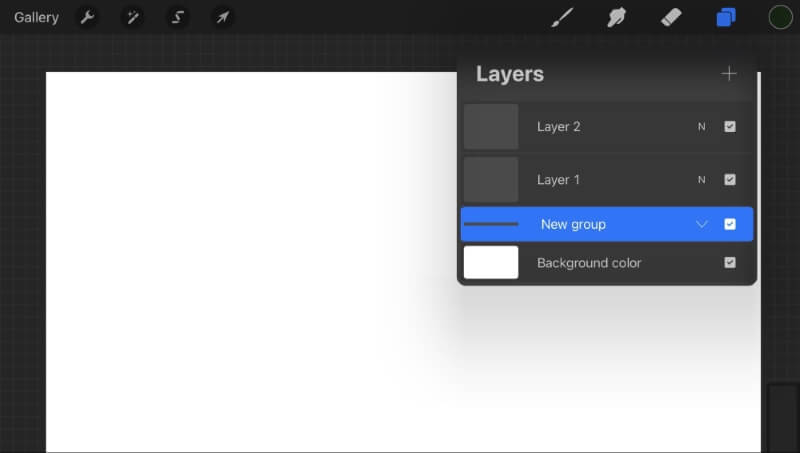
Method 2: Combine Down
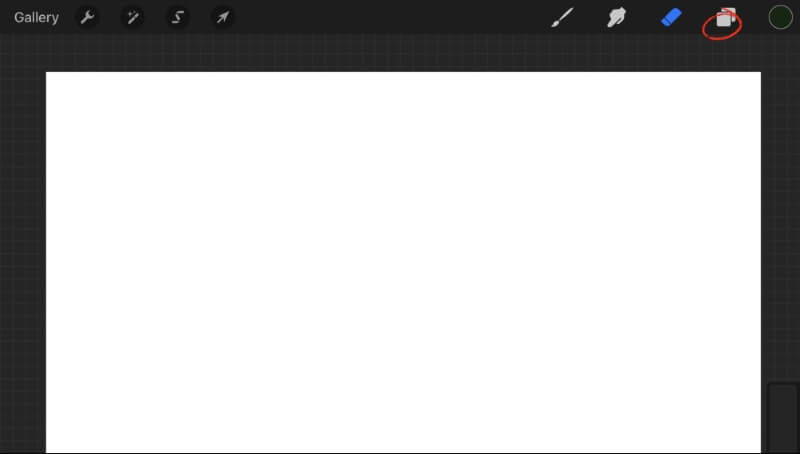
Step 1: Tap on the Layers icon on the upper right side of the screen. This will show you a dropdown of your layers.
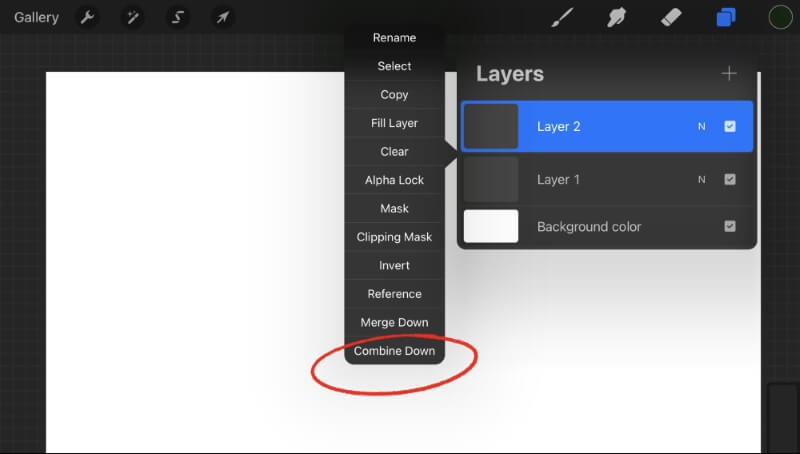
Step 2: Tap on the layer above that you want to group down.
Step 3: Select Combine Down on dropdown settings to group layers. Continue to select Combine Down for as many layers as you need to group.
How to Ungroup Layers in Procreate
Step 1: To ungroup layers, click, hold, and drag the layer out of the group.
Step 2: Continue dragging other layers out of the group until the group is empty.
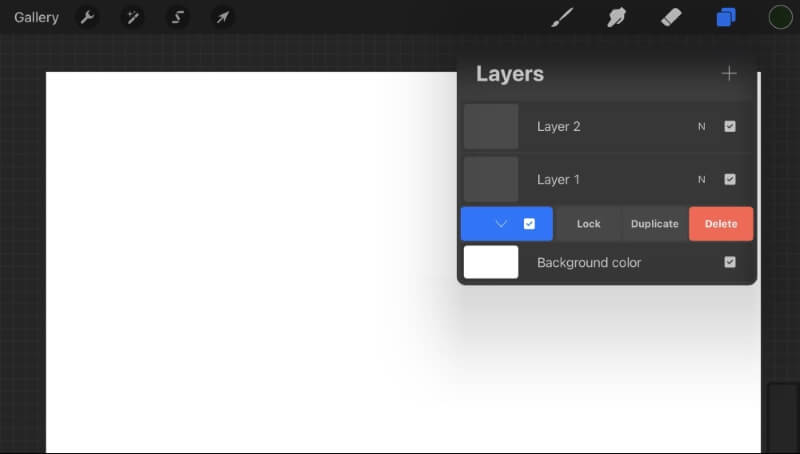
Step 3: Now you have a group with no layers. Swipe right on the empty group layer and select Delete.
How to Name Your Layers in Procreate
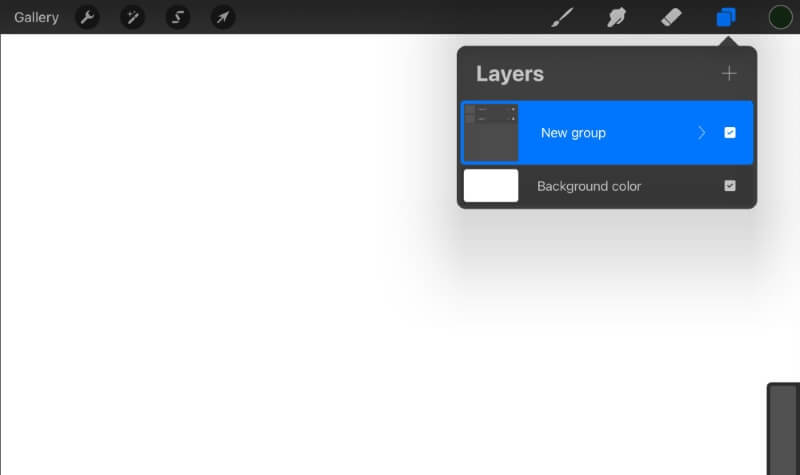
Step 1: To name your group, select the layer that says New Group.
Step 2: Tap the setting that says Rename.
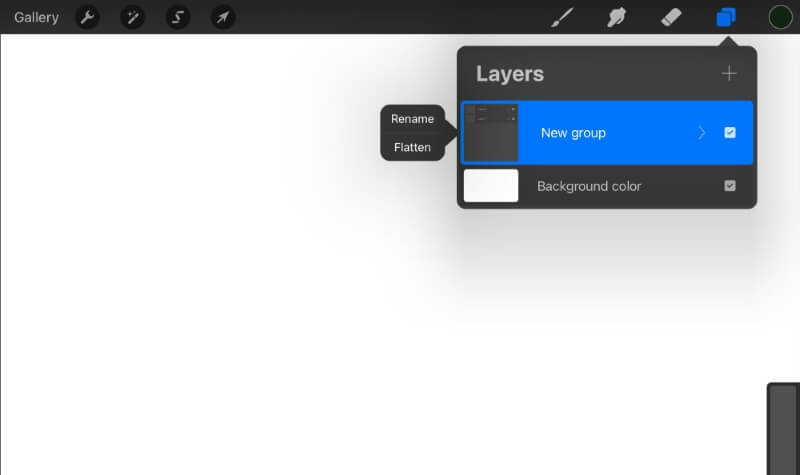
Step 3: Type a name to organize the group. For example, you can name them lines, shadows, highlights, colors, etc.

How to Open and Close Groups in Procreate
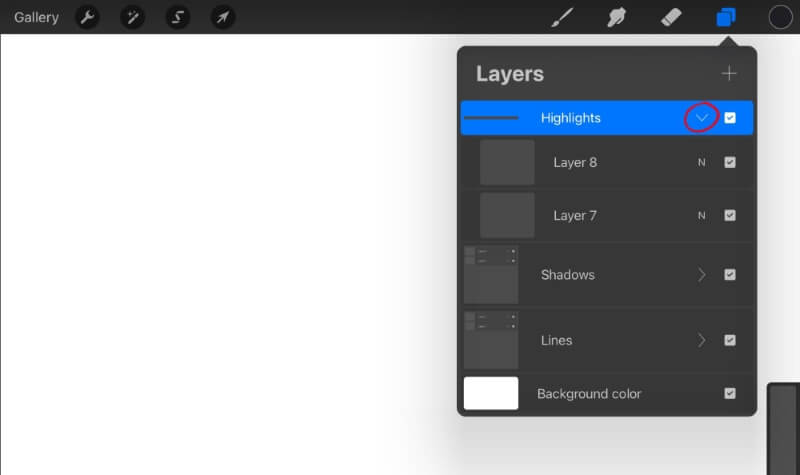
Closing your groups will keep your layers more organized, and less cluttered while you are painting.
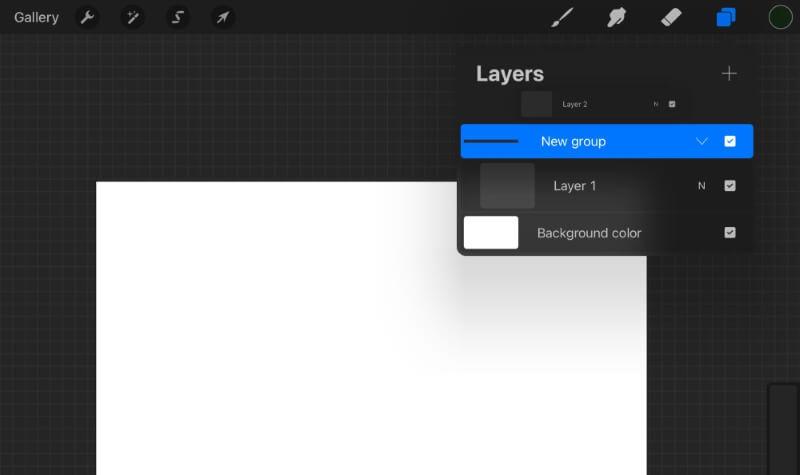
Step 1: To close the group select the downward arrow on your group of layers. Now you should see fewer layers.
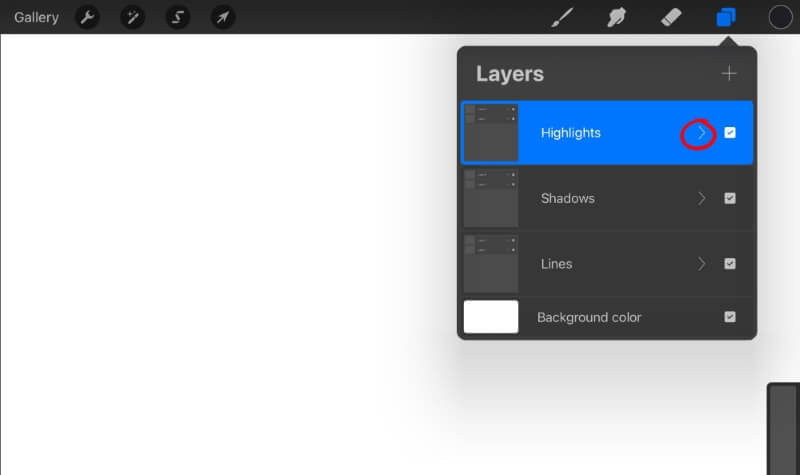
Step 2: To open the group select the arrow pointing at the check mark. Now you will see all layers in the group.
Conclusion
Grouping your layers will help you keep your layers organized. Naming your groups will also help you find the right layer that you are looking for when scrolling through your groups, whether it’s through your lines, shadows, or colors. Down the line, you will be glad that you grouped your layers and named them!
Let us know if this article has helped you solve your problem, and please leave a comment below if you have any questions about this guideline or have any suggestions for more articles!