
When editing a video there can be many reasons that one may need to freeze the picture on a specific frame. Whether it be a VFX or just a frame you are wanting to show, DaVinci Resolve has made it easy to do.
My name is Nathan Menser. I am a writer, filmmaker, and stage actor. My entryway into filmmaking was done via video editing, which I started 6 years ago. Through the past 6 years, I have found myself freezing on frames many times, so I am happy to share this essential skill.
In this article, I will cover three different methods for freezing a frame in DaVinci Resolve.
Table of Contents
Method 1
Step 1: Navigate to the “Edit” page from the horizontal menu bar at the bottom of the screen.
Step 2: Right-click, or for Mac users, Ctrl+Click, on the clip you need to add a freeze frame. This will open a vertical menu bar to the right.
Step 3: Select “Retime Controls” from the menu. A row of arrows will pop up on the clip on the timeline.
Step 4: Move your player head on the timeline to the exact moment you need to freeze the frame. Click the black arrow at the bottom of the clip to view the “Retime Controls” menu. Choose “Freeze Frame.”
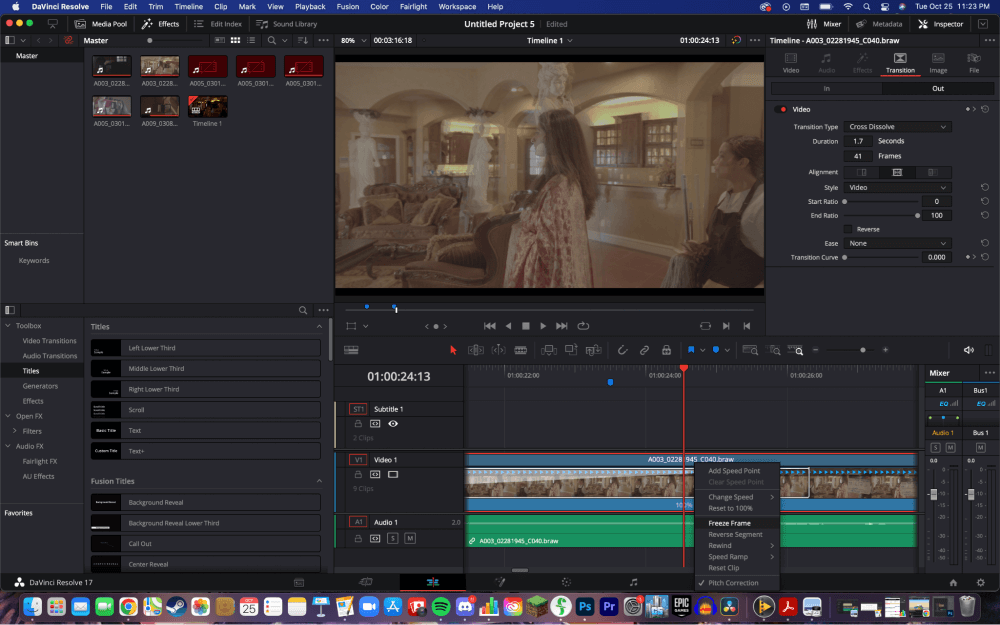
Step 5: Two “speed points” will appear on the clip. To make the freeze frame last longer, pick up the speed point and drag it to the right. To make it shorter, drag the point to the left.
Method 2
From the “Edit” page, move the player head to the moment in the video you need to add a freeze frame. Click on the “Color” workspace icon to open the color workspace. Then select “Gallery.”
This will open a pop-up menu. Right-click, or Ctrl+click, on the preview window. This will open a vertical menu pop-up. Choose “Grab Still” from the options. The still will show up in the gallery to the left of the workspace.
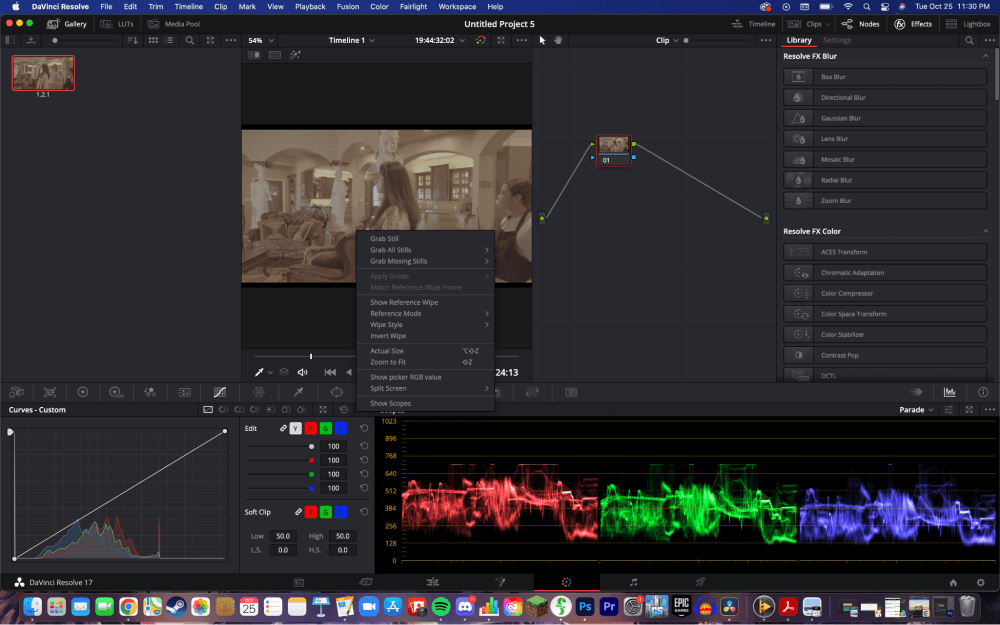
Use the razor tool to cut the video where you got the still. From the gallery, drag your still to the timeline. Make sure the second half of the clip is where you made the cut.
Method 3
For this option, we will start at the “Edit” page. Position the player head on your timeline where you need the freeze frame to start.
Select the “Razor” tool from the options above the timeline. Make a cut on the player head, where the freeze frame will begin. Move the player head to where you need the freeze frame to end. Make another cut with the razor tool.
Choose the “Selection” tool from the options above the timeline. Right-click on the clip, or Ctrl+Click for Mac users. This will open a vertical menu bar. Select “Change Clip Speed.”
Check the box for “Freeze Frame.” Then, click” Change.”

Conclusion
Using any of these three ways is an effective way of freezing a frame. Try them out and determine which one works best for your workflow.
If this article has added some value to you as an editor, or if it has added a new skill to your repertoire as a video editor, then let me know by leaving a comment, and while you are down there, let me know what you would like to read about next.