
Premiere Pro can lag for various reasons, including insufficient RAM or too many running background programs. Additionally, inadequate storage space, heavy video effects and transitions, and an outdated graphics card (GPU) can all contribute to lagging.
To reduce lagging, you should ensure their computer meets the recommended system requirements for Premiere Pro, clean up their system, and ensure that your computer drivers are up-to-date.
This article explains how to clear a cache file, change playback quality, use a proxy video, increase RAM, render, disable autosave, use GPU acceleration, match footage and sequence settings, and turn off overlays.
Try these options and see the performance of your computer increase drastically!
Table of Contents
- Clearing Adobe Premiere Pro Media Cache
- Changing Playback Resolution in Adobe Premiere Pro
- Turning Off High-Quality Playback in Adobe Premiere Pro
- Using Proxy Video In Adobe Premiere Pro to Speed Up Editing
- Muting Effects in Adobe Premiere Pro
- How to Boost Ram Memory in Adobe Premiere Pro Preferences
- Rendering a Preview Video in Adobe Premiere Pro
- Closing The Lumetri Scope Panel In Adobe Premiere
- Disabling Auto-Save in Adobe Premiere Pro
- Activating GPU Acceleration in Adobe Premiere Pro
- Matching Your Footage and Sequence Settings in Adobe Premiere Pro
- Conclusion
Clearing Adobe Premiere Pro Media Cache
The media cache is a temporary storage space in Premiere Pro that keeps copies of media files when imported; This allows Premiere Pro to access the files faster, resulting in less choppy playback.
However, with time, the media cache can get bloated and use a significant amount of hard disk space. Clearing the cache by eliminating outdated files can help reduce the amount of disk space consumed and enhance playing performance.
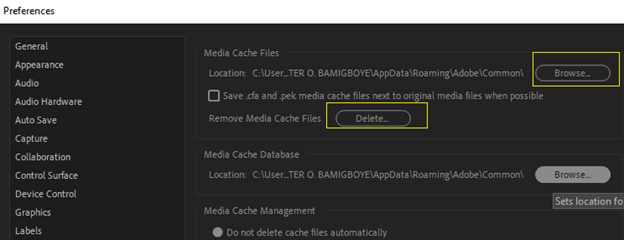
Open Premiere Pro and go to the Preferences menu to remove the media cache; This will bring up a box where you can select which media cache files to erase. Choose media first, then clean.
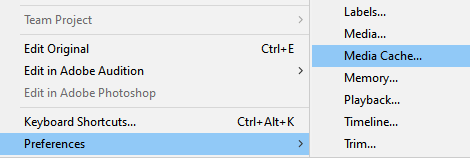
You can choose to view the files or just those saved for a particular period (such as one month). After making your choices, click OK to remove the files.
After clearing the media cache, you should notice an increase in playback performance. However, if the problem persists, continue reading.
Changing Playback Resolution in Adobe Premiere Pro
Select the “Dynamic Quality” option from the Settings menu in the screen’s upper-right corner. For playback, choose a lower resolution, such as 1:2 (half the resolution of the original content) or lower.
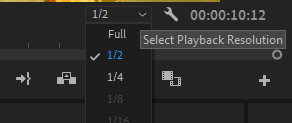
You will see options to reduce playback to 1/2, 1/4, 1/8, or 1/16 of the native resolution depending on your clip size.
Turning Off High-Quality Playback in Adobe Premiere Pro
You may also deactivate high-quality playback. In the bottom-right corner of the Preview Window, change the setting to 1/2 or 1/4. Click on the wrench button next to the Resolution option, then deselect High-Quality Playback.
Using Proxy Video In Adobe Premiere Pro to Speed Up Editing
Video proxies, often known as proxy files, allow you to edit large video files without experiencing slowness or processing strain. Proxy files are compressed versions of your original files.
Select all the videos you want to create proxies for in your project panel, then right-click and select “Proxy” > “Create Proxies.”
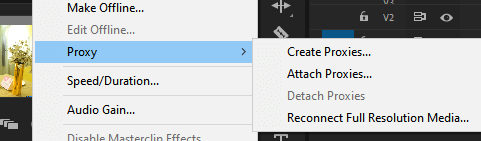
In this new window, select the codec > QuickTime.
Below that, you may specify the location of your proxies. I recommend keeping them in a new folder with the original material.
When you click “OK,” Adobe Media Encoder will launch and instantly produce the video proxies. Depending on the length and size of the film, this might take a few seconds or a few minutes.
Muting Effects in Adobe Premiere Pro
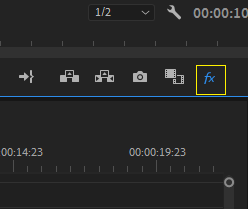
Muting effects will turn off all effects in your sequence temporarily. Activate the FX button by pressing the plus (+) icon at the bottom right of the Program Monitor to open up the Button Editors.

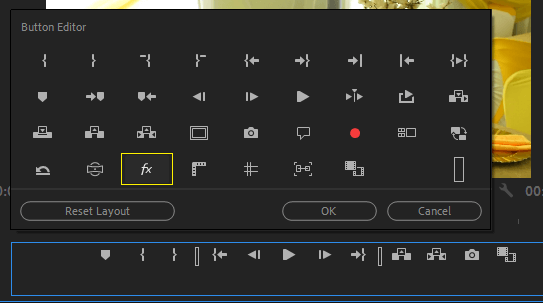
Search for it, click and drag it to the button panel. After that, press the FX button to toggle FX on or off.
How to Boost Ram Memory in Adobe Premiere Pro Preferences
Go to the Edit menu, select Preferences, and select Memory in the Preferences dialog box.
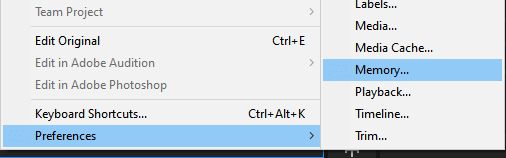
In the drop-down list, next to “Optimize Rendering For,” select Memory in the drop-down list. Click OK, close Premiere Pro, and reopen the project for the new preference to take effect.
Rendering a Preview Video in Adobe Premiere Pro
People frequently report slowness when playing back video productions in Adobe Premiere Pro. It might be because specific frames are skipped, or the transitions and effects are not working correctly.
If you’re experiencing the same problems, your video project requires rendering.
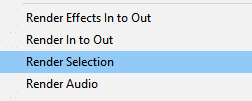
To render a video preview, select the area you want to render, then go to the sequence menu at the top and select render (Render Effects In to Out, Render In to Out, Render Selection, Render Audio).
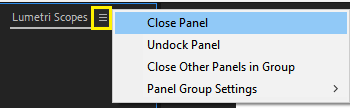
Closing The Lumetri Scope Panel In Adobe Premiere
The lumetric scope panel can slow down your PC while playing back your project.
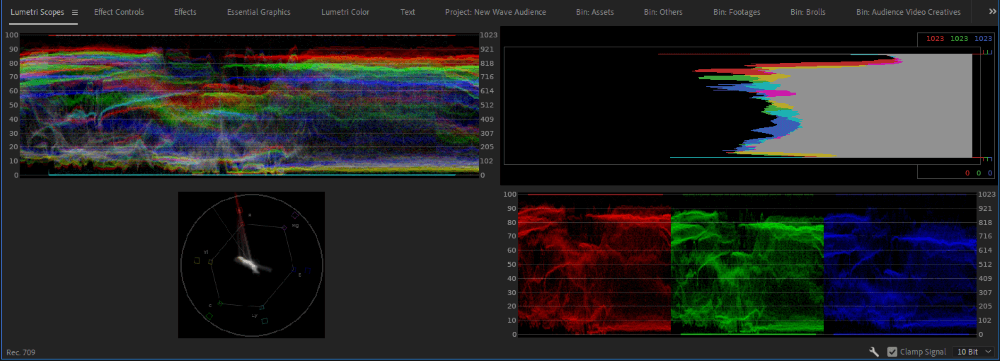
To close the lumetri scope panel, select the three at the top of that panel and select the close panel. The lumetri scope panel will immediately close.
Disabling Auto-Save in Adobe Premiere Pro
Open Adobe Premiere Pro and go to Preferences in the Edit menu. On the left-hand side, click on “Auto Save.”
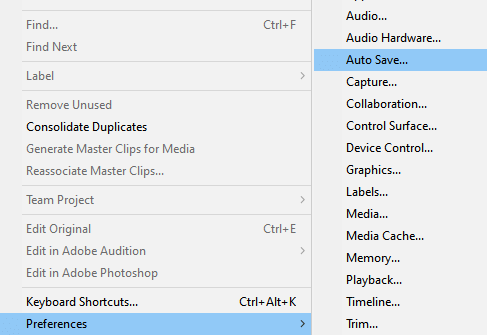
Uncheck the “Enable Auto Save” box and Click OK; This will disable auto-saving for all future projects. Follow the same steps to turn it back on and re-check the box.
Activating GPU Acceleration in Adobe Premiere Pro
File > Project settings > General > Video Rendering and Playback

Then, in Premiere Pro, change the renderer to Mercury Playback Engine GPU acceleration.
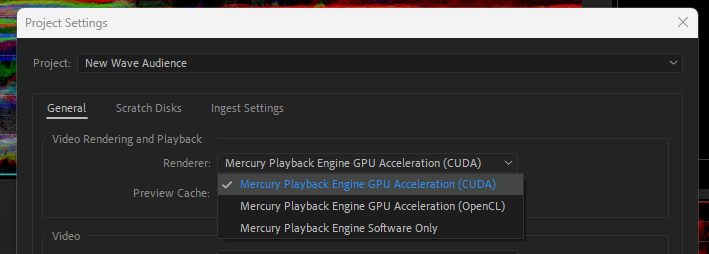
Then click OK to confirm.
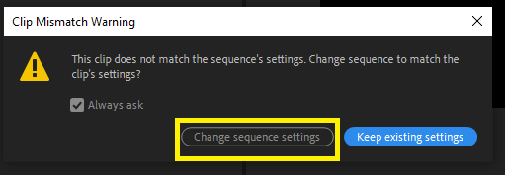
Matching Your Footage and Sequence Settings in Adobe Premiere Pro
Drag a clip from your project browser to the Timeline panel. If they do not match, Premiere Pro will warn you and give you two options: maintain the sequence parameters or adjust them to match the clip. Change the sequence to match the clip to change your settings.
Conclusion
A wide variety of reasons can cause Premiere Pro to lag. It could be due to a lack of processing power, outdated drivers, or even incompatible hardware. It is essential to take the time to troubleshoot and identify the cause of the lag.
You can take the necessary steps to fix the issue and ensure that Premiere Pro runs smoothly and efficiently.
If you have questions about anything in the article, please leave them in the comments area.