
Filling Color in Adobe Illustrator is a straightforward task that can be achieved in a variety of ways. With the Fill/Stroke, Swatches panel, and Live Paint Bucket Tool you can color your artwork in seconds.
My name is Elianna. I have a Bachelor of Fine Arts in Illustration and have been using Adobe Illustrator for over six years.
In this post I will show you how to fill color in Adobe Illustrator using the Fill/Stroke ButtonSwatches, the Live Paint Bucket tool, and how to fill color in Illustrator for iPad. Additionally, I will show you how to use the Painting workspace to further optimize your color workflow.
Let’s get into it!
Table of Contents
Key Takeaways
- Use the Painting workspace for a better color experience in Adobe Illustrator.
- The keyboard shortcut for the Live Paint Bucket Tool is K.
- Use Shift + X to swap Fill and Stroke color.
Fills vs Strokes

When applying color in Adobe Illustrator it is important to understand the difference between Fills and Strokes:
A Fill is a color, pattern, or gradient inside of an object. Fills can be applied to objects that are opened or closed.
A Stroke can consist of the outline of an Object, Path, or edge of a Live Paint Group, and can have swatches, gradients, and patterns applied to them. Strokes can also be stylized with a zigzag or dotted effects applied to them.
Fill Controls
Controls to color Fill and Stroke can be found in the Properties, Control, Color, and Tool panels. Here’s what they look like and their corresponding keyboard shortcuts:
| Control | Icon | Function | Keyboard Shortcut |
| Fill | Double-click to select a fill color using the Color Picker | Use X to switch between strokes and fill | |
| Stroke | Double-click to select a stroke color using the Color Picker | Use X to switch between strokes and fill | |
| Swap Fill and Stroke | Click to swap fill and stroke colors | Shift+X | |
| Default Fill and Stroke | Click to return to default color settings (black stroke and white fill) | D | |
| Color Button | Click to apply the last selected color to an object. | < | |
| Gradient Button | Click to apply the last selected gradient to an object. | > | |
| None | Click to remove fill or stroke. | / |
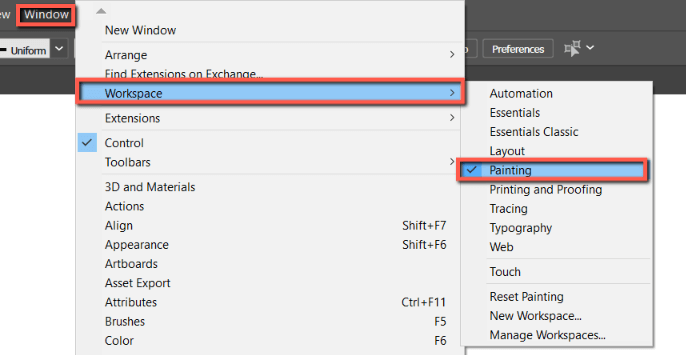
Setting up Your Illustrator Workspace for Painting
Before beginning to fill your objects with color, it can be useful to set up your Illustrator workspace for the task. The easiest settings for coloring your digital illustrations will be found in the Workspace options.
Depending on what you’re creating, you can choose different Workspaces for specific tasks/goals in Illustrator. If you want to draw or color artwork, the best workspace. preset for coloring is the Painting.
The Painting workspace opens the Swatches, Color, Gradient, Graphic Styles, Stroke, and Layer panels.
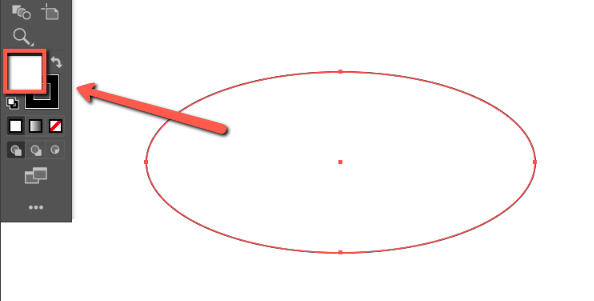
The easiest way to color a fill or stroke in Illustrator is with the Fill/Stroke buttons. Here’s how:
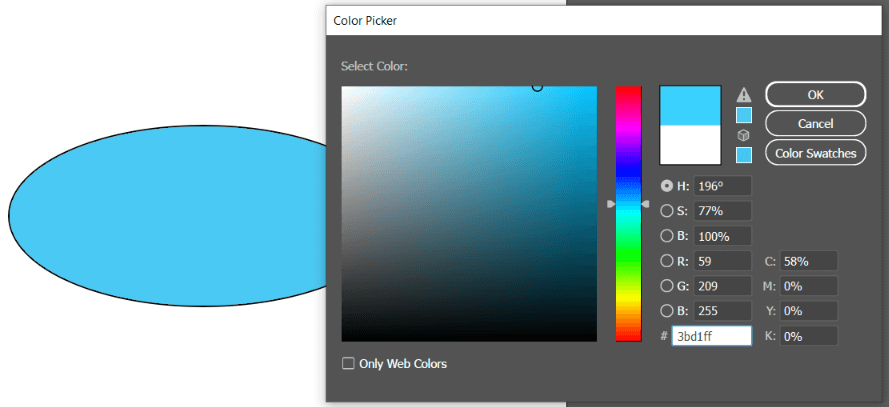
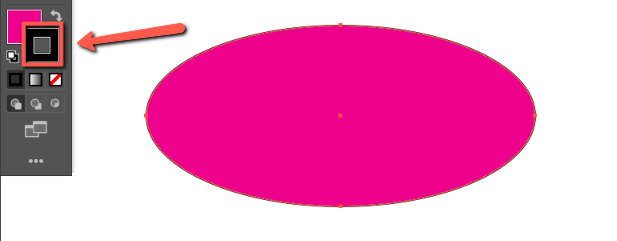
Step 1: Select the object you would like to color. Double-Click on the Fill button in the Properties, Control, Color, or Tool panel. For this example, I am clicking the Fill button in the Tool panel. This will open the Color Picker.
Step 2: Select a color from the color picker. To use Swatches instead of the color picker, select Color Swatches. After you have selected a color, click OK.
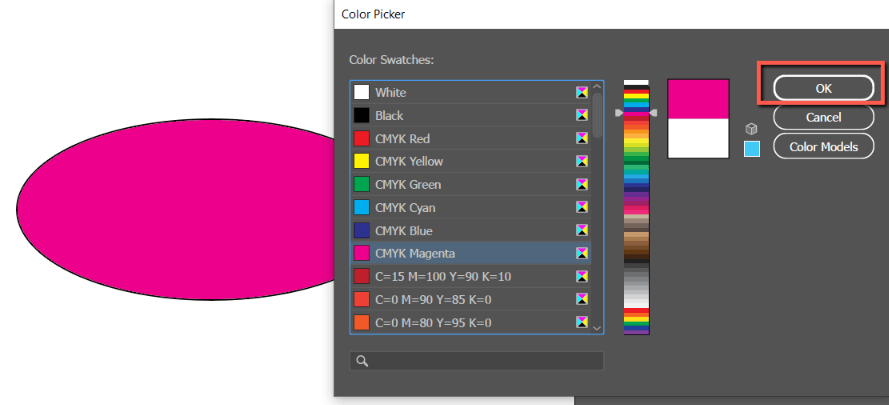
Step 3: To fill a Stroke, click on the Stroke button and follow the same steps as above.
Apply a Fill/Stroke Color with Swatches
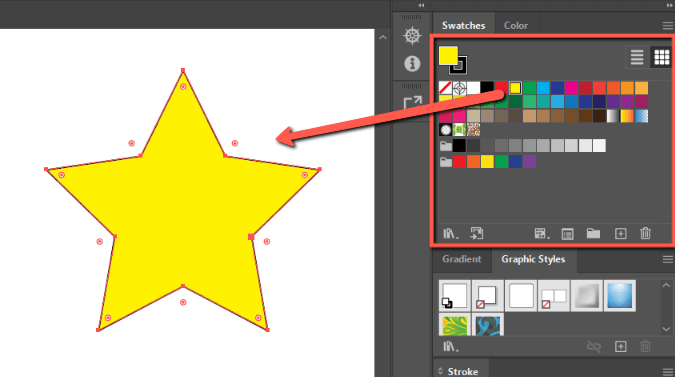
The standard way to fill color in Adobe Illustrator is with Swatches. Here’s how to do it:
Step 1: Select the object you would like to fill with or change color.

Step 2: Click on a swatch in the Swatches panel. Your object will fill with your color of choice.
You can also create and use your own color palette.
How to Fill/Stroke Color with Live Paint Bucket
Live Paint allows you to fill colors in object(s) as if they were on the same layer. Many users find the Live Paint workflow more natural than coloring with Swatches or with any other method, likening it to a coloring-book experience.
Here’s how to do it:
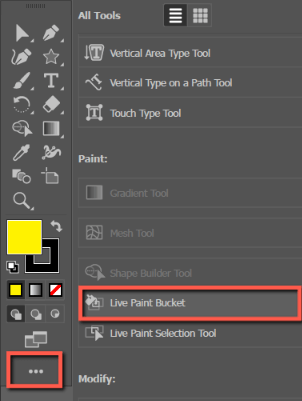
Step 1: Open the Live Paint Bucket Tool by clicking K on your keyboard.

Alternatively, you can select the Live Paint Bucket Tool under Edit Toolbar.
Step 2: Click on a color swatch of choice.
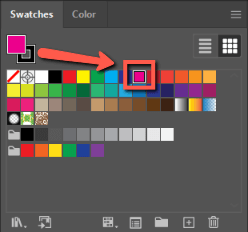
Step 3: Click on your object to make a Live Paint Group. Your object will change color to the color swatch you selected.

How to Fill Color in Illustrator for iPad
Here’s how to fill color in Illustrator for iPad:
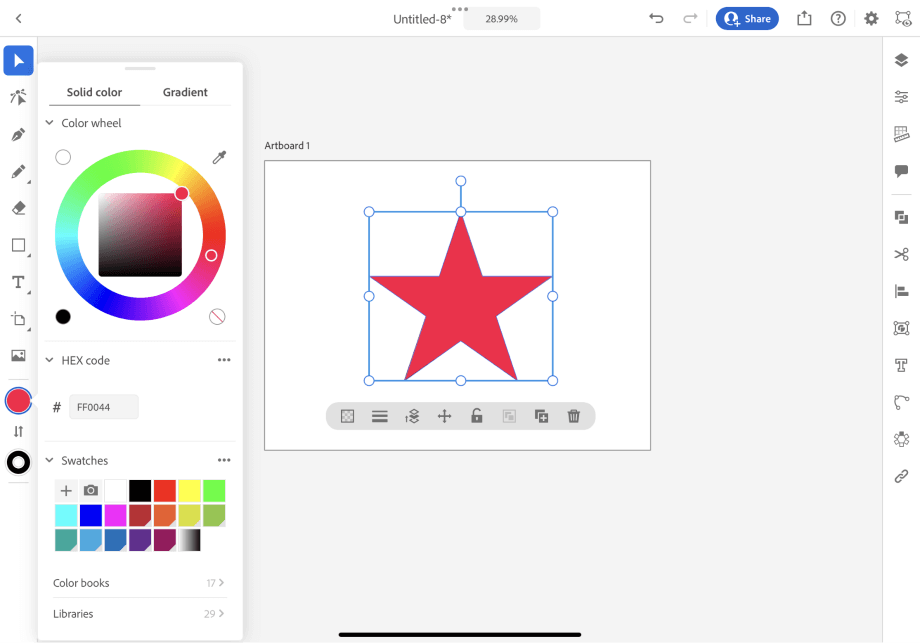
Step 1: Click on the object you would like to fill/change the color of.
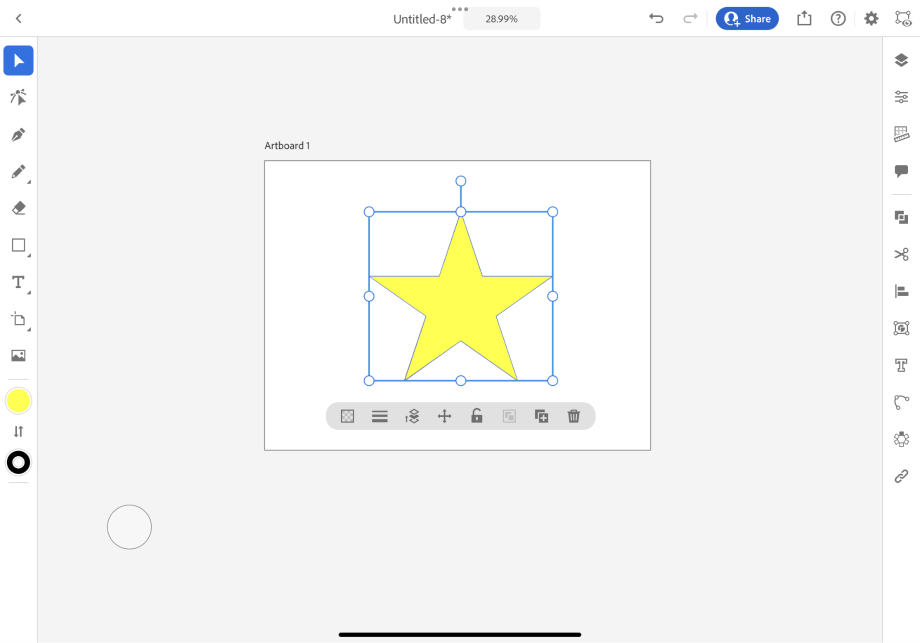
Step 2: Click on the Solid Color icon to open the Solid Color panel. In this panel, you will be able to select a color using the Color Wheel or Swatches. Select a color. This will fill your object with a color of choice.
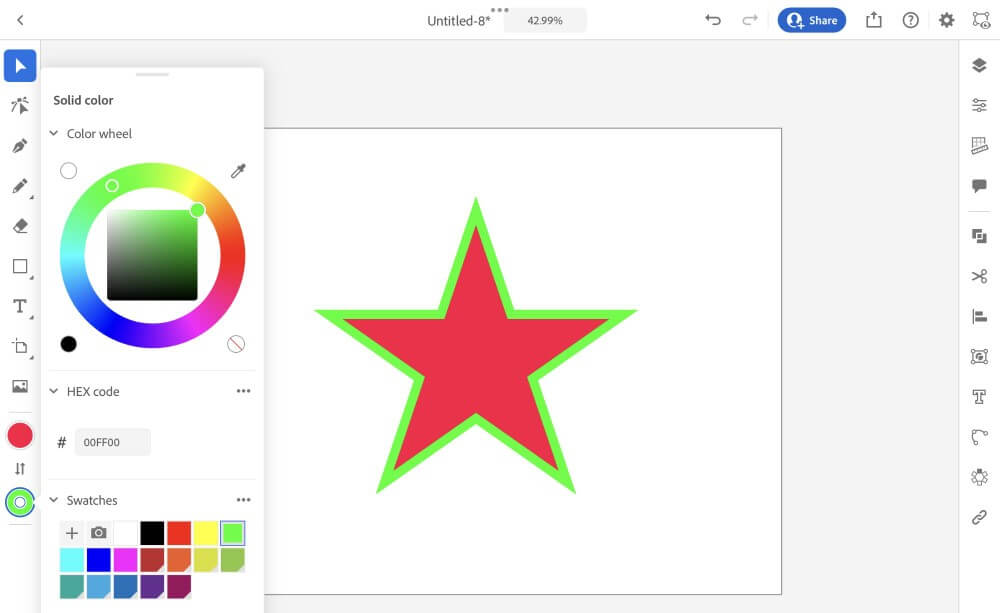
Step 2: Click on the Stroke Color icon to open the Stroke Color panel. In this panel, you will be able to select a stroke color using the Color Wheel or Swatches. Select a color. This will fill the stroke around your object with a color of choice.
Final Thoughts
Knowing how to fill the color of your Fill and Stroke in Adobe Illustrator is essential to the design process. With Swatches and the Live Paint Bucket tool, this process is made easy.
Additionally, before you begin your color process, consider changing your Workspace to Painting. Having your Adobe Illustrator workspace matches the function you are performing will help in further optimizing your workflow. Experiment for best results.
How do you fill color in Adobe Illustrator? Tell me in the comments below!