
You can fade audio in DaVinci Resolve on the Cut Page, Edit Page, and Fairlight Page. However, the steps vary slightly with each method.
Fading audio is an essential part of video editing. It could be that you are fading out of a song or transitioning between dialogue clips. No matter how you try to utilize the fade technique, it is an easy and handy skill to master.
My name is Nathan Menser. I am a writer, filmmaker, and stage actor. During my six years as a video editor, I have encountered a need to fade an audio clip almost every single time. With DaVinci Resolve, fading your clips is an easy process!
In this article, I will explain the simple process of fading audio clips in DaVinci Resolve.
Table of Contents
Method 1: Fading from the Cut Page
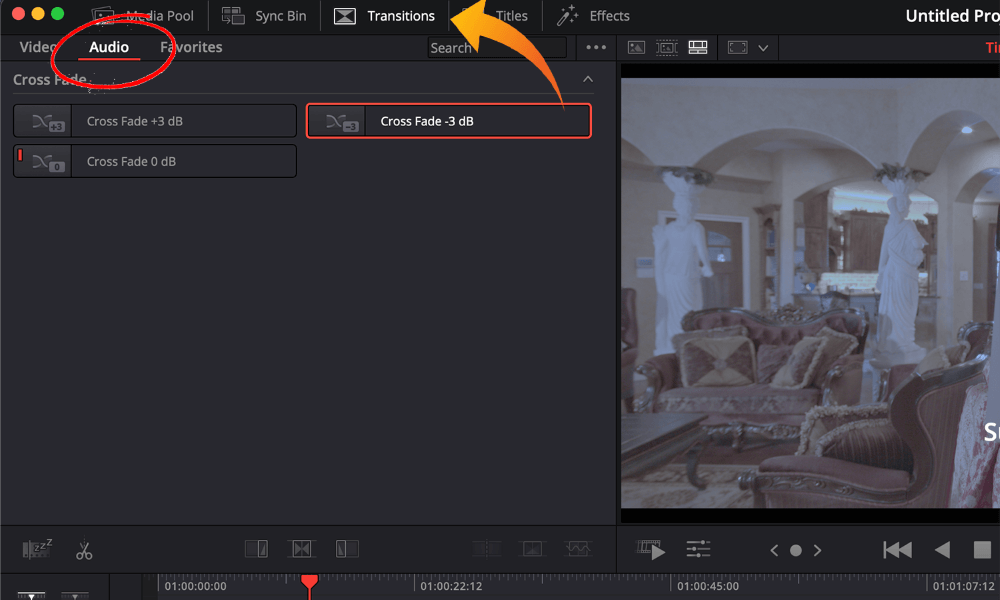
Step 1: Go to the “Cut” Page. You can access this from the horizontal menu bar at the bottom of the screen.
Step 2: In the top left region of the screen, select “Transitions.”
Step 3: Below the “Transitions” button, there will be three options: “Video,” “Audio,” and “Favorites.” Select “Audio.” This will give you three different types of crossfades. Select the one you need, and drag the button onto the audio bar on the timeline where you need the fade to begin.
To make the fade longer or shorter, drag the end of the fade left or right from the timeline.
To further edit the crossfade, go to the “Edit” Page. Then, click “Transitions” in the top right corner of the screen. This will open a few options to edit the crossfade more precisely.
Method 2: Fading from the Edit Page
Step 1: Navigate to the “Edit” page from the horizontal menu bar at the very bottom of the screen.
Step 2: Once your audio clip is positioned correctly on the timeline, ensure you can see the wavelengths.
Once the wavelengths are opened, a small button will appear in the top left corner of the audio bar on the timeline.
Step 3: Grab and drag the little icon to the right. This will create a “fade-in.” The further you carry the icon, the longer or more gradual the fade will be.
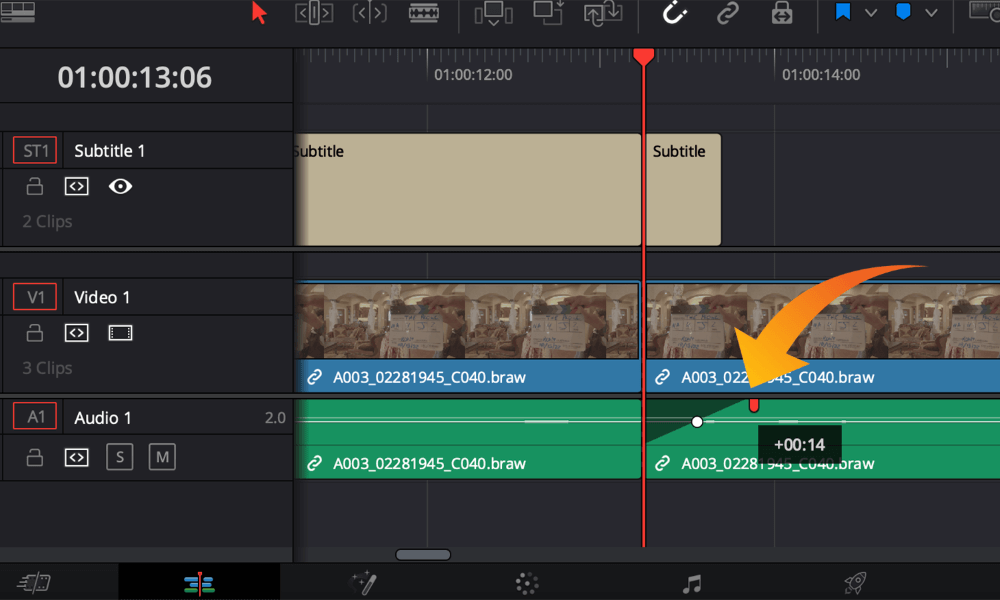
You can also change the speed of the fade. There will be a second little icon to drag. It’s located here:
Drag it up or down to alter the speed of the fade. It will definitely take some practice to know when and how much to change the fade speed, but it can be an extra little detail to make your video more professional. Play around with this feature until you have the effect you need.
Method 3: Fading Audio from the Fairlight Page
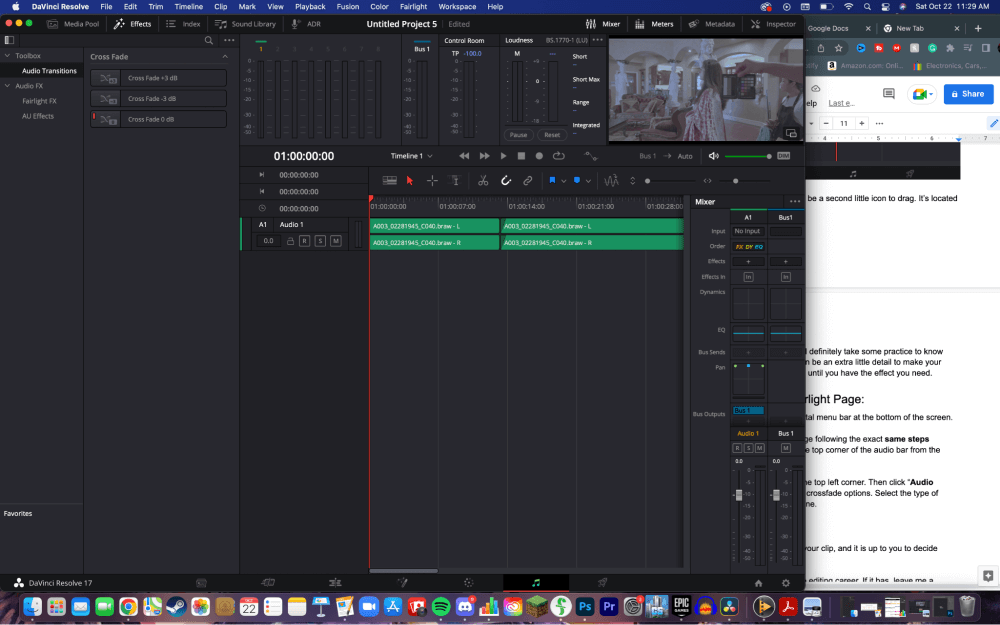
Step 1: Go to the “Fairlight” Page through the horizontal menu bar at the bottom of the screen.
Pro Tip: You can edit in a fade from the “Fairlight” Page following the same steps outlined in method 2. Just drag the little icon from the timeline’s top corner of the audio bar.
Step 2: From the “Fairlight” Page, select “Effects” in the top left corner. Then click “Audio Transitions.” This will give you a few different crossfade options. Select the type of crossfade you need, and drag it onto the timeline.
Conclusion
Any of these methods are acceptable ways of fading your clip, and it is up to you to decide which works most efficiently.
I hope this article has added some value to your video editing career. If it has, leave me a comment and let me know! If not, let me know what I could do better or what you would like to read about next.