
How do you feel about exporting photos one-by-one from Lightroom? It gets to be a drag quickly, doesn’t it?
Hello, I’m Cara! As a professional photographer, exporting photos one-by-one simply isn’t an option. I can easily have hundreds of photos to export for a wedding and I am NOT going to sit there exporting them one at a time. Nobody’s got time for that!
Thankfully, Adobe is quite conscious of this. Exporting multiple photos at once in Lightroom is a breeze. Let me show you how.
Table of Contents
3 Steps to Exporting Multiple Photos in Lightroom
Here is the short version for those of you who already have an idea of where things are in Lightroom.
- Select all the images you want to export.
- Open the export option.
- Choose your settings and export the image.
Not sure how to do one or more of those steps? No problem! Let’s break it down here.
Note: the screenshots below are taken from the Windows version of Lightroom Classic. If you are using the Mac version, they will look slightly different.
Step 1. Select all the images you want to export
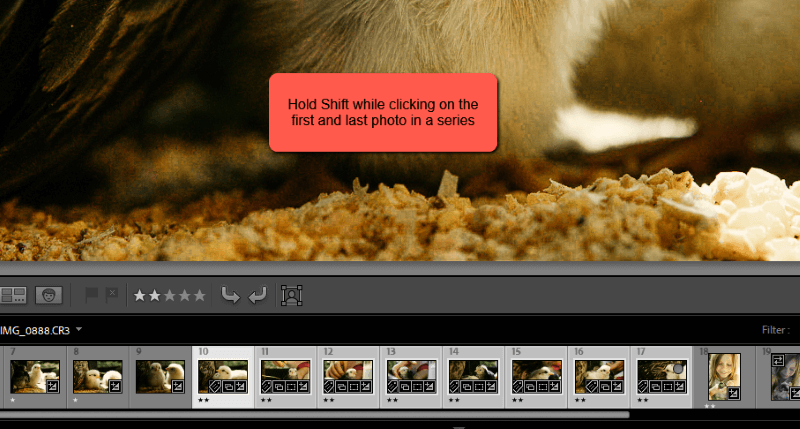
Selecting multiple images in Lightroom is pretty straightforward. Click on the first photo in a series then hold Shift while clicking on the last photo. The first and last photos as well as all the photos in between will be selected.
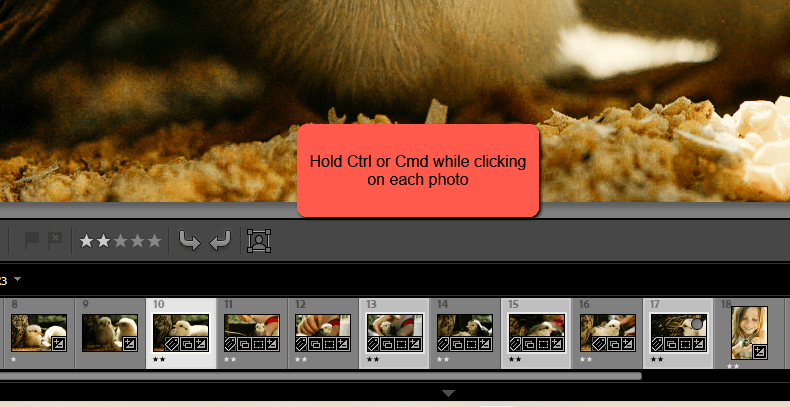
If you want to select individual photos that are not next to each other, hold Ctrl or Command while clicking on each photo.
These examples are done in the Develop module. You can also select all the images in your work area by pressing the keyboard shortcut Ctrl + A or Command + A.
This is usually how I select multiple images when exporting the images from a photo shoot. Once I’ve finished editing, all the keepers have a higher star rating than the other images. For my method, all the images rated 2 stars or higher will be included.
Limit the view to only images rated two stars or higher by clicking on the second star in the filter bar. Then when you hit Ctrl + A or Command + A the program selects only the 2-star (or higher) images.
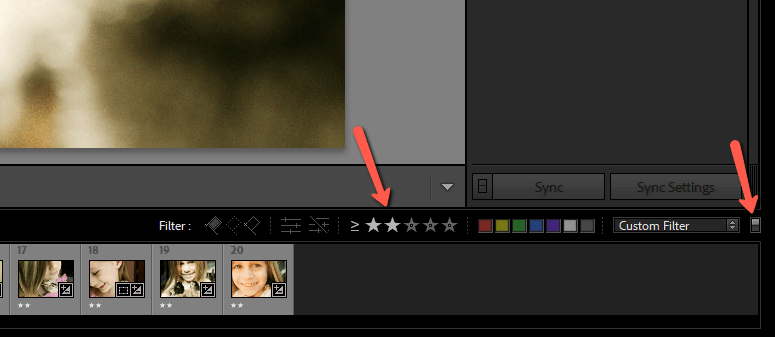
Toggle this bar on and off with the switch on the far right.
Step 2: Open the Export Option
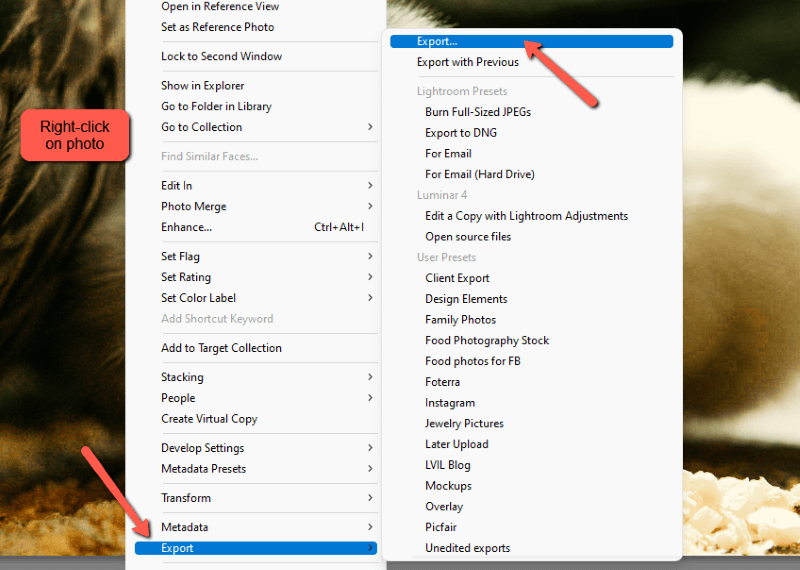
With your images selected, right–click on the active image. Hover over Export to open the flyout menu. Choose the export preset option you’d like to use or click Export to open the export settings box and specify your export settings.
Another option is to press Ctrl + Shift + E or Command + Shift + E on the keyboard. This will take you directly to the export options dialog box.
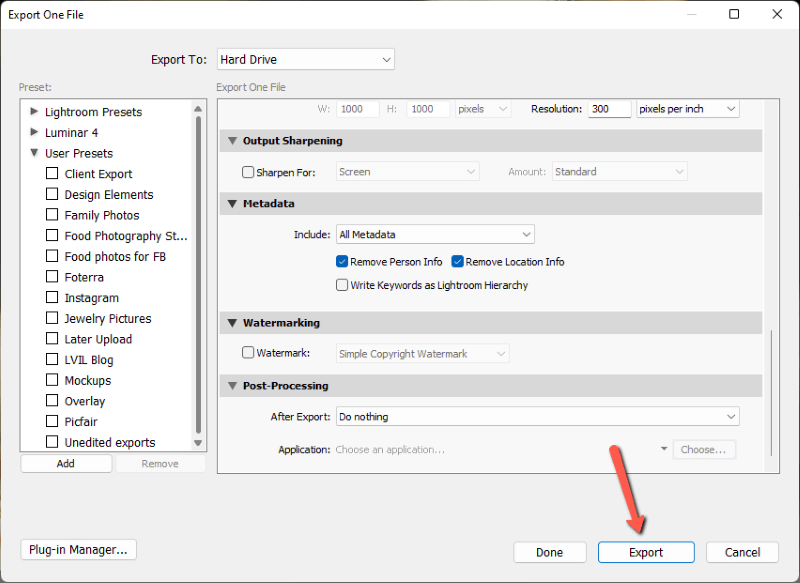
3. Choose Your Settings and Export the Image
In the export settings box, choose one of your presets on the left or input the settings you want to use. Learn all about the best export settings to avoid losing quality and how to create export presets in this tutorial.
Once you’re happy with your selections, click Export at the bottom.
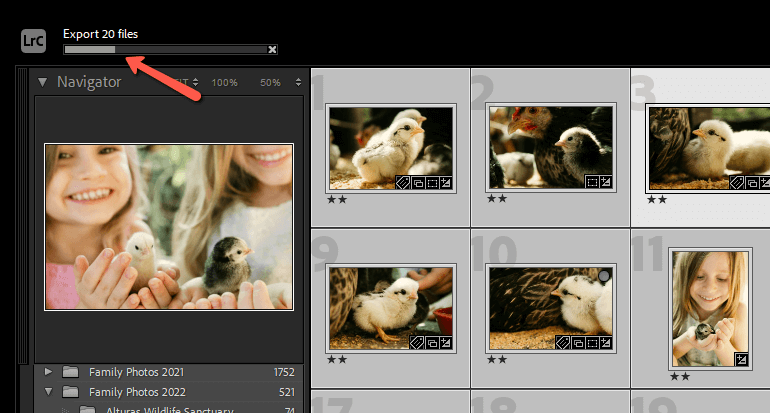
If you have a lot of photos to export, it will take Lightroom a little while to process them all. Track the progress with the bar that appears in the upper lefthand corner. Thankfully, Lightroom runs this process in the background so you can continue working while it’s running.
Quick and easy! Exporting a batch of photos from Lightroom saves you a lot of time. Looking for other ways to speed up your workflow? Check out how to batch edit in Lightroom here!