
Erasing is an essential function in design, but Illustrator’s Eraser tool isn’t the easiest to work with if you’re not familiar with its unique properties. But once you get how it works, you can easily erase in Adobe Illustrator with a few handy keyboard shortcuts and a couple of minutes to spare.
My name is Elianna. I have a Bachelor of Fine Arts in Illustration and have been using Adobe Illustrator for over six years.
In this post, I will explain how to use and customize the Eraser in Adobe Illustrator so you can design more, and stress less.
Let’s get into it!
Table of Contents
Key Takeaways
- The keyboard shortcut for the Eraser tool is Ctrl/Command + E.
- You can edit the Angle, Roundness, and Size of the Eraser.
- You can use [ and ] to quickly change the Eraser size.
Adobe Illustrator Eraser Tool
The Eraser tool is the main way to erase in Adobe Illustrator. Found in the main toolbar, it can be accessed with the keyboard shortcut Ctrl/Command + E and has its own menu and customizations. There are currently three Eraser options. They are as follows:
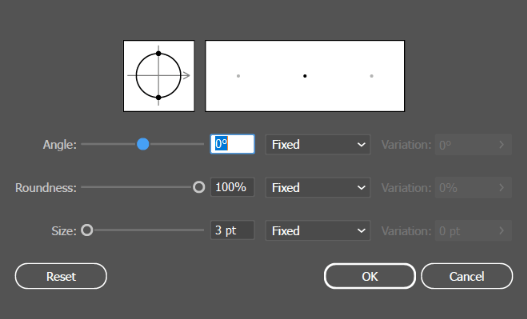
| Angle | Modifies the angle of the eraser by a set degree. |
| Roundness | Modifies the roundness of the eraser by a set percentage |
| Size | Modifies the size of the eraser |
There are also variables you can select from using the drop-down menus under Angle, Roundness, and Size, with all of their default options set to Fixed. Here is what they mean:
| Fixed | Sets a fixed angle, roundness, or size (default option) |
| Random | Sets a random variable for angle, roundness, or size. When this option is selected and a variation is selected, the diameter of the eraser will vary based on the size of the eraser and the set variation. Example: If the size of the eraser is 6pt and the Variation is set to 3pt, the diameter of the eraser will randomly vary between 3pt and 9pt. |
| Pressure | Sets a variable angle, roundness, or size based on pressure input from a tablet pen. Similar to Random, when variation is set your eraser’s diameter will vary in a specified range (in this case dependent on the tablet pen pressure). |
| Stylus Wheel | Sets variable angle, roundness, or size dependent on a stylus wheel. |
| Tilt | Sets a variable angle, roundness, or size based on the tilt of a tablet pen. |
| Bearing | Sets a variable angle, roundness, or size based on the bearing of a tablet pen. |
| Rotation | Sets a variable angle, roundness, or size based on the rotation of a tablet pen tip. |
Depending on your setup and workflow with Illustrator, some of these options may or may not be available for your device(s). Experiment for best results.
How to Erase in Adobe Illustrator
Got the Eraser set up? Here’s how to use it:
Step 1: Click on the Eraser in the Toolbar menu, and select the object you would like to erase.
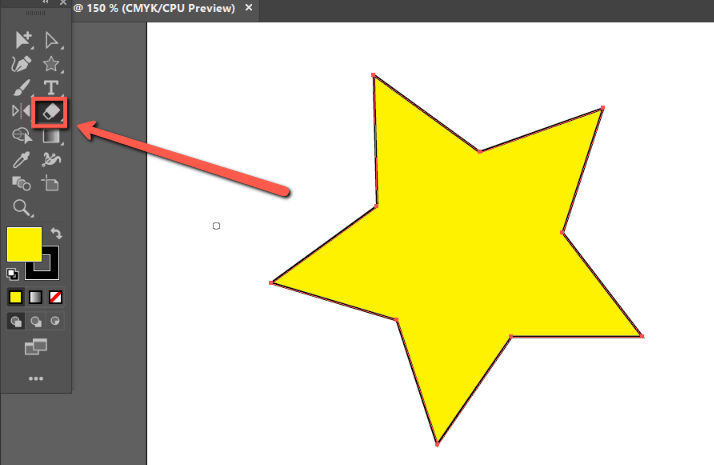
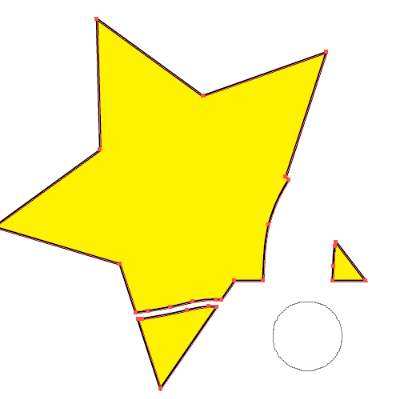
Step 2: Click and Drag on the part you want to erase.

Step 3: To quickly change the size of your eraser use [ and ].
To modify your eraser, double-click the Eraser icon to option Eraser Options.
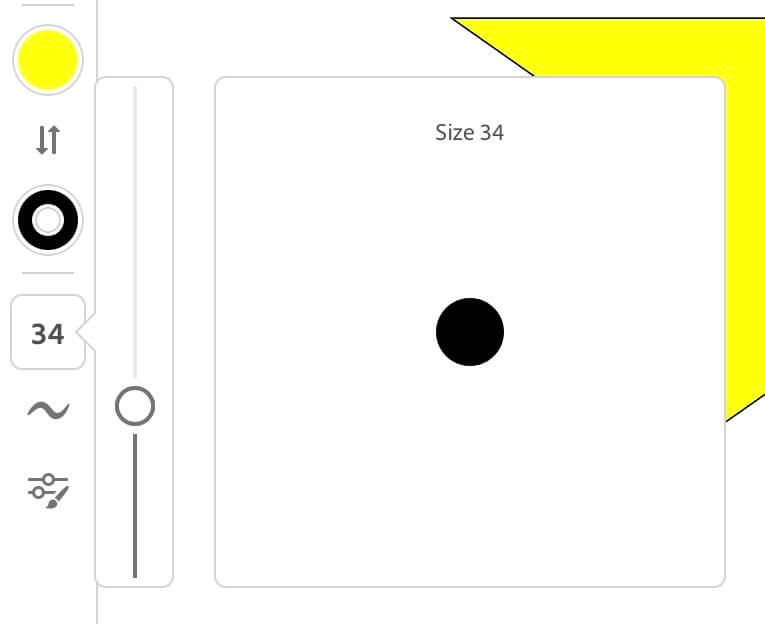
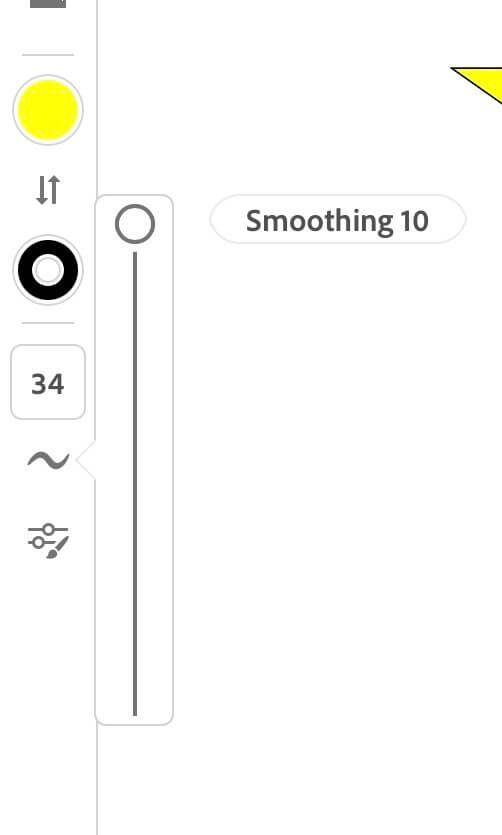
How to Erase in Adobe Illustrator for iPad
Step 1: Click on the Eraser icon in the toolbar.
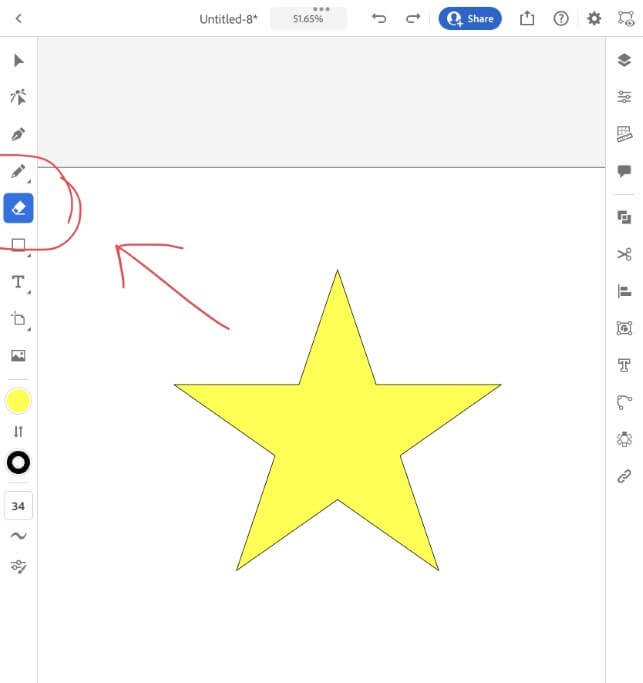
Step 2: Click on the Eraser Settings icon to adjust your eraser’s Roundess, Angle, and Pressure Dynamics.

Step 3: Click on the Size icon to adjust your eraser’s Size.
Step 4: Click on the Smoothing icon to adjust the smoothing of your eraser.
Step 5: Draw to Erase.

Why Can’t I Erase Something in Illustrator?
You may not be able to erase in Illustrator if your object is on a locked layer, or part of a locked group. Double-check your layer panel to assess the status of your objects before proceeding with erasing them again.
Final Thoughts
Erasing is a foundational function of any design process. With Illustrator’s Eraser, this is an easy task when the correct shortcuts and customizations are used.
Experiment to find which options work best with your workflow.