
Editing and changing the font in Adobe Illustrator is a breeze with the Character Panel and Touch Type Tool. All you need is a couple of minutes to spare to elevate your Illustrator and typography knowledge.
My name is Elianna. I have a Bachelor of Fine Arts in Illustration and have been using Adobe Illustrator for over six years. I handle text in almost all my designs, and obviously, I need to edit text/font a lot depending on what I’m creating.
In this post, I will teach you how to edit and change the font in Illustrator with the Character Panel and Touch Type Tool. I will also explain how fonts work in Illustrator, and give a comprehensive breakdown of all the functions in the Character Panel, so you can design more and stress less.
Let’s get into it!
Table of Contents
Key Takeaways
- Use Window > Type > Character, or the keyboard shortcut Ctrl/Command + T to open the Character Panel.
- The keyboard shortcut for the Touch Type Tool is Shift + T.
- The keyboard shortcut for Select All is Ctrl/Command + A.
Fonts in Adobe Illustrator
Adobe Illustrator comes with a pre-selected list of font families that can be found from the overhead menu Type > Font menu, control panel, or the Character panel. You can also activate and use additional fonts from Adobe Fonts if you have a Creative Cloud account.
You can also download custom fonts online. Just know that when using custom fonts, they may not be able to load when opening your Illustrator document on another device and you should check the font license before using them.
Understanding the Character Panel
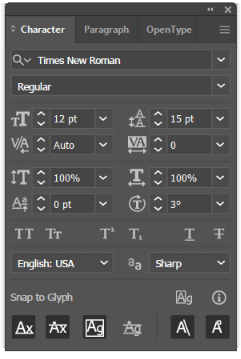
You can open the Character panel from Window > Type > Character and here’s where you can change font, font size, and other settings.
Here’s a quick overview of the Character panel in Illustrator.
| Font Family | Sets the font family. You can search for, and select a font family in this menu using the default Illustrator fonts or by activating an Adobe Font using Find More. |
| Font Style | Sets the font style based on options available in each font family. Examples include Regular, Bold, Italic, Bold Italic, Semibold, Heavy, and more. |
| Font Size | Sets the font size. |
| Leading | Modifies the vertical spacing between lines of text. |
| Kerning | Modifies the spacing between pairs of characters. If the kerning between letters is too much or too little, it can greatly impact the readability of the text. |
| Tracking | Similar to kerning, tracking controls the overall space between characters by a set value. |
| Vertical and Horizontal Scale | Modifies the Vertical and Horizontal scale of characters by a set percentage. |
| Baseline Shift | Shifts characters on a given baseline. Positive values will shift characters up, while negative values will shift characters down. |
| Character Rotation | Rotates characters bt a set angle |
| All Caps/Small Caps | Changes character to ALL CAPS or small caps in one click. |
| SuperScript/Subscript | Creates superscripts and subscripts in one click. |
| Underline | Underlines Text |
| Strikethrough | Creates a Text Strikethrough |
| Language | Modifies the language setting of text |
| Anti-Aliasing | Sets the anti-aliasing of characters by Sharp, Crisp, Strong, or None |
Snap to Glyph  | Allows you set how elements/objects snap precisely with text in your .ai document. |
| Angular Guides | Allow you to set objects to snap to angular guides along text |
| Anchor Point | Snaps to anchor point of glyphs while drawing. |
How to Change Font Using Control Panel
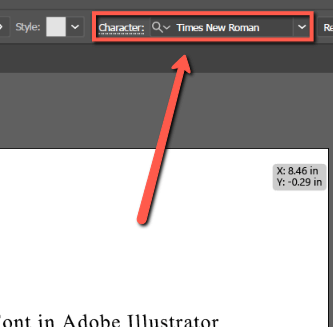
The easiest way to change font in Adobe Illustrator is from the control panel, which can be found on top of your document, and the Properties panel on the right-hand side of your workspace.
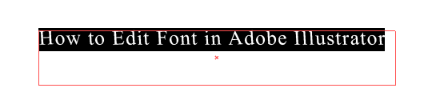
Step 1: Click on the textbox of the text you would like to change the font of. Use the keyboard shortcut Ctrl/Command + A to select all text, or click and drag your cursor so all of the text highlights black.
Step 2: Go to the control panel, next to Character find the Character dropdown menu and you can change the font from there.
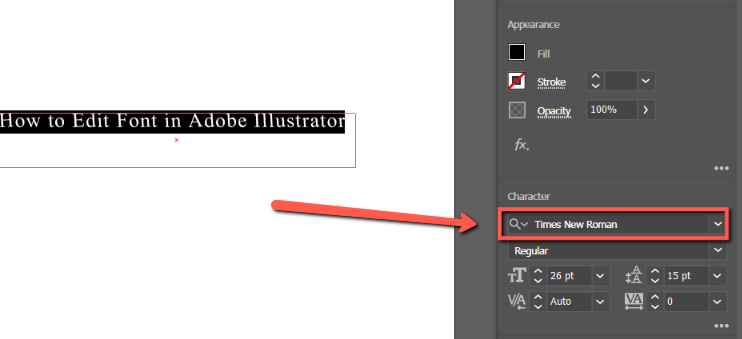
Alternatively, edit the font from the Properties panel. When text is selected, the Character panel will automatically appear on the Properties panel.
Step 3: Select a new font from the menu or type in a font name in the search box.
If you want to edit the font previews, click on Selected Text or one of the A icons to change the size of the font preview.
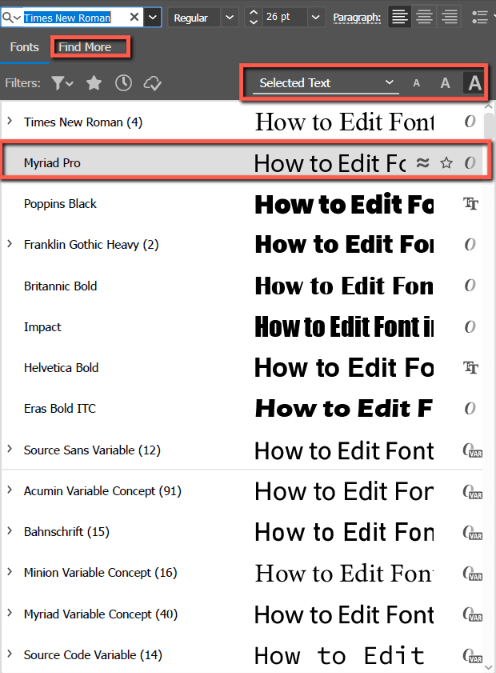
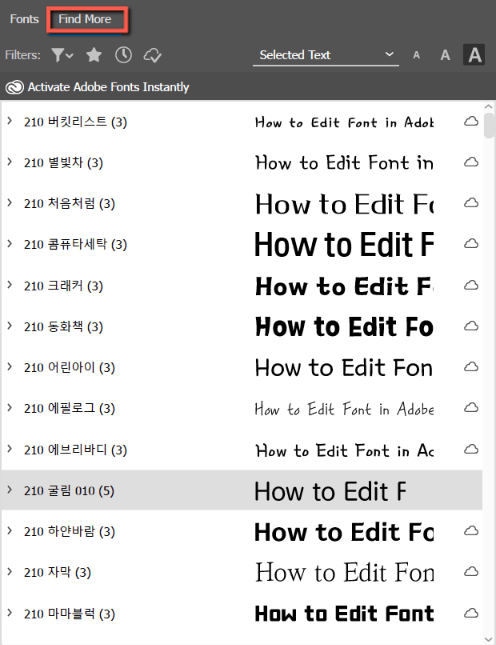
To search for new fonts, click on Find More to browse options from Adobe Fonts.
Step 4: When you have selected your font, it will change on your artboard.
How to Edit Font with the Touch Type Tool
Another way you can edit text in Illustrator is with the Touch Type Tool. The Touch Type Tool allows you to edit text dynamically by selecting and transforming glyphs similar to how you would transform any other object.
This allows you to have more creative freedom while designing type and still retaining the vector typographic properties.
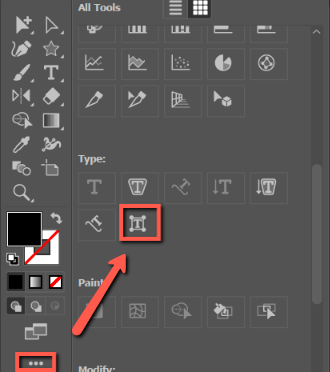
Step 1: Access the Touch Type Tool using the keyboard shortcut Shift + T, or by clicking on the Touch Type Tool icon under Edit Toolbar.
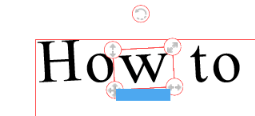
Step 2: Click to select the glyph(s) you would like to edit in your text. Modify and repeat as desired.
FAQs
Here are answers to common questions related to editing/changing the font in Adobe Illustrator.
Can you modify Adobe Fonts?
Yes, you can modify Adobe Fonts like any other font in Illustrator with the Character menu.
Why can’t I edit my text in Adobe Illustrator?
You may not be able to edit your text if your text is on a locked layer, or in a locked group.
Final Thoughts
Font and typography are foundational elements of design that can make or break your piece. Knowing how to manipulate type and the ins and outs of the Character Panel is essential to your career as an artist.
What is your favorite font? Tell me in the comments below!