
It’s important to strike the right balance between image and text, and page layouts can depend on the tiniest of adjustments. While you could keep all the images you need for your layout open in an image editor, that becomes a slow and tedious workflow.
Fortunately, InDesign allows you to make simple tweaks such as recomposing and cropping images without having to switch programs every time.
Before jumping into the steps, I’ll quickly go over how images work in InDesign.
Table of Contents
Image Objects in InDesign
Images in your InDesign layout have two parts: an image frame that acts as a combined container and clipping mask, and the actual image object itself. These two elements can be adjusted at the same time or independently as needed.
All of these adjustments are non-destructive, which means the original image file isn’t permanently altered.
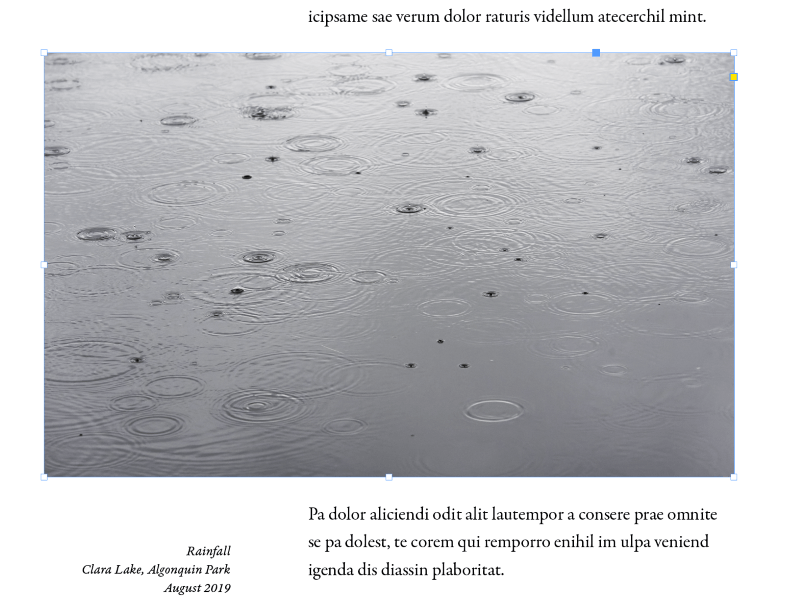
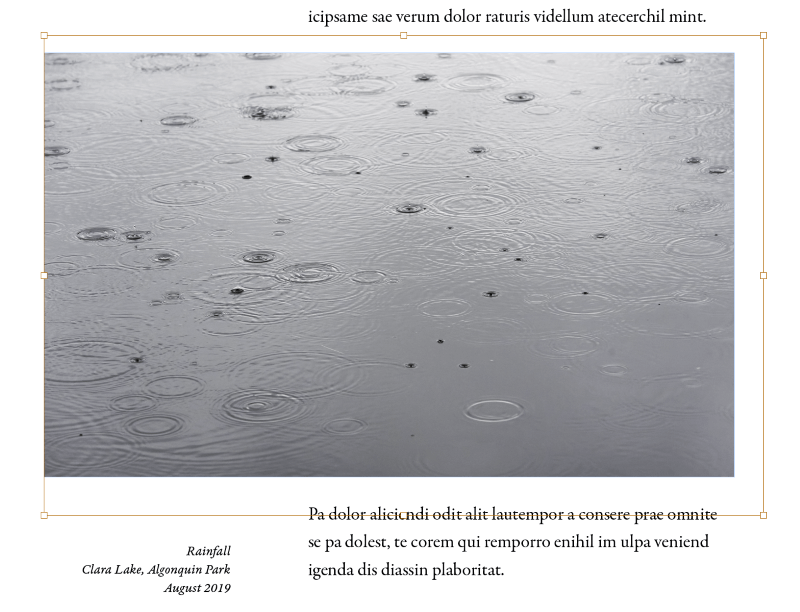
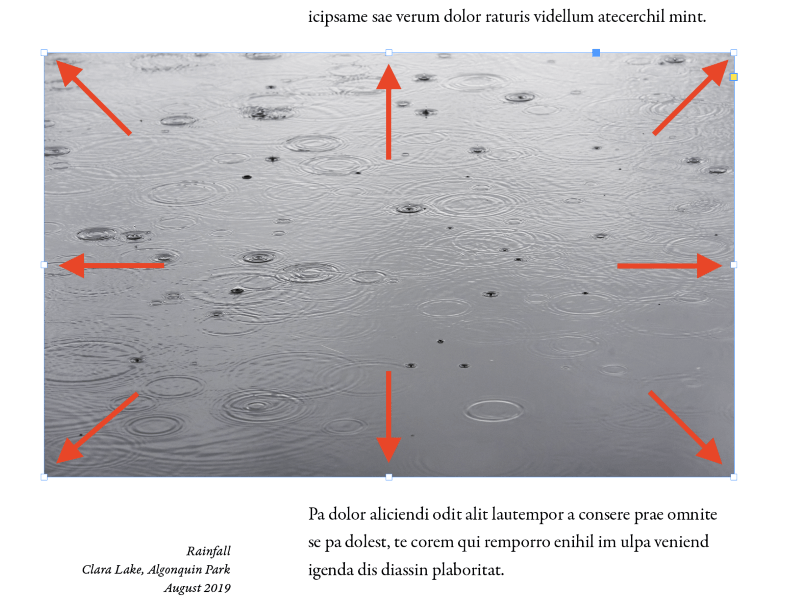
The image frame bounding box is displayed in blue (shown above), while the image object bounding box is displayed in brown, as you can see in the partially cropped image below.
The image itself is larger than the image frame, so the brown bounding box extends past the visible image.
When you move your cursor over an image object with the Selection tool active, two gray circles appear in the center of the image frame.
These circles are creatively named the content grabber, and you can click and drag it around to move the image object without moving the image frame, effectively recomposing the image by controlling which parts of it are visible.

This framing system can be a bit confusing for new InDesign users (and can sometimes be frustrating for experienced users in a rush) but it has some useful advantages such as allowing you to quickly crop images to fit your layout without modifying the original image file or switching back and forth between InDesign and your image editor.
How to Crop an Image in InDesign Using Image Frames
Here’s the simplest method for cropping an image in InDesign using image frames.
How to add & crop an image to InDesign
The command used to insert images in InDesign is called Place, and it creates a preview thumbnail of your image file for use within the InDesign document. The image is known as a linked image since the image file is not embedded directly into the InDesign document file.
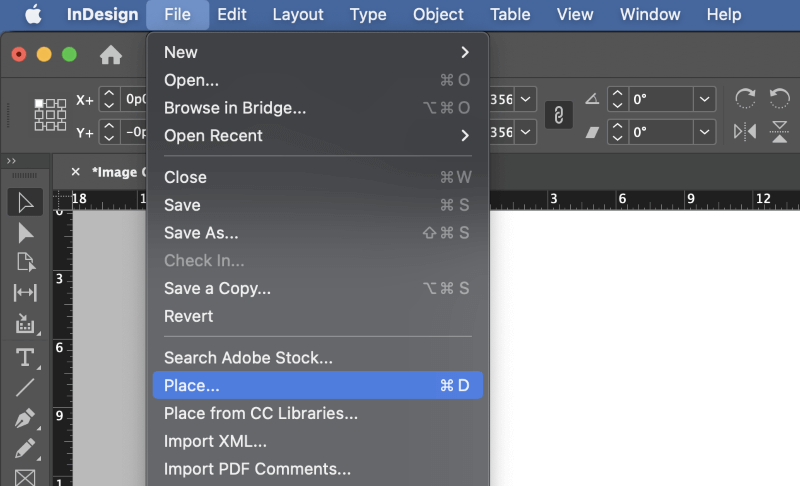
Step 1: Open the File menu and click Place. You can also use the keyboard shortcut Command + D (use Ctrl + D if you’re using InDesign on a PC). Browse to select your image, and click Open.
The mouse cursor will change into a “loaded” cursor, with a preview thumbnail of your image attached to the cursor position.
Step 2: The next spot you left-click with the mouse will be used as the placement point for your image, starting from the upper left corner.
The image will be placed at its native size and resolution, inside an image frame with the same dimensions.
Alternatively, you can click and drag using your loaded cursor to define a specific image frame size, and the image will be automatically scaled to fit within your frame.
This can make things a bit complex in terms of image resolution, so I recommend that you use the first method I described earlier and then scale your image more precisely after placement if needed.
How to adjust the crop area in InDesign
Now that you have placed your image into your document, you can adjust the dimensions of the image frame to crop your image using InDesign.
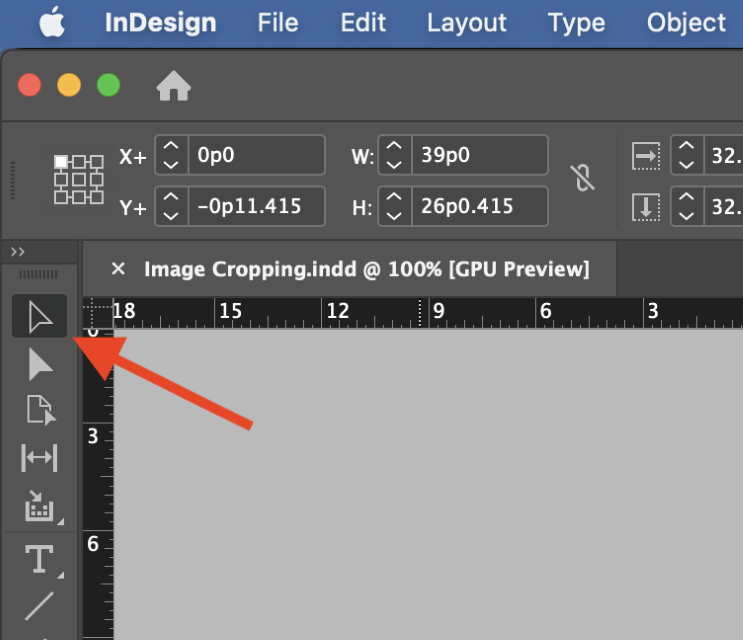
Step 1: Switch to the Selection tool using the Tools panel or the keyboard shortcut V. Click the image you want to crop, and the blue bounding box should appear around it, indicating that you’re editing the image frame, not the image object itself.
Step 2: Click and drag any of the 8 transforms handles on the bounding box to adjust that edge of the image frame, which will crop your image entirely within InDesign.
As I mentioned earlier, this leaves the original file untouched and gives you the option of adjusting your crop area at any time.
How to reset your crop in InDesign
If something goes wrong with your crop, or you just want to return the image to its original shape, you can use InDesign’s content fitting options to reset the image frame to match the actual image contents.
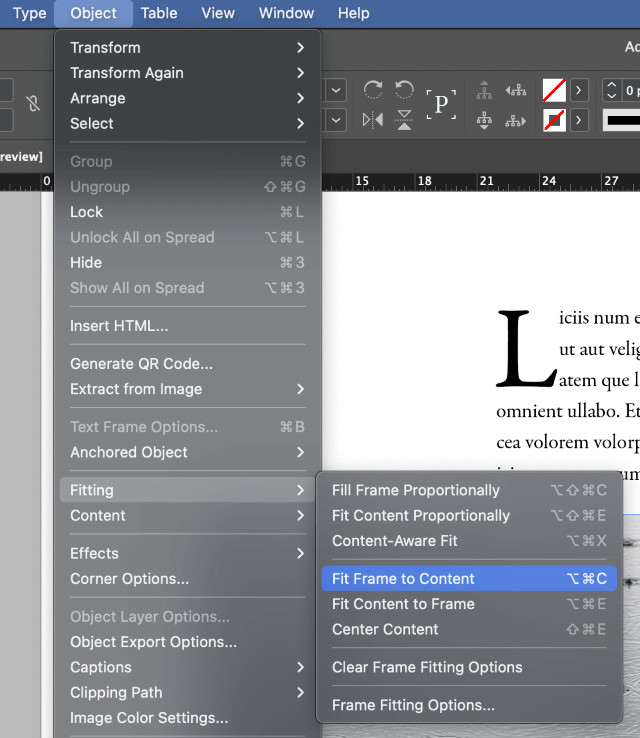
Select the image you want to reset, open the Object menu, select the Fitting submenu, and click Fit Frame to Content. You can also use the keyboard shortcut Command + Option + C (use Ctrl + Alt + C if you’re using InDesign on a PC).
Cropping Images into Shapes in InDesign
If you want to get fancy with your use of images, you can also crop images into any vector shape that you want. Just keep in mind that for more complex clipping masks, you’ll get better results by working with Photoshop or another dedicated image editing app.
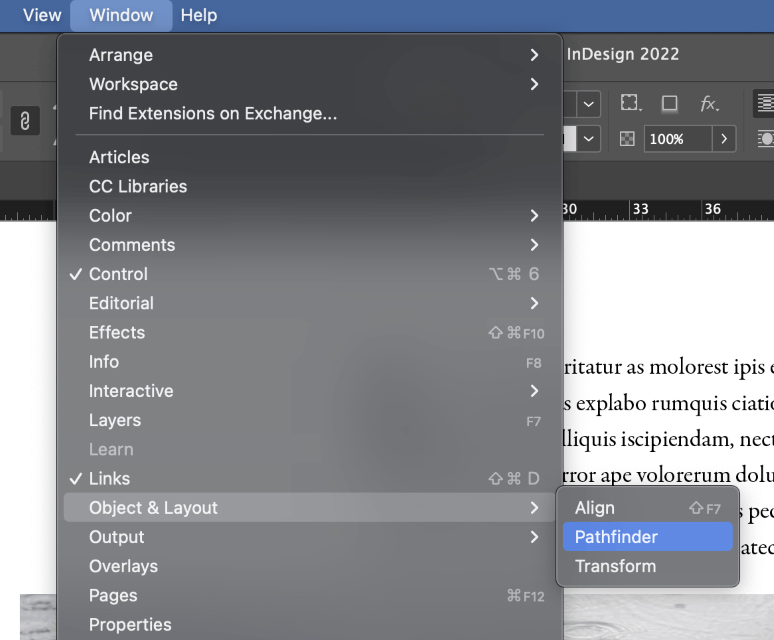
Place your image using the method described earlier in the post, and then open the Pathfinder panel. Depending on your current workspace settings, you may have to make it visible by opening the Window menu, selecting the Object & Layout submenu, and clicking Pathfinder.

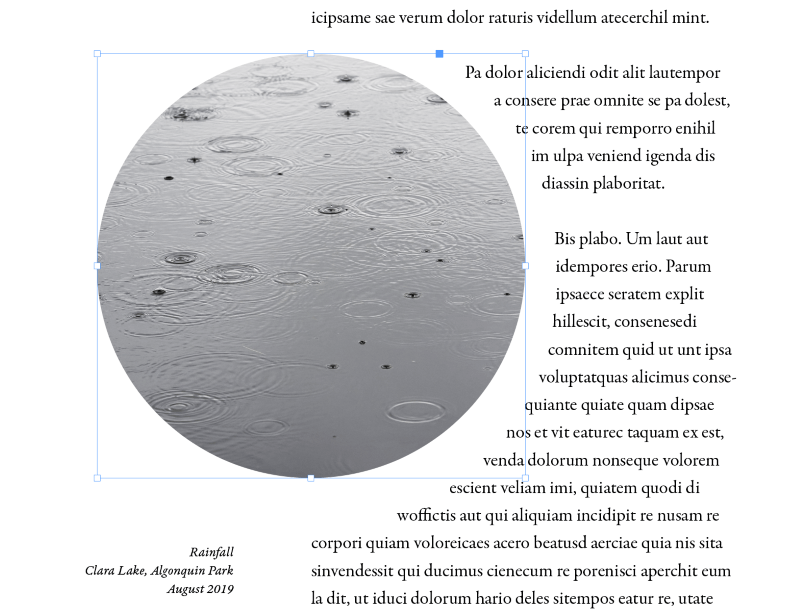
Select the image frame you want to adjust, and click any of the buttons in the Convert Shape section of the Pathfinder panel. The image frame will update to match the new shape. For example, you can crop an image into a circle or square.
If you want to create more complex freeform shapes, it’s simplest to draw the shape first by using the Pen tool and then placing the image into the existing frame. Just make sure the shape is selected before you use the Place command!
A Final Word
That’s just about everything there is to know about how to crop an image in InDesign! While you can do some simple crops and shaped frames with InDesign, remember that you’ll probably get better results if you do complex cropping and editing in a dedicated image editor like Photoshop. Always use the best tool available for the job =)
Happy cropping!