
Knowing how to crop your artwork is essential right from the start. It’s a fundamental skill that can make a huge difference in how your artwork is presented.
Hey there! I’m Zoe, an illustrator and graphic designer who loves using Clip Studio Paint. When it comes to enhancing the composition and impact of your artwork, cropping is where it all begins. That’s why I’m excited to share these two essential methods with you.
In this article, we’ll dive into two quick methods for cropping in Clip Studio Paint. First, we have the Selection Tool method, where you can easily draw a rectangle around the area you want to crop.
Next, we’ll explore the Change Canvas Size tool, which gives you precise control over the dimensions of your artwork. Whether you need to resize your canvas or extend it beyond its original size, this method has got you covered.
Let’s get started.
Table of Contents
Key Takeaways
- Even after cropping, your layers will still be saved beyond the bounding box, so you can easily drag them back into your cropped canvas without losing any parts of your drawing.
- To match standard image sizes, it’s best to use the Change Canvas Size method, allowing you to manually enter the size of your canvas.
- If your artwork feels too small after cropping, you can easily make it bigger. Just go to Edit > Change Image Resolution > Scale field and enter how much bigger you want it (e.g., 2 for twice the size).
Let’s dive into the two methods for cropping your artwork in Clip Studio Paint.
Note: All screenshots from this tutorial are taken from the CSP Mac version.
Method 1: Selection Tool
The Selection Tool method is very intuitive because you can quickly draw a rectangle around the part of your artwork you want to crop. Here are five simple steps to get it done:
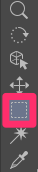
Step 1: Click on the Selection Tool in the toolbar.
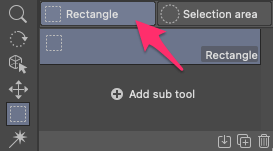
Step 2: Choose the Rectangle option from the selection options. This lets you create a rectangular selection around the area you want to crop.
Step 3: Position your cursor at the top-left corner of the area you want to crop. Click and hold the mouse button, then drag the cursor to the bottom-right corner to create a selection rectangle that covers the desired area.
Step 4: If needed, you can adjust the position by dragging your rectangle across the canvas.
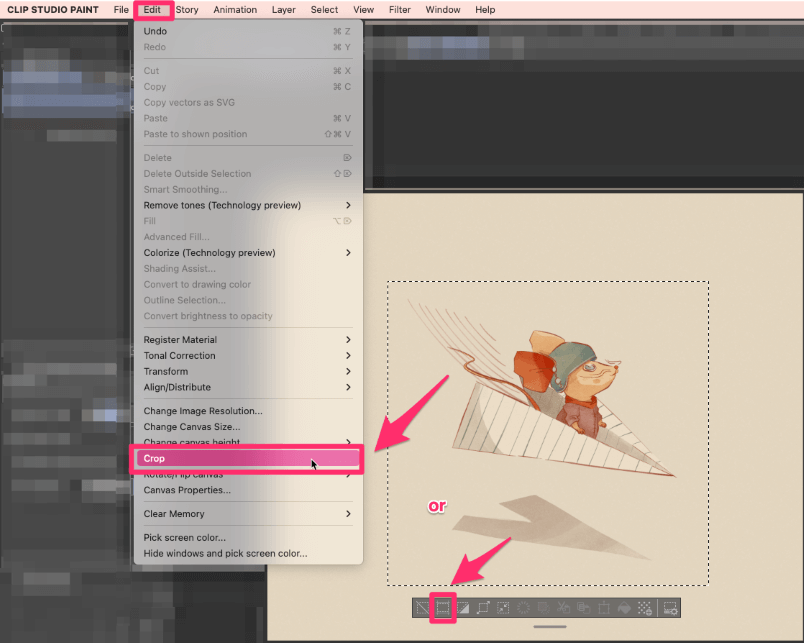
Step 5: Once you’re satisfied with the selection, click on the Crop icon in the bar that appears below. Alternatively, you can go to the menu bar and select Edit > Crop from the dropdown menu.
This method is perfect for quick and straightforward cropping. However, what if you find yourself needing to extend your canvas beyond its original size or have specific dimensions in mind? That’s where our second method comes in handy.
Method 2: Change Canvas Size Tool
This method gives you more precision and control over the size of your artwork. You’re not limited to the original canvas size and can make it larger or add more space on one side. Follow these five quick steps:
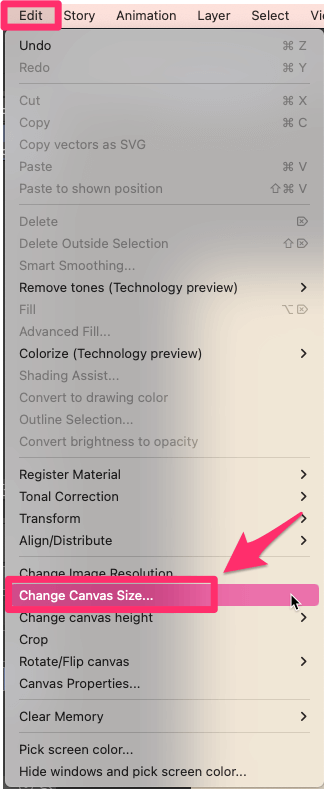
Step 1: Go to the menu bar and select Edit. From the dropdown menu, choose Change Canvas Size.
Step 2: In the dialog box, you’ll see options to adjust the canvas width and height. You can drag the handlebars or enter dimensions directly in the value fields. To reposition the bounding box, simply drag it anywhere on the canvas.
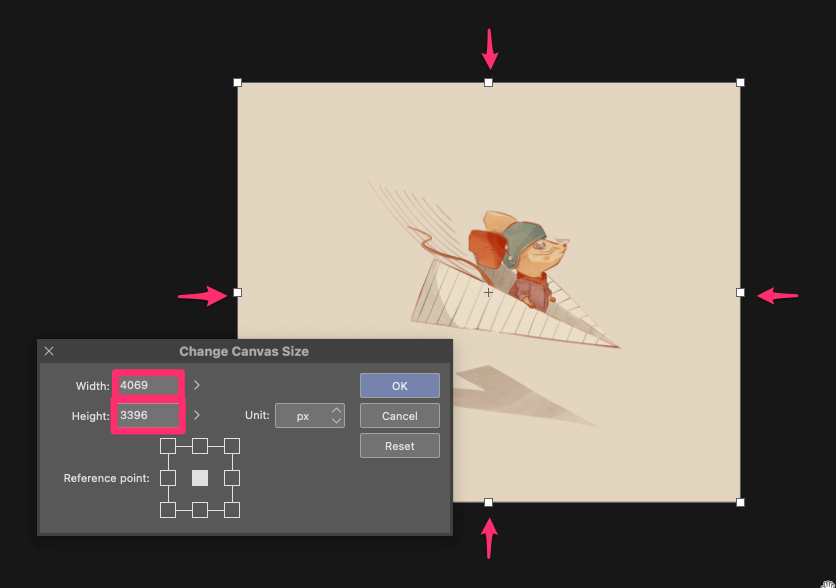
Step 3: By holding Shift while dragging the handlebars, you can preserve the original aspect ratio of your image. Additionally, holding Alt while resizing allows you to resize the image from its center.
Step 4: When manually entering the width and height of the canvas, you can also select the Reference Point.
This determines which part of the image remains fixed when changing the canvas size. For example, choosing the top-left reference point will crop the bottom and right sides of the image.

Step 5: Once you’re ready, click OK to apply the changes and crop your image based on the new canvas size.
So there you have it! If you’re creating artwork that should correspond to a precise standard size, you’ll be able to achieve exactly the right dimensions by entering the appropriate pixel values in the Change Canvas Size window. This allows you to ensure your artwork meets the specific size requirements for printing, digital display, or any other purpose you have in mind.
Final Thoughts
Whether you choose the Selection Tool method or the more precise Change Canvas Size technique, you now have the knowledge to bring out the best in your creations. Remember, cropping not only helps you focus on the most impactful parts of your artwork but also allows you to explore different compositions!
Before we wrap up, I’d love to hear from you. If you have any questions, tips, or thoughts to share about cropping in Clip Studio Paint, feel free to leave a comment below.