
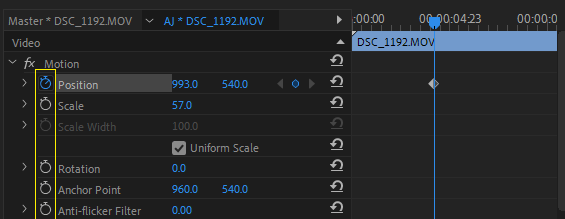
To create a video overlay effect in Adobe Premiere Pro, Import the video clip you want to use for the overlay effect on track two – V2 over the first video. Then, adjust the video clip’s scale, opacity, position, and rotation settings to create the desired overlay effect.
In this article, I will explain how to overlay a video over another, make a black-and-white overlay, a VHS overlay, and how to overlay a transparent video in Adobe Premiere Pro.
I am David, a professional video editor. I’ve been editing videos for creative organizations for the past few years, and I know the inside and out of Premiere Pro confidently.
Table of Contents
- What Exactly is an Overlay in Premiere Pro?
- How to Create a Video Overlay Effect in Premiere Pro
- How to Have Two or More Videos on The Screen at Once
- How to Create a Black-and-White Overlay in Premiere Pro
- How to Create a VHS Overlay in Premiere Pro
- How to Overlay a Transparent Video in Premiere Pro
- Conclusion
What Exactly is an Overlay in Premiere Pro?
Overlay in Adobe Premiere Pro is a visual effect that allows you to place one clip over another. This effect can superimpose text, graphics, logos, or other images over your video footage.
You can use the overlay effect to create creative effects such as split screens and picture-in-picture or to add backgrounds and textures to your clips.
You can use video overlays to apply a filter or effect to specific areas of a video. They allow the user to target particular video portions without affecting the entire clip. Overlays can also add special effects to particular areas of the video, such as blurring out faces.
How to Create a Video Overlay Effect in Premiere Pro
Creating a video overlay will allow you to blend two videos. We will be blending two videos on our screen. Start by importing the video clip you want to use for the overlay effect on track two.
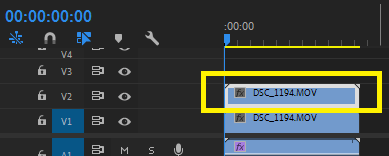
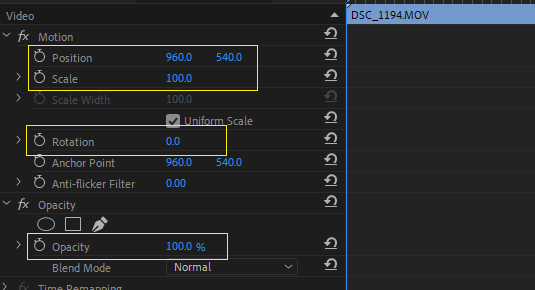
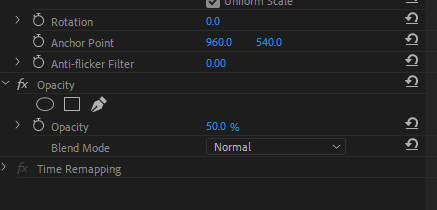
Adjust the video clip’s scale, opacity, position, and rotation settings to create the desired overlay effect.
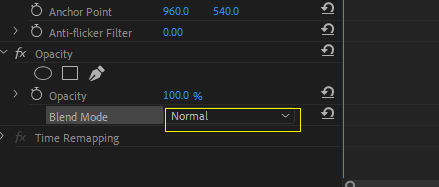
Add a blend mode to the video clip. The blend mode will determine how the video overlays with the other clips in the sequence.
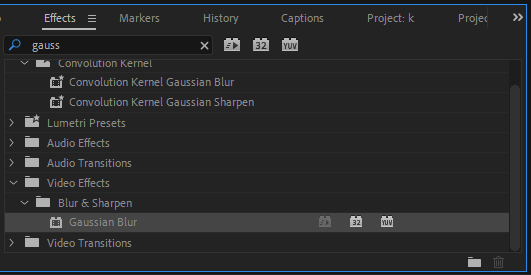
Add a gaussian blur effect to the video clip to soften the edges of the overlay effect.
Add a keyframe to the video clip’s beginning and end to control the overlay effect’s timing.
How to Have Two or More Videos on The Screen at Once
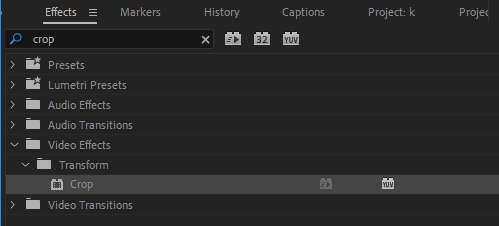
Using the crop effect, you can overlay two videos on top of each other in Adobe Premiere Pro. To do this, drag one clip into your first track in the timeline, then drag the second clip directly above it into the second track.
Select the clip you want to use as the background, go to the Effects Panel, type in “Crop,” and drag the effect onto the clip. You can then adjust the size and positioning of the second clip to your liking.
How to Create a Black-and-White Overlay in Premiere Pro
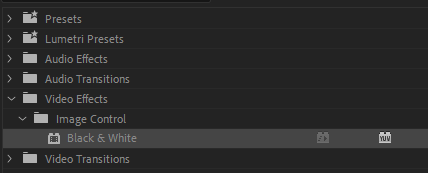
Once inside your effects panel, navigate to Video Effects > Image Control > Black and White. This is Adobe Premiere Pro’s Black and White Effect. Drag this effect directly onto the footage you want to convert to black and white.
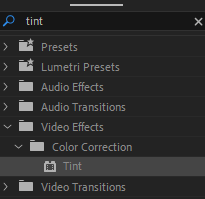
Creating a Black and White Overlay with Tint FX in Premiere Pro
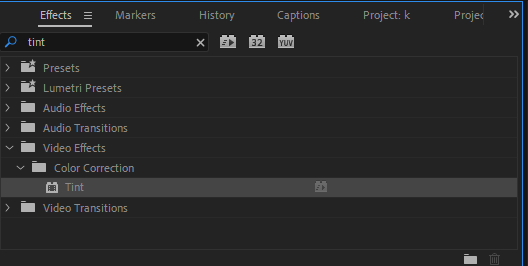
Select your clip in the timeline. Go to the Effects tab and search for “tint.” Drag and drop the “tint” effect on the clip. With the tint effect applied, go to the Effect Controls panel. Under the tint effect, set the mode to “tint.” Change the color to the desired color. Adjust the amount to the desired intensity.
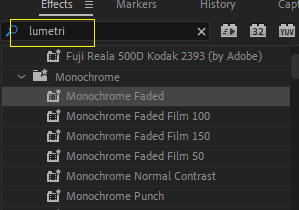
Creating a Black and White Overlay with Lumetri FX in Premiere Pro
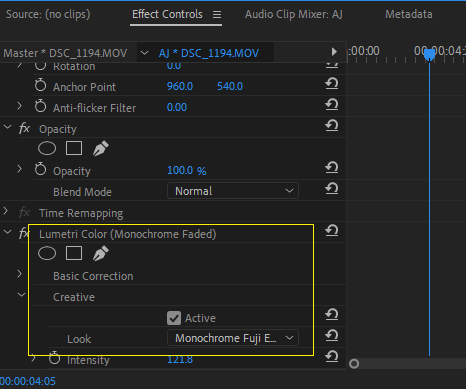
Begin by selecting the clip you want to edit. In the Effects Panel, search for the “Lumetri” effect. Drag the effect onto your clip in the timeline.
In the Lumetri Color Effect, select the “Basic Correction” tab. Under the “Creative” tab, select “Black and White.” Now, we are done!
How to Create a VHS Overlay in Premiere Pro
Are you ready to take your video project back to the 90s? Here’s how to use Adobe Premiere Pro to make new video footage appear like it was captured on an old VHS camera.
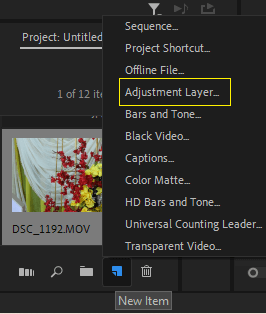
The first step is to change color. Click on the “New Item” button in the bottom right corner of the Project panel. Select “Adjustment Layer” from the list of options. Then press okay.
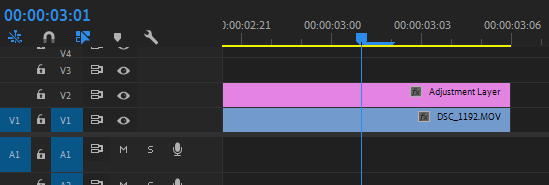
Drag your new adjustment layer precisely above the clip to which you want the effect applied.
After that, navigate to the Effects tab and look for the tint effect. Drop it onto your video clip.
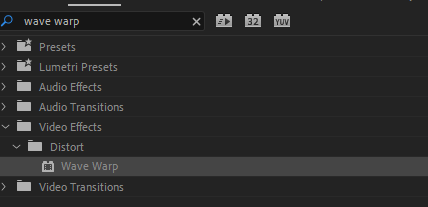
To finish up the VHS effect, go to the Effects Panel and search for the “Wave Warp effect.” This effect will add the scan lines found on ancient VHS cassettes.
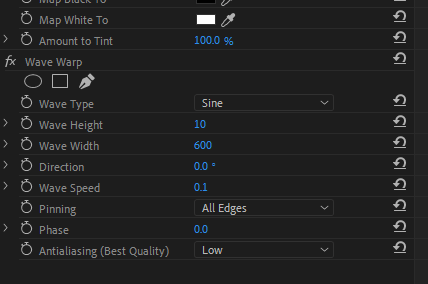
Use the following parameters to add wave warp to your adjustment layer:
- Square wave type
- Minimum Wave Width: 600
- Direction of the wave: 0
- Pinning: All Edges
- Pinning: Wave Speed: 0.1
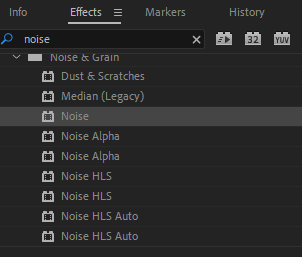
Finally, search for the noise effect and drag it onto the adjustment layer.
Increase the amount of noise until you’re satisfied with the result. And there you have your VHS overlay effect.
How to Overlay a Transparent Video in Premiere Pro
Import the video clips into Adobe Premiere Pro. Drag and drop the video clips onto the timeline. Adjust the opacity of the top video clip to make it transparent.
You can try out options like Multiply, Screen, Overlay, etc., depending on the clip type.
Conclusion
I am happy you’ve successfully learned to create a video overlay effect in Adobe Premiere Pro. You can easily add unique visuals to your video with a few simple steps.
With the various tools and customization options available in Adobe Premiere Pro, you can create a professional-looking video overlay effect in no time.