
Making money from your passion is something everyone would love, but only a few people actually get to do it. If your passion is photography, somehow you have to get people to buy your photographs. And for that, you’re going to need mockups.
Hey there! I’m Cara and I’m in the same boat with you. I do family and wedding photography to make money with my camera, but that isn’t everyone’s jam. If landscape or macro photography is your thing, you must sell the images to make money.
But people need a big push to jump from enjoying your image on a screen to hanging it on their wall. A high-quality mockup is a great way to give them that push.
That’s why today we’re going to look at how to create mockups in Adobe Photoshop.
Note: I use the Windows version of Adobe Photoshop. If you are using a Mac, the workspace will look slightly different from the screenshots displayed here.
Table of Contents
Step 1: Choose an Image
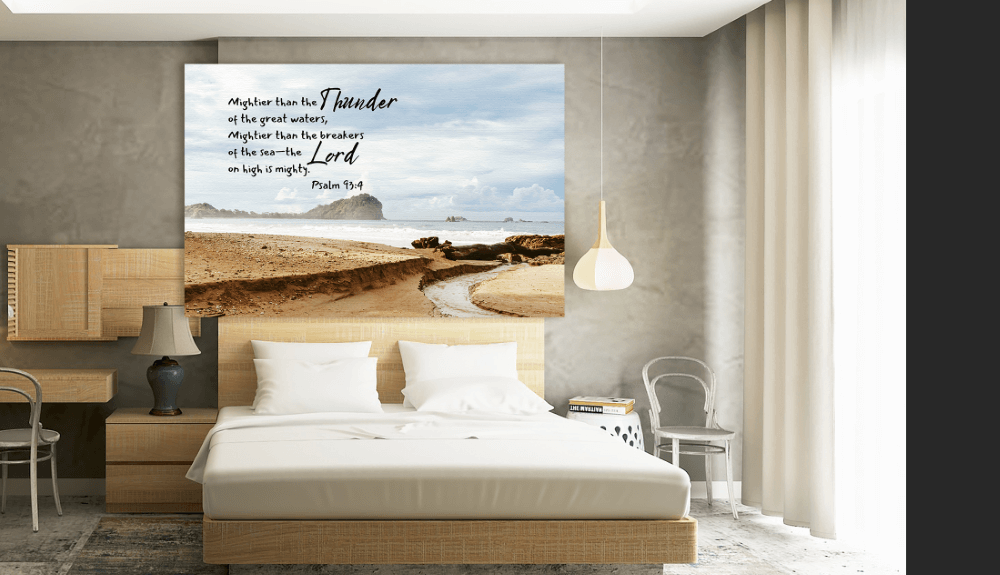
The purpose of a mockup like this is to help people envision how their image would look hanging in their home. Keep in mind, you can use mockups to sell independent images, but you could also use them to show clients how great their portraits would look when printed.
To that end, we need an interior photo. You can use one you’ve taken yourself or you can find a stock photo. I’ve downloaded this one from Pixabay.
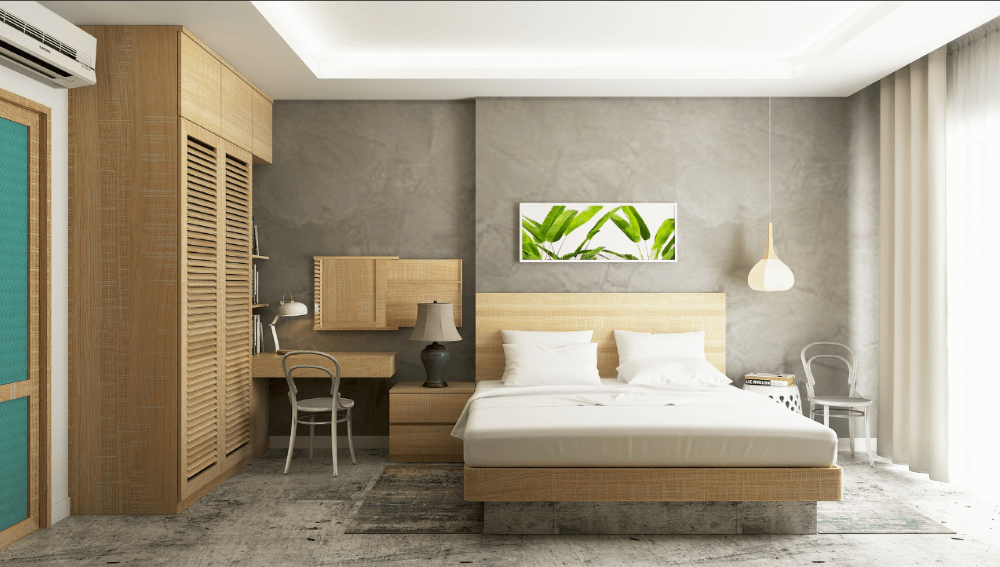
Now, you’ll notice there is already a nice piece of wall art hanging above the bed, which is often the case with these images. You can simply remove it with the clone stamp tool or just leave it there if you’ll be placing a large enough piece to cover it.
Step 2: Choose a Wall Art Type
The next step is to choose how you want to present your art. There are many different types of wall art from posters to framed pieces to canvases to metal prints to acrylics.
If you want to offer framed prints, you’ll need a picture of a frame you can use in the mockup. You can find one on a stock website or take your own picture. Then, you can place your art inside the frame using the steps below as a guide to make it look realistic.
Today, we’re going to create a canvas print that won’t require any other elements. We’re simply going to hang my image on the wall and make it look like a canvas print.
Step 3: Hang Your Artwork
So let’s do that. Go to File in the menu bar and choose Place Embedded.
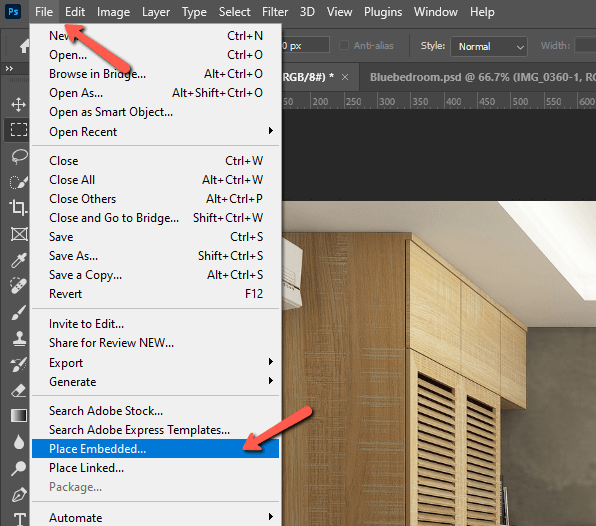
Navigate to your artwork image and click Place. It will automatically appear as a smart object on a new layer on top of your image. The Transform tool is already active, so you can grab the corners to resize and reposition the artwork to “hang” it on the wall.
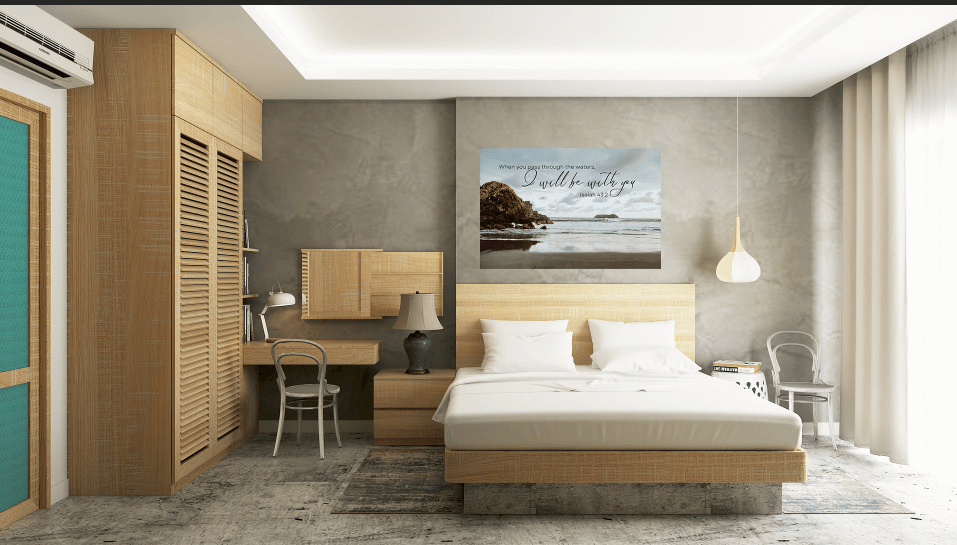
You could technically leave it like this for a simple mockup, but of course, it doesn’t look very realistic. It’s just a flat image on the wall.
So how do we make it look like a canvas?
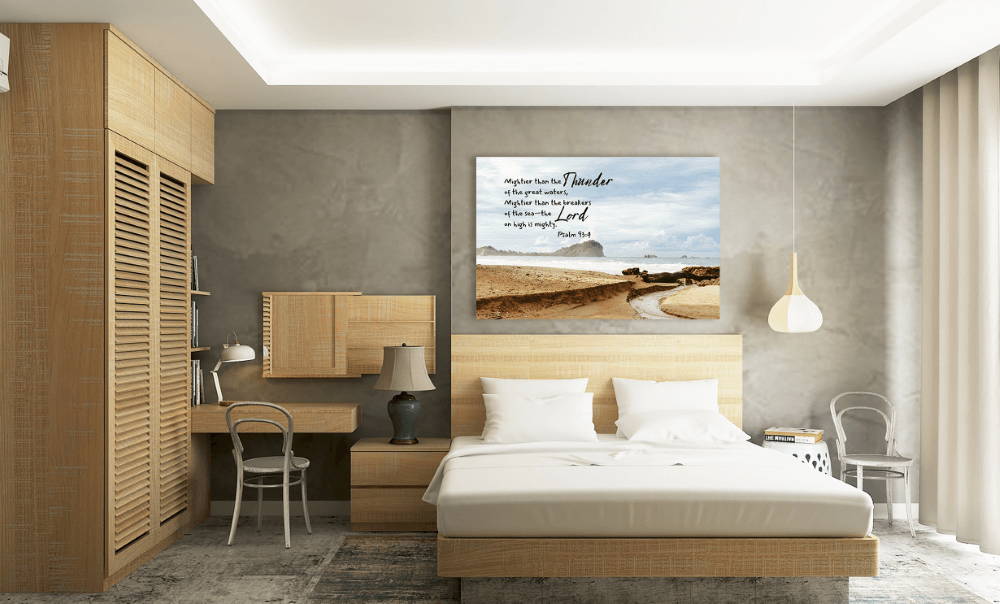
Step 4: Add a Texture Filter
Once it is printed on canvas, the artwork will take on the texture of the canvas. It won’t be a smooth image anymore. So let’s give this image some texture.
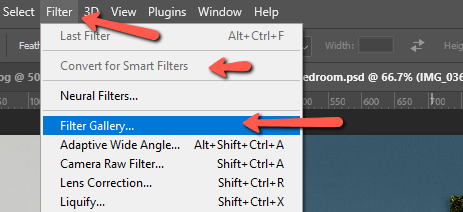
Go to Filter and choose Filter Gallery.
Note: If for some reason your artwork is not a smart object, click Convert for Smart Filters here. The option is grayed out for me because mine has already been converted.
From the Texture folder, choose the Texturizer option. You’ll see settings on the right and a preview of the image on the left.
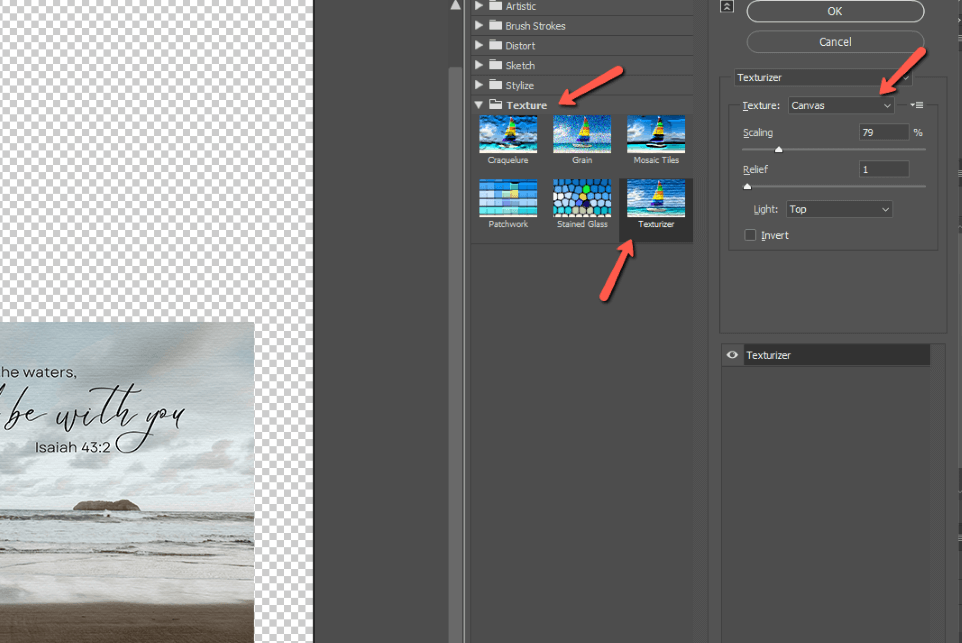
Choose Canvas from the dropdown Texture box and then play with the sliders until you get the look you want. You can see the settings I chose to create a realistic canvas texture.
When you’re finished, press OK.
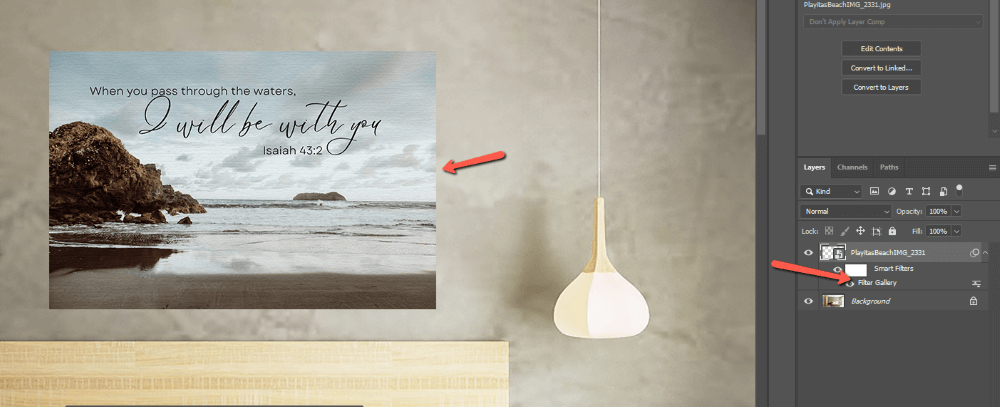
Now you can see that your artwork has the appropriate texture to it. Because we are using a smart object, you can go back into the filter at any time and make adjustments. Simply double-click on the filter gallery under your image in the layer panel to reopen the settings.
Step 5: Add a Drop Shadow
With the texture in place, this is looking better, but it still looks like a flat image on the wall. Canvas pieces are not flat like posters, we need to give our artwork some depth.
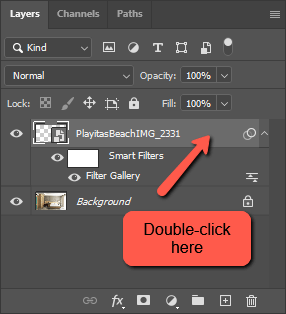
We’ll bring it up off the wall with a drop shadow. Double-click on the artwork layer to open the Layer Styles panel.
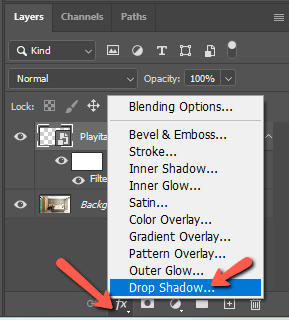
You can also get there by selecting your artwork layer, then pressing the fx button at the bottom of the layers panel. Choose Drop Shadow from the menu to go directly to this option.
In the Layer Styles panel, choose the Drop Shadow tab from the bottom of the option on the left.
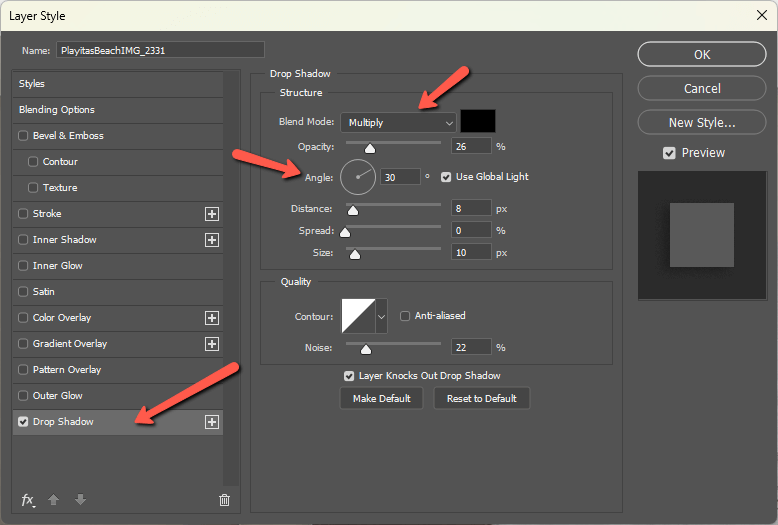
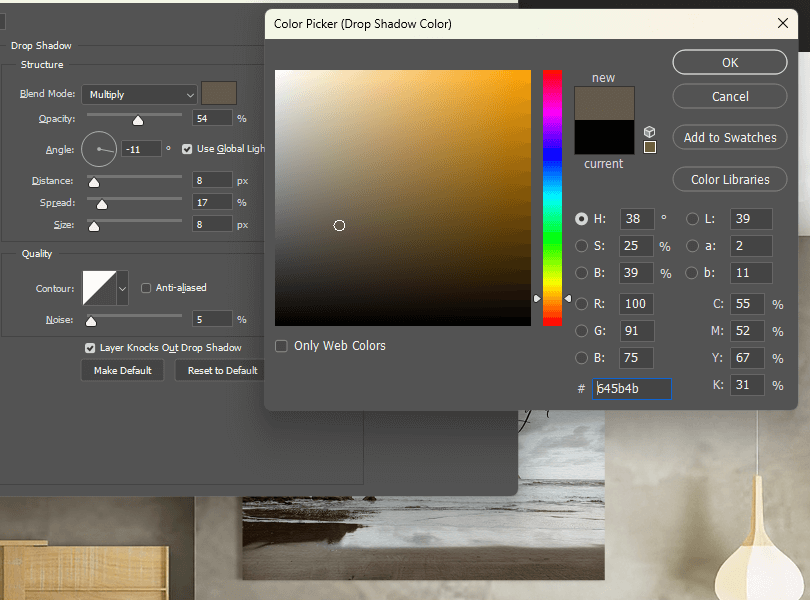
You’ll want the blend mode set to Multiply since we’re adding in something dark. You can choose the color of your shadow by clicking on the color swatch to the right. Remember, shadows aren’t always black and depend on the colors in your image.
When you open the color picker and hover your cursor over the image, you’ll see it turns into the eyedropper. Then you can sample in one of the other shadows to perfectly match the color. As you can see, my image has a bit of brown in the shadows.
The next important detail is to make sure the angle of your shadow is correct. In my image, there is a window on the right side of the room. Thus, the shadows will be going to the left. You can use the shadows of other objects in the image to help you get the angle just right.
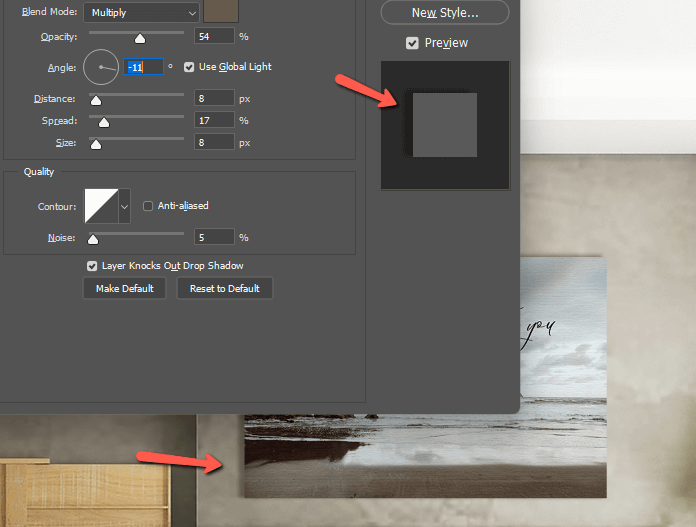
The preview box to the right will move with you as you rotate the Angle dial so you can see how it’s placed. When you let go of the mouse, the angle will change on the artwork in your image, allowing you to double-check the look before accepting the changes.
Finally, fine-tune your shadow by adjusting the Distance, Spread, and Size sliders. You can also add a touch of Noise to the shadow if needed to match your base image.
Once you’re finished, press OK.

Now this is looking awesome! A mockup like this helps your client envision how your artwork would look hanging on the wall.
You can even take things a step further and have them send you an image of their actual room. Then you can copy your artwork layer and paste it onto their image. Adjust the shadows to match and voila! You have a custom mockup!
Step 6: Change the Image
Now, the other cool thing about this mockup is that you don’t have to redo it for every piece of artwork you want to display. You can simply drop in a new piece of artwork and in one step you have a new mockup. That’s the advantage of working with a smart object!
Let’s look at how to change the contents.
Over in the layers panel, right-click on the artwork layer. Make sure to avoid the thumbnail and the layer’s name. Click in the blank space to the left. Then choose Replace Contents from the menu that opens.
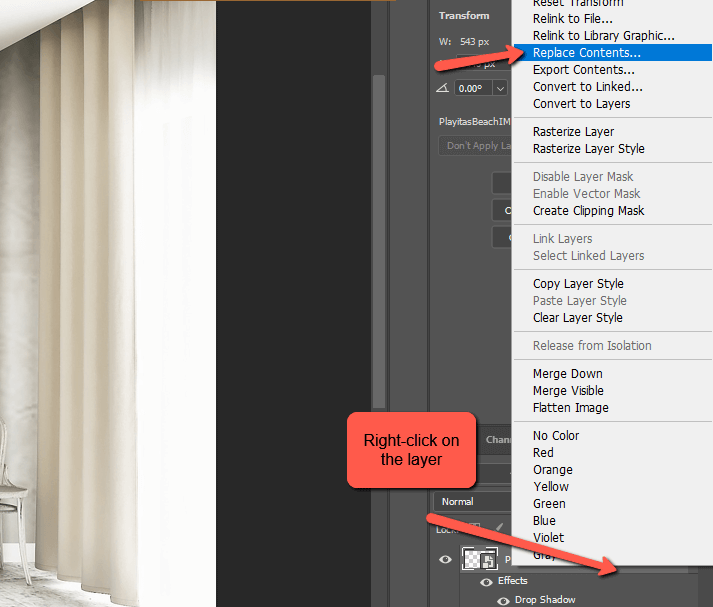
Navigate to your next piece of artwork and click Place. It immediately drops in your new artwork with all the settings of the first one!
You may have to resize it, but that’s a quick fix with the Transform tool. Press Ctrl + T or Command + T to activate and drag the corners to resize and reposition.
Boom! Now you have a versatile image you can use over and over to sell various pieces of your artwork. We certainly wish you all the best in your efforts.
Let us know how it’s going in the comments below!