
To clean up noisy audio in Premiere Pro, navigate to the effect panel and search for “Denoise”. Select and drag this effect on your audio clip in your sequence timeline – it is that simple.
In this article, I will explain how to clean up your noisy audio clip, increase your audio volume, use the parametric equalizer tool, and finally, use the multiband compressor to soften your audio.
Table of Contents
Different Ways to Clean up Audio in Premiere Pro
There are several ways to clean up noisy or reverb audio in Premiere Pro. Let’s start with the essential sound panel.
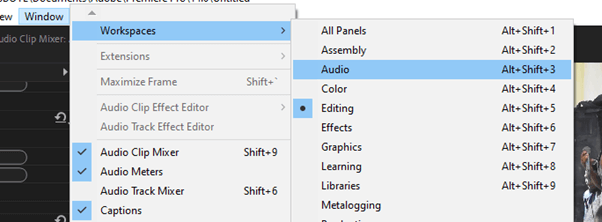
To get to the essential sound panel, go to the Windows Menu > Workspace > Audio. Or press the ALT + SHIFT + 3, and the essential sound panel will appear on your workspace’s right-hand side.
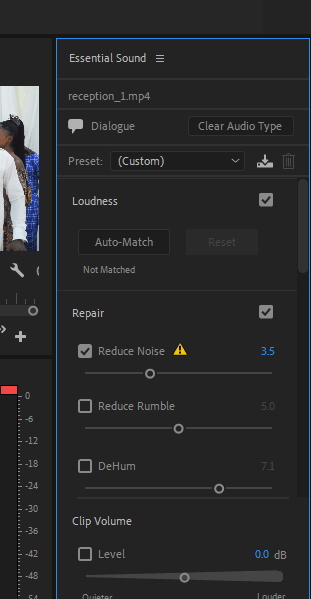
Now, select your audio from your essential sound panel and navigate to Dialogue > Loudness to activate the auto-match. Afterward, go to the repair section, and check the reduced noise.
This will identify and reduce the noise from the background. You will discover a slider under Noise reduction. This will help you reduce or increase the intensity of the background noise. But I will advise you to let the intensity be around the middle to avoid a bad output.
Method 1: How to Clean up Audio with Denoise Plugin
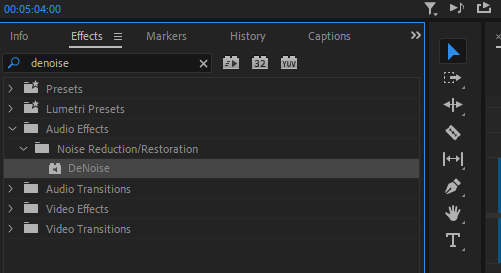
Go to the Effect Panel, search for denoise, select it and drag it down on your audio clip.
Then, navigate to the Effects control panel and move down to the denoise fx. Click on the edit to adjust the auto-denoise effect you just dragged on your audio clip.
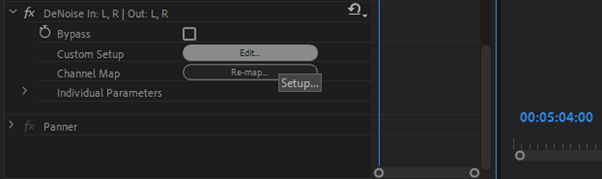
Now a function box will pop up. You can choose from the presets if you want the noise reduction to be heavy or light.

If you explore downward, you can adjust your denoise manually from the Processing Focus. Under the Processing focus, choose your desired option and the intensity of that effect from Amount by dragging the line forward or backward.

Note that using these functions can actually work well/better if you already have a good sound recording during your production stage (while recording).
Method 2: Clean up Audio with Parametric Equalizer Tool
To use this tool, go to the Effect Panel, and search for the parametric equalizer effect.
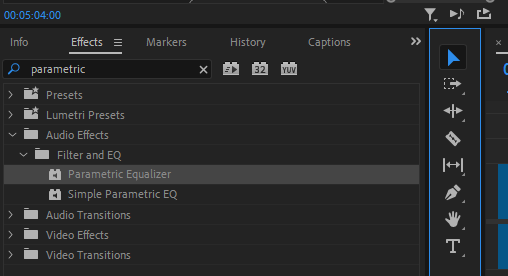
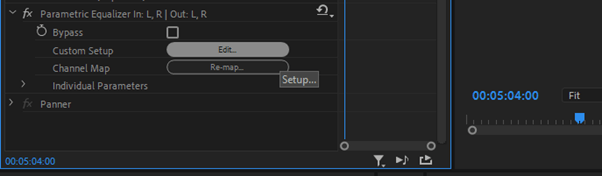
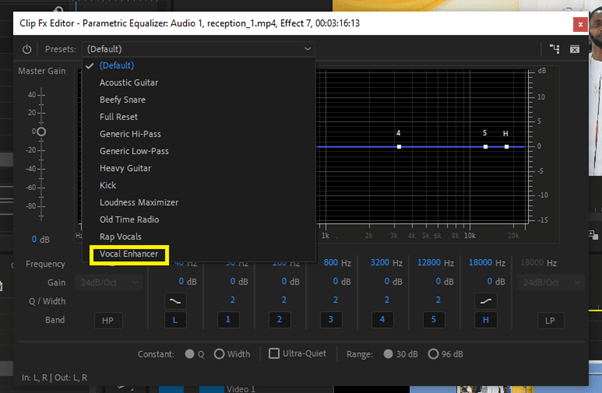
Drag it down on your audio clip. It is usually not always perfect with what you have in mind. So you will need to tweak the parameters. Go to your Effects Control Panel, locate the fx, and click edit.
Now you will have a pop-menu, select vocal enhancer. Now your audio should sound well.
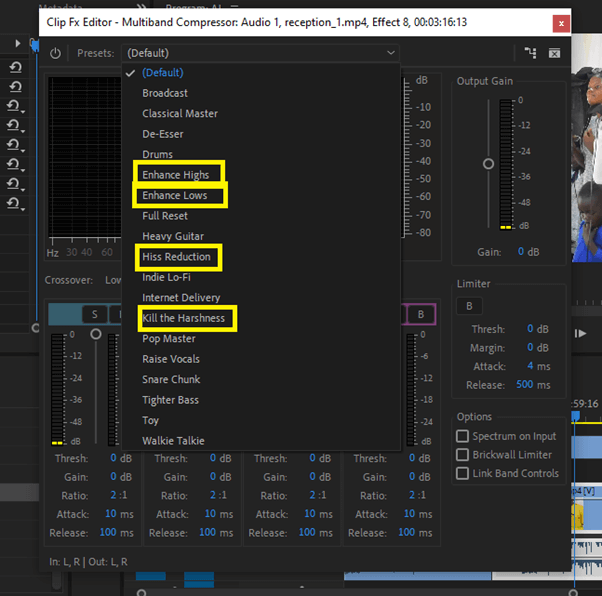
Method 3: Use Multi-band Compressor Plugin to Clean Up Audio
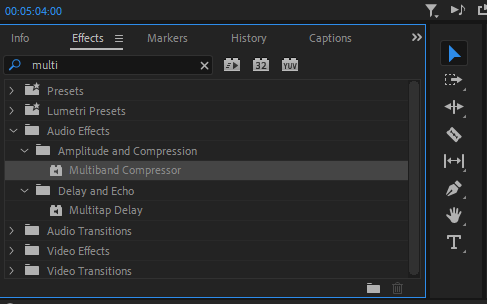
To use this tool, go to your Effects Panel as usual and search for this fx. Then drag it down on your audio clip.
Most times, it is not always perfect with what you have in mind. So you will need to edit it. Navigate to the effect control panel, find the fx and edit.
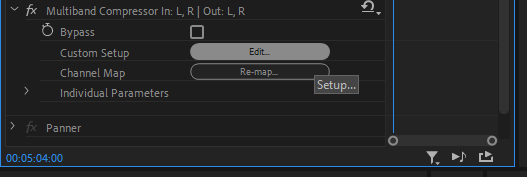
Now you will have a menu pop up; select enhance high/low or Hiss reduction to reduce hiss or kill the harshness.
How to Increase Audio Volume After Cleaning up Audio in Premiere Pro
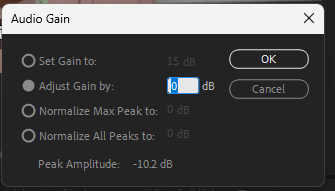
After cleaning up your audio, your audio volume will often sound very low. So, after all the tweaking, ensure your audio volume pops up. It’s straightforward to do this. Just click on the audio and press G on your keyboard; it will open up a Gain Panel, input above +6dB.
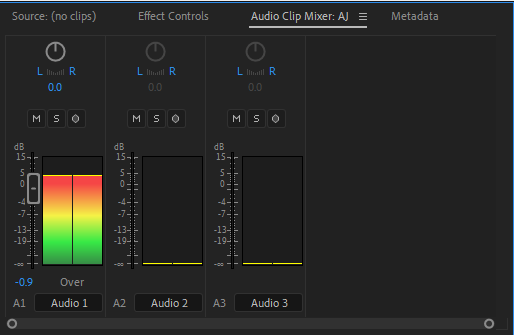
Also, you can choose to increase the volume of your video clips at once to save stress, you can do this using the audio mixer panel. Open your audio mixer panel.
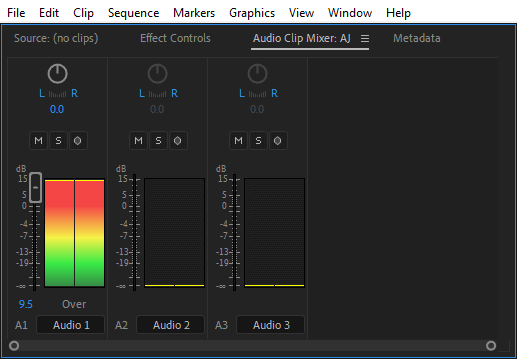
Select the audio track you want to increase the volume. Here, you will find a bar, select the bar band and drag it up to increase the volume of your audio clip.
How to Clean up Audio Using Third-Party Plugin in Premiere Pro
Life has been made easy. I’m an advocate of an easy lifestyle. There are tons of plugins out there that can help you do things with a single click.
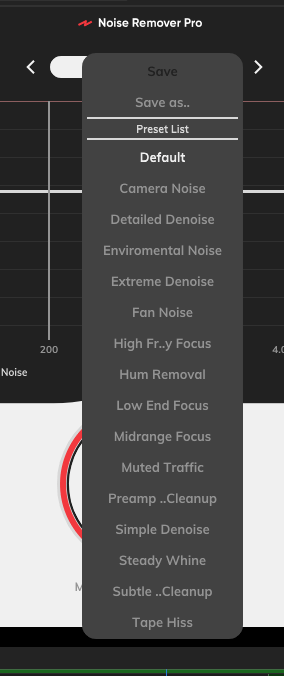
ERA BUNDLE is the professional plugin I use to clean up my audio in Premiere Pro. This plugin is heaven! I would advise you to get one; you can try out the free version to see if it is something you would love.
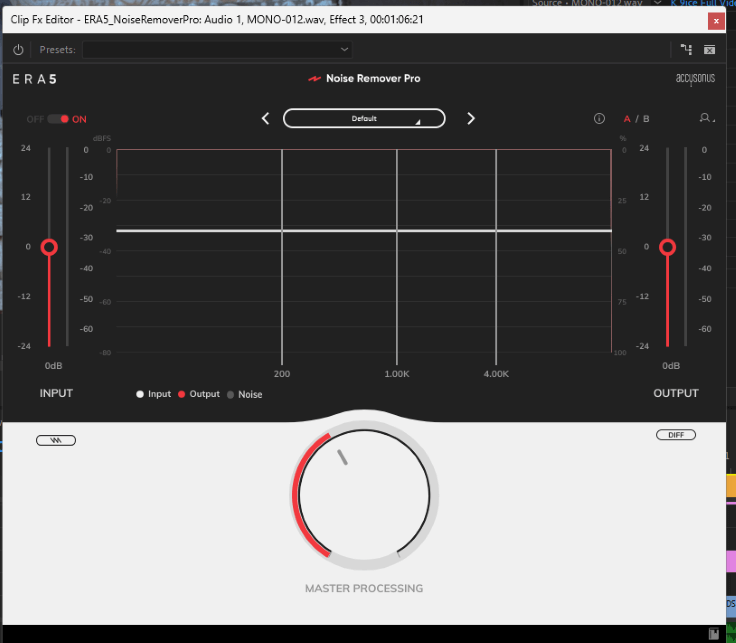
With just a single click and tons of presets, you are good to go with your audio. You don’t even need to increase your audio volume after doing all your magic on the audio.
Conclusion
Cleaning the audio noise in Premiere Pro is just a simple process. Be sure to keep listening to your audio throughout your edit, as small changes can make a big difference in the sound quality of your final product.
Don’t forget; you only need to navigate to the effect panel and search Denoise. Drag this effect on your audio clip in your sequence timeline.
If you need help understanding anything from the article, send your question to me in the comment box, and I will respond promptly.