
To change video size in Adobe Premiere Pro, go to “Sequence” > “Sequence Setting” > “Change Frame Size,” then hit “Okay.” Super simple!
My name is David, and I’m a video editor. I’ve worked with many brands taking movies and audio projects. I use Adobe Premiere Pro for all my projects.
In this article, I will show you how to use the crop tool, different ways to change the frame size of your project, the standard frame size in Premiere Pro, and the frame size for YouTube.
Table of Contents
How to Crop a Video in Adobe Premiere Pro
The first thing to do is to import your footage into Adobe Premiere Pro. To do this, go to File, select Import, or hit the Ctrl button and key “I” on your keyboard.
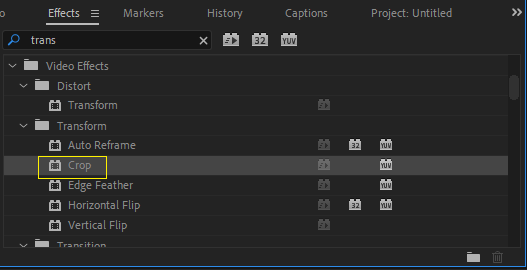
Create a sequence and drag your clip into the sequence you created. Proceed to the Effects panel and select Video Effects. Under this category, select Transform.
Then look through this category, where you will find the crop effect, and drag it onto the footage in the timeline, or select the footage and double-click on the crop effect.
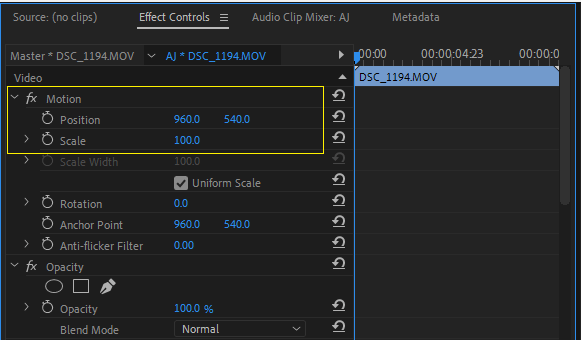
Navigate to the effect control panel. Here, you can tweak the crop fx parameters – the bottom, the right, top, and left of your desired clip.
How to Resize a Video in Adobe Premiere Pro
Creating a frame size will reshape the footage to correspond to the sequence settings.
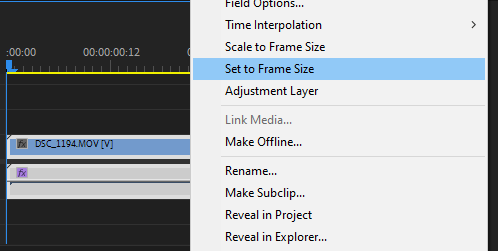
On your timeline, right-click on your clip while a drop-down menu pops up. Select set tp frame size to adjust the frame size of your sequence to the size of the clip. And then it resizes automatically.
Other Methods to Resize Video in Adobe Premiere Pro
- Go to effect control, select motion, then drag a point out to fill the size.
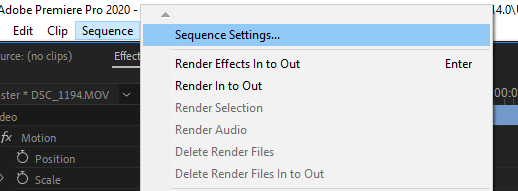
- Go to “Sequence” > “Sequence Setting” > “Change Frame Size,” then hit “Okay.” After that, select Change Sequence.
How to Change Frame Size in Premiere Pro?
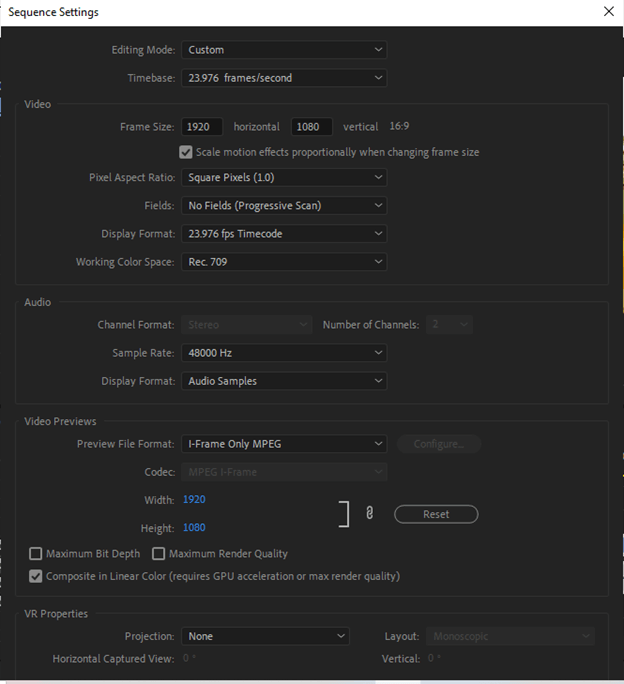
If you’re making a video for Instagram Stories, the ideal dimensions are 1080p by 1920p. To change your frame size, open up your sequence settings – Go to “Sequence” > “Sequence Setting” > “Change Frame Size.” Set the frame size to your requirements and click OK.
Suppose you’re adding video to a new timeline, and your footage’s resolution doesn’t match your sequence’s resolution. In that case, Premiere Pro will display a pop-up window recommending that you change your sequence settings to match the footage. When you click “Change sequence settings,” Premiere Pro automatically adjusts the sequence frame size.
The Best Frame Size in Premiere Pro for YouTube
If you have a 1080p video, the resolution and frame size should be 1920 x 1980—a 2560 x 1440 frame size for a 2K video. Finally, the 4K ultra HD videos’ frame size should be 3840 x 2160.
If you want to achieve the standard 16:9 aspect ratio, ensure that your “Pixel Aspect Ratio” is set to square pixels (1.0).
Conclusion
Now that you know how to change your video size, I hope you enjoy it. The quickest way is to go to “Sequence” > “Sequence Setting” > “Change Frame Size,” then hit “Okay.”
If you have questions, feel free to ask me in the comment section below.