
Changing the color of any selection in Photoshop can be done by creating one or more layer masks. With your subject selected, create a hue and adjustment layer and change the hue to any color you like.
In this article, I’ll cover three ways to change the color of something in Photoshop.
Table of Contents
Key Takeaways
- By exploring the three methods in this article, you will learn all about layer masking and how to create a realistic photo color change.
- Create a group and attach your layer mask to it, so that all the adjustment layers inside are covered by the mask.
- Take your time fine-tuning your subject selection. Adobe offers a head start when you go to Select > Subject.
How to Change or Replace a Color in Photoshop
With a hue and adjustment layer, changing and replacing colors in Photoshop is very easy. It involves selecting your subject and applying one or more adjustment layers.
Method 1: Blending mode
This is my cat, Mittenwool. Let’s change the color of his fur to light pink.
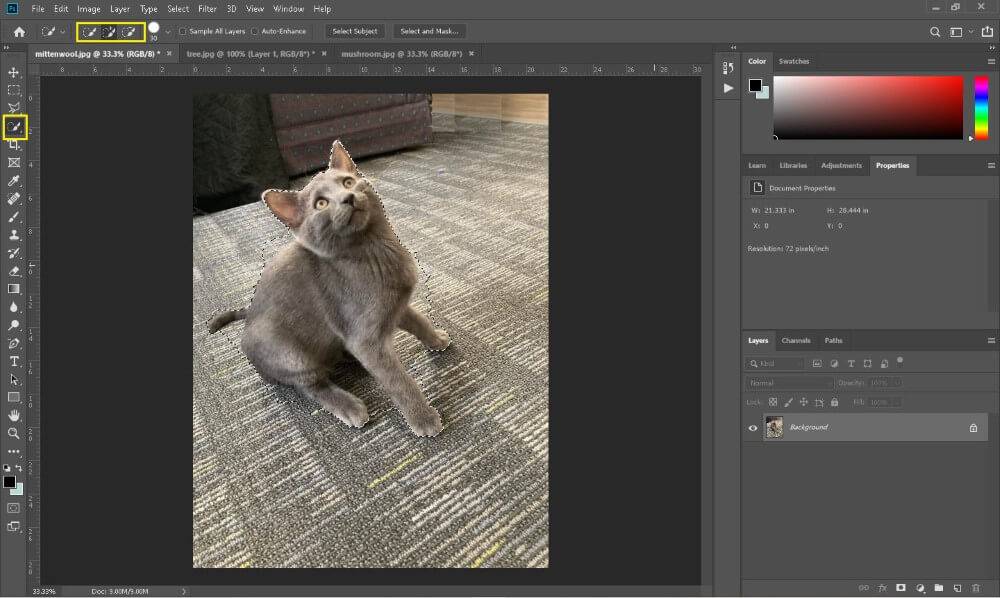
Step 1: Choose the Quick Selection tool from the toolbar, I’m going to click and drag on Mittenwool. In the process of selecting him, some of the carpet was selected so you need to refine the selection.
Step 2: Refine your selection. You can use the add and subtract features across the top to fine-tune your selection, but I am going to use the Polygonal Lasso tool while pressing the Alt key to subtract from my selection, including Mittenwool’s eyes.
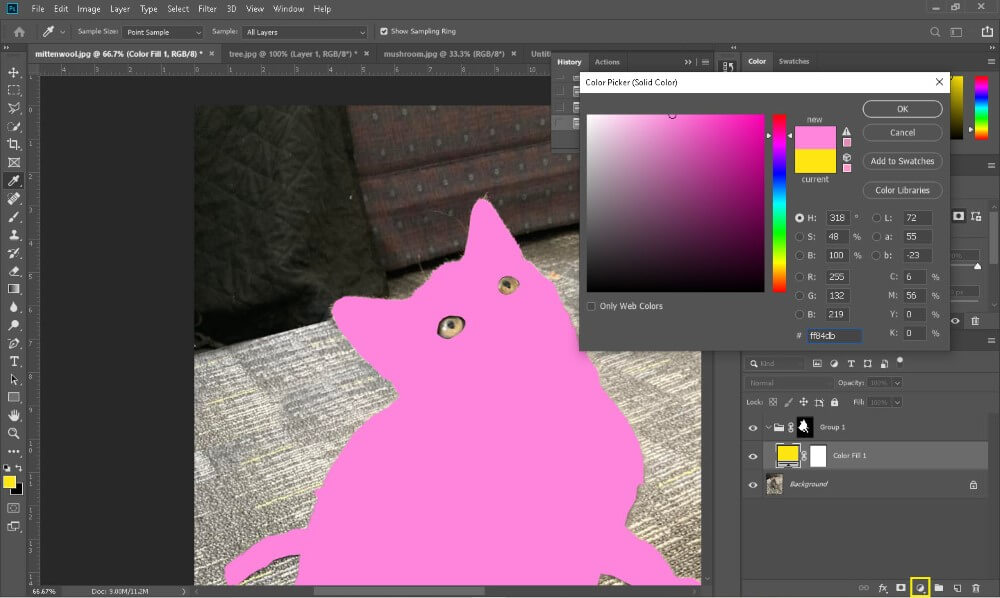
Step 3: Now I’m going to create a group (the little folder next to the yellow box on the bottom) and a new adjustment layer (yellow box) by going to Solid Color.
As you can see in the image above, this adjustment layer for Solid Color was added to the new group I created.
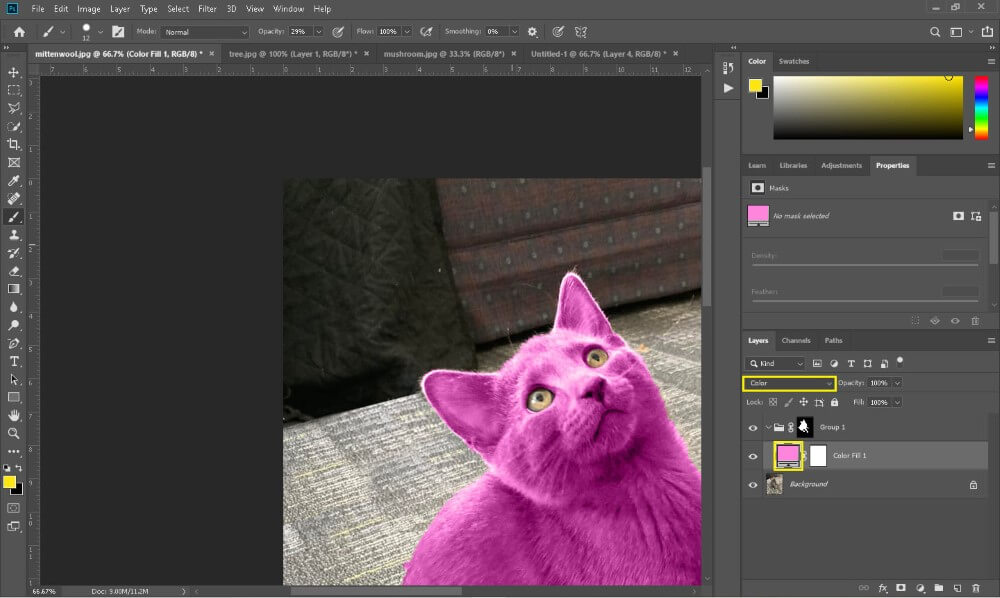
Step 4: Change the layer blending mode to Color. I was aiming for a lighter pink, so let’s keep going.
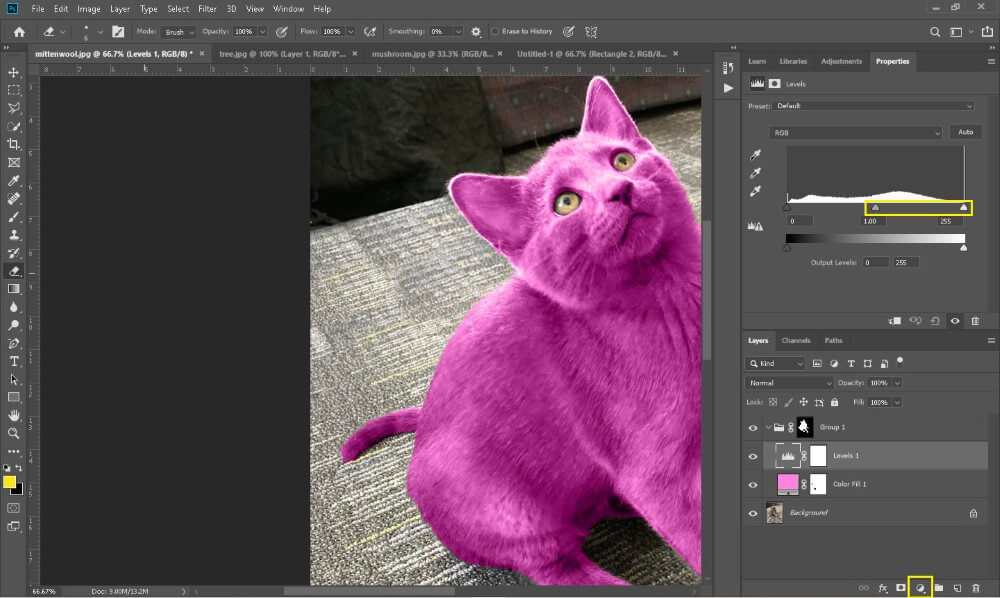
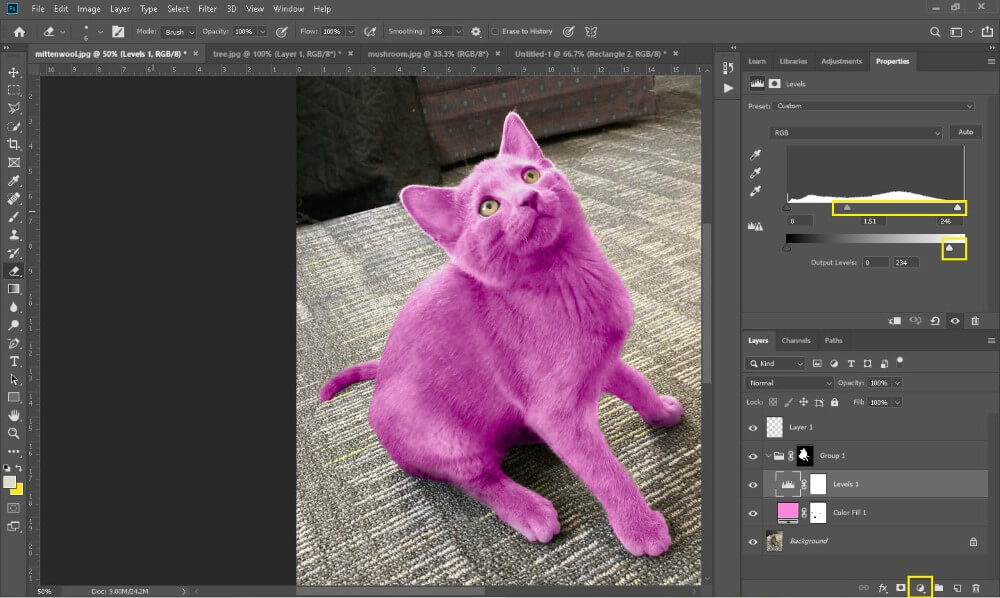
Step 5: Create another adjustment layer (small yellow box) for Levels. Slide these two sliders in the Properties panel to the left, to make this color brighter.
Here’s my final image, with the level adjustments I made. I added a top layer for shadowing around his paws with the feathered brush tool.
Method 2: Hue/Saturation
Let’s change the leaves in this photo to blue.

Step 1: Create a loose selection of the leaves with the Lasso tool, then create an adjustment layer for hue and saturation (blue box below).
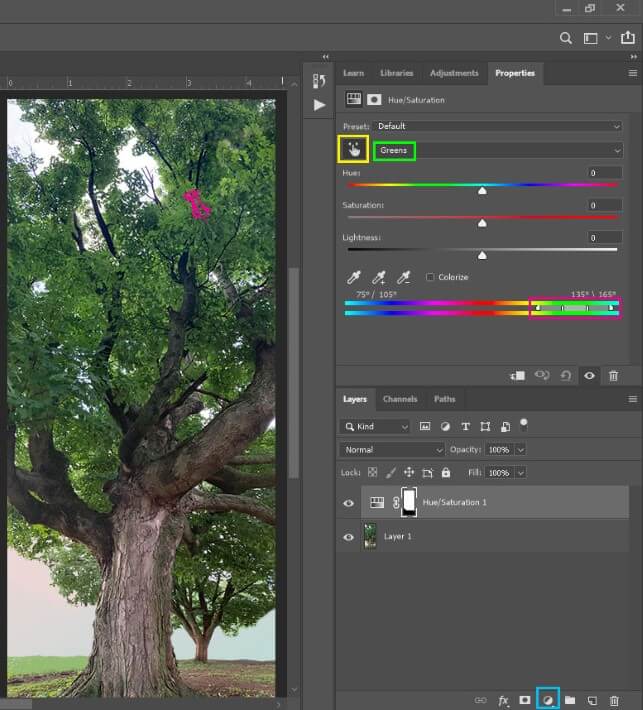
Step 2: Click the hand in the properties panel (yellow box) to turn your mouse into an Eyedropper tool. Click on one of the leaves.
The drop-down beside the hand will change from “Master” to “Greens.” The slider bar (in pink) can be adjusted as necessary to cover a wider range of colors.
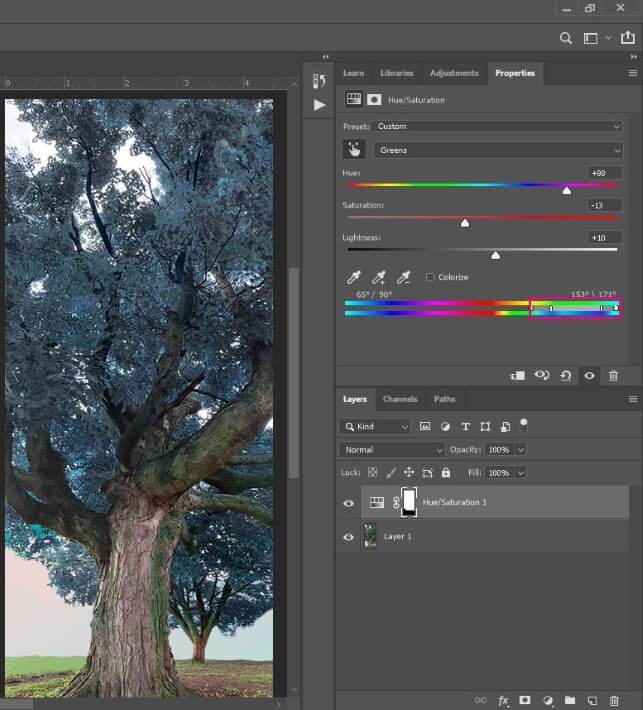
Step 3: This is my tree after adjusting the inner sliders a bit. I did this because when I changed the color to blue, it left some greens behind.
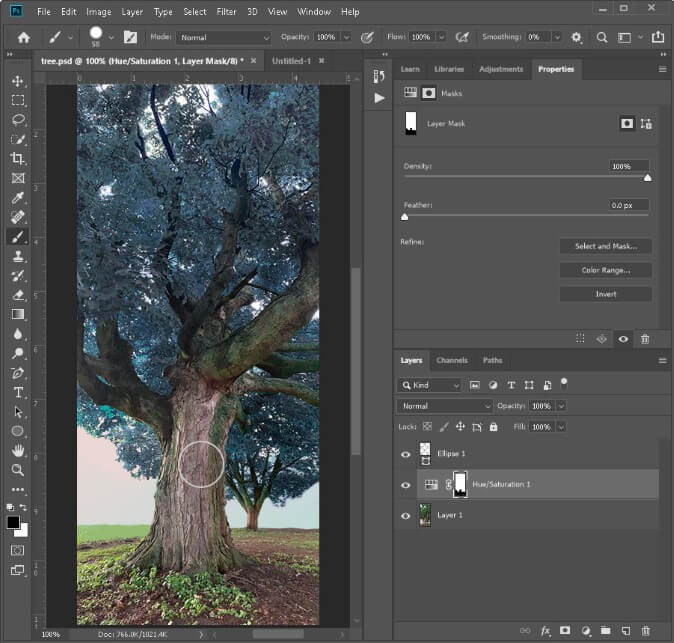
Step 4: When it comes to a layer mask, black conceals and white reveals. I’m going to add to the concealed portion of the mask by using the brush tool with the color black to go over the wood of this tree.
I don’t want the color change to apply to the wood of the tree, so I’ll paint with black on the layer mask.
Our tree is looking great now, but I’m going to show you a few more helpful tips. Let’s add an adjustment layer to our mask selection to adjust the brightness of our leaves.
Step 5: Duplicate your image by using the shortcut Ctrl + J, click and drag the duplicate to the top of your layers, and change the blending mode to Difference.
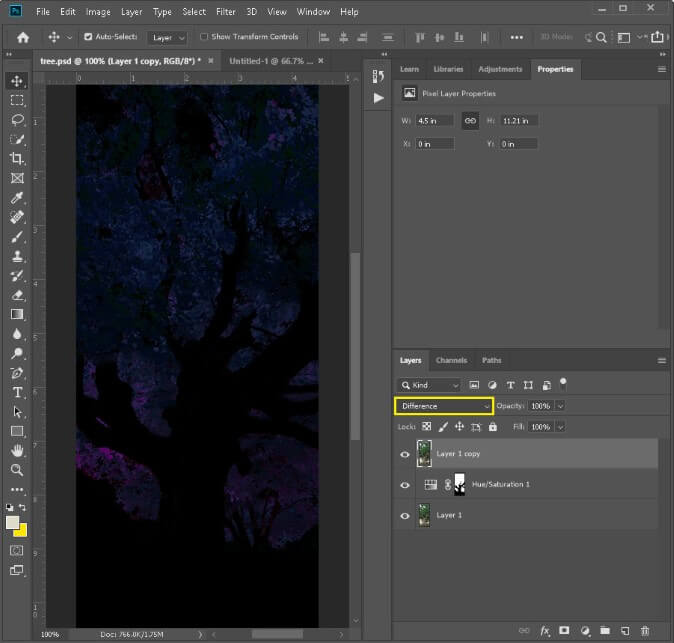
Step 6: To select what you see here, use the shortcut Ctrl/Command + Alt + 2. If you get a pop-up about the amount of pixels selected, don’t worry about it, this will still work.
Now we can delete this layer copy because we’ve made a selection of our leaves.
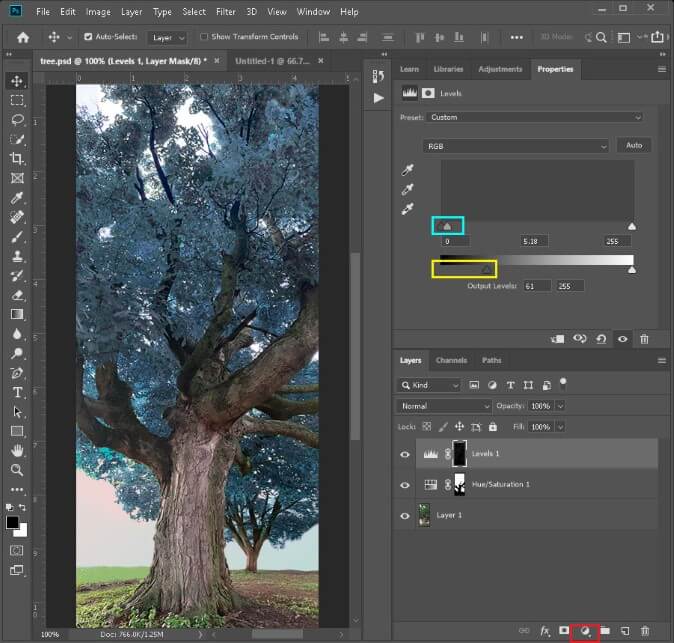
Step 7: Click in the red box at the bottom to create a new adjustment layer for Levels.
I slid the sliders in the blue and yellow boxes to make it brighter, and gray at its darkest level.
Method 3: Levels
Let’s see another way to create masks and target the color we want to change.
Step 1: Go to Select > Subject and then fine-tune your selection as we did with Mittenwool.
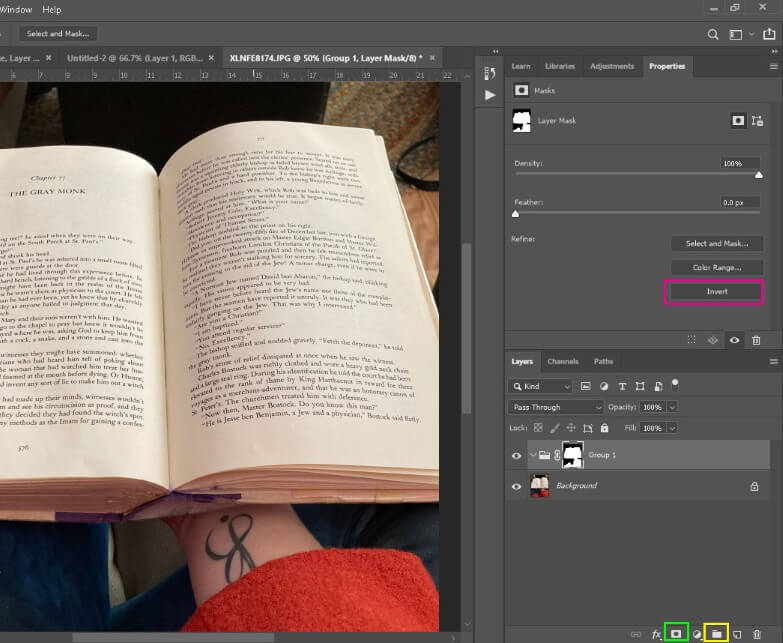
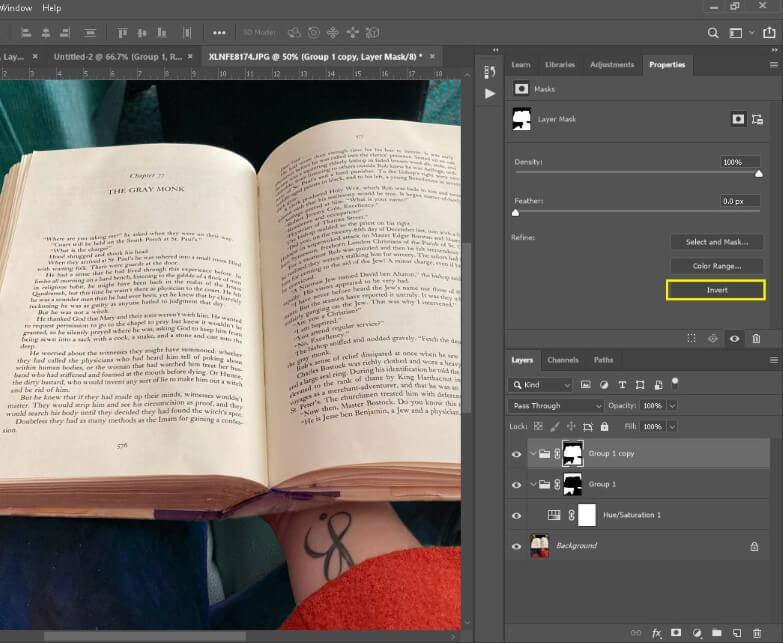
Create a group (yellow box) and then click in the green box to create a mask of your selection.
If you need to, you can click in the pink box in the properties panel to invert the mask selection. This group mask will affect all the adjustment layers you add to it.
Step 2: With the group selected, click in the yellow box to add an adjustment layer for Hue and Saturation. The first thing I did was adjust the hue bar (green box) to the hue I wanted for the background.
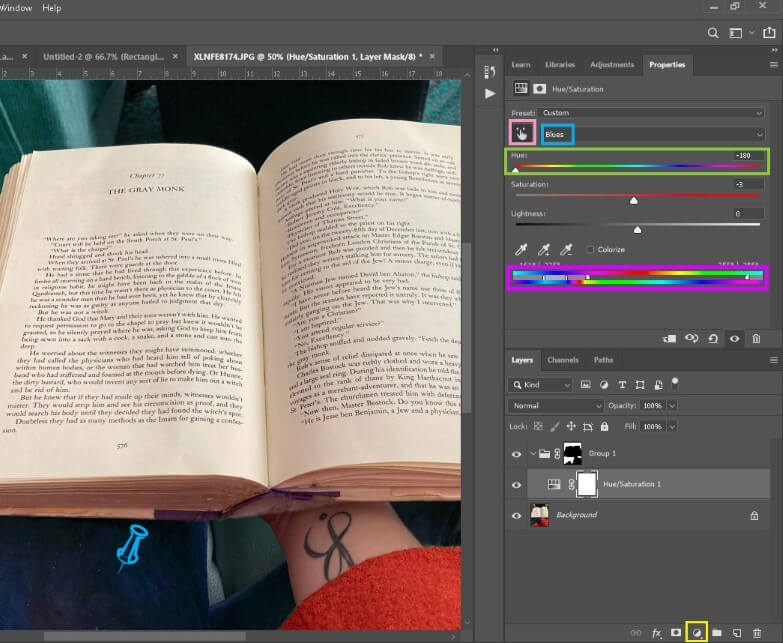
I didn’t like how it changed the color of the pants as well, so after the background was the right hue, I went on to the next step.
Step 3: Click on the hand symbol (pink box) and then click on the pants. The drop-down changes from “Master” to “Blues.” I also expanded the sliders (pink bar) to expand the range of colors affected.
Now you can adjust the hue bar again, and it will only affect the “Blues.”
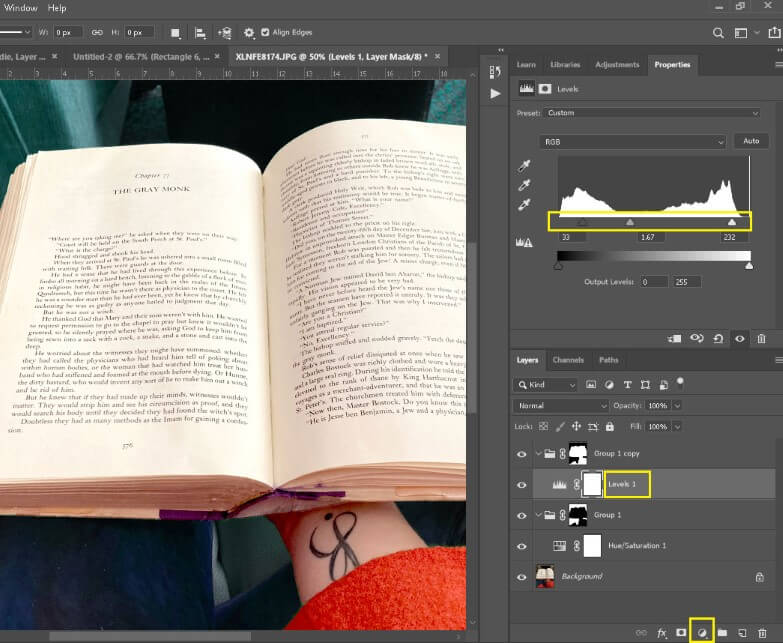
Step 4: With the group selected, use the shortcut Ctrl + J to duplicate it and the mask. Click on the mask copy and then invert (yellow box) it.
Step 5: Add an adjustment layer (yellow box at the bottom) for Levels. Adjust the sliders to make this part of the image brighter and more vibrant.
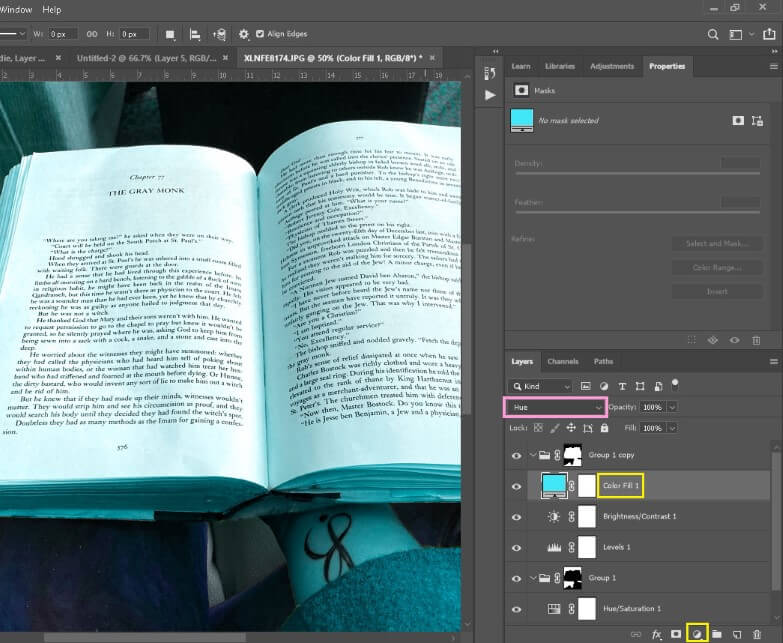
Step 6: Add another adjustment layer for Brightness and Contrast and adjust the sliders to your heart’s content.

Step 7: Create another adjustment layer for Solid Color. Select your color choice and then change the layer blending mode (pink box) to Hue or whatever else looks great!
Final Thoughts
By taking the time to learn about layer masking and fill and adjustment layers, we’ve become familiar with helpful and universal tools that will make your future projects come to life.
Now you can easily change the color of anything while retaining the realism of the original image. I strongly encourage you to continue experimenting with layer masks and blending methods.
Do you have any tips for other artists or graphic designers? What’s your reason for being in Photoshop? Let me know in the comments below.