
Stumped on how to change the opacity of your objects in Adobe Illustrator? Fear not. Changing the opacity of your objects and text in Illustrator is easy by using the “Appearance” panel.
My name is Elianna. I have a Bachelor of Fine Arts in Illustration and have used Adobe Illustrator for over six years. I use Illustrator to create posters, illustrators, business cards, and more.
In this post, I will show you how to adjust the opacity of your objects in both the Desktop and iPad version of Illustrator using the Appearance and Properties panels.
Let’s get into it!
Table of Contents
Key Takeaways
- At 100% opacity, the object will be opaque. At 0% opacity, an object is transparent.
- The keyboard shortcut for the Appearance panel is Shift + F6.
- You can change opacity in Illustrator for iPad in the Properties panel.
What is Opacity?
Opacity refers to the transparency of an object. An object with 100% transparency will appear opaque, while an object with 99% opacity or below will have a varying degree of transparency, similar to the level of tint on a car window. When Opacity is set to 0% an object is invisible.
Using Opacity with other effects like blending modes can improve visual interest in your design. Experiment with both for the best results.

Change Opacity Using the Appearance Panel
The easiest way to change the opacity of an object or text is in the Appearance panel. Here’s how to do it.
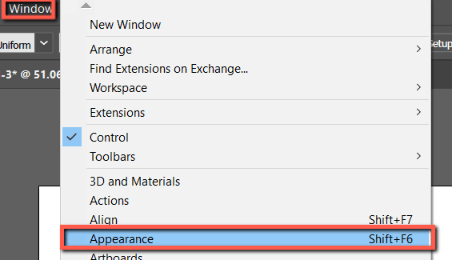
Step 1: Open Adobe Illustrator and select Window > Appearance to open the Appearance panel, or use the keyboard shortcut Shift + F6.
Alternatively, when an object is selected, you can find Appearance in the Properties panel.
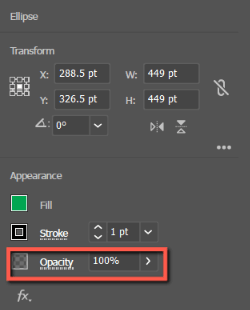
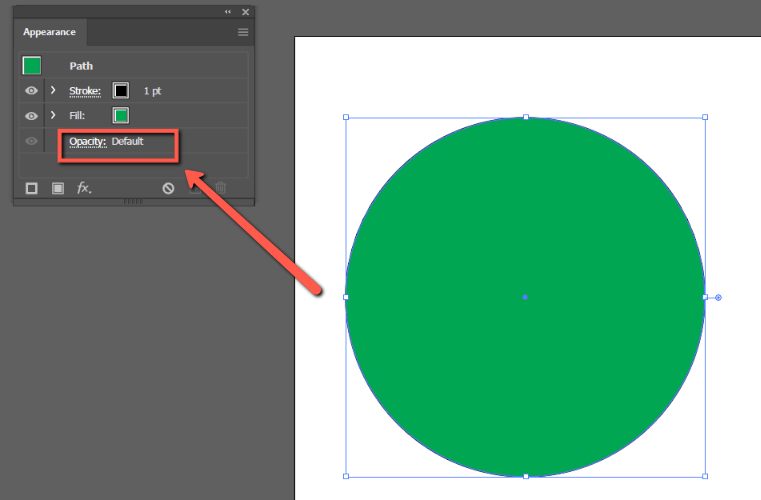
Step 2: Click on the object you would like to change the opacity of and click Opacity.
Step 3: Click on Opacity to open the slider. Use it to adjust the opacity of your object as desired. Hit Enter on your keyboard when you finish.
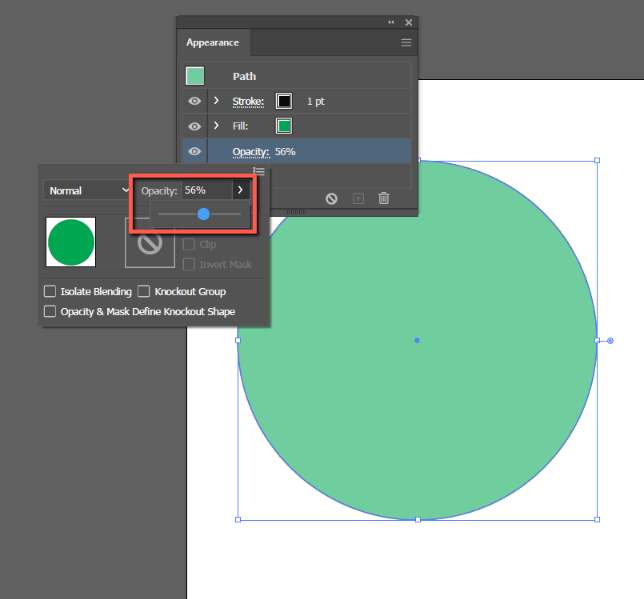
Your change will reflect in your object.
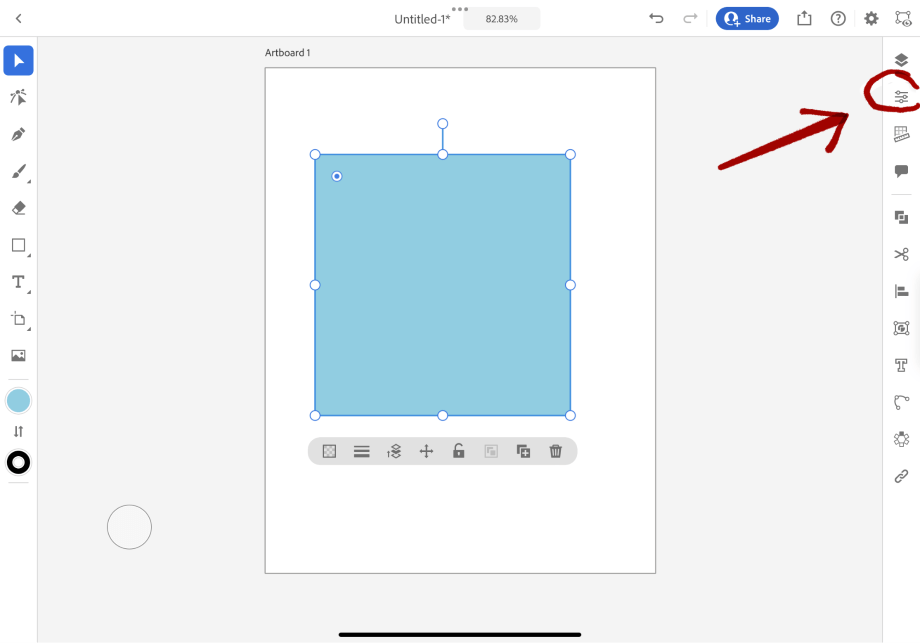
How to Change Opacity in Illustrator for iPad
If you’re using the iPad version of Adobe Illustrator, follow the instructions below to change object/image opacity.
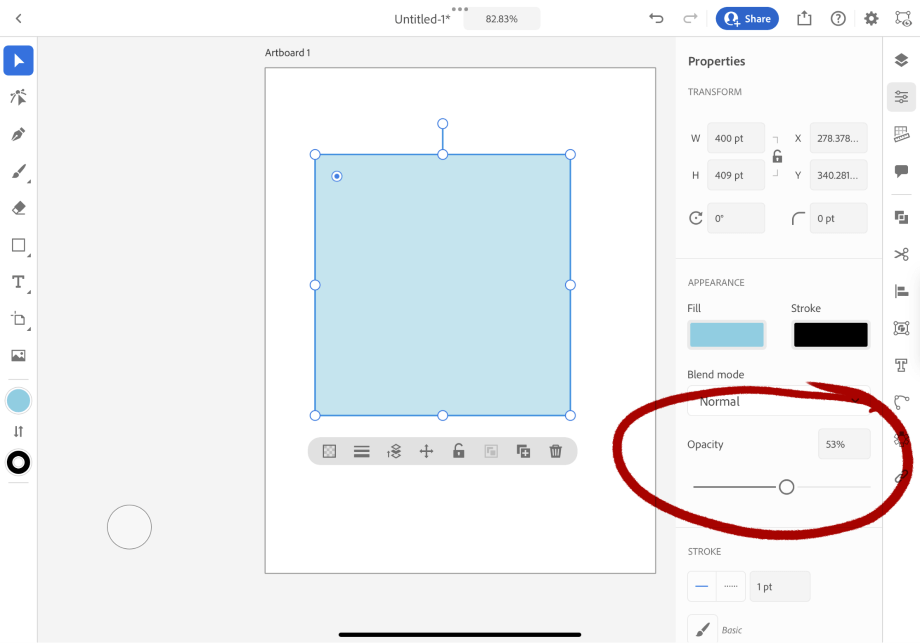
Step 1: Click on an object you would like to change the opacity of and tap on Properties.
Step 2: Under Opacity adjust the transparency of your object.
Final Thoughts
The option to change the opacity of text and objects in Adobe Illustrator allows you to create visually interesting and striking images. With the Appearance panel, you can change the opacity and transparency of your objects with ease. In the iPad version, you can access opacity in the Properties panel.
How do you use opacity in your designs? Tell me in the comments below!