
Changing hues is a basic yet essential skill in digital art. With just a few clicks, you can totally change how your artwork looks. Knowing how to adjust the hue and blend the new colors with the rest of your art is something every digital artist should learn.
Hello, I’m Zoe, a freelance illustrator. Sometimes I end up with dull, regular colors in my work. That’s when the hue adjustment effect steps in because it can uncover color combinations that might seem strange at first but can actually make your art pop, or it can add a touch of atmosphere. So, I’m thrilled to share this versatile skill with you!
In this post, I’ll show you how changing hues can totally transform your artwork’s colors and mood, learn about creative ways to use this technique, understand the process in Clip Studio Paint, and pick up pro tips for fine-tuning the effects.
Table of Contents
Key Takeaways
- Change colors to create different feelings, match elements, or make interesting visuals.
- You can always adjust things again. Just double-click on the effect and modify the sliders.
- Use layer masks to control where the effect is applied.
- Try different blending modes for unique layer(s) and color interactions.
Here’s the step-by-step guide to applying hue change effects to your artwork in Clip Studio Paint.
Understanding Hue Changes
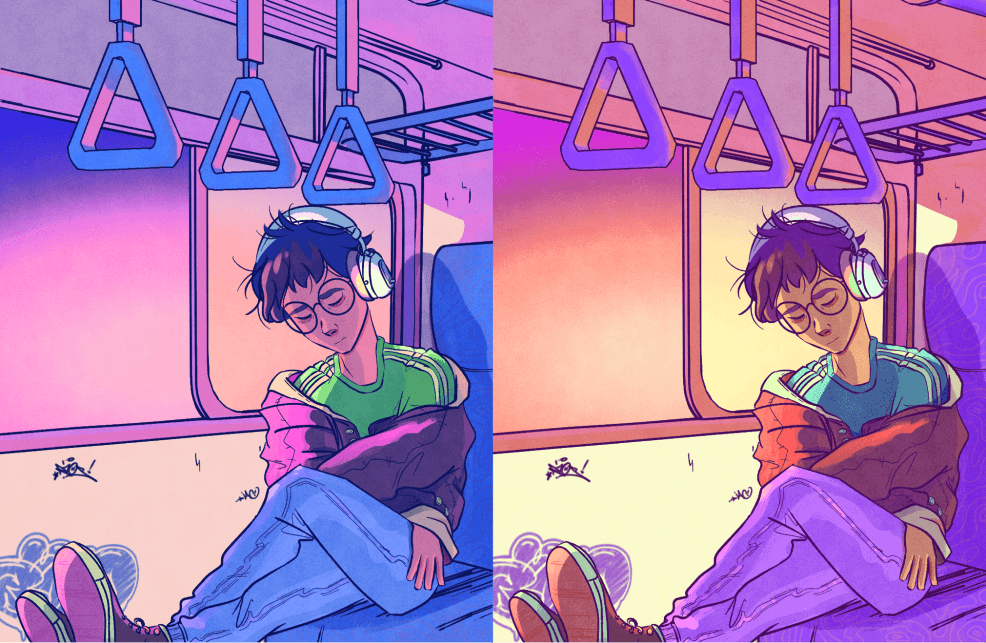
Changing the hue means changing the overall color tone of your artwork.
Unlike simply tinting, which puts a new color on top, changing the hue transforms all the colors, moving them around the color wheel. This is more dynamic and lets you try out different color groups while keeping the brightness and intensity of the colors the same.
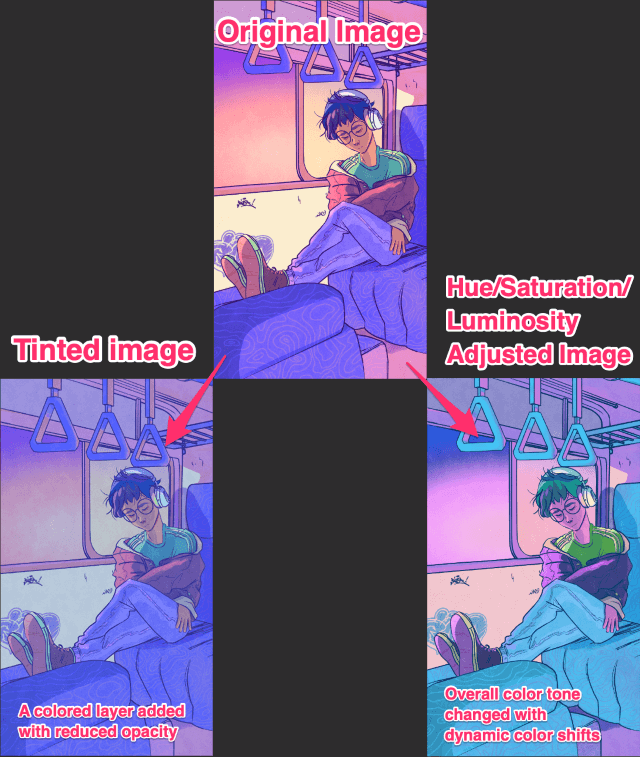
When you change the hue, it affects all the colors in the layer(s) you’re working on. This makes it easy to blend with the rest of the colors naturally. Since you’re changing all the colors, not just one, the alterations fit well with the artwork, making a natural and balanced change.
Creative Uses of Hue Changes
Setting Moods and Atmospheres: When you tweak the hue, you can make your artwork feel different.
Warm colors like red and orange can bring in energy or a cozy feeling, while cool colors like blue and green can make things calm or even dreamy.
Achieving Color Harmony: Changing the hue helps you balance the colors in your artwork by making them match better.
This makes everything look coherent and balanced, making your artwork more appealing.
Visual Effects: Hue changes let you try out cool new looks and show your art style.
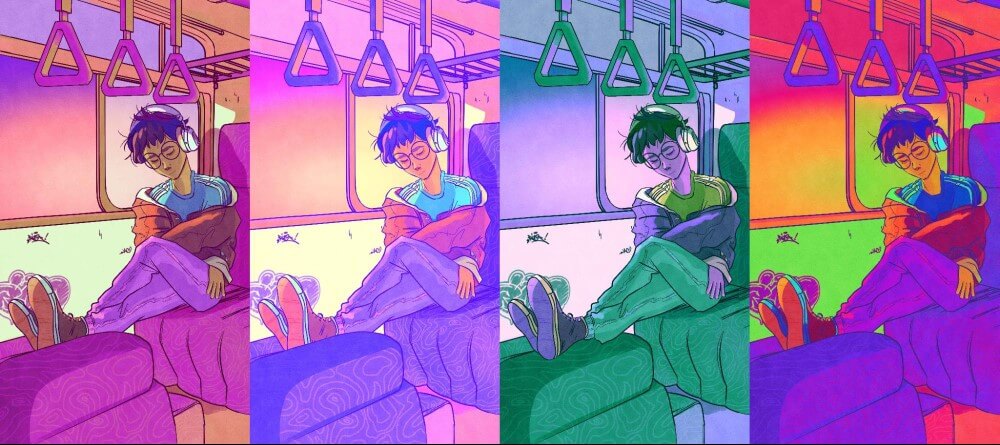
When you experiment with unique color combinations, you can make interesting visuals that convey different themes or ideas.
Surprising Color Transformations: Hue changes are useful when you want to transform ordinary colors into something unexpected.
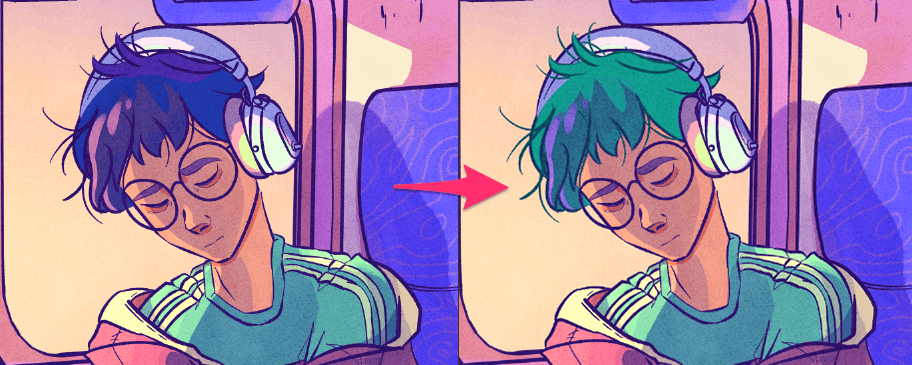
For instance, you can keep the details on a character’s skin or hair but totally change their overall color. The result integrates seamlessly, appearing both natural yet unusual and imaginative.
Changing the Hue in Clip Studio Paint
To change the hue of your artwork in Clip Studio Paint, follow these simple steps:
Step 1: Open your artwork in Clip Studio Paint.
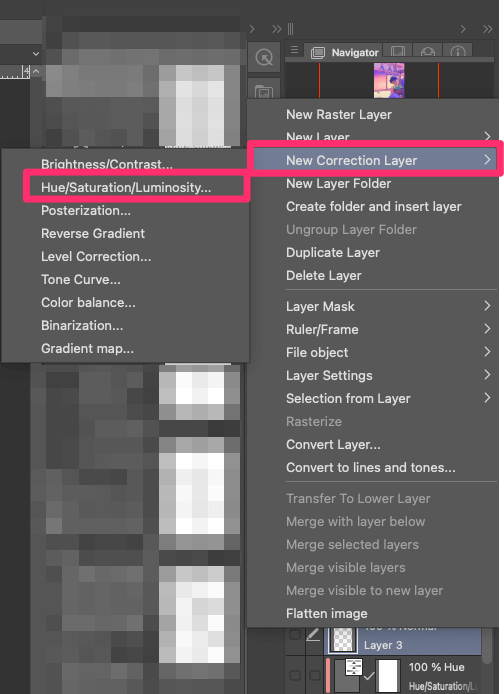
Step 2: Go to the Layer menu and select New Correction Layer > Hue/Saturation/Luminosity.
Step 3: A window will pop up, offering options to tweak the hue of your artwork.
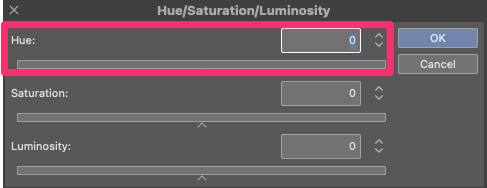
The first slider is labeled Hue. Slide it to the right for warmer tones like vibrant reds, oranges, and yellows. Slide it to the left for cooler tones like soothing blues, fresh greens, and mysterious purples.
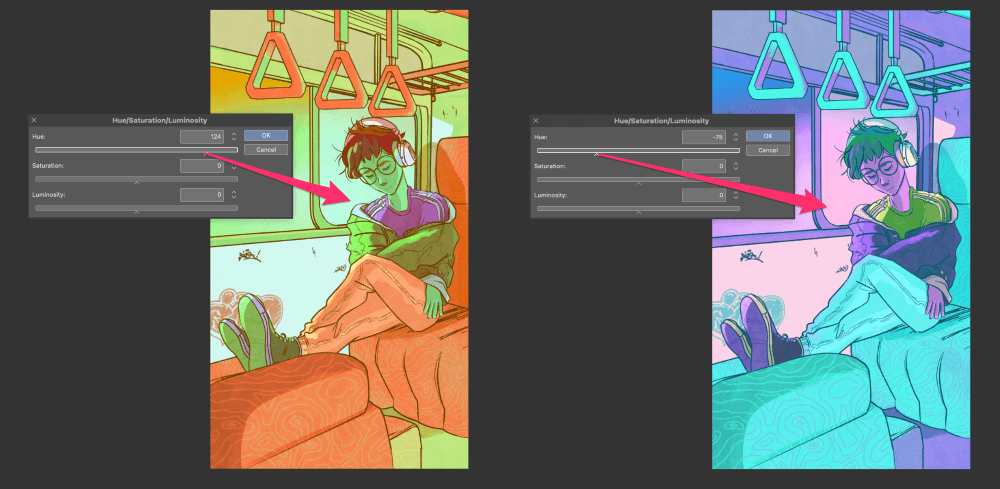
As you make changes to the hue slider, you’ll see the real-time impact on your artwork.
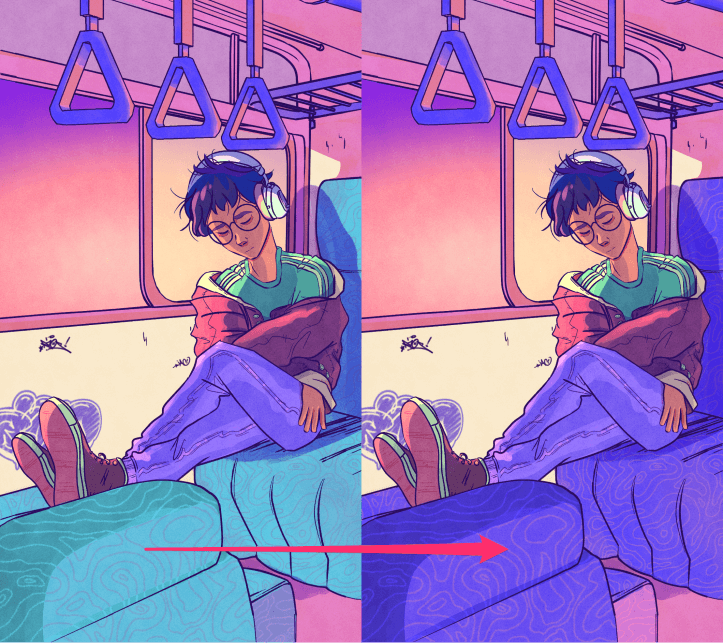
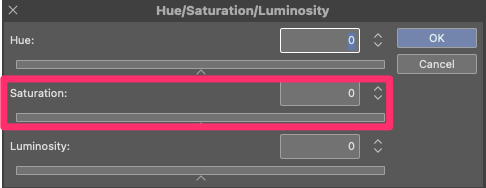
Step 4: Explore the saturation slider to control the intensity of colors. Adjusting the saturation can result in vibrant or muted tones, depending on the effect you desire.
Step 5: Next, we have the luminosity slider. It allows you to adjust the brightness or darkness of your artwork. Different hues and saturations may require slight adjustments to achieve the desired look.
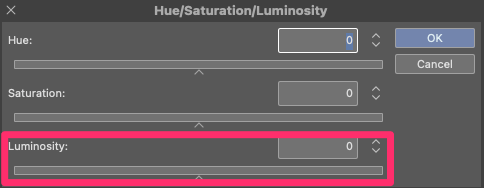
Use the luminosity slider as a tool to refine your hue changes, rather than completely correcting the exposure.
Step 6: Once you’ve settled on your hue, saturation, and luminosity changes, click OK to confirm the modifications.
Remember, the adjustments you make to the hue are not permanent. You can always go back and modify them later if needed.
Step 7: Fine-tune the hue changes and seamlessly integrate them into your artwork by experimenting with blending modes and layer opacity.
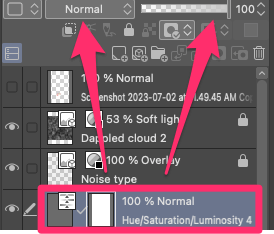
Step 8: To smoothly blend the changes into your artwork, modify the effect’s layer mask.
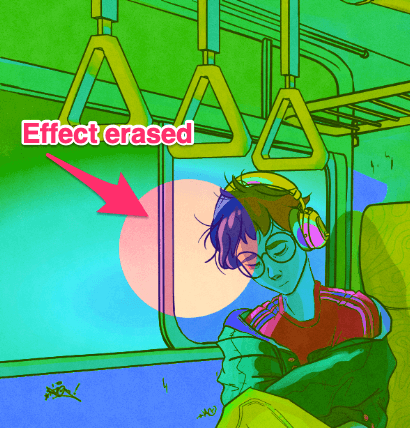
Click on the white box next to the effect, and choose an eraser or brush set to transparency.

Paint over the areas you want to erase or use a pen set to any color to fill areas back in. You can also use blenders to create smoother transitions in the affected areas.
If you want to make further changes to the effect’s colors, simply double-click on the correction layer to go back to the Hue/Saturation/Luminosity window.
Pro Tip: Applying Hue Changes to a Selection
To adjust the color of specific parts in your artwork without changing the entire image, you can follow these steps for both layers and selected areas.
Changing the Hue of a Layer or Folder
If you want to target a specific layer, or several layers within a folder for the changes, here’s what you need to do:
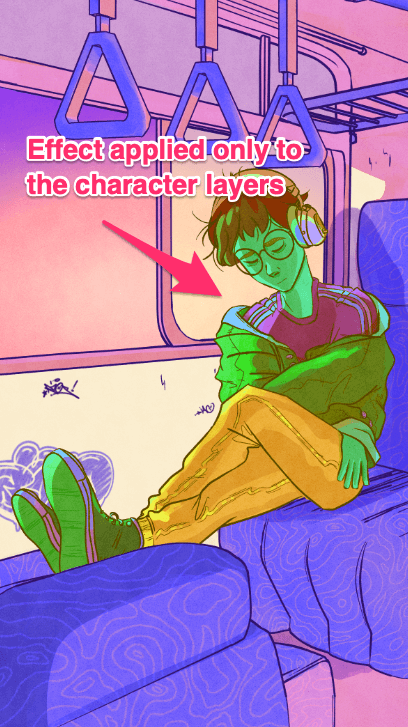
Step 1: Place the hue and saturation correction layer directly above the desired layer or folder.
Step 2: Click on the Clip to Layer Below icon.
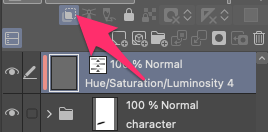
This way, the hue changes will only affect the layers underneath, keeping the rest of your artwork intact.
Changing the Hue of a Selection
To change the hue of a specific part of your illustration, follow these steps:
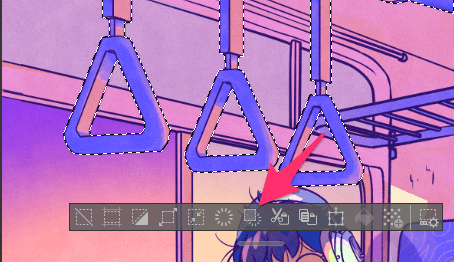
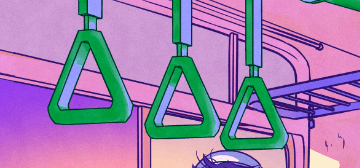
Step 1: Use Clip Studio Paint’s selection tools to create a contour around the area you want to modify.
Step 2: Select the layer mask of your effect, and click on the Delete Outside Selection icon. This ensures that only the selected area will be affected by the hue changes, leaving the rest untouched.
Step 3: For a polished finish, you can use brushes and blenders to smooth out any rough edges and achieve seamless integration of the modified area with the surrounding elements.
With this technique, you have precise control over where the hue changes take place, allowing you to bring attention to specific details or create focal points in your artwork.
Final Thoughts
Now you have the know-how to easily use the Hue/Saturation/Luminosity options, make adjustments, and apply the effect precisely. This skill proves useful in various scenarios, whether you’re enhancing, correcting, or taking your artwork in a fresh direction.
In digital art, it’s smart to focus on methods that don’t damage your work, and changing hues is a non-destructive technique. Picking the right colors can take time, often adjusted many times as your artwork develops. Hue changes can be a powerful tool in that process.
If you have any tips or thoughts about changing hues, feel free to let us know in the comments section below!