
To change the font in Adobe Premiere Pro, press key T on your keyboard and select the text you want to change. Then, go to the Effect Control Panel and change your font to your desired font type.
In this article, I will discuss how to change the text format in Premiere Pro, how to add a font in Premiere Pro, replace fonts, and how to change the font in the MOGRT file in Premiere Pro.
Table of Contents
Why Is It Important to Use a Good Text?
When creating any project, it is always essential to use a professional font. This is because using a professional font helps to create a sense of credibility and authority.
Additionally, a professional font can help your project appear more polished and well-put-together. Using a professional font is an excellent way to ensure that your project makes a good impression on its audience. Professional fonts convey a certain level of sophistication and can add a touch of class to your work.
They can help you to better communicate your message to your audience. Using good text is important because it can make your work more visually appealing and easier to read. Finally, professional fonts can help you stand out from the crowd and make your work more special.
How to Add Text in Premiere Pro
First and foremost, make sure your text has a good background color. To do this, go to the project panel in the bottom right, select a new item icon, then you will have options. After that, select the color matte.
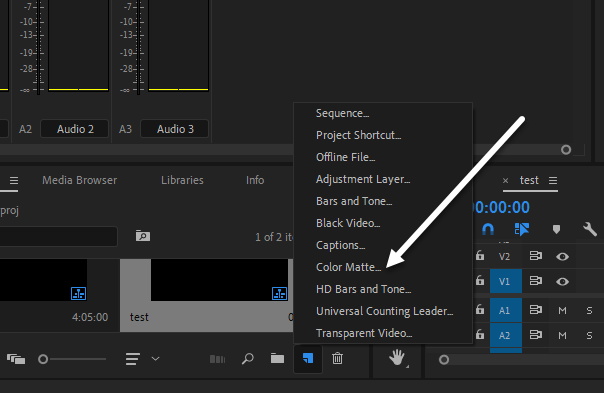
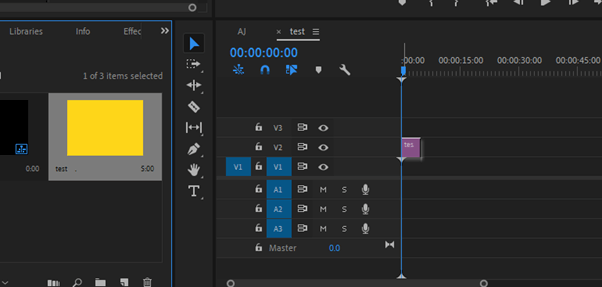
After that, make sure it’s set to your sequence size. Select your color and name it. Then, drag it into your project timeline.
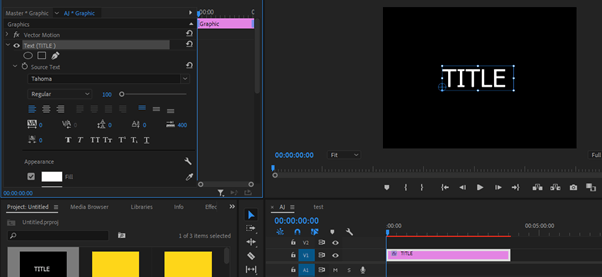
To add text, go to the tools bar, select the text tool or press T on your keyboard. Then proceed to your preferred place on your program panel and type in your text.
To edit this, select your text element, then go to the effect control panel. You will then find a dropdown menu labeled text. Extend this menu, and you will have a lot of text effects. Change your text font, size, color, and other effects.
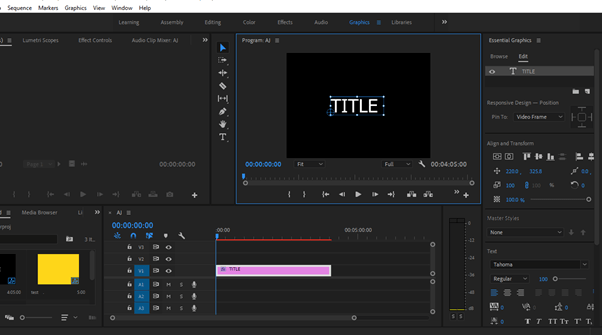
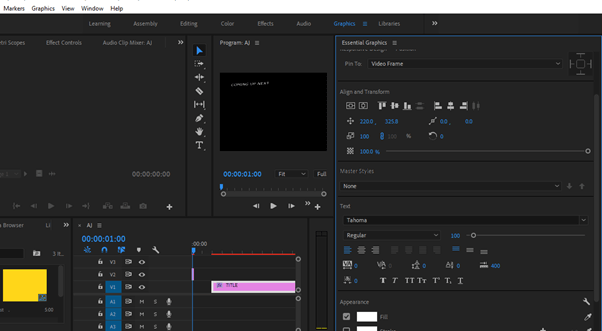
How to Use Essential Graphics Panel to Edit Text
You can also add text in the essential graphics panel and change font size, color, style, etc. Make sure your text is selected, and it will appear under the essential graphics panel. Here you are allowed to make all your text edits.
How to Change Font in MOGRT Files in Premiere Pro
A MOGRT file is a motion graphics template file. We have a lot of these files in Premiere Pro saved. Choosing one to work with, you may not find it suitable for your project, and you will definitely need to adjust it.
To add this, go to the essential graphics panel, and select the MOGRT file in your timeline. Now go to the edit tab from the essential graphics panel. You can change parameters like fonts, color, size, and others here.
How to Replace Fonts in Multiple Texts at Once in Premiere Pro
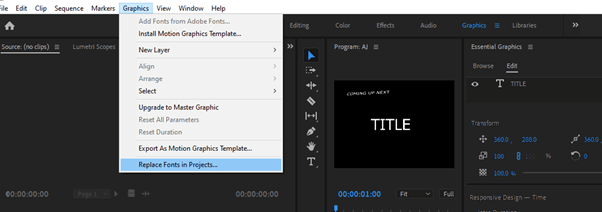
When you have more than one or two graphics text opened in sequence, and you want to replace it with the same font all through. It will take too much time to edit it one after the other. To replace the font, go to Graphics Menu > Replace Fonts in Projects.
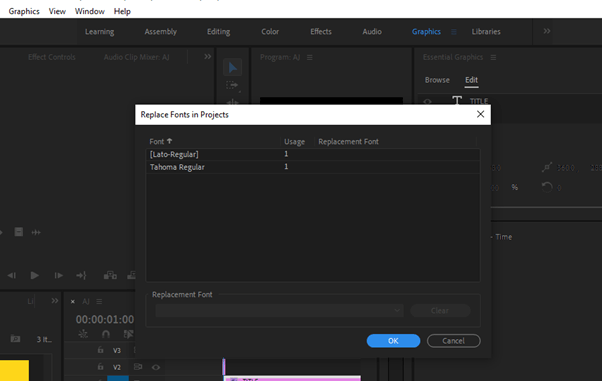
A function panel will pop up, leaving you with the replace font option. Select your desired font, which will replace all the fonts in the project. Note that this only applies to the fonts created with the essential graphic panel.
Conclusion
A good font in Premiere Pro can add some personality to your video project. With so many different fonts available, you can find the perfect one for your project. Remember to keep your audience in mind when choosing a font, as some may be difficult to read.
Do you need help using these motion graphics effectively? Drop your question in the comment box, and I will respond soon.