
Changing blending modes in Adobe Illustrator is easy with the Transparency panel. With fifteen blending modes to choose from, all you need is some patience and a couple of minutes to spare.
My name is Elianna. I have a Bachelor of Fine Arts in Illustration and have been using Adobe Illustrator for over six years. I use the blending modes to change photo colors or to create overlay effects in Adobe Illustrator.
In this post, I will explain what blending modes are and how you can use them with the Transparency panel to design more and stress less.
Let’s get into it!
Table of Contents
Key Takeaways
- Adobe Illustrator has 15 blending modes to choose from, which can be accessed in the Transparency panel, or with the keyboard shortcut Shift + Ctrl + 10.
- You can open the Transparency panel in Illustrator with Window > Transparency or by clicking on Opacity in the Properties panel.
What Are Blending Modes in Adobe Illustrator?
Blending modes affect how colors on different layers interact with each other. In Adobe Illustrator, there are 15 blending modes. Here are their names and what they do.
| Normal | This is the default blending mode in Illustrator. Produces no change in the appearance of your objects. |
| Darken | Produces a darker color by choosing the darker color out of the base and blending color. |
| Multiply | Produces a darker color by multiplying the base color with the blend color. |
| Color Burn | Named after the real-life photography film technique of “burning” (overexposing) prints to make darker colors, this blending mode darkens colors and increases contrast. |
| Lighten | Produces a lighter color by comparing the base and blend colors, and selects the more golden color as the result. |
| Screen | Produces a lighter color by multiplying the base’s inverse and blending colors. |
| Color Dodge | Produces a brighter color by brightening the base color to reflect the blend color. |
| Overlay | Multiples or screens colors on top of each other, while preserving highlights and shadows. |
| Soft Light | Produces the effect of a diffused spotlight on objects with darker or lighter colors depending on the blend color. |
| Hard Light | Produces the effect of a harsh spotlight on objects by multiplying or screening blend colors. |
| Difference | Subtracts blend and base colors dependent on brightness. When blended with black, the difference produces no change in the appearance of the artwork. |
| Exclusion | Similar to difference, exclusion creates an effect with lower contrast. |
| Hue | Produces a change in hue |
| Saturation | Produces a change in saturation |
| Color | Produces a change in color |
| Luminosity | Produces a color with the hue and saturation of the base color and the luminance of the blend color. |
Learning what effects blending modes produce will help you to expand your design thinking and strategies. Be sure to experiment with various modes to realize their full effects.
How to Change the Blending Mode in Adobe Illustrator
An easy way to change the blending mode of objects in Adobe Illustrator is using the Transparency panel. Here is how to open and use it.
Step 1: Open the Transparency panel with Window > Transparency, or use the keyboard shortcut Shift + Ctrl + 10.
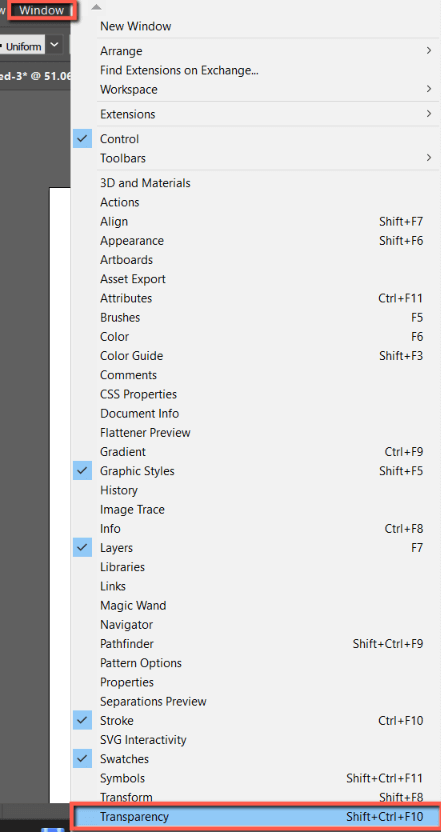
You can also open the Transparency panel by clicking Opacity in the Properties panel.
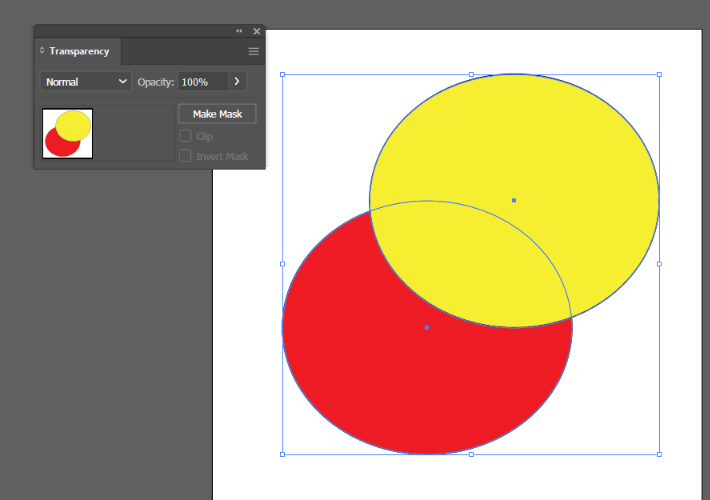
Step 2: Click on the object(s) you would like to change the blending mode of.
Note: If your objects do not overlap you may not notice much change. I would recommend selecting two overlapping objects to understand the properties of blending modes better.
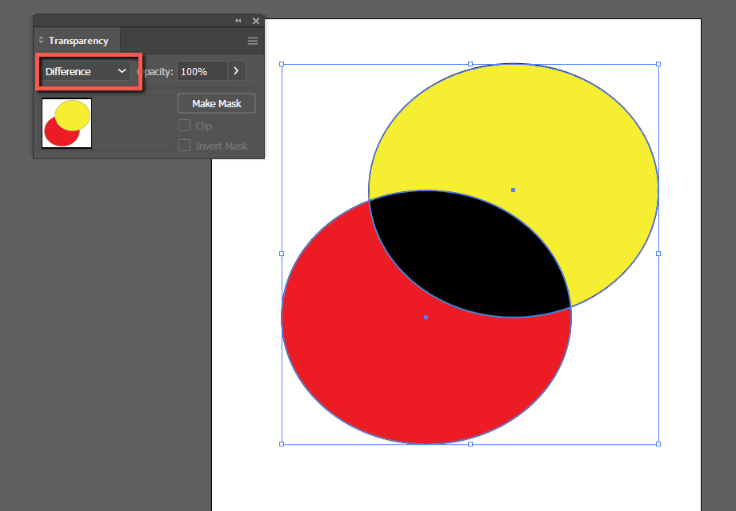
Step 3: Choose a blending mode from the Blending Mode dropdown menu. For this example, I am selecting Difference. Your object(s) will now reflect the blending mode chosen.
Feel free to try out different blending modes. For example, you can also add a color burn effect to objects or images.
How to Change Blending Modes on Adobe Illustrator for iPad
You can also change the blending mode of objects on the Illustrator app. Here’s how:
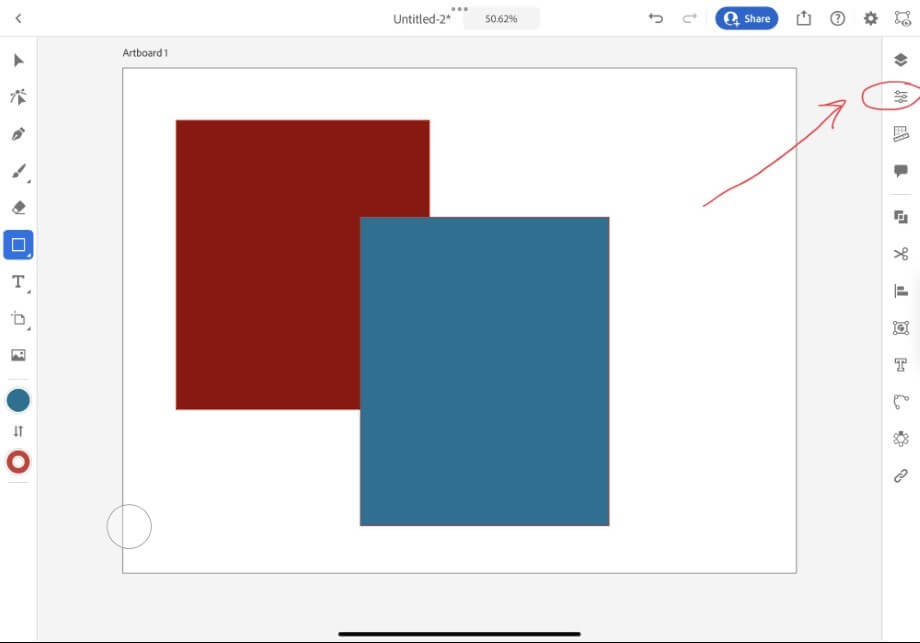
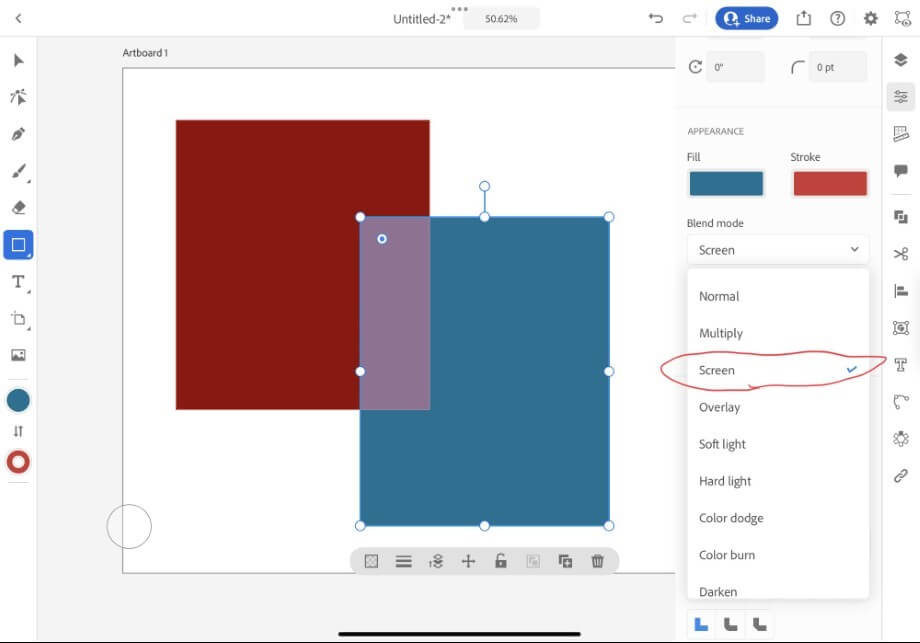
Step 1: Select the object(s) that you would like to change the blending mode of. Click on the Properties icon on the left side of the screen.
Step 2: Under Blend Mode select the blend mode you desire. For this example, I am using Screen. Your object(s) will reflect your blending mode.
Final Thoughts
Changing blending modes in Adobe Illustrator is easy using the Transparency panel. With 15 modes to choose from, there are endless possibilities for effects in your designs. Familiarize yourself with the properties of blend modes to make the most of Adobe Illustrator.
You can also change the blending mode of objects in the Adobe Illustrator iPad app in the Properties window.
What blending mode is your favorite? Tell me in the comments below.