
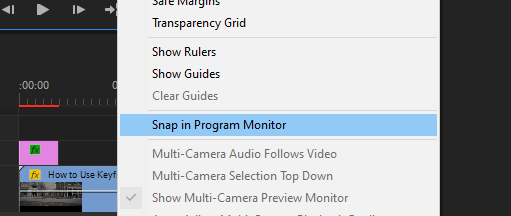
To center your text in Adobe Premiere Pro, select the text you want to centralize. Below the playback screen, select the “Wrench Function” (Settings Function). Now, click on snap in the program monitor. Then drag your text on the playback screen, and you will notice a redline to align it. Finally, drag it toward the middle, and your text is centralized.
I am David, a professional video editor, and expert in Premiere Pro. I have created a lot of motion graphics for clients all over the world using Adobe Premiere Pro. Centering of texts is relatively the simplest thing to do in Premiere Pro.
In this article, I will explain how to place your text at the center of the Premiere Pro playback screen. Likewise, I will show you how to centralize multiple texts in Adobe Premiere Pro and explain the essential graphics panel.
Table of Contents
How to Center Text in Premiere Pro
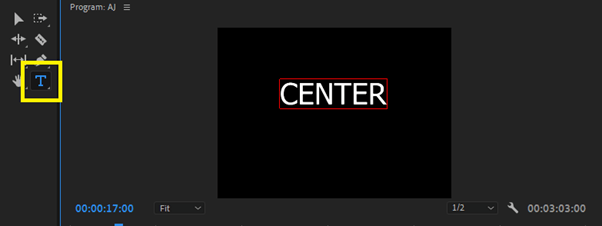
You need to Add Text to your project. To add text, press key T or select the text tool in the toolbar. Then, click on your playback screen to view what you are typing; your text is added successfully.
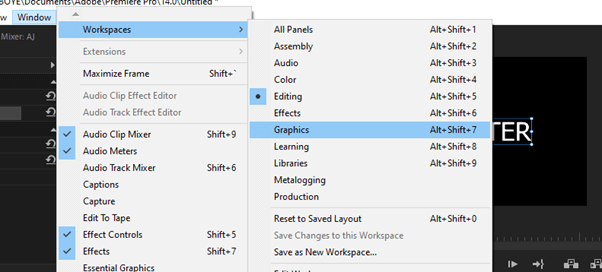
Now to centralize the text, select it from your sequence timeline. Change your workspace to Graphic Workspace or go to Windows Menu > Workspace > Graphics.
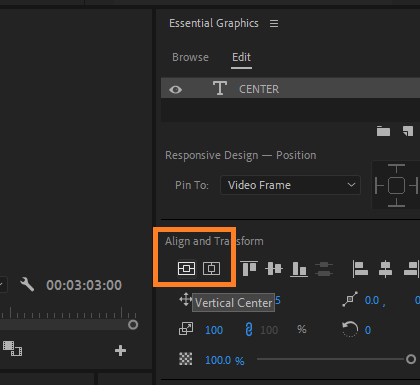
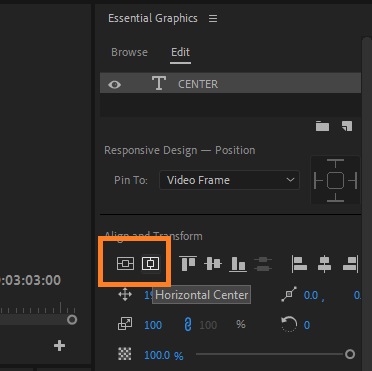
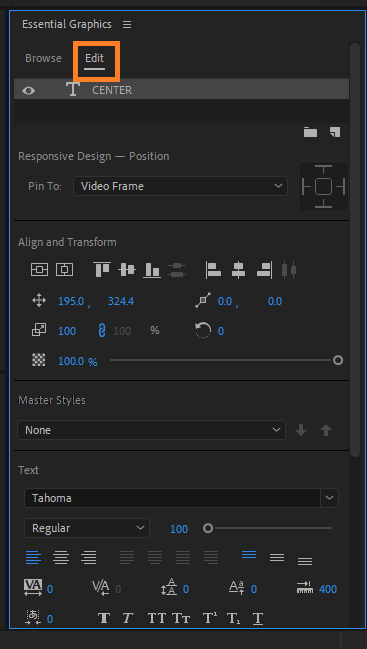
The essential graphics panel will open up on the right-hand side. Then click on the edit tab. Under the transform, you have two centering align options. One to centralize vertically, and the other to centralize horizontally.
Other Ways to Centralize Texts in Premiere Pro
Method 1: Using the snap program monitor centering, select the text you want to centralize, and select the Settings function below the playback screen. Then click on snap in the program monitor.
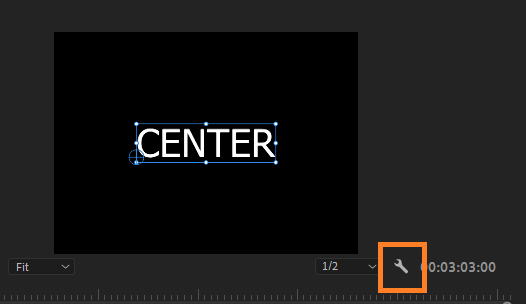
Now, drag your text on the playback screen, and you will notice a redline to align it. Drag it towards the middle, and your text is centralized.
Method 2: Centralizing using the CTRL keys. To use this, select your text from your playback screen. Then, hold down your CTRL key, then click and move your text layer towards the middle while holding on to the CTRL Key. Very simple!

How to Centralize Multiple Texts at Once in Premiere Pro
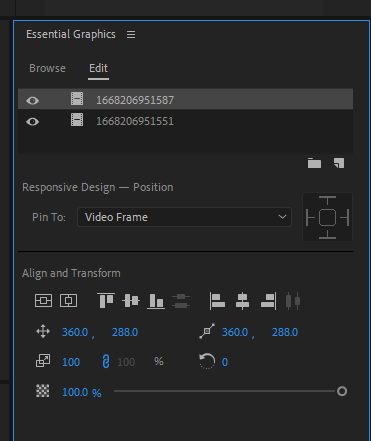
To centralize multiple texts in Premiere Pro, go to the Essential Graphics Panel and from your graphics menu, select the texts you want to centralize from the essential graphics panel. Then, you can now select the central align button to centralize.
You can as well use the snap program monitor centering. Select the texts you intend to centralize. Navigate to the Settings function key below the playback screen. Then click on snap in the program monitor.
Hover your texts on the playback screen, and you will notice a redline to align it. Now drag it towards the middle, and your text is centralized.
How to Align Objects in Premiere Pro
When you have more than one object imported into your Timeline. Select them in the essential timeline. Now, navigate to select the alignment. You can choose to align vertically or horizontally.
When you choose horizontal alignment, the selected objects align along the edge of the objects horizontally towards the area to which you want to align them.
Essential Graphic Panel in Premiere Pro Explained
Adobe Premiere Pro is a video editing program that allows users to create videos using various features. One of these features is the Essential Graphics Panel, which is a panel that provides basic tools for animated graphics.
The essential graphics panel in Premiere Pro helps you to create motion graphics effects. It includes tools for creating titles, customizing texts, and more. The panel is on the right-hand side of the graphic workspace and is easy to use.
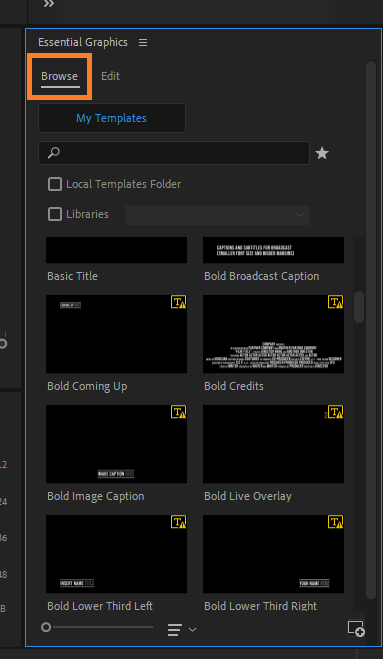
Using this essential graphic panel, you can work with MOGRT files. The MOGRT files are motion graphics templates that can be imported and used on your video. You can locate this under the essential graphics panel and work on it.
With essential graphics, editing the graphic is even easier than importing it into Premiere Pro. The text characters can be changed, and you can also work on alignments from your Graphic essential panel.
Conclusion
Centering your texts in Premiere Pro can be a great way to add some personality to your video project. Thus proper alignment can go a long way to pass your message across to the viewers. Just remember to keep your audience in mind when arranging your texts.
For the point of emphasis, to center your text in adobe premiere pro, select the text you want to centralize and select the Wrench Function (Settings Function) below the playback screen.
Now, click on snap in the program monitor. Then drag your text on the playback screen, and you will notice a redline to align it. Drag it towards the middle, and your text is centralized.
If you are finding it tough to do these motion graphics effects effectively, just drop your question in the comment below.