
Do you want to blur that part out of your video in Adobe Premiere Pro? If so, here’s your quick answer:
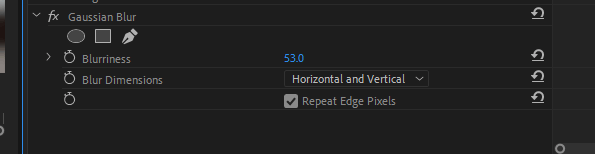
Go to the Effects panel and search for “Gaussian Blur” and drag it to the video in the timeline. Then, go to the Effects Control Panel to edit and manipulate the Gaussian Blur effect. Set blurriness between the range of 25 to 30%. This will blur the entire clip.
My name is David, and I am an expert in Adobe Premiere Pro. I have been using this software to edit videos for cooperate and commercial clients all around the globe. And blurring in Premiere Pro doesn’t require any special knowledge.
In this article, I will explain how to blur using Gaussian blur. Likewise, I will show you how to blur out a particular area in your video clip (face and logo) using gaussian blur. Then, how to copy the blur effect to other clips.
Table of Contents
How to Use Gaussian Blur in Adobe Premiere Pro
Adding a blur effect to video clips in Premiere Pro can create a more professional and polished look for your project. You can also use blurring to draw attention to certain elements in the clip or obscure elements that are not relevant to the overall composition.
The blur effect can help to reduce the appearance of camera shake or motion blur, which can be distracting or even nauseating for viewers. You can use the blur effect to have a popped title too.
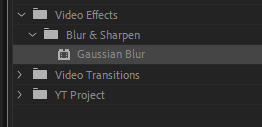
To use gaussian blur on your video, go to the Effects Panel, search for Gaussian Blur Effect, and drag it onto the video clip in your timeline. Then go to the Effects Control Panel to tweak the blurriness parameters as wanted.
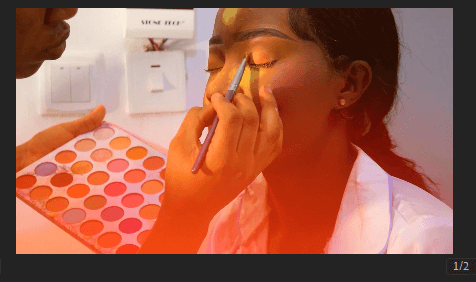
How to Blur Out a Particular Part of a Video Clip
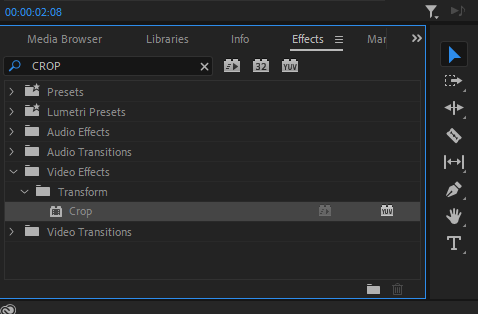
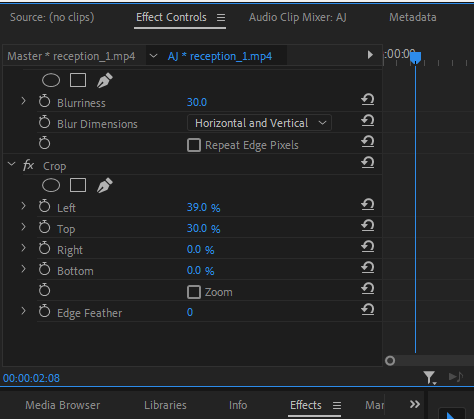
First and foremost, duplicate the video and put it on top of each other. Apply Gaussian Blur to the upper video clip. Go to your Effects Panel and look for Crop Effect, drag and apply it on the blurred video clip.
You are almost done, then with the crop fx, go to the Effects Control Panel to crop out the wanted area and keep the area you want to blur. You can achieve this with the left, top, right, bottom, and feather options of the crop fx.
You can use this to blur out a logo, a face, or literally anything. Just play around with it. One challenge you might have is if the object you’re blurring out is a moving subject, how will you do that? Well, you have to track the motion. I will cover this tutorial in another article and link it here once it’s up.
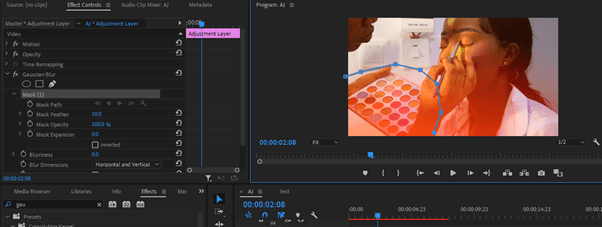
Using a Mask on Blurred Video with Adjustment Layer
Create an adjustment layer, and drag it on top of the video clip – on the empty layer next to it. Apply the Gaussian Effect on the adjustment layer.
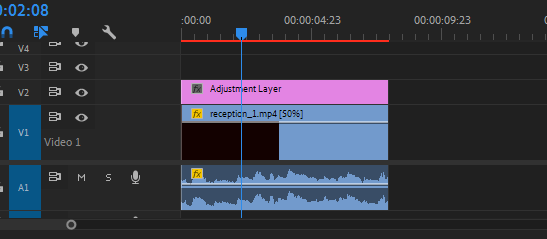
Then, go to the effect control panel, navigate down to the blur effect, and choose the mask tool/opacity. Select the area you want to blur out, and add a slight feathering to the masked area from the effect control panel.
Adjust the blurriness to your desired percentage, which will isolate the blur effect to the area where you have your mask alone.
After the masking, select the two clips, then right-click and choose nest from the dropdown menu to merge the two clips together.
How to Copy and Apply a Blur Effect to Other Clips in Premiere Pro
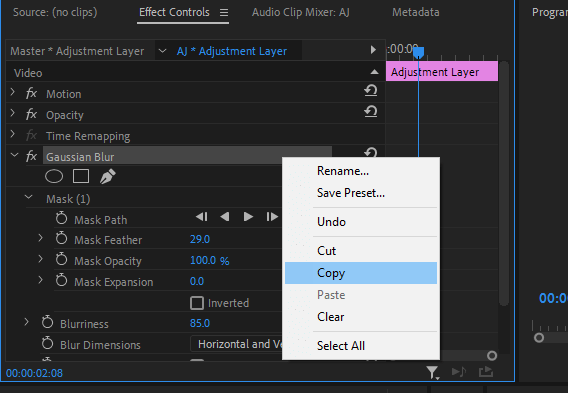
Go to the effect panel, select the blur effect you want to copy, right-click on it and select copy.
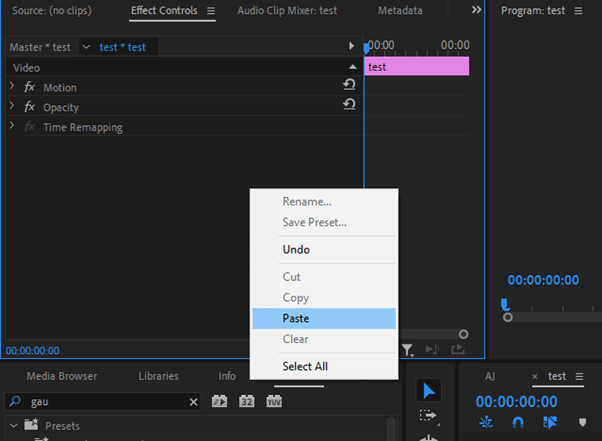
Now move to the video clip you want to apply the blur effect to, then right-click and paste the blur effect.
Conclusion
Adding a blur effect to your clip in Premiere Pro is a straightforward process that you can complete with just a few steps.
Import your video clip into your sequence timeline. Then, Go to the Effects panel, search for Gaussian Blur and drag it into the video in the timeline.
After that, go to the Effects Control Panel to edit. Set the blurriness between the range of 25% to 30%. This blurs the entire clip.