
For new InDesign users, baseline grids are one of the least-understood features, but if you’re serious about creating the best possible typographic design in your InDesign document, they deserve your attention.
Baseline grids provide you with a consistent grid system for positioning type and determining relative typographic scales for headings, subheadings, body copy, and all other parts of your text.
Configuring the baseline grid is often the first step for a new project, and it helps to provide a framework for the rest of your layout design.
That being said, it’s important to remember that all grids and layout techniques are supposed to be helpful tools, not prisons! Breaking free from the grid can also create an excellent layout, but it helps to know the layout rules so that you also know when to break them.
Table of Contents
Displaying the Baseline Grid
The baseline grid is hidden by default in InDesign, but it’s quite easy to make it visible. The baseline grid is just an on-screen design aid, and it will not appear in exported or printed files.
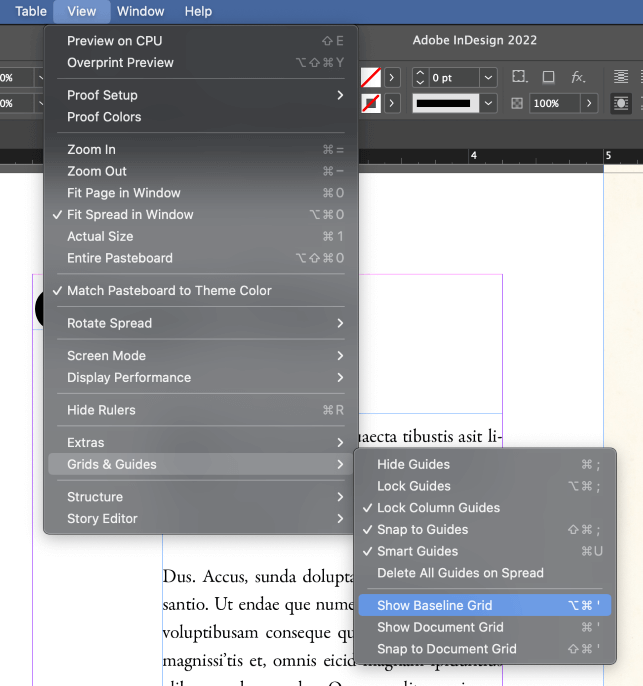
Open the View menu, select the Grids & Guides submenu, and click Show Baseline Grid. You can also use the keyboard shortcut Command + Option + ‘ (use Ctrl + Alt + ‘ if you’re using InDesign on a PC). For the sake of clarity, that’s an apostrophe on both operating systems!
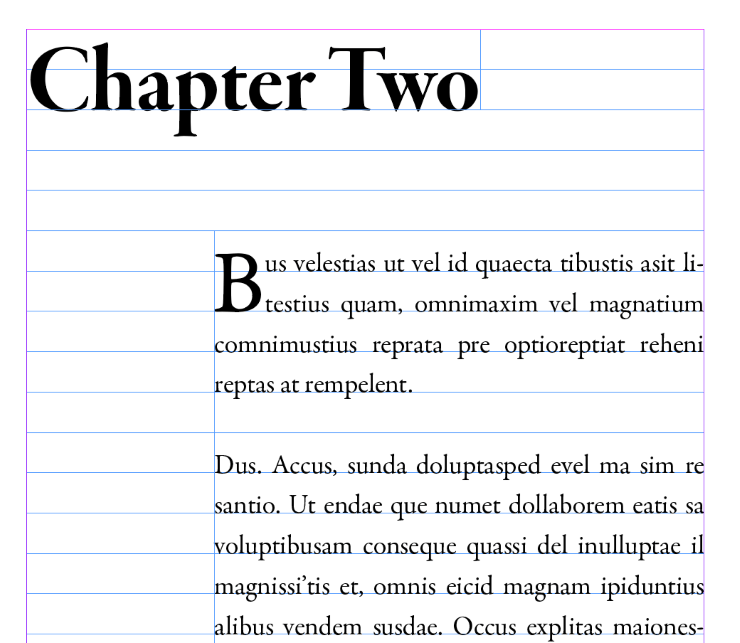
InDesign will display the baseline grid using the default settings, which means the gridlines are usually 12 points apart and colored light blue, although you can customize all aspects of the baseline grid to make sure they work for your current layout.
Read on to find out how!
Aligning Your Baseline Grid
Unless you just happen to need the default 12-point baseline grid, you’re probably going to want to adjust the alignment of your baseline grid. This is also easy to do – at least once you know where to look!
It’s not immediately quite clear why, but Adobe stores the settings for the baseline grid in the Preferences window instead of a more localized section of InDesign – perhaps this is because they expect designers to establish a baseline grid they’re comfortable with and re-use it.
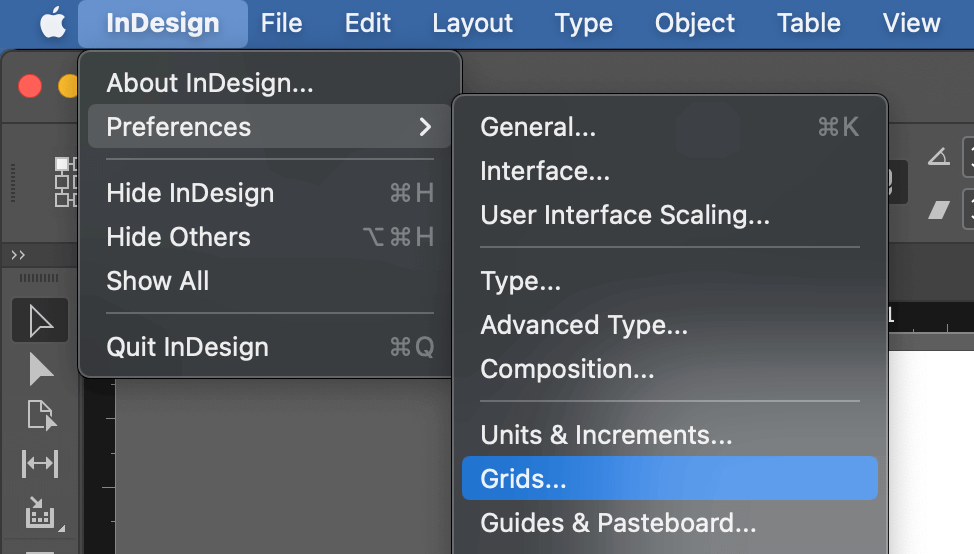
On a Mac, open the InDesign application menu, select the Preferences submenu, and click Grids.
On a PC, open the Edit menu, select the Preferences submenu, and click Grids.
In the Baseline Grids section of the Grids preferences window, you can adjust all the settings that control the positioning and appearance of the baseline grid.

For layouts with heavy color or image content, it can be helpful to change the Color setting for the baseline grid to ensure that the gridlines are properly visible. InDesign has a number of preset color options, but you can specify your own custom color by selecting the Custom entry at the bottom of the Color dropdown menu.
The Start and Relative To settings control the placement of the grid as a whole. Relative To determines if you want the grid to start at the page boundaries or the margins, and the Start setting allows you to specify an offset, although this can be set to zero.
Increment Every sets the spacing between the grid lines, and this is arguably the most important part of the baseline grid.
The simplest method for setting the increment value is to match it to the leading you want to use for your body copy, but this can have a slightly limiting effect on the placement of other typographic elements such as headers, footnotes, and page numbers.
Many designers will use an increment setting that matches one-half or even one-quarter of their primary leading, which allows for a lot more flexibility. For example, if you’re planning to use 14-point leading, setting the Increment Every value to 7pt will allow you to position elements
Last but not least, you can also adjust the View Threshold to match a certain zoom setting. If you’re zoomed out above the current View Threshold, then the baseline grid will temporarily disappear, giving you a clearer overall look at your document without a bunch of grids cluttering up the view.
When you zoom back in below the View Threshold, the baseline grid will reappear.
Snapping to the Baseline Grid
Once you’ve got your baseline grid configured the way you want it, you can start working with the rest of your text, but you’ll have to adjust your text frames to make sure that they align with the grid.
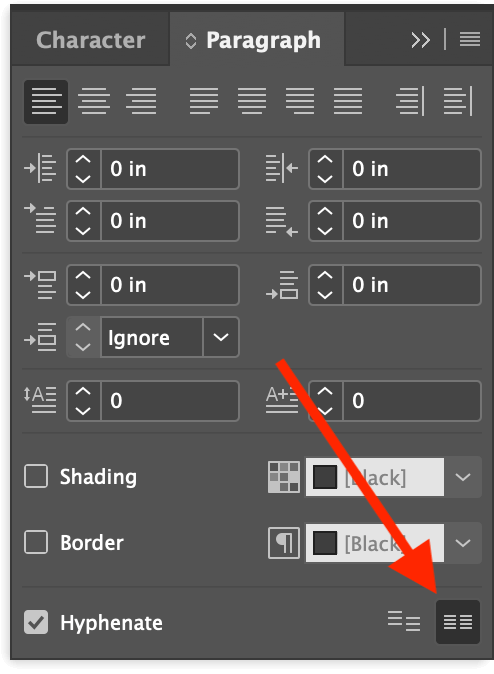
With your text frame selected, open the Paragraph panel. At the bottom of the panel, you’ll see a pair of small buttons that control whether or not the text will align with the baseline grid. Click Align to Baseline Grid, and you’ll see the text in the frame snap to match the gridlines (unless, of course, it was already aligned).
If you’re using linked text frames, the Align to Baseline Grid option will be unavailable. To get around this, select all the text you want to align using the Type tool, and then apply the Align to Baseline Grid setting in the Paragraph panel.
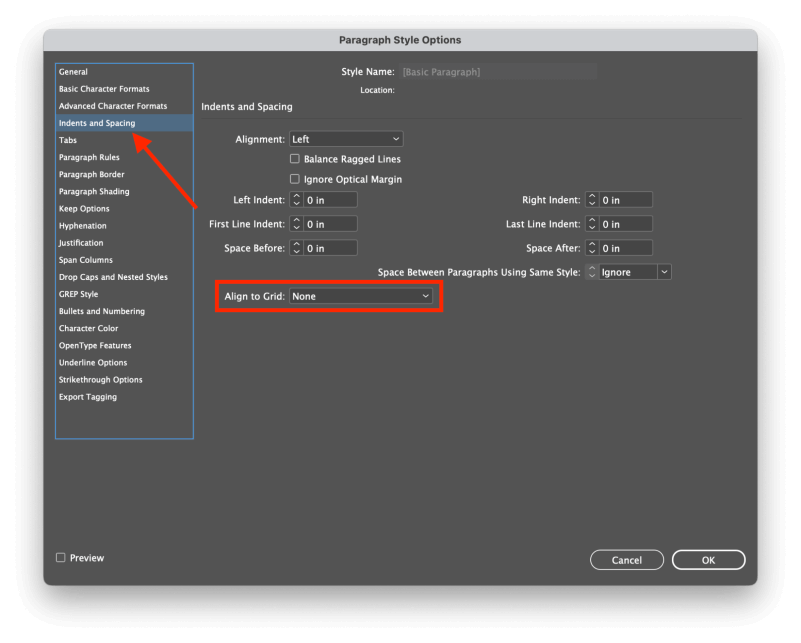
However, if you’re serious about InDesign best practices in your typesetting, you may want to use a paragraph style to snap your text to the baseline grid.
In the Paragraph Style Options panel, select the Indents and Spacing section in the left pane, and then adjust the Align to Grid setting as necessary.
Custom Baseline Grids in Text Frames
If you’ve got a specific text frame that needs a custom baseline grid, you can adjust it locally so that it only affects that one frame.
Right-click the text frame and select Text Frame Options, or you can select the frame and use the keyboard shortcut Command + B (use Ctrl + B if you’re on a PC).
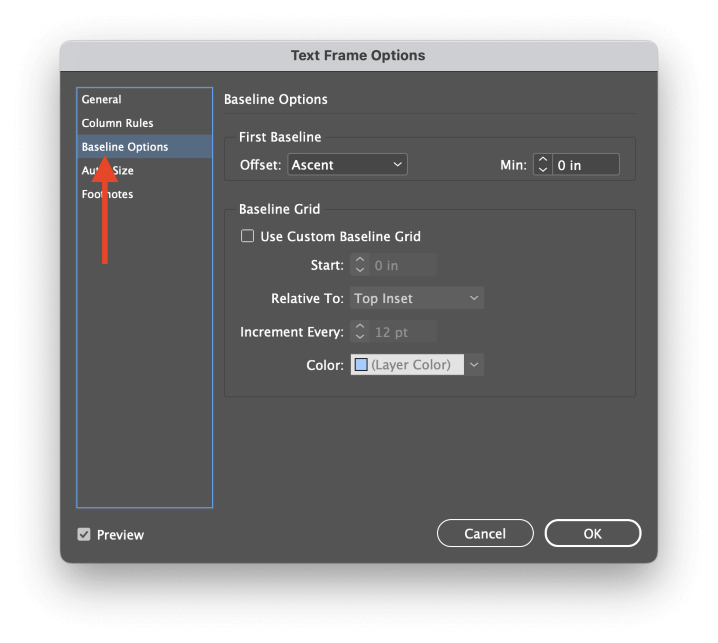
Select the Baseline Options section in the left pane, and you’re presented with the same set of options available in the Preferences panel to allow you to customize the grid for this one frame. You may want to check the Preview box in the bottom left corner of the Text Frame Options window so that you can see the results of your adjustments before clicking OK.
Why Isn’t My Baseline Grid Showing Up in InDesign (3 Possible Reasons)
If your baseline grid isn’t showing up in InDesign, there are several possible explanations:
1. The baseline grid is hidden.
Open the View menu, select the Grids & Guides submenu, and click Show Baseline Grid. If the menu entry says Hide Baseline Grid, then the grid should be visible, so one of the other solutions may help.
2. You are zoomed out past the View Threshold.
Zoom in until the baseline grid appears, or open the Grids section of the InDesign Preferences and adjust the View Threshold to the default 75%.
3. You are in the Preview screen mode.
Grids and guides of all types are hidden while in the Preview screen mode so that you can get a clear look at your document. Press the W key to cycle between Normal and Preview modes, or right-click the Screen Mode button at the bottom of the Tools panel and select Normal.
A Final Word
That’s just about everything you need to know to start using baseline grids in InDesign, but there’s a lot more that you can only learn by actually using them. While they can seem frustrating at first, they’re a useful layout tool that can help unify your entire document and give it that last final professional touch.
Happy gridding!