
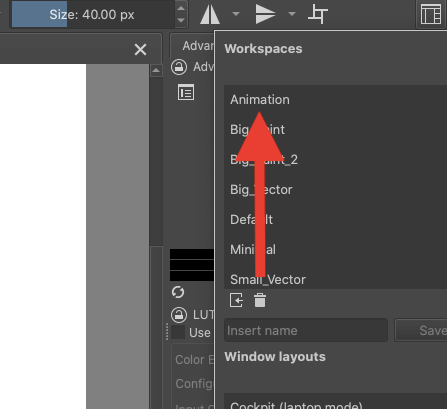
First things first, you need to activate the Animation Workspace in Krita. You can do this by tapping on the faint rectangle in the top right-hand corner of the screen. Then tap on the white square and select Animation in the Workspace drop-down menu.
I’m Carolyn and I’ve been using digital design programs like Krita to run my digital illustration business for over three years. One of the reasons I love using Krita is because of its dedicated animation functions. And the fact that it’s totally free to download.
The reason Krita is so popular with animators is because of its ability to add “Tweening” to its projects. These are mini frames in between each main frame that allows for your project to flow smoothly when it’s played back as a moving image and it makes all the difference.
In this article, I’m going to show you how to get started on creating a basic animation in the Krita app.
Table of Contents
Key Takeaways
- Krita offers 2D animation features.
- Krita’s advanced program is not user-friendly so dedicate some time to this learning process.
- You need to download the FFmpeg file type before exporting your project.
- You can export your animation as a video or a GIF.
5 Steps to Animate on Krita
Below is a step-by-step method that you can follow along with on the Krita app.
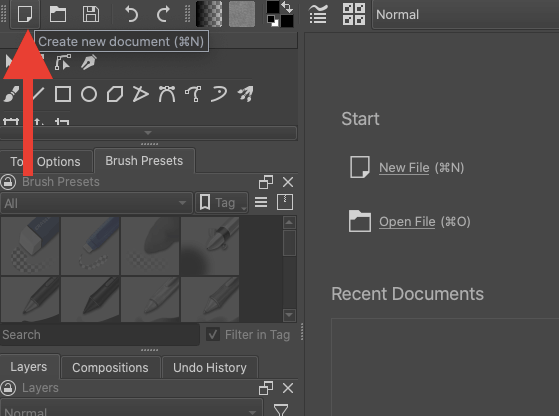
Step 1: Start a new project. You can do this by clicking on the paper icon in the top left-hand corner of the screen.
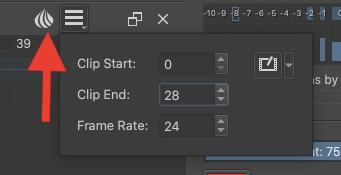
Under Custom Document, you need to set the dimensions to 1200 x 1000 pixels and a DPI of 72.
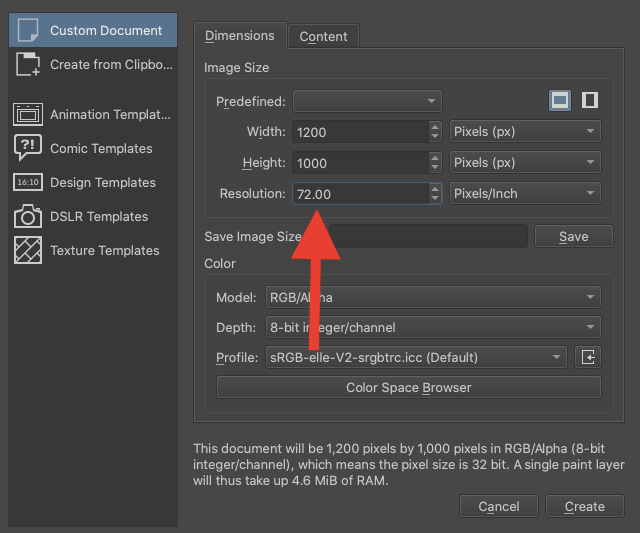
Then tap on the Content tab at the top of this window. Select the option that says As canvas color in the Background menu. Once you have made these changes, tap on the Create button in the bottom right-hand corner of the window.

Step 2: Change the Workspace. You can do this by tapping on the white box in the top right-hand corner and in the drop-down menu, selecting the Animation option.
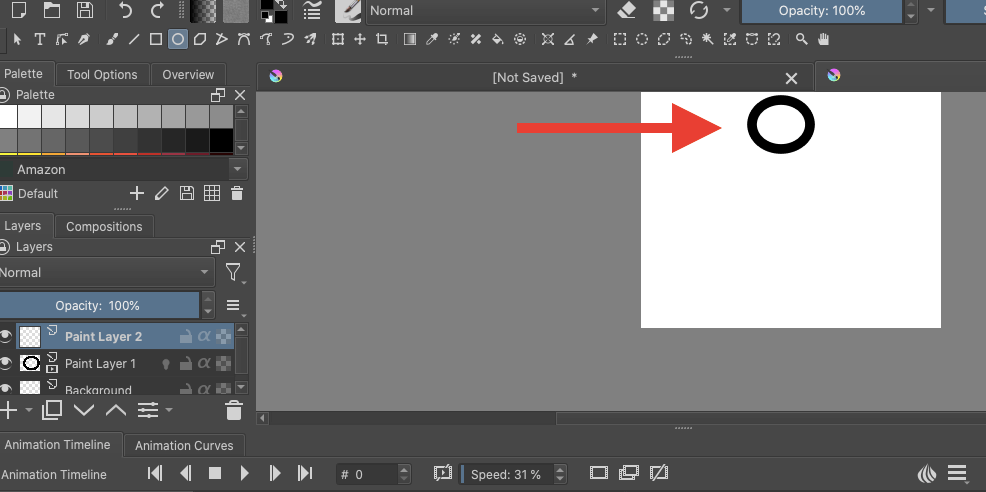
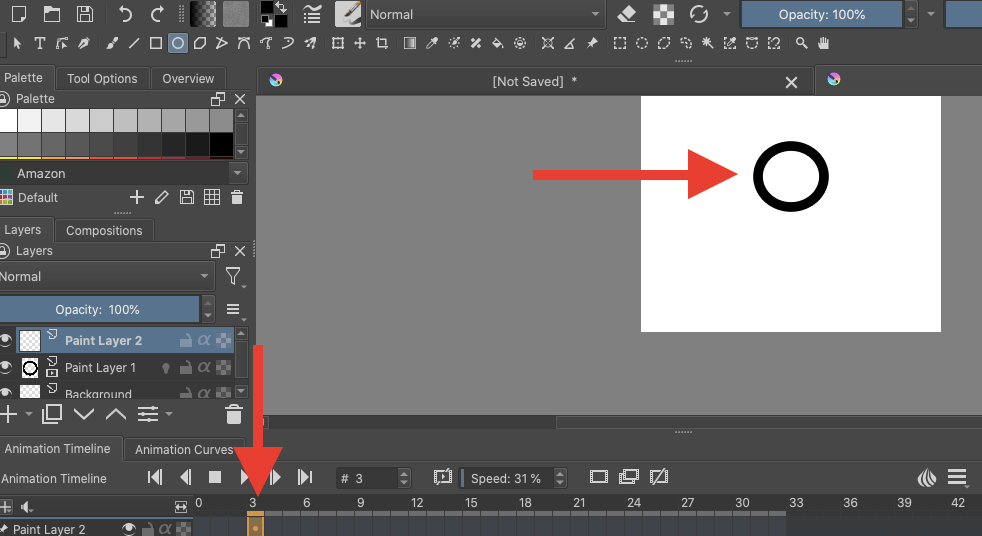
Step 3: Draw your first frame. For example, I’m using a small circle shape that I created using the Ellipse tool.
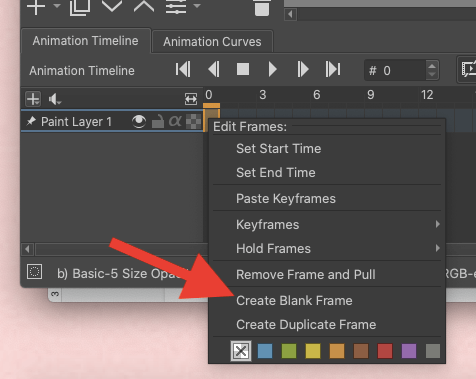
Step 4: Create a new frame by tapping on the orange highlighted section in your Animation Timeline. In the drop-down menu, select Create Blank Frame. Tap on the new frame and draw your next shape.
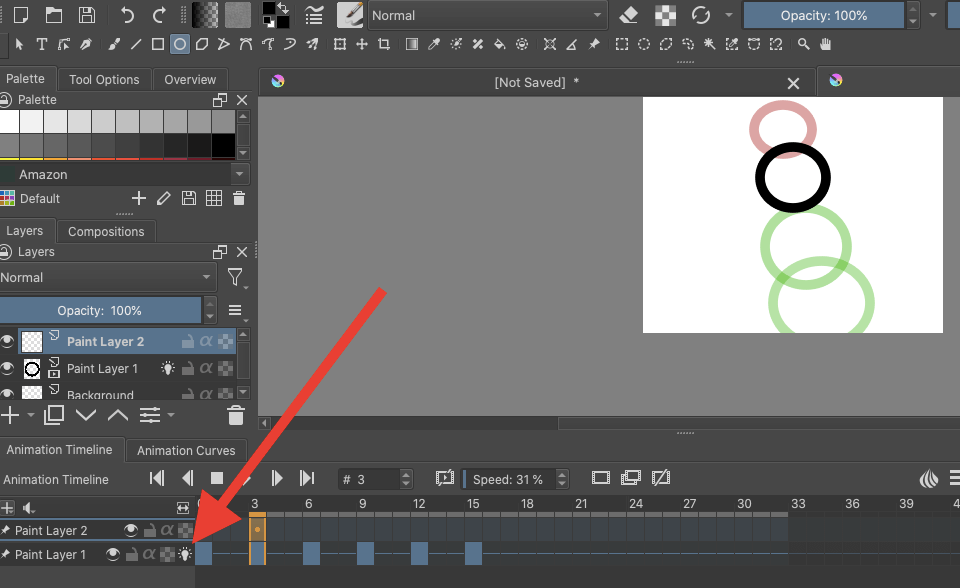
Repeat this step until you have all the frames you want to add. To be able to see each frame, activate the Onion Skin by tapping on the lightbulb icon on the layer.
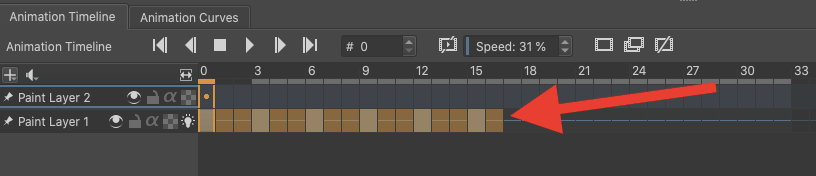
If you want to play your animation, drag your mouse over the active frames to select them. Everything inside the orange highlighted section will be selected.
Alternatively, you can tap on the three horizontal lines icon to manually input which frames you want to be played.
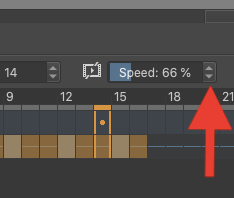
Step 5: You can choose the speed at which your animation plays. Tap on the Speed percentage window on top of your layer and use the arrows to increase or decrease the playback speed.
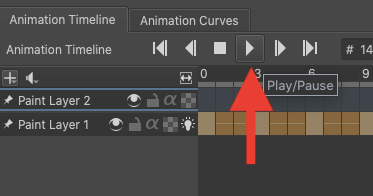
Once you have made these changes, tap on the play icon on top of the Animation Docker. This will continue to play your animation until you pause it.
If you want to tween the animation, follow the steps below:
How to Tween in Krita:
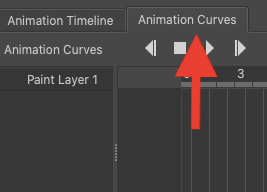
Step 1: Select the Animation Curves menu to the right of the Animation Timeline.
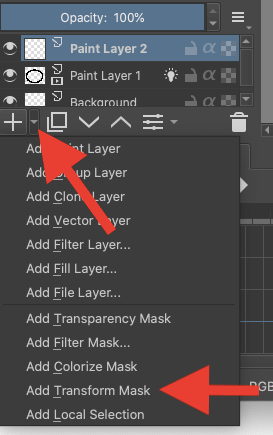
Tap on your layer and beside the + icon underneath it, click on the downward arrow. Then select Add Transform Mask.
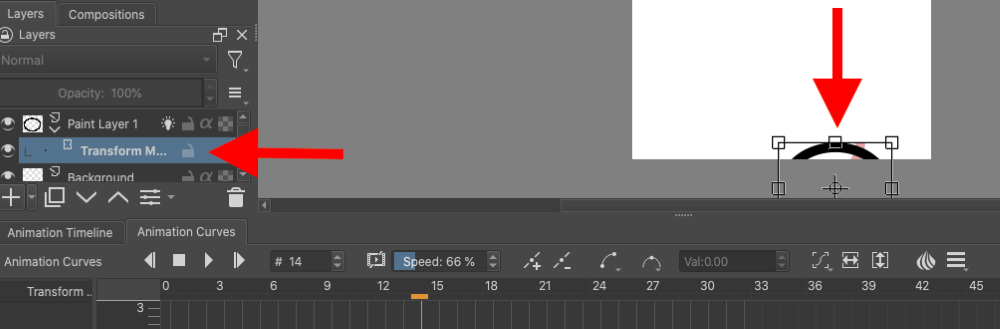
Step 2: Choose Transform Mask and then use your selection tool to move your layer into a new position.
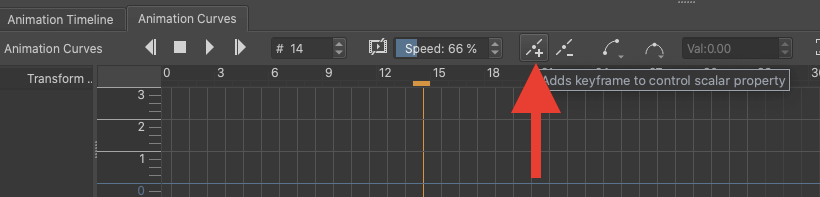
Step 3: Select the Add Keyframe button which is to the right of your playback speed window.
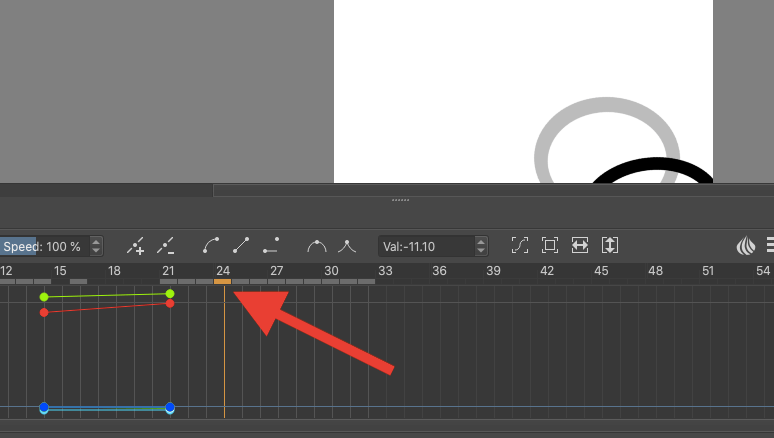
Drag your new Keyframe to its desired location. Once you are done, go back to the Animation Timeline.
How to Export Animation in Krita
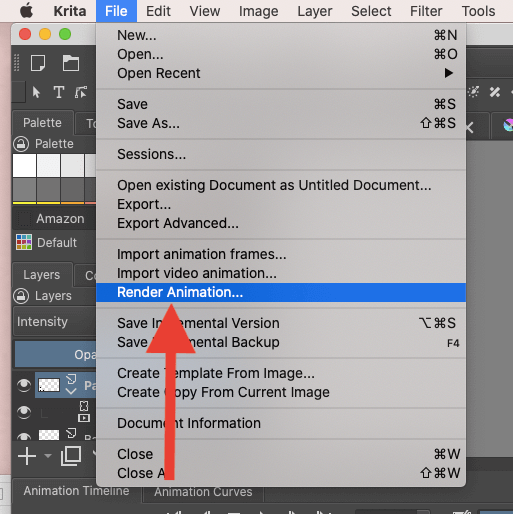
When you are ready to export your animation project, go to the File menu in the top left-hand of the toolbar. Then click on Render Animation.
You will have three options. You can export your file as an Image Sequence, which will save each frame individually. You can also export your image as a Video or Both. Once you have made your decision, click OK.
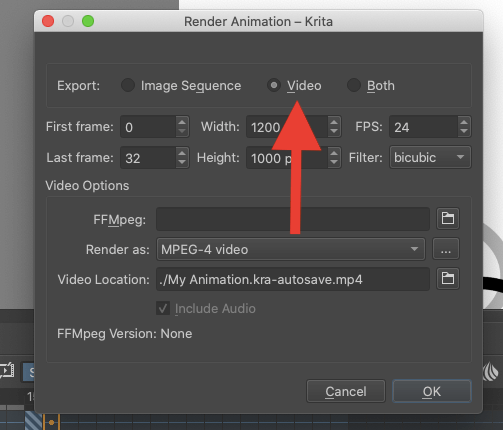
Note: You must download the FFmpeg file format and save it to your device before exporting your animation.
Things to Note
This program is incredibly advanced and can take quite a bit of time to familiarize yourself with. Please see below some of my extra tips to keep in mind while using Krita for animation purposes:
Onion Skins
You can edit and change the color and opacity of the onion skins within each frame to suit your personal preferences. You can also hide onion skins if you don’t wish to use them.
Moving Your Canvas
To move your canvas on a Mac, you do not need to tap or click on it. You will need to hover your mouse over the canvas and move it into your desired location. You can also use your keypad to zoom in and out of your canvas.
Move Tool
The move tool in Krita does not have its own icon on the workspace. You can activate the move tool on a Mac by holding down Command and T and then using your mouse to select the layer or object you want to move.
FAQs
Below are a few of your frequently asked questions about animating on Krita:
Is Krita good for animation?
Krita offers a very advanced and elaborate animation feature that includes many tools that other apps don’t.
How to download Krita?
You can download Krita directly from their website or from the Windows App Store.
How to animate in Krita with sound?
You can animate with sound in Krita by importing your chosen audio clip into the app.
Is animating in Krita easy?
No. Krita is a very advanced program that takes some time to learn. Even with many resources and tutorials available online, this is a challenging tool to learn on Krita which means it has a steep learning curve.
Final Thoughts
Now you know the basics of how to get started making your animation in Krita. This app is so advanced that there are many more intricate features that you can use to edit and improve your animation techniques. You just need to have the time set aside to learn how to use them.
If you’re looking to get started on your own animation career, this app is a great place to start as it is free and has a useful handbook to cover the basic tools and features. For a more advanced resource, I suggest purchasing their animation guidebook for an extra fee.
Do you use Krita for animation? Leave your feedback in the comments section below.