
To adjust the volume in Adobe Premiere Pro, select the audio clip and press G on your keyboard. To increase the volume, input a positive number (+6); if you want to decrease the volume, input a negative number (-6).
From a professional point of view, having bad-sounding audio is like having a glitching video. Audio is as important as video. I am David, a professional video editor. I have been using Adobe Premiere to edit audio and videos for the past ten years.
Thus, in this article, I will explain how to increase the audio gain, show you several ways to adjust audio volume, what the audio meter is, what an auto duck is, and how to balance audio levels for all clips in a sequence.
Table of Contents
How to Increase Audio Gain
To increase your audio gain, select the audio clip you want to adjust, right click on the selected audio clips. Choose Audio Gain from the drop-down menu.
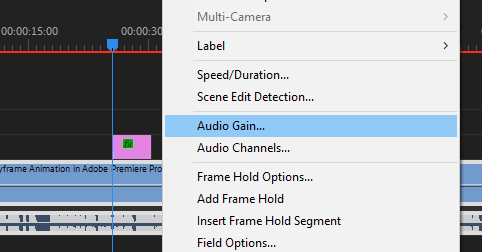
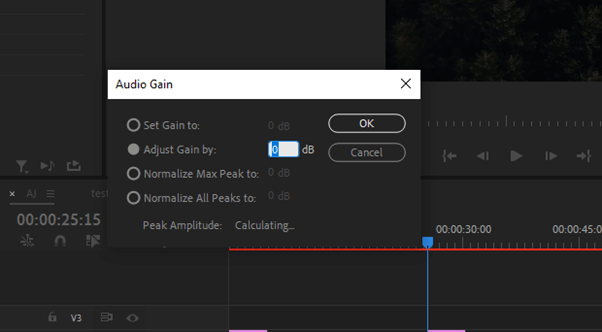
Alternatively, you can find Audio Gain under the Audio Options in the menu or press the Key G. The audio gain box will pop. Adjust dB in the audio Gain box to your desired level and after that, select OK.
How to Adjust Audio in Premiere Pro
Adjusting the Audio output volume of a clip, select the clip or clips in the Timeline. Navigate to the Effect Controls button below the main menu. From the effect panel that opens up, Select Volume in the Audio section.
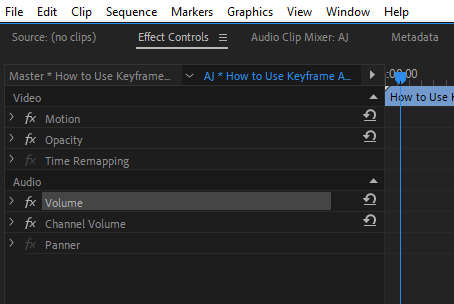
Under the Volume level setting, select dB volume. Select the Stopwatch icon beside it to turn off Keyframes.
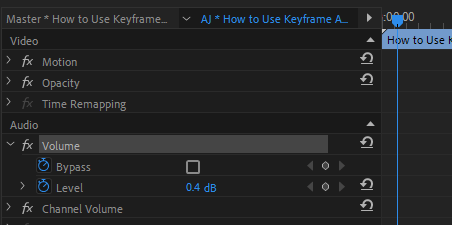
Select the current dB and change the value by typing it or dragging your mouse to the right or left to change the value. There you go.
Other Methods to Adjust Volume in Premiere Pro
As I say, there are many ways to do things in Premiere Pro, and that’s the joy of using this software. Go with the most convenient method.
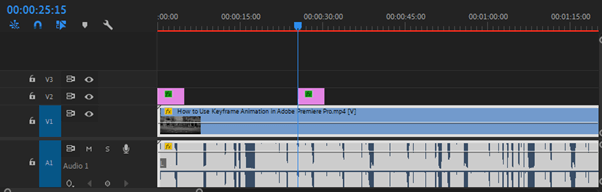
Method 1: To adjust your audio, select your audio from the sequence timeline. Enlarge your audio track. Now drag your mouse over the audio band from your sequence timeline.
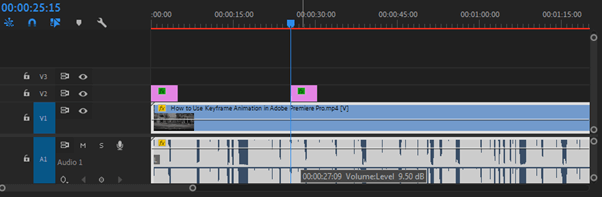
Your pointer will change; just drag it upward to increase the volume or drag it down to decrease it.
Method 2: Select your audio from the sequence timeline. Here you will be able to differentiate in tracks. Open your audio mixer panel.
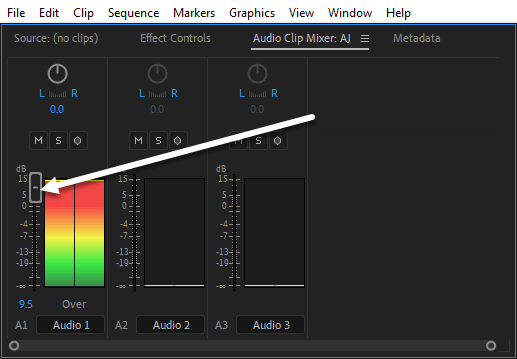
Select the audio track you want to adjust the volume. Here, you will find a bar, select the bar band and drag it up to increase the volume of your audio clip or drag it down to decrease the volume of your audio clip.
What is Auto Duck in Premiere Pro
Auto duck in Premiere Pro is the process by which Premiere Pro creates automatic keyframing on audio tracks, to reduce the audio volume of one or some selected tracks. This always works well with background music in a video project with vocals.
Auto Duck in Adobe Premiere Pro is an effective way to make background music fade out when the voiceover begins. The volume of audio tracks can be adjusted automatically, so it will not be too loud or too soft.
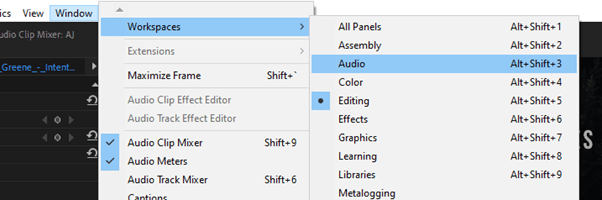
To auto-duck in Premiere Pro, Go to your audio workspace. You can easily get this by going to the Window Menu > Workspace > Audio. Don’t forget to set your workspace back to Editing or the default you’re using after.
This will open a new workspace, and the essential sound panel will open on the right-hand side of the screen.

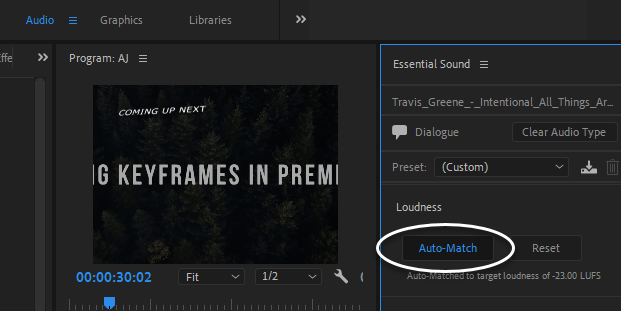
From the dialogue options, select Loudness and Activate the Auto Match from the loudness option.
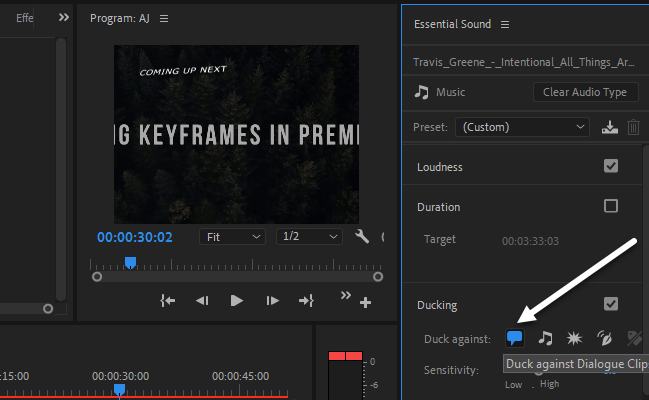
Then, from the essential panel, select Music Option. Go to the ducking and enable it.
From the options below the ducking option, select the dialogue button to duck against the dialogue clips.
Navigate downwards to select generate keyframes. This will add keyframes to your audio. Not satisfied with the final result? You can do it manually; let me take you through my process.
Manual Ducking in Premiere Pro
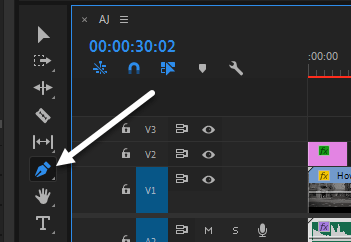
You can do ducking manually by using the pen tool. To do this, select the Pen Tool from the Tools bar or press P on your Keyboard.
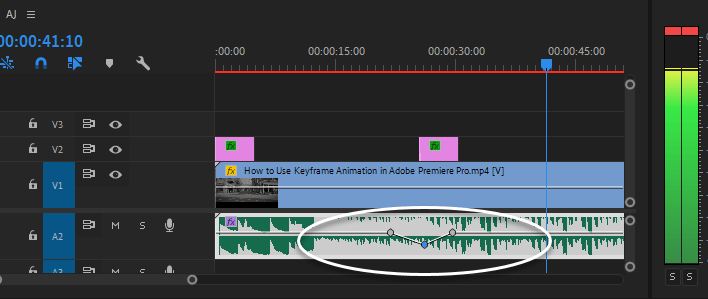
Now go to the Audio Band and create nodes to your desired area, then drag the band down. You can also use this to fade music in and out.
Audio Meter in Premiere Pro Explained
The audio meter in Premiere Pro is a visual representation of the audio level in a clip or track. The meter displays the average level for the entire clip or track and the peak level for each channel.
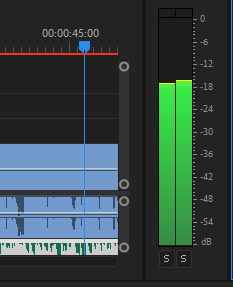
You can use the audio meter to ensure that the audio levels are within an acceptable range and to avoid clipping. If it clips, you will see red bars on top of the audio meter.
Conclusion
Adjusting the audio volume in Adobe Premiere Pro can be tricky, but with some know-how, it’s easy to get the level you need.
Be sure to keep an eye on your audio levels throughout your edit, as small changes can make a big difference in the sound quality of your final project.
If you find it tough to understand anything from this article, just drop your question in the comment box below.