
What’s the bummer part about sharing your amazing images online? The better they are, the more likely it is that someone else might try to use your image without permission or giving you the credit.
Hey-o! I’m Cara, and knock on wood, to date I’m not aware that anyone has tried to steal my images. Not sure if I should be happy or insulted…lol.
Anyway, a simple way to discourage thieves from targeting your images is to add a watermark. Lightroom makes this quite simple to do. You can create and store several variations of your watermark and quickly apply them to multiple images.
Let’s take a look.
Note: the screenshots below are taken from the Windows version of Lightroom Classic. If you are using the Mac version, they will look slightly different.
Table of Contents
2 Ways to Create a Watermark in Lightroom
Before adding a watermark, you need to create the watermark you want to use. You can create and add a graphic or text watermark in Lightroom.
Lightroom allows you to upload a PNG or JPEG version of your watermark. Or you can create a text-only watermark directly in Lightroom.
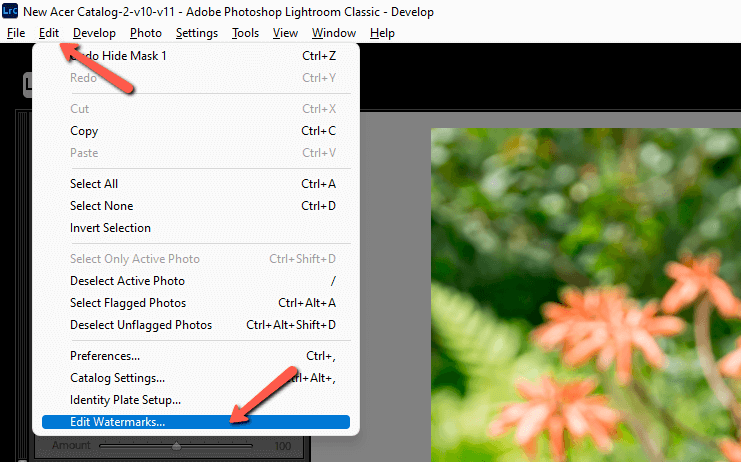
Either way, go to Edit and choose Edit Watermarks from the bottom of the menu.
Then you can decide what type of watermark you want to create and add.
1. Create a Graphic Watermark
Once you open the Watermark Editor, click Choose under Image Options to add a PNG or JPEG file.

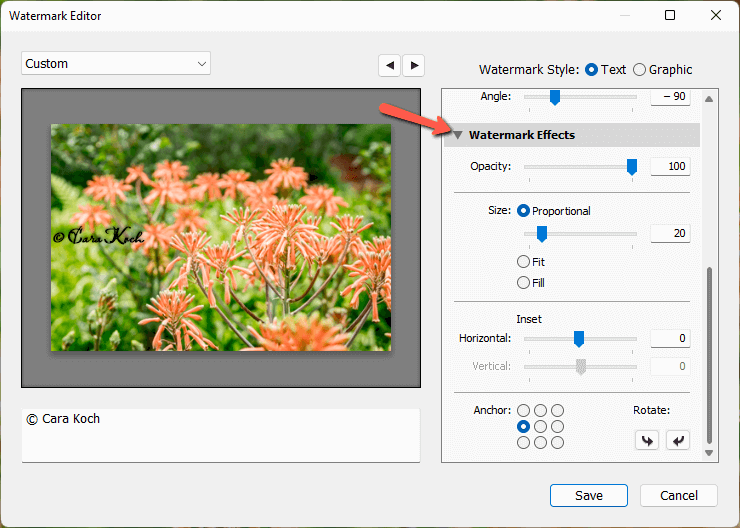
Lightroom will upload the file and a preview will appear on the image on the left side of the Watermark Editor. Scroll down on the right to Watermark Effects.
Here you can adjust how the watermark appears on the image. Bring down the opacity for a more subtle look. Change the size and inset both horizontally and vertically.
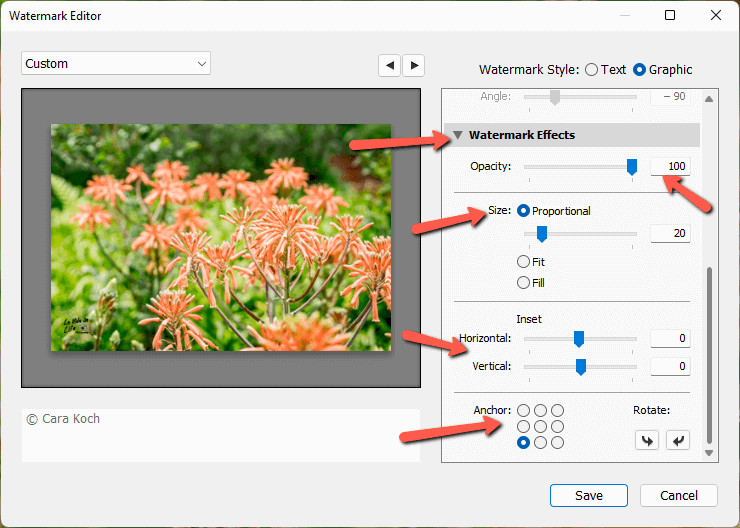
At the bottom, you can pick one of nine points for the anchor point. This will give you a basic position for the watermark. You can use the inset sliders to fine-tune the positioning if needed.
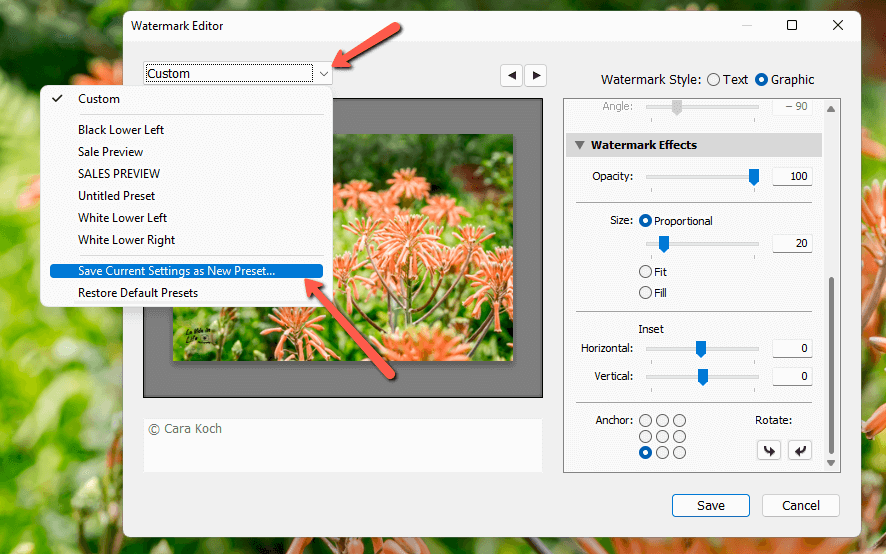
Save your watermark as a preset. If you’re making multiple watermarks, click the dropdown box right above the preview window. Choose Save Current Settings as New Preset.
Then give it a name you’ll remember. Otherwise, just hit Save and give your preset a name when prompted.
2. Create a Text Watermark
If you don’t have a graphic, you can create a basic text watermark in Lightroom. For example, adding a signature to your photos is always a good idea if you don’t want others to use your photos without permission.
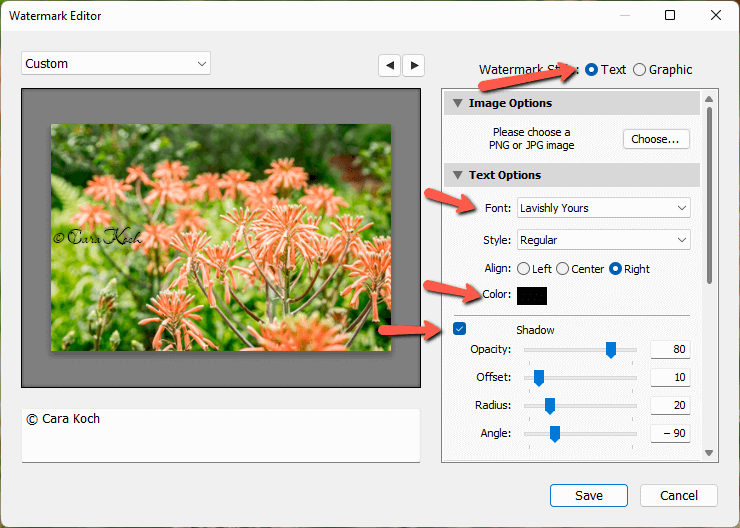
Make sure to check the Text option at the top. Then choose a font from the dropdown menu under Text Options.
There are basic Adobe fonts available, but I also found fonts that I had downloaded and installed on my computer to use in Photoshop. I assume that means Lightroom pulls all the fonts you install system-wide on your computer.
You can choose regular or bold styles and some fonts will allow you to do Italics.
Right under that, you can align your watermark. This is in relation to the 9 anchor points I mentioned earlier. Click on the color swatch to choose a color, but keep in mind it is in grayscale.
Under that, you can add a shadow to the text and adjust how it appears.
Scroll down to access the same Watermark Effects we just looked at. Use these to adjust the positioning and opacity of your text watermark.
Press Save and you’ll be prompted to save your settings as a preset and name it.
Adding Watermark to a Photo in Lightroom
Adding watermarks is a cinch, though keep in mind that they don’t appear in the Develop module. Instead, you add the watermark when you’re exporting the images. Here are the steps.
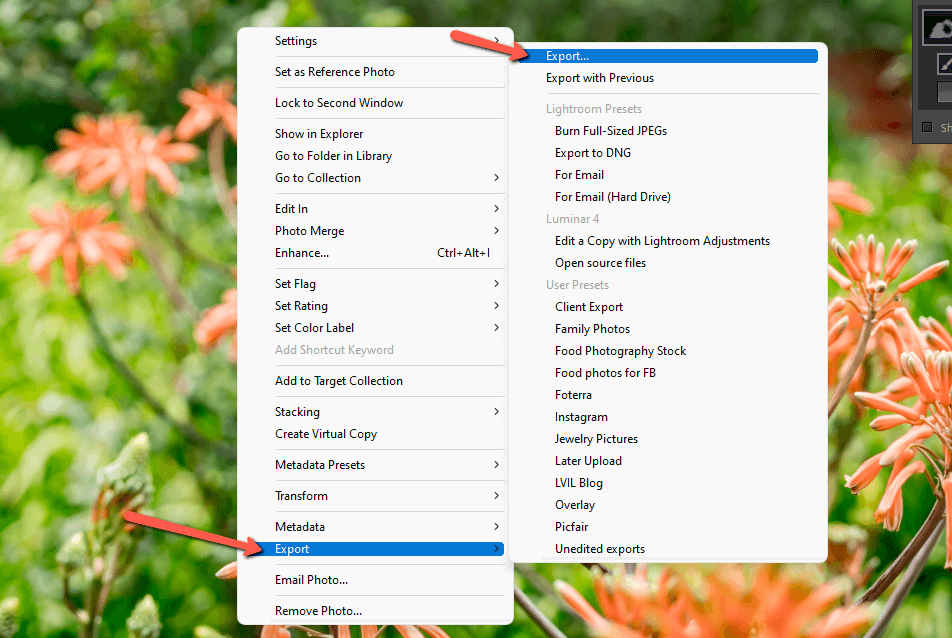
Step 1: With your watermark ready, right-click on the image you wish to export and choose Export, then Export again. Alternatively, select the image(s) you want to export then press Ctrl + Shift + E or Command + Shift + E to jump straight to the export panel.
Step 2: Choose any of your export presets or choose new settings as appropriate. For the watermark, scroll down until you find the Watermarking section.
Check the box to activate the feature. Then click the dropdown menu to choose the saved watermark you wish to add.
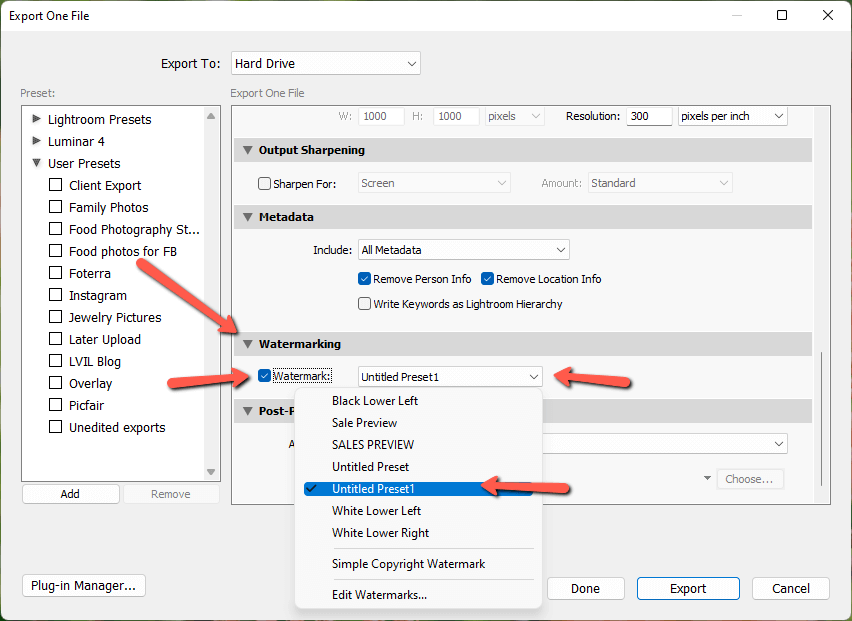
Notice that you can also Edit Watermarks at the bottom of this menu if needed.
There you go! Adding watermarks is super simple in Lightroom. If you want to add watermarks to multiple images at once, simply select multiple images before you go into the export panel.
Wondering what other cool features are available in Lightroom? Check out the Soft Proofing feature here!