
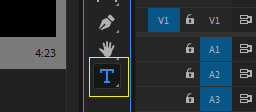
To add text to your project in Adobe Premiere Pro, go to the tools bar and select the text tool, or on your keyboard, press the “T” key. After that, move to the playback panel and decide where you want your text to appear.
I’m David, a video editor. I have been editing for the past ten years using Adobe Premiere Pro. I fell in love with this software; it’s my hobby.
Thus, in this article, I will explain how to create title graphics, add effects to titles, add multiple texts, make rolling or crawling titles, and show you how to make cinematic titles. Now let’s get straight to work.
Table of Contents
How to Add Text in Adobe Premiere Pro
When creating titles in Premiere Pro, it is crucial to use the right font, size, color, and text placement. Additionally, adding effects such as motion blur or animation can help make titles look more professional.
It is also essential to ensure the text size is large enough to read easily. If the text is too small, it can be easier to read and will not look professional. It is vital to ensure the text is not too close or too far apart, as this can make titles look cluttered or difficult to read.
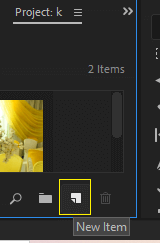
Before you add your text, add a good background color for your text. To do this, go to the project panel in the bottom right, and select a new item icon.
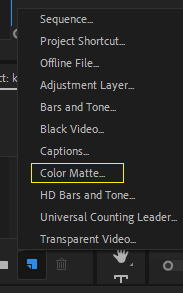
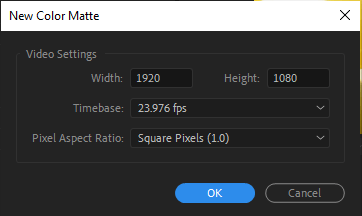
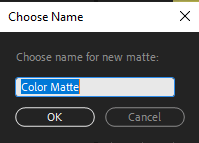
Select your color and give it a name. Then choose the color matte. After that, make sure it’s set to your sequence size.
Then, drag it into your project timeline. To add text, go to the tools bar and select the text tool.
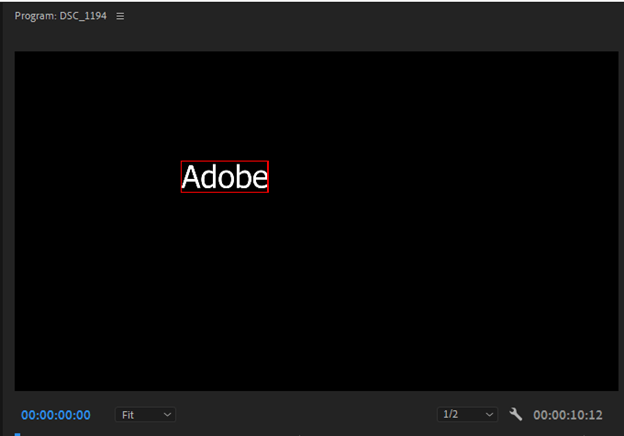
Afterward, you will proceed to your preferred place on the playback screen, where your color matte is created and typed in your title.
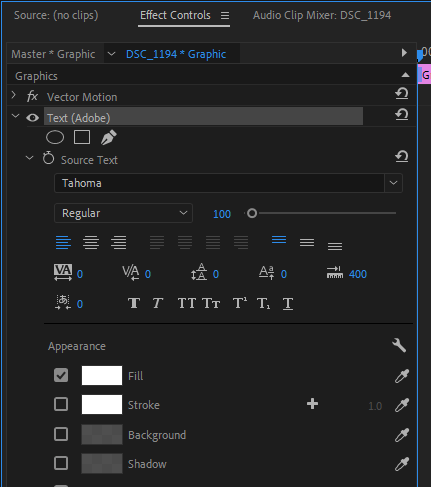
To edit this, select your text element, then go to the effect control panel. Find a dropdown menu labeled “text.” Extend this menu, and you will have a lot of text effects.
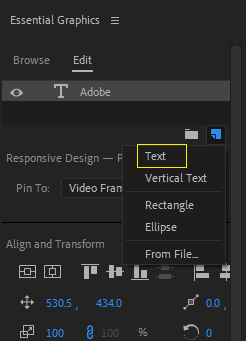
How to Add Text Using the Essential Graphics Panel
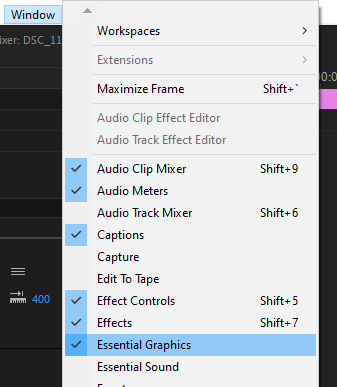
Go to Window > Essential Graphics to open a new panel on your screen if it isn’t already open. Now navigate downward to create text.
Then, type in your title. Click the Edit tab in the Essential Graphics panel to edit all that you want to edit, like font type, font size, font alignments (center, right, etc.), and change color if necessary.
How to Add Effects to Titles in Adobe Premiere Pro
Open your project in Adobe Premiere Pro. Click on the Effects tab in the upper-left corner of the interface. Select the title clips in the timeline.
Scroll through the available effects and select the one that you would like to use. Adjust the settings to achieve the desired effect. Click the OK button to apply the effect to the title clip.
How to Create Cinematic Titles in Adobe Premiere Pro
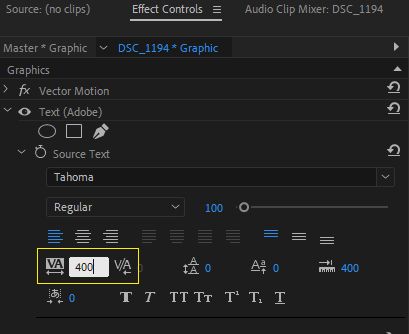
To create a cinematic title in Adobe Premiere Pro, you must make your title with your desired name.
Afterward, go to the effect control panel to make necessary adjustments, like alignments, font size, type, and color. Now, change the spacing value to 400.
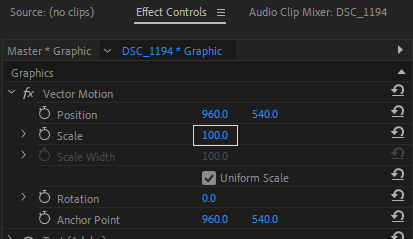
To add animation to the text, select the text, go to the vector motion under the effect controls panel, and set keyframes for scale. 100 for the start point and 107 for the end keyframe point
Now, add a transition. Go to the effect panel under video transition and select cress dissolve from the dissolve transition category. Drag this effect into your text title at the beginning and at the end to make the text fade in and fade out.

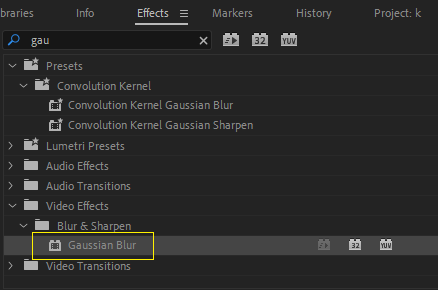
Another thing to consider is adding Gaussian blur to make the text blurry at the start and fade out. Set the keyframe for this effect now to indicate when it should start and stop.
How to Roll Text in Adobe Premiere Pro
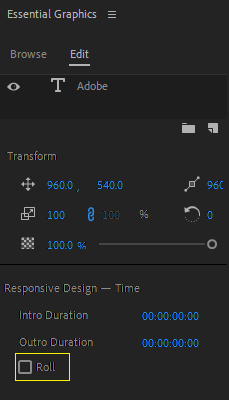
After entering the desired text that you want to roll on the playback screen, Navigate to the essential graphics panel. If you cannot find a “graphics” workspace, go to Windows > Essential Graphics.
You can extend or shorten the graphics layer in the timeline to speed up or slow down the scrolling. In the Essential Graphics panel, click the Edit tab. Check the box next to Roll. Then you have a continuous text.
Conclusion
Adobe Premiere Pro is an incredible video editing tool that allows you to easily add text to your videos. You can quickly add titles, captions, and credits to your project with a few simple steps.
First, you must select the text tool from the tools panel and click where you want to add text to the timeline. You can then type in the text you wish to display and adjust the text’s font, color, size, and position.
Once you are satisfied with the text, you can select the text tool again and click on the timeline to set the duration of the text. With Adobe Premiere Pro, adding text to your videos is easy and fun.
If you’re having trouble creating titles effectively in Adobe Premiere Pro, leave your message in the comment section.