
Texture can bring depth, visual interest, and a unique touch to your illustrations. Whether you’re aiming for a vintage look, natural surfaces, or exploring different styles, Clip Studio Paint has the tools you need.
Hey there! I’m Zoe, an illustrator who’s been using Clip Studio Paint for a few years now. I know firsthand that something as seemingly small as texture can breathe life and character into your artwork. That’s why I’m excited to show you how to add texture to your own creations.
In this tutorial, we’ll walk through the four simple steps of adding texture to your illustrations. And in case you can’t find the perfect texture in Clip Studio Paint’s material library, I’ll even provide tips on designing your own textures.
So let’s jump right in!
Table of Contents
Key Takeaways
- Layer multiple textures for interesting effects.
- Experiment with blending modes and opacity to achieve the desired look.
- You don’t need an extensive collection of texture materials. Clip Studio Paint’s pre-installed options are often sufficient.
Here’s the step-by-step guide to adding texture to your artwork in Clip Studio Paint.
Note: All screenshots from this tutorial are taken from the CSP Mac version.
Applying Texture in Clip Studio Paint
Clip Studio Paint provides a variety of texture materials that are ready to use. Here’s how you can add material as a texture and blend it with your artwork:
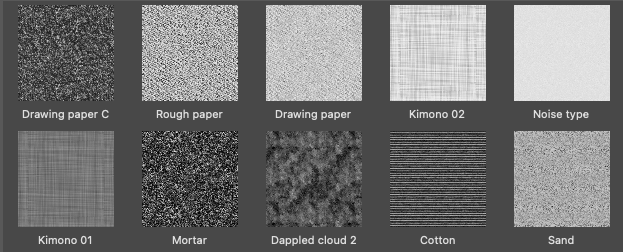
Step 1: To access Clip Studio’s texture materials, go to the Material panel and select Monochromatic pattern. From there, you can browse through the options under Basic and Texture to see what catches your eye!

In Texture, you’ll find an assortment of realistic patterns, such as canvas, fabric, paper, and more.
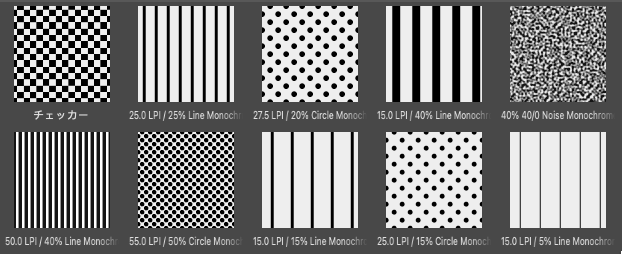
The Basic category features various tone effects, such as noise that you can generate yourself.
Step 2: Once you’ve found the perfect texture, just drag the material onto your canvas, and it will appear at the top of all your layers.
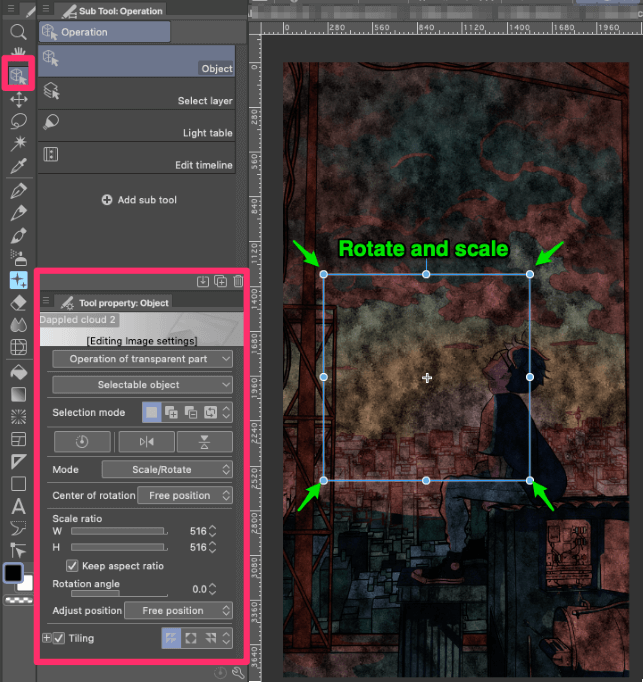
Step 3 (Option A): Follow this step if you selected a texture from the Texture category.
With your texture layer selected, you can now rotate or scale the tiled texture using the Tool Property palette under the Object Tool.
Step 3 (Option B): Follow this step if you’re using a pattern from the Basic category.
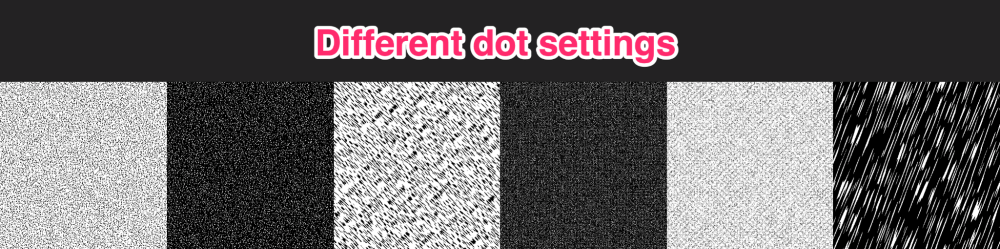
With materials like noise, checkers, stripes, etc., you have even more customization options, which can be found in the Layer Property panel.
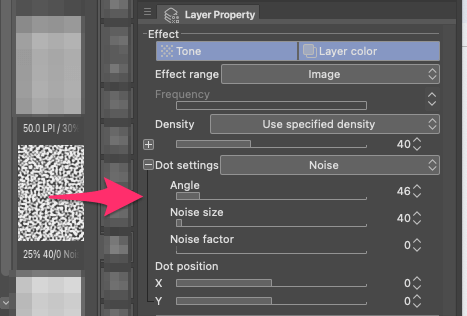
These sliders enable you to fine-tune the appearance of your texture. For example, you can choose to make noise more or less dense, control the size of the dots, or change its angle.
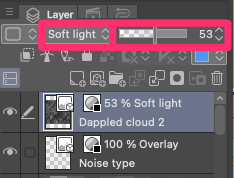
Step 4: To blend the texture into your artwork, experiment with different Blending Modes like Overlay or Soft Light. These blending modes will interact with the colors beneath the texture, giving you more natural results.
You can also adjust the Opacity to fine-tune the intensity of the texture.
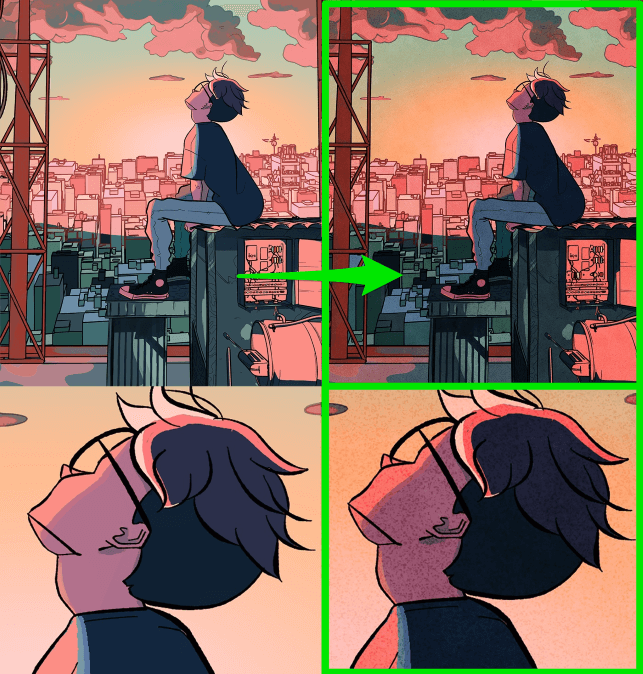
You’re now all set to add textures to your drawings! By following these steps,
you can achieve different styles such as a distressed look, a painted effect, or a woody grain.
But what if you need a very specific texture that isn’t available in Clip Studio Paint’s materials or Clip Studio Assets? Keep reading for a quick guide on designing your own textures.
Pro Tip: Creating Custom Textures in Clip Studio Paint
You can add your personal touch by designing custom materials to use as textures. Follow these simple steps:
Step 1: Open a new canvas to design your pattern. This helps you focus solely on creating the texture without any distractions.
Step 2: Go ahead and create your texture, using any brush, shape, or image you prefer.
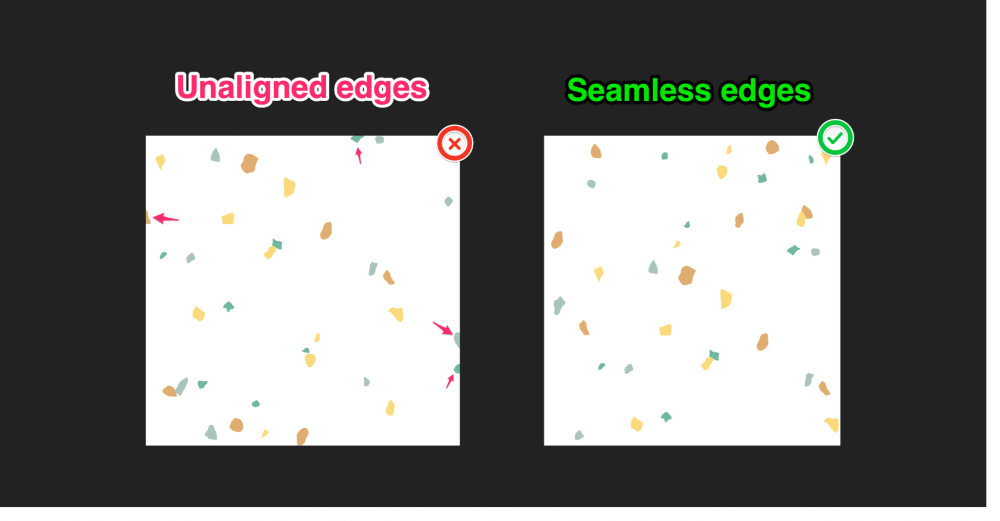
Make sure it’s seamless, meaning the edges blend smoothly into each other when tiled. But don’t worry too much about perfectly matching borders either, as textures tend to have a more irregular appearance.
Step 3: Once you’re happy with your design, merge any layers together if you’ve used multiple ones. Select your chosen layers while holding the Shift key, then right-click and choose Merge Selected Layers.
Step 4: Right-click on the layer and select Convert Layer > Image Material Layer.
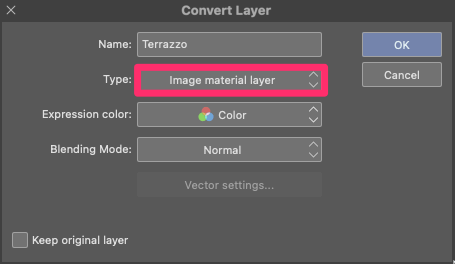
This turns your layer into an image material, which allows you to use Clip Studio Paint’s built-in tiling feature.
Step 5: Copy and paste the converted layer back into your artwork file.
Step 6: Locate the Operation Tool and select the Object Sub Tool.
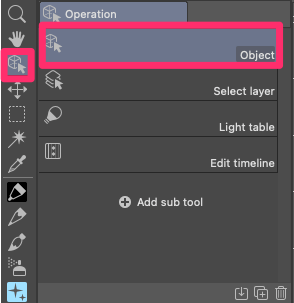
In the Tool Property panel, check the Tiling box at the bottom. Now, simply move your pattern and see it repeat seamlessly!
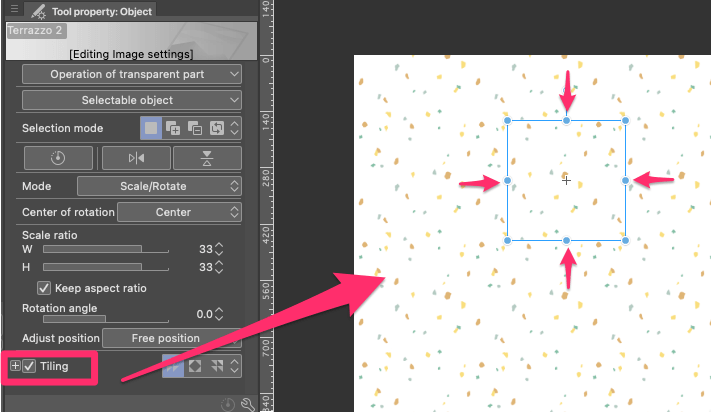
You also have the option to rotate and resize the bounding box around your image to make further adjustments to your texture.
Step 7: Set the blending mode of your custom texture layer to Overlay or Soft Light. This enhances the natural appearance of your texture within the artwork.
Final Thoughts
Adding texture to your illustrations in Clip Studio Paint is an easy way to enhance your artwork. You can use premade texture materials or create your own custom textures. Layer them, experiment with blending modes and opacity, and adjust the tiling to achieve different styles.
Clip Studio Paint has everything you need to get started, so have fun exploring textures and adding depth to your artwork!
If you have any questions or want to share your experiences with texturing artwork, feel free to leave a comment below!