
Adding subtitles is a useful technique to add clarity to your video, or to expand your audience to other languages. Adding subtitles in DaVinci Resolve is a straightforward process and is simple for even beginners. Learning this skill can increase your opportunities for work tenfold.
My name is Nathan Menser. I am a writer, filmmaker, and stage actor. I have been video editing for 6 years now, and even from the start of my editing journey I was using subtitles on things like my Spanish projects, so English speakers could enjoy them. So I am happy to share this skill!
In this article, we will be covering two methods for adding subtitles to your video in DaVinci Resolve.
Table of Contents
Method 1
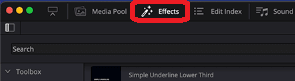
Step 1: Navigate to the edit page by clicking “Edit” from the horizontal menu bar at the bottom of the screen. In the top left corner of the screen, click “Effects.”
Step 2: Go to the “Titles” section and scroll to the very bottom. There you will find “Subtitles” Click and drag the option to the timeline.
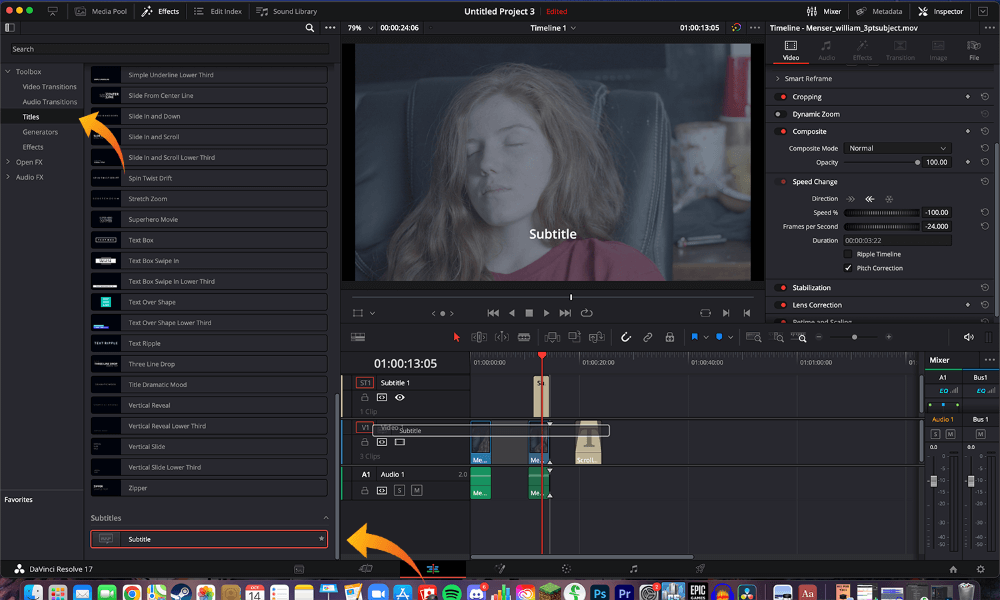
Step 3: To edit the subtitles themselves, click on the new beige subtitle bar located on the timeline. This will open a menu to edit the subtitles in the top right corner of the screen. There will be a big box that just says “Subtitle” inside. Click on the box to edit the text and write the correct captions for your video.
Step 4: To time the subtitles correctly, you can drag the side of the beige subtitle bar on the timeline.
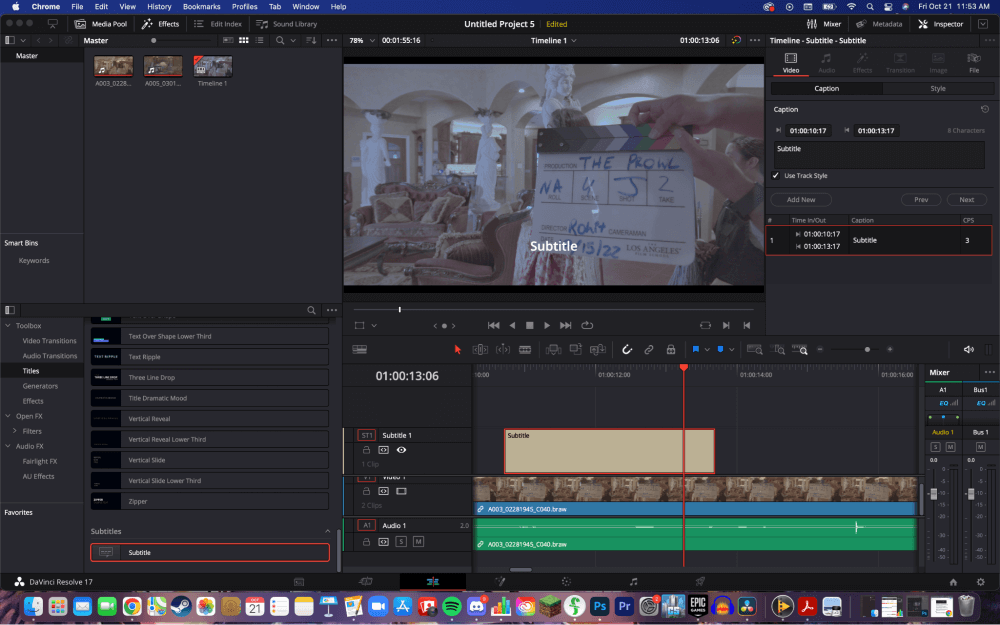
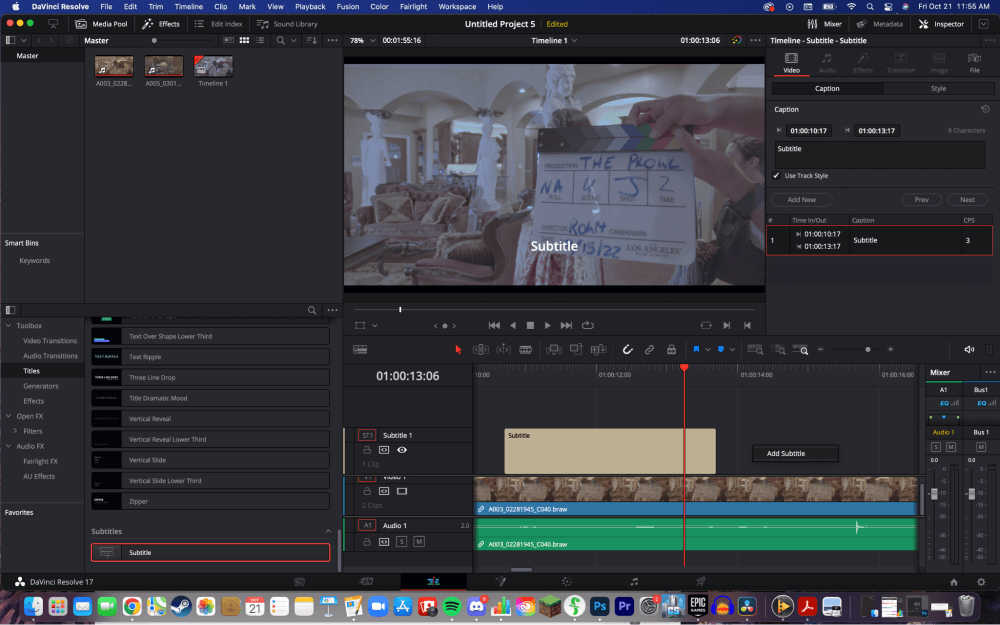
Step 5: To change the font and size of the text, choose the “Style” button from the subtitle menu. You can change everything from letter spacing to the exact positioning of the words on the screen.
Step 6: Of course, you will need to add more subtitles the more words you need to be subtitled. To add another caption to a different section of the video, click “Add New” from the subtitle menu. You can also just copy the horizontal beige subtitle bar from the timeline and paste it where you need it.
All necessary changes could instead be made in the Inspector tab.
Method 2
Another way to add subtitles to a project in DaVinci Resolve is to go to the “Edit” page.
Right-click, or “Ctrl+Click” for Mac users, on the empty space to the left of the timeline. This will open a pop-up menu. Select “Add Subtitle Track.”
To edit the subtitles, right-click on the subtitle track. This will open the subtitle menu on the right-hand side of the screen. Click “Create Caption.” A beige subtitle bar will appear in the timeline. You will be able to edit the subtitles the same way as described in method one.
Follow steps 3-6 from Method 1 to edit the subtitle text.
Conclusion
Subtitles can seriously elevate your video accessibility and professionalism. On top of this, it is a skill that many video editing employers are looking for, meaning it can open up job opportunities.
Thank you for reading this article; I hope it has added some sort of value to your video editing career. If you liked this article, thought it needed some improvement, or if you want to read about something else next, you can let me know by dropping a line in the comments section.