
A good font selection is at the heart of any good typographic design, but you’ll quickly get discover the limitations in your operating system’s default fonts.
Mac users will have a bit of an advantage here over Windows users thanks to Apple’s attention to design details, but it still won’t take long before you’ll want to expand your font collection for use in your InDesign projects.
Table of Contents
Adding Adobe Fonts to InDesign
Every Creative Cloud subscription comes with full access to the impressive Adobe Fonts library. Formerly known as Typekit, this growing collection boasts a huge range of typefaces for any design project, from the professional to the whimsical and everything in between.
To get started, make sure that the Creative Cloud app is running on your computer and properly logged in to your Creative Cloud account. This app synchronizes the fonts you select on the Adobe Fonts website and makes them available instantly in InDesign, as well as any other apps that you have installed.
Once the Creative Cloud app is running, visit the Adobe Fonts website here and make sure that you’re logged into the website using the same Creative Cloud account as you used in the app.
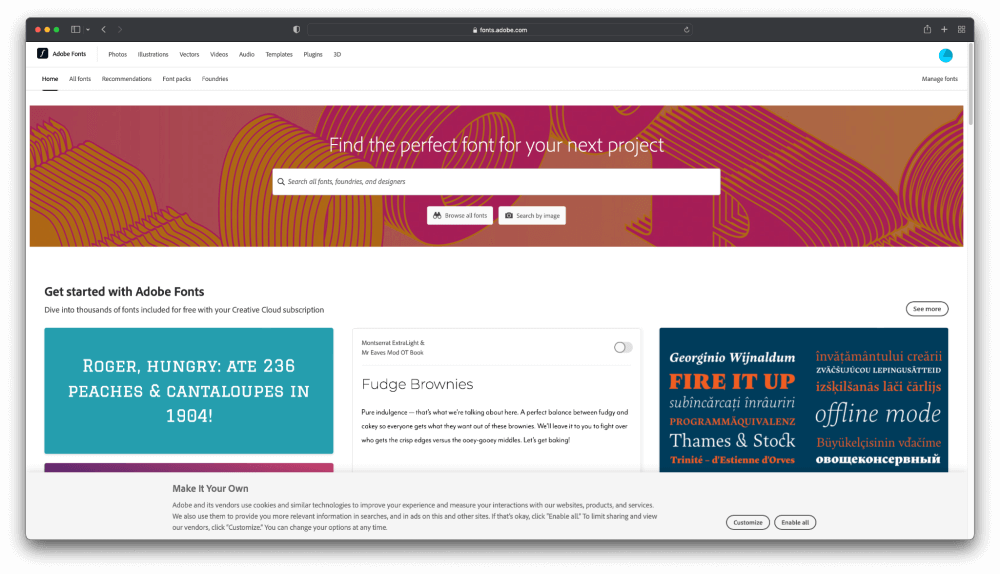
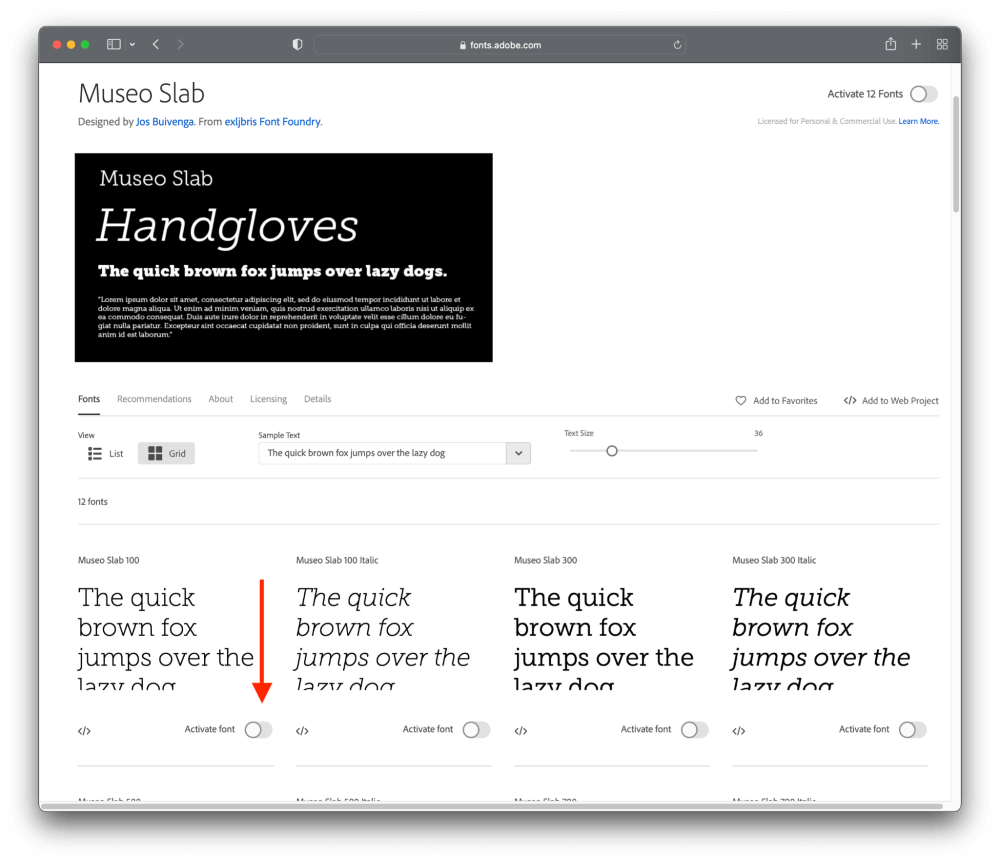
Browse through the selections to find a typeface that you’d like to use in InDesign. Once you’ve made a choice, you can simply click the slider button next to each font in order to activate it (see below). The Creative Cloud app will synchronize with the Adobe Fonts website to download and install the required files to your computer automatically.
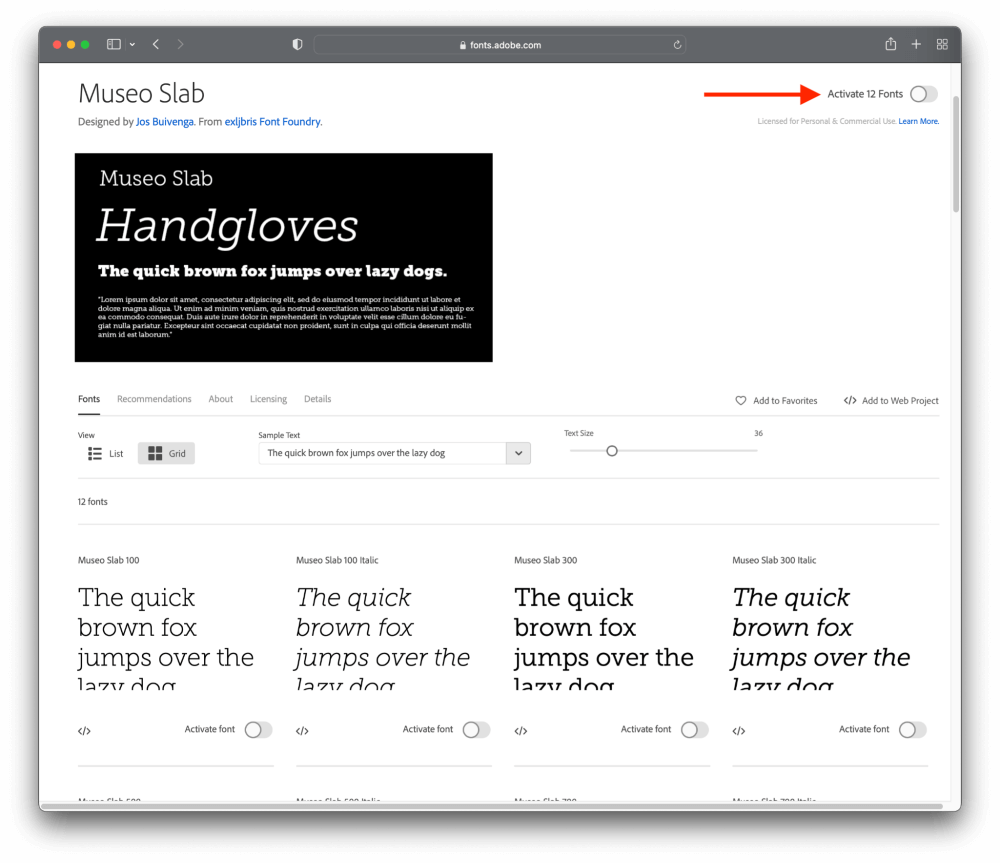
If you’re adding a number of fonts from the same family, you can save time by clicking the Activate All slider button at the top right of the page.
That’s all there is to it!
Adding Downloaded Fonts to InDesign
If you want to use a font that isn’t part of the Adobe Fonts library, it takes a few more steps to get it ready for InDesign, but it’s still very easy to do. The steps look a bit different depending on which operating system you use, even though the overall process is similar, so let’s look at adding fonts to macOS and Windows separately.
For the purposes of this guide, I’m going to assume that you’ve already downloaded the font that you want to use in InDesign. But if not, you can find plenty of fonts at a number of different websites including Google Fonts, DaFont, FontSpace, OpenFoundry and more.
Adding Fonts to InDesign on macOS
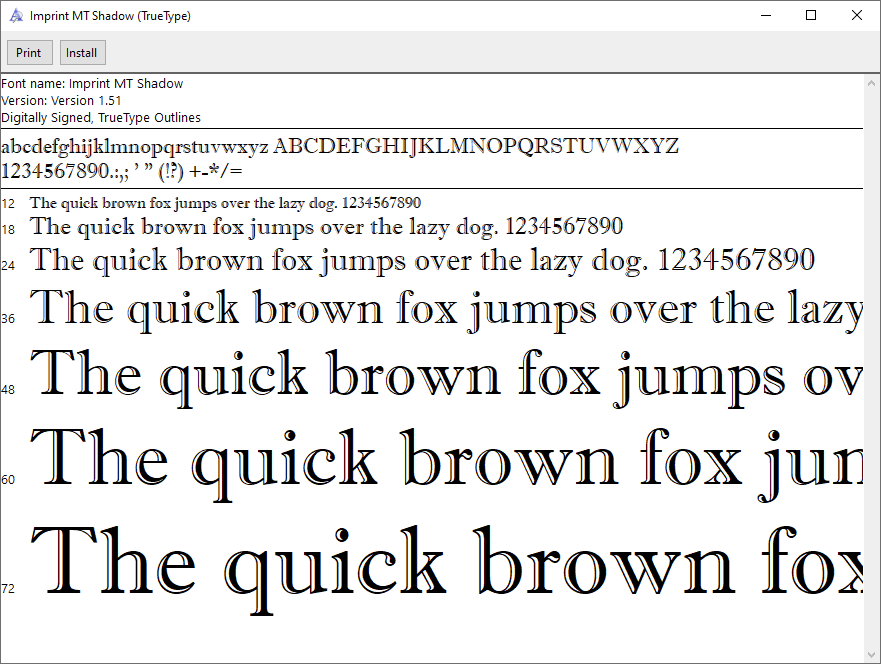
Locate your downloaded font file, and double-click on it to open it. Your Mac will open a preview of the font file in Font Book, giving you a basic display of the uppercase and lowercase alphabet.
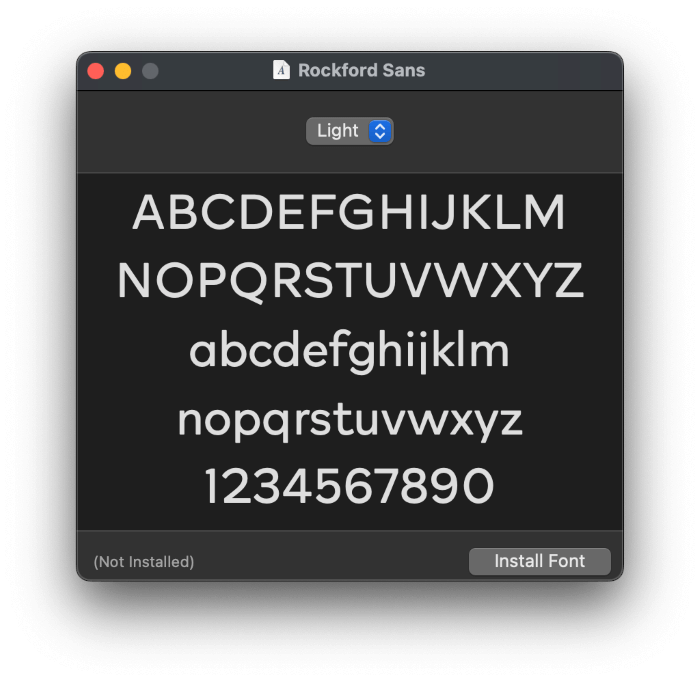
Just click the Install Font button, and your Mac will automatically install and activate your new font, ready to be used in your next InDesign project.
Adding Fonts to InDesign on Windows
Adding fonts to InDesign on a Windows PC is just as easy as adding them on a Mac. Locate your downloaded font file, and double-click it to open a preview of the font in a range of sizes. While the preview window doesn’t look quite as pretty as the Mac version, it does everything it needs to do.
Click the Install button in the upper left corner of the window, and your font will be installed for use in InDesign and any other program on your PC.
If you want to streamline the process even more and skip the preview process, you can simply right-click on the downloaded font file and choose Install from the popup context menu. To install the font for each user account on your PC, click Install for all users.
Congratulations, you’ve just added a font to InDesign!
Frequently Asked Questions
If you’re looking for even more information about fonts and font-related issues in InDesign, here are some of the most frequently asked questions from our visitors.
Why is InDesign Not Finding My Fonts?
If the font you want to use isn’t appearing in the InDesign fonts list, there could be a number of different issues preventing you from finding it.
The two most common issues are that the font is located in a different section of the font list, or it has a different name than you are expecting. Check the list carefully before moving on to the rest of the troubleshooting options.
Check to see if your desired font is available in another program on your computer. If it is not available in InDesign or any other apps, then the font is not installed correctly. Depending on where you originally sourced the font, repeat the steps in the appropriate section from the start of the article.
Remember that if you’ve activated fonts from the Adobe Fonts library, the Creative Cloud app must be running to handle the synchronization and licensing process.
If InDesign still isn’t finding your fonts, then you may be trying to use an incompatible or damaged font file.
How Do I Replace Missing Fonts in InDesign?
If you try to open an InDesign file that uses fonts that are not currently installed on your computer, the document will not display properly and InDesign will open the Missing Fonts dialog box.
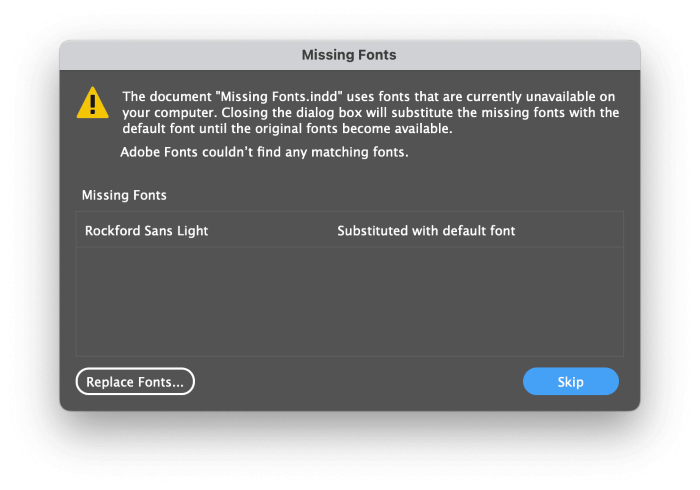
Click the Replace Fonts… button, which opens the Find/Replace Fonts window.
If you have accidentally skipped this step, you can also find the Find/Replace Fonts command in the Type menu.
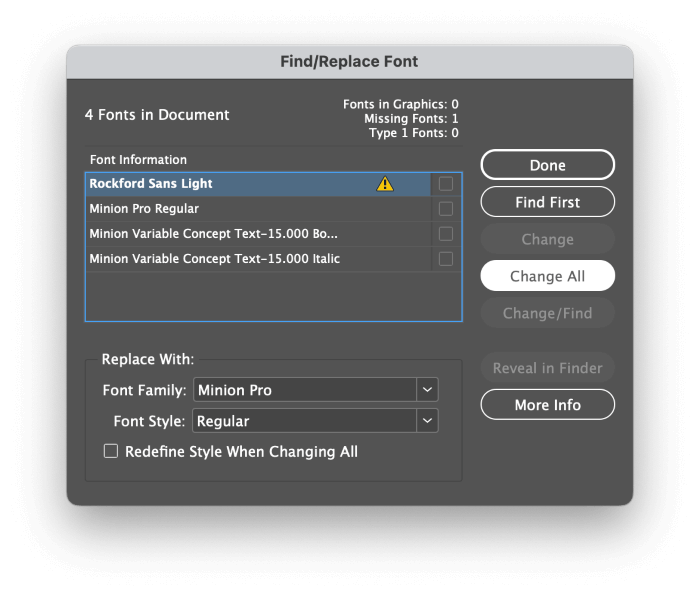
Select the missing font from the list, choose a replacement font in the Replace With section, and click the Change All button.
Where is the Fonts Folder in InDesign?
Adobe InDesign works with the fonts that are installed on your operating system, so it doesn’t need to use its own dedicated Fonts folder. By default, the InDesign fonts folder is empty, and it usually makes much more sense to install fonts for your entire operating system instead of just InDesign.
If you still need to access the InDesign fonts folder, here’s where it can be found:
On macOS: Applications -> Adobe Indesign 2022 (or whichever release you’re using) -> Fonts
On Windows 10: C:\Program Files\Adobe\Adobe InDesign CC 2022\Fonts
You can copy and paste font files into this folder if you want them to be exclusively available in InDesign, and not in any other apps on your computer.
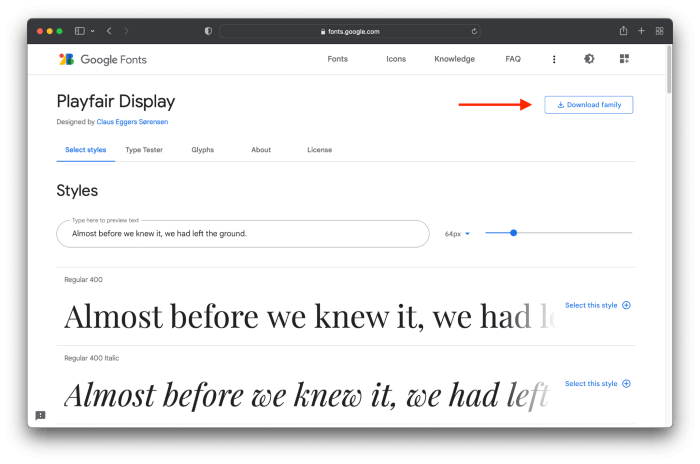
How Do I Add Google Fonts to InDesign?
Adding Google Fonts to InDesign is just as easy as adding any other downloaded font. Visit the Google Fonts website here, and select a font you want to use in InDesign. Click the Download Family button in the top right of the page (shown below), and save the ZIP file.
Extract the font files from the ZIP file, and then install them using the steps in the “Adding Downloaded Fonts to InDesign” section earlier in the post.
A Final Word
That’s almost everything there is to know about how to add fonts to InDesign! The world of typography is so much larger than what most people realize, and adding new fonts to your collection is a great way to expand your design skills.
Happy typesetting!