
Do you want to add a drop shadow to your design in Adobe Illustrator but don’t know how? Fear not. You can add a drop shadow easily with Effect > Stylize > Drop Shadow. All you need is a couple of minutes to spare.
My name is Elianna. I have a Bachelor of Fine Arts in Illustration and used Adobe Illustrator for more than six years. I’ve used Adobe Illustrator to create vector illustrations in my academic and professional career.
In this post, I will show you how to add a drop shadow to your design in Adobe Illustrator so you can troubleshoot less, and design more.
Let’s get into it!
Table of Contents
Key Takeaways
- A drop shadow is a visual effect that simulates the appearance of a cast shadow and makes objects appear as if they are “hovering” over a background.
- You can add a drop shadow in Adobe Illustrator using Effect > Stylize > Drop Shadow.
- To edit your drop shadow after applying it to an object, open the Properties panel in Windows > Properties. Then select your object and click on Drop Shadow in the appearance section of the Properties panel.
- Click on the trashcan icon on Drop Shadow in the Properties panel to delete your drop shadow.
- To convert your drop shadows to a path use Object > Expand Appearance and ungroup your objects.
What is a Drop Shadow in Adobe Illustrator
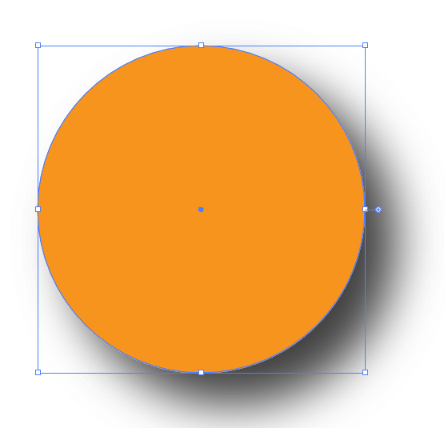
In digital design, a drop shadow is a visual effect that simulates the appearance of a cast shadow under an object. This effect is often used to distinguish objects or text from one another or to give a sense of perspective and 3D to a design.
Drop shadows often make an object appear as if it is “hovering” or “floating” above a background.
Here is an example of a drop shadow applied to an object in Adobe Illustrator: ew
How to Add Drop Shadow in Adobe Illustrator
Now that you know what a drop shadow is, here is how to create one in Adobe Illustrator.
Step 1: Open your document in Adobe Illustrator.
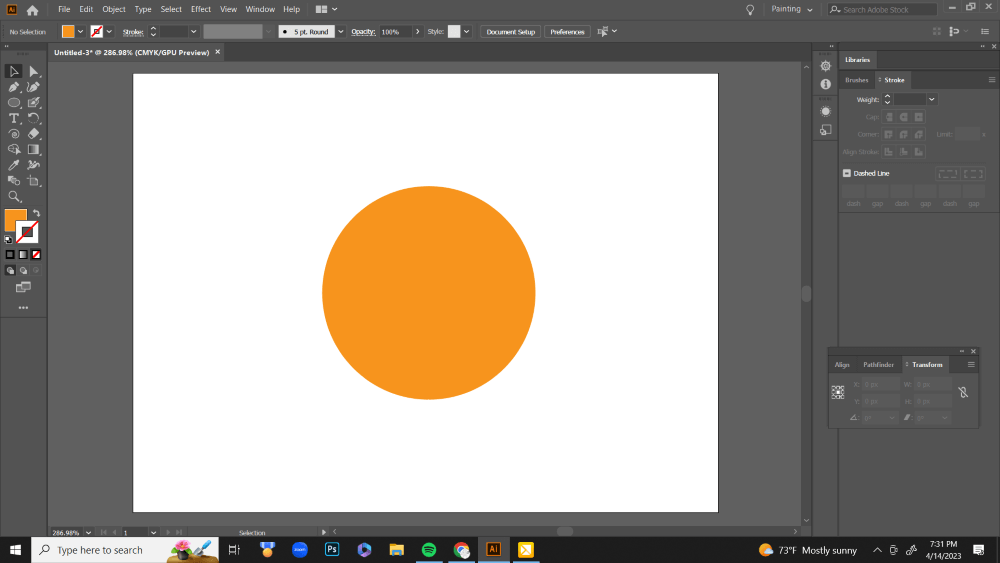
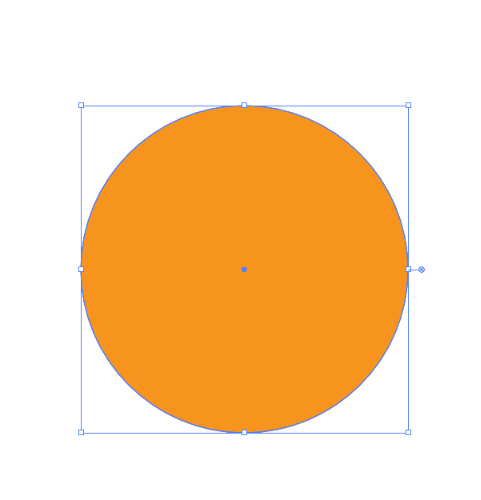
Step 2: Click to select the object that you would like to apply the drop shadow to.
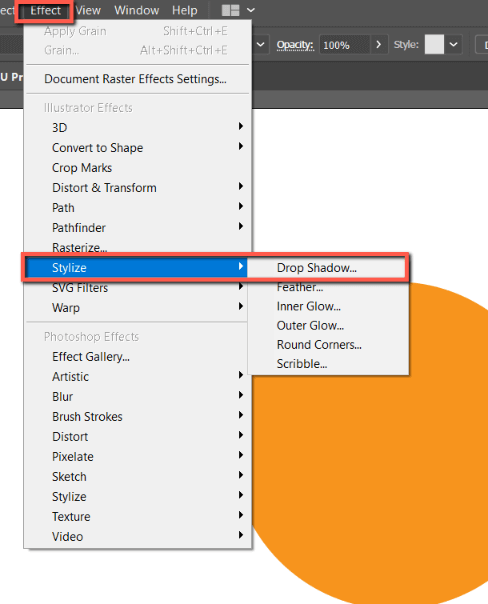
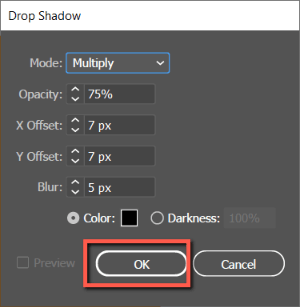
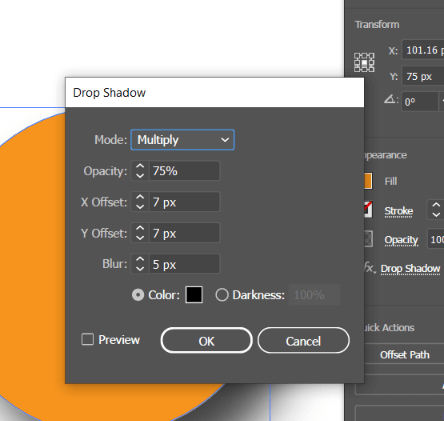
Step 3: Click on Effect > Stylize and choose Drop Shadow. This will open the Drop Shadow Menu. Modify them to your preferences.
Note: Make sure to check the Preview box to view live edits to your drop shadow.
| Mode | Modifies the blending mode of the drop shadow |
| Opacity | Modifies the percentage of the opacity of the drop shadow |
| X Offset and Y Offset | Specify the distance the drop shadow will be offset from the selected object. |
| Blur | Specifies the distance from the drop shadow where blurring occurs. Illustrator creates a raster object to make the blur |
| Color | Modifies the color of the drop shadow |
| Darkness | Modifies the percentage of black added to the drop shadow. A value of 0% will create a drop shadow that is the same color as the selected object. A value of 100% on an object with a black stroke will create a black drop shadow. |
Step 4: Once you’re happy with the drop shadow effect. Click OK.
Enjoy! The drop shadow has now been added to your object.

How to Edit and Delete Drop Shadows in Adobe Illustrator
Congratulations! You know how to create a drop shadow in Adobe Illustrator. But how do you edit one after applying it to your object? Here’s how:
Step 1: Select the object that contains the drop shadow using the Selection Tool.
Step 2: Select Windows > Properties. This will open the Properties panel.
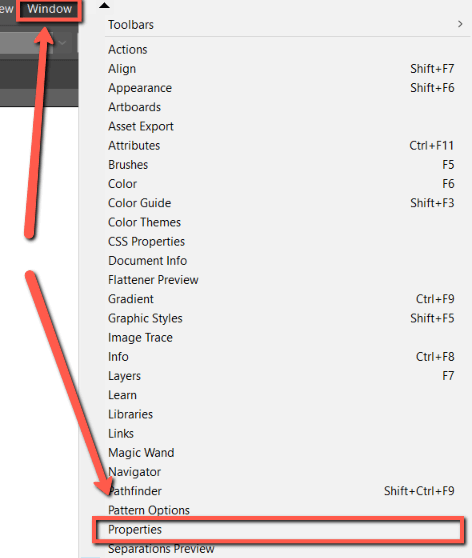
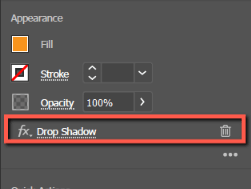
Step 3: Under Appearance, locate the Fx tab. You will see Drop Shadow. Click on it.
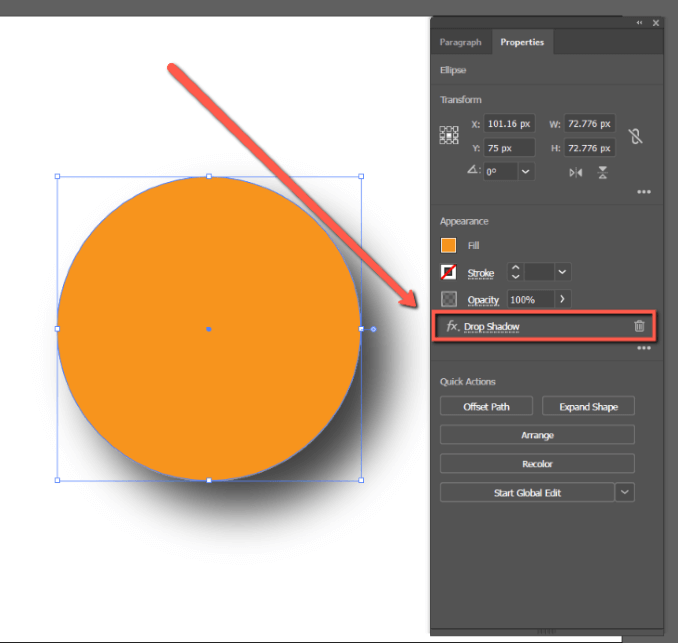
Step 4: Once you click on Drop Shadow, it will reopen the Drop Shadow menu and you can edit the drop shadow as you want.
Step 5: When you are done, click OK.
If you don’t want the drop shadow effect anymore, you can click on the Trashcan icon to delete your drop shadow.
How to Add Drop Shadows to a Path in Adobe Illustrator
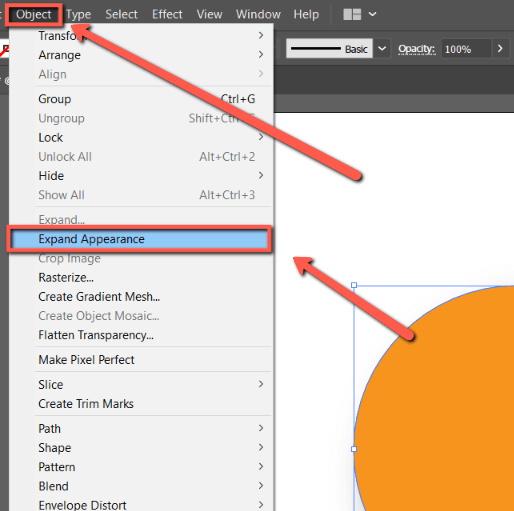
If you are satisfied with the look of your drop shadow and would like to finalize your design by converting your drop shadows to a path, you can do so easily through Object > Expand Appearance. Here’s how:
Step 1: Click on the object that contains the drop shadow you would like to convert to a path.
Step 2: Click on Object > Expand Appearance.
Step 3: Select your object and drop shadow and right-click. Select Ungroup.
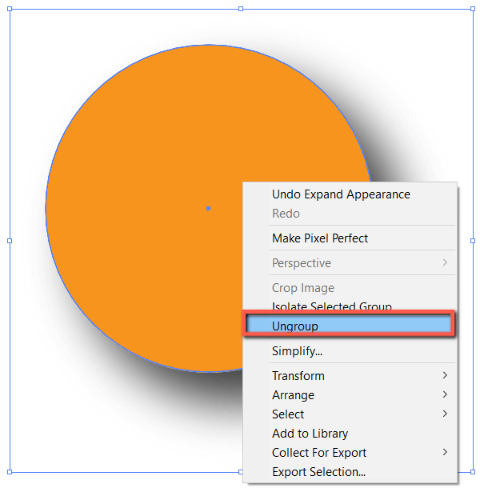
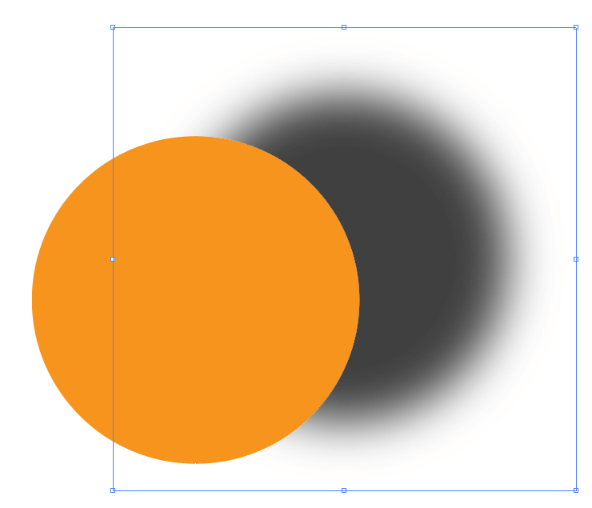
Step 4: You will now be able to move your drop shadow independently from your object.
Final Thoughts
Drop Shadows can add depth and visual interest to a piece and is easy with Effect > Stylize > Drop Shadow. There are a variety of adjustments you can make to further modify the mode, opacity, blur, offset, color, and darkness to suit your design needs.
Just be sure to check the Preview so you can view live edits.
Furthermore, you can use Windows > Properties to edit or delete your drop shadow after applying it to a selected object. You can also convert your drop shadow to a path through Object > Expand Appearance. Experiment for best results.
How did your drop shadows turn out? If you have any questions, feel free to ask me in the comments below.