
To delete audio tracks in Adobe Premiere Pro, select the audio track in the timeline you want to delete. Right-click on the selected track and choose “Delete” from the menu.
My name is David, and I’m a video editor. I’ve worked with many brands taking movies and audio projects. I use Adobe Premiere Pro for all my projects.
In this article, I will explain how to add audio tracks, delete an audio track, empty audio tracks, a particular section from an audio clip without affecting the video, how to add multiple audio tracks, and finally, how to export a video without audio.
Table of Contents
- How to Delete an Audio Track in Premiere Pro
- How to Add an Audio Track in Adobe Premiere Pro
- How to Delete Audio from a Video in Adobe Premiere Pro
- How to Delete Empty Tracks in Adobe Premiere Pro
- Delete a Particular Section from an Audio Clip without Affecting the Video
- How to Add Multiple Tracks in Adobe Premiere Pro
- How to Export Video without Audio in Premiere Pro
- Conclusion
How to Delete an Audio Track in Premiere Pro
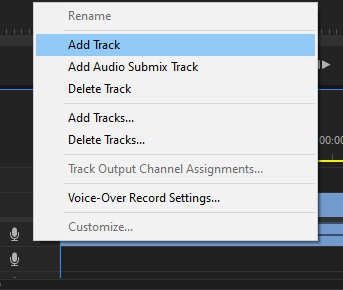
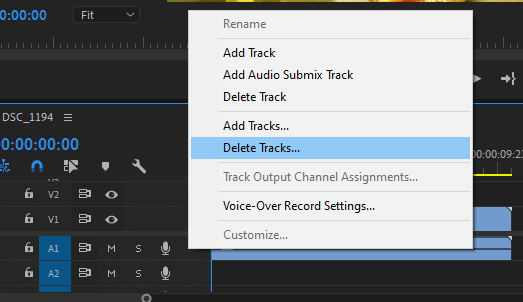
To delete tracks, right-click an empty spot in the track you intend to delete and choose Delete Track from the pop-up menu. This will immediately delete the track.

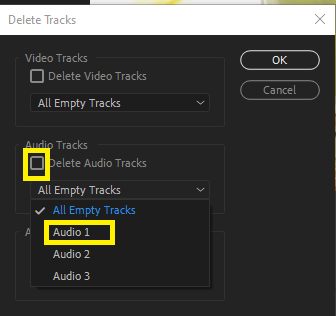
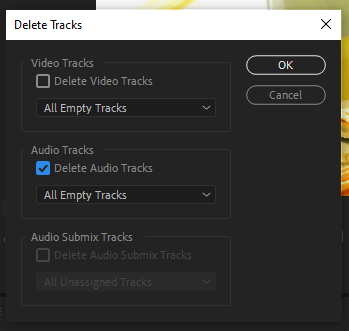
You will see the “Delete Tracks” window. To remove a track(s), check Delete Video Tracks or Delete Audio Tracks for any track deletion.
Now, select which track you want to remove from the dropdown. For instance: Audio 1, Audio 2, or All Empty Tracks.
How to Add an Audio Track in Adobe Premiere Pro
The easiest and fastest way to add an audio track is to grab an audio clip in the timeline, then drag it below the rest of the audio tracks and the Master track.
When you release your mouse, a new audio track will be created automatically.
Using the Add Tracks Tool
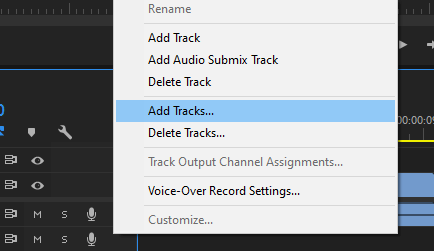
Another way to make new tracks in Premiere Pro is to use the Add Tracks tool. Select Add Track from the Timeline panel’s right-click menu.
The new audio track will appear immediately in your timeline when you click on the audio timeline.
How to Delete Audio from a Video in Adobe Premiere Pro
The first step is to right-click on the video clip in the timeline and select Unlink. This effectively separates the audio and video tracks, making it much easier to deal separately with the audio portion of your clip without affecting the video itself.
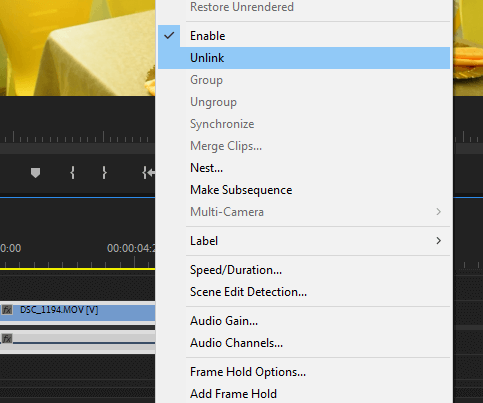
Using the Unlink Function
Another way to separate is to use the unlink function by selecting it to unlink.
After that, click on the audio, then press the Delete key on your keyboard.
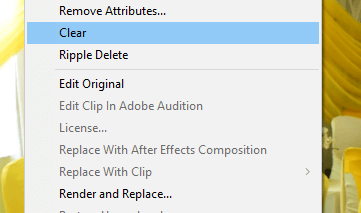
Alternatively, you may right-click on the audio layer that appeared in your timeline after you hit Unlink and then select the Clear option from the menu that displays. In any case, the audio will be erased from your movie.
How to Delete Empty Tracks in Adobe Premiere Pro
If you wish to tidy up your timeline by eliminating useless audio tracks, you may do it in a few simple steps by just following these processes: Right-click in the track header box and select “Delete Tracks.”
Choose “Delete Tracks” and “Delete Audio Tracks” from the new box to delete audio tracks. Take notice of the bottom section that says “All Empty Tracks,” Make sure you click it and hit OK.
Delete a Particular Section from an Audio Clip without Affecting the Video
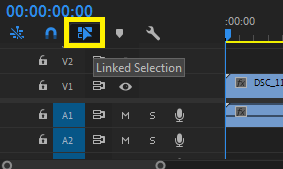
Deleting a particular section from an audio clip without affecting the video can only be easily done when you separate your audio and video files. You can also use the technique of locking the video layer while leaving the audio layer unlocked.
Move the playhead bar to where you want to start the delete from, and press C on your keyboard to select the cut tool.
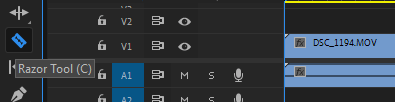
Start by cutting the unwanted parts just as you cut things with your kitchen knife.

How to Add Multiple Tracks in Adobe Premiere Pro
Adding more audio tracks can help you organize your project and layer audio clips. Audio layering is vital for creating complex soundscapes, giving your project a fuller, more professional sound.
For example, you could layer music, dialogue, and sound effects to create a unique audio mix. To add multiple tracks, Select Add Tracks from the track header menu.
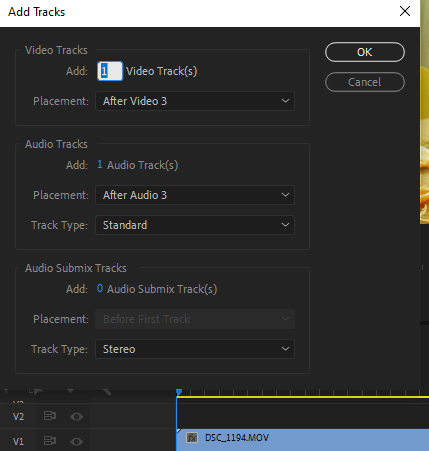
The Tracks dialog box will then appear, where you may specify the number of audio tracks to add and where they should be placed. Following that, click “Okay.”
How to Export Video without Audio in Premiere Pro
Exporting video without audio is often done to create a video that can be used as a background or visual aid to accompany audio from an external source which you can use in a video project or for a presentation or advertisement.
Exporting video without audio also allows for more flexibility in the final product, as audio can be added, changed, or removed at any time.
Therefore, exporting without audio is very simple. Once you finish with your editing process, Ctrl+M to export. Or you can navigate to File > Export > Media.
In the dialogue box, uncheck the export audio part.

Conclusion
Deleting an audio track in Adobe Premiere Pro is straightforward. Start by selecting the audio track in the timeline, then right-click and select “Delete.” The audio track will then be removed from the timeline.
You can also delete audio tracks by clicking the “Delete” button in the Audio Track Mixer. You can easily delete an audio track in Adobe Premiere Pro with a few simple steps. Are you finding it challenging?