
InDesign is often used to set large amounts of text, but as any dedicated reader will tell you, line length has a huge impact on a document’s readability. Lines that are too long cause the eye to lose its place within the text, and over time this can cause eye strain and frustration in your readers.
Columns are a great solution to this problem, and InDesign has several different ways you can add them to your layouts. You can add columns as non-printing guides, within a primary text frame, or as part of an individual text frame, although the process for each method is slightly different.
Table of Contents
How to Create Text Columns in InDesign
The easiest method to add columns in InDesign is to add them to a single text frame. This technique works best for short, simple documents with a low page count, and it isn’t always considered ‘best practice,’ but it gets you working with columns as quickly as possible.
In your InDesign document, create a text frame on the desired page using the Type tool and input your text. If you just want to experiment with the method, you can also fill the frame with placeholder text by opening the Type menu and selecting Fill with Placeholder Text.

With the text frame still selected, open the Object menu and select Text Frame Options. You can also use the keyboard shortcut Command + B (use Ctrl + B if you’re using InDesign on a PC), or right-click the text frame and select Text Frame Options from the popup menu.
You can even hold down the Option key (use Alt on a PC) and double-click anywhere within the text frame.
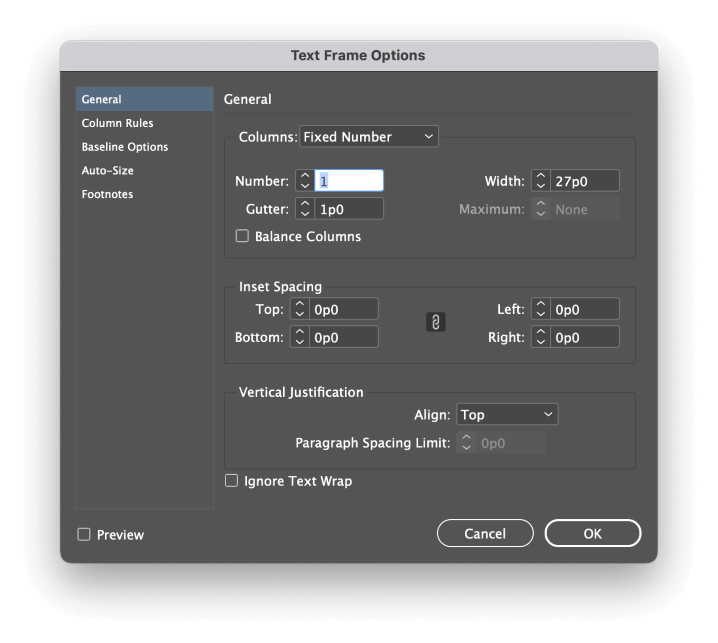
InDesign will open the Text Frame Options dialog window, as shown above. The Columns section of the General tab allows you to add columns to your text frame, while the Column Rules tab allows you to add and customize ruled dividers between your columns.
Column rules can be useful when you’re forced to use very narrow gutter sizes since they help prevent the reader’s eye from jumping between columns accidentally.
Within the Columns section of the General tab, you can select from three column types: Fixed Number, Fixed Width, or Flexible Width.
Typically, columns are added using the Fixed Number option. This allows you to specify the number of columns and the size of the space between them, known as the gutter, and InDesign will calculate the width of your columns automatically based on the total size of your text frame.
The Balance Columns option allows you to evenly divide smaller passages of text into two or more columns, instead of having one full column and another only partially filled.
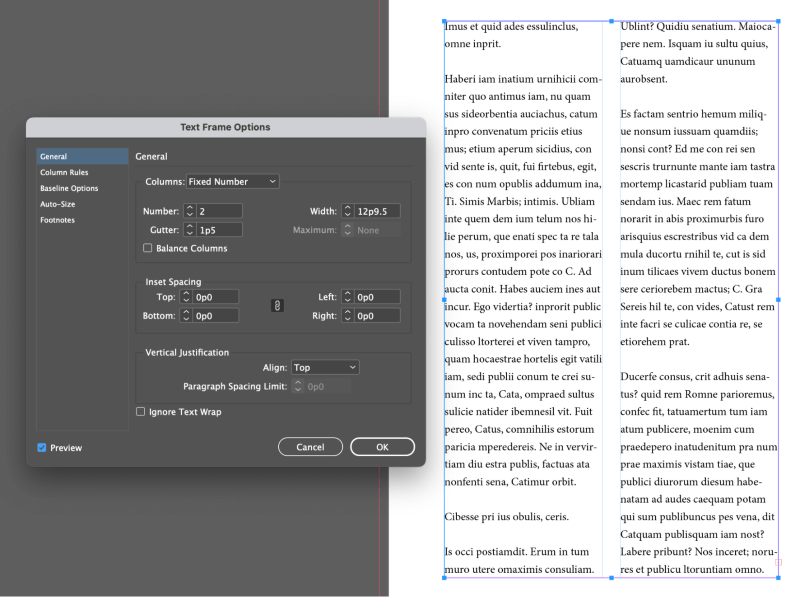
Be sure to enable the Preview checkbox so that you can see your results before clicking OK.
How to Add Column Guides to an InDesign Document
If you need to add columns to every single page of a long InDesign document, then the fastest method is to configure your column setup during the new document creation process.
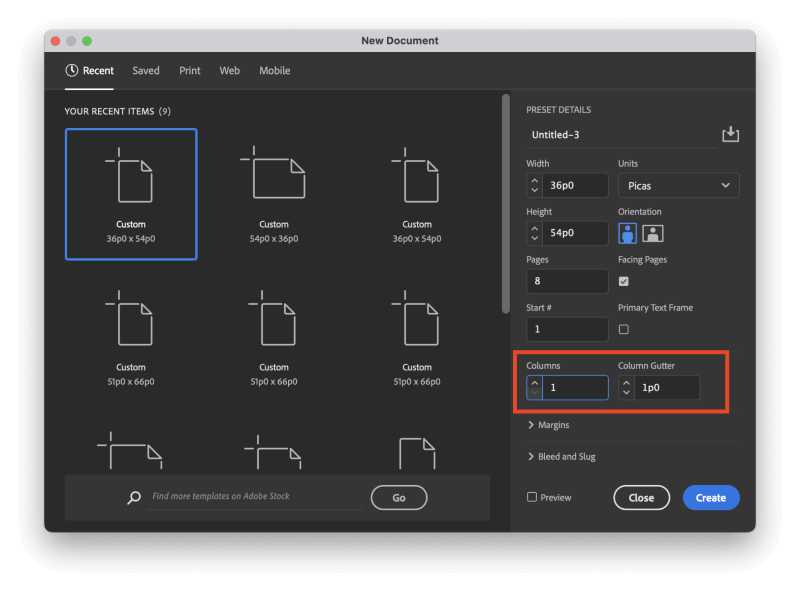
In the New Document window, locate the Columns section, as highlighted above. You can specify the number of columns as well as the column gutter size. The term column gutter refers to the width of the space between each column.
Before you click the Create button, there’s one final choice that will make a big difference in how your columns are applied: the Primary Text Frame option.
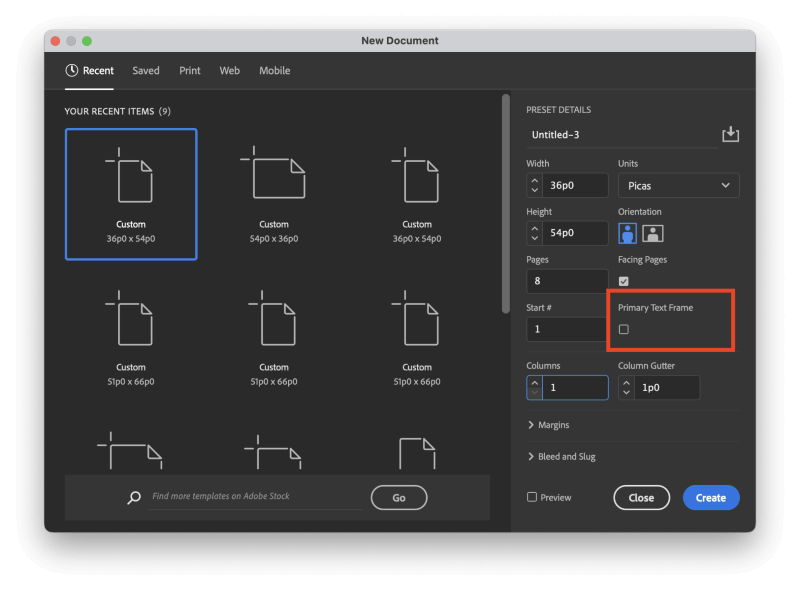
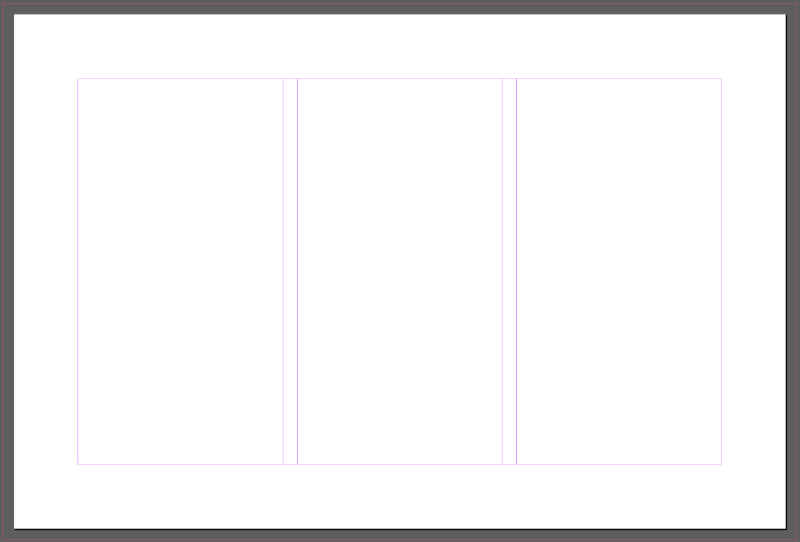
If you leave the Primary Text Frame option disabled, then your columns will only display as non-printing guides in the background of your document (see the example below).
If you enable the Primary Text Frame setting, then InDesign will automatically add a text frame to your parent pages pre-configured with the same column settings and enable smart text reflowing, which adds or removes pages to your document as needed to ensure that all added text is visible.

You may also want to check the Preview box in the New Document window so that you can get a visual preview of your column settings.
If you’ve already created your document and decided afterward that you need to add columns, you can still do so. Open the Pages panel, select all the pages that you want to add columns to, then open the Layout menu and click Margins and Columns.
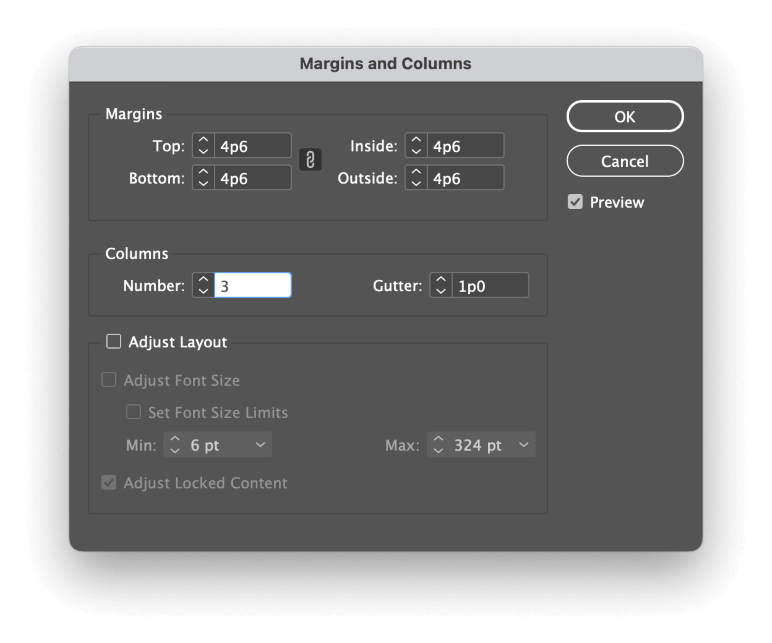
InDesign will open the Margins and Columns dialog, allowing you to specify the number of columns and the column gutter size, just like in the New Document window.
Just remember that this will only affect your currently selected pages in the Pages panel, rather than the entire document as a whole.
Advanced Layouts with a Multi-Column Grid
One of the most popular page layout techniques is known as a ‘grid layout.’ Popularized by modernist designers, this technique divides the active text area of a page into multiple columns, typically ranging in number from 3 to 12, depending on the required complexity (and the designer’s patience, of course).
These columns aren’t necessarily used the same way as the standard text columns mentioned earlier, although they are often aligned with text columns.
Instead, the columns in a multi-column grid layout act as guides, providing a blend of flexibility and consistency when positioning individual page elements.
Actual text columns may span multiple columns of the grid layout while still matching parts of the underlying grid pattern, and other layout elements such as images and graphics can also be aligned to the grid.

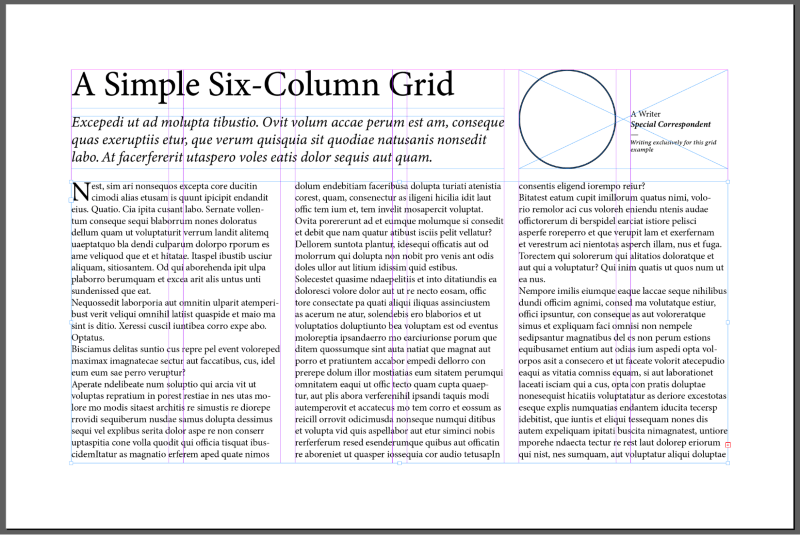
For example, look at the classic 6-column grid layout above showing the front page of the New York Times from 2014. Despite the fact that there is a consistent grid, there’s still quite a bit of flexibility in its application.
More complex grids require more setup work but also offer more flexibility in terms of layout positioning. You can read more about the NYT’s layout process here, in the article which also provided the image above.
A Final Word
That covers the basics of how to add columns in InDesign, whether you’re looking for document-wide columns, text frame columns, or you’re growing curious about grid-based design techniques.
But while you know all the basics now, grid-based design, in particular, takes a lot of practice to apply successfully!
Happy columnating!