
PaintTool SAI is primarily a drawing program that has limited blur effects. However, there is one native SAI function you can use to add blur effects to your drawings in the Filter menu.
My name is Elianna. I have a Bachelor of Fine Arts in Illustration and have been using PaintTool SAI for over seven years. I know everything there is to know about the program, and hopefully soon, you will too.
In this post, I will give you step-by-step instructions on how to add a blur effect to your drawing in PaintTool SAI.
There are three ways to blur objects in PaintTool SAI. Let’s Get into it!
Table of Contents
Key Takeaways
- Use Filter > Blur > Gaussian Blur to add a blur effect to your drawing.
- Use multiple opacity layers to simulate a Motion Blur in PaintTool SAI.
- PaintTool SAI Version 1 includes a Blur tool. Unfortunately, this tool was not integrated with Version 2.
Method 1: Adding Blur with Filter > Blur > Gaussian Blur
PaintTool SAI has one native feature to add blur to an image. This feature is located in the Filter dropdown menu and lets you add a Gaussian Blur to a target layer.
Follow the steps below to add blur in PaintTool SAI.
Step 1: Open your PaintTool SAI file.
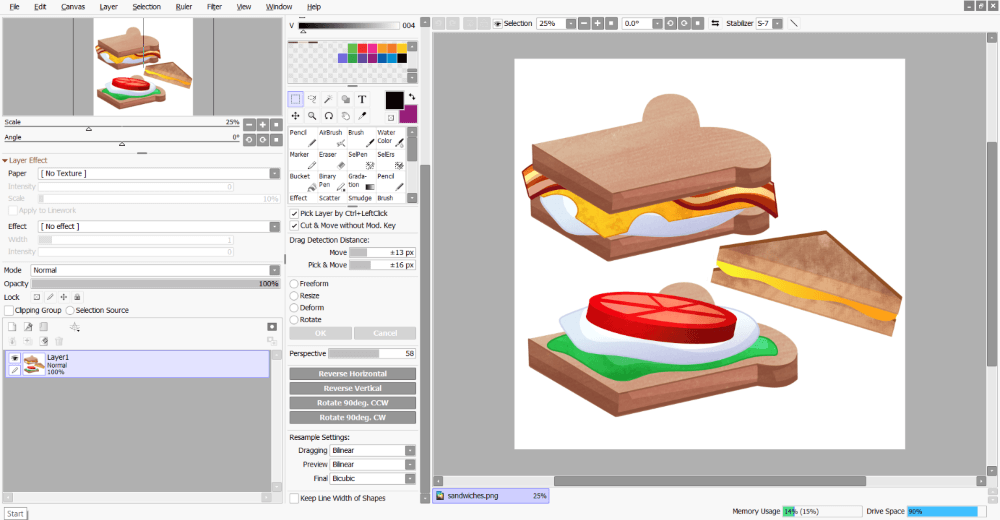
Step 2: Select the Layer you would like to Blur in the Layer Panel.

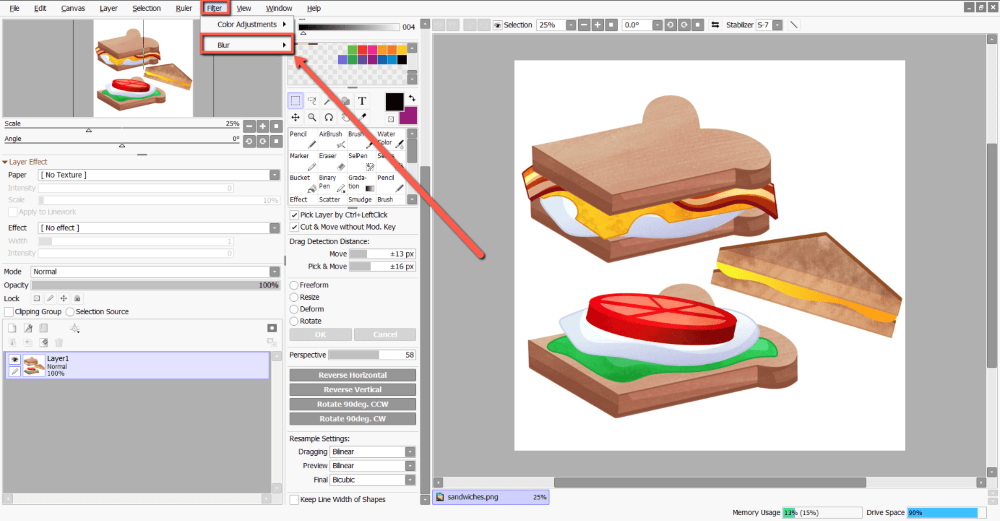
Step 3: Click on Filter and then select Blur.
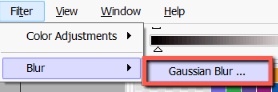
Step 4: Select Gaussian Blur.
Step 5: Edit your blur as desired. Make sure to check Preview so you can see your edits live.
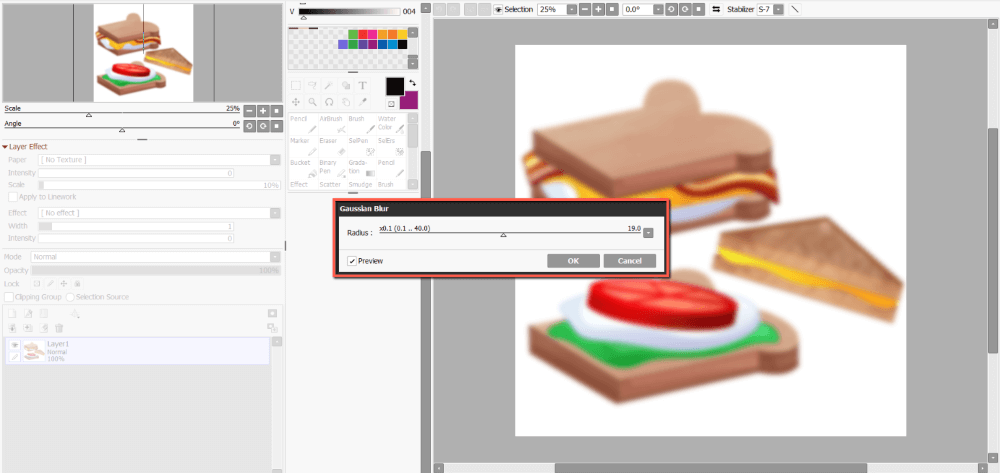
Step 6: Click Ok.

Enjoy!
Method 2: Use Opacity Layers to Create Motion Blurs
Although PaintTool SAI does not have a native feature to create motion blurs, you can manually create the effect through strategic uses of opacity layers.
Here’s how:
Step 1: Open your PaintTool SAI file.
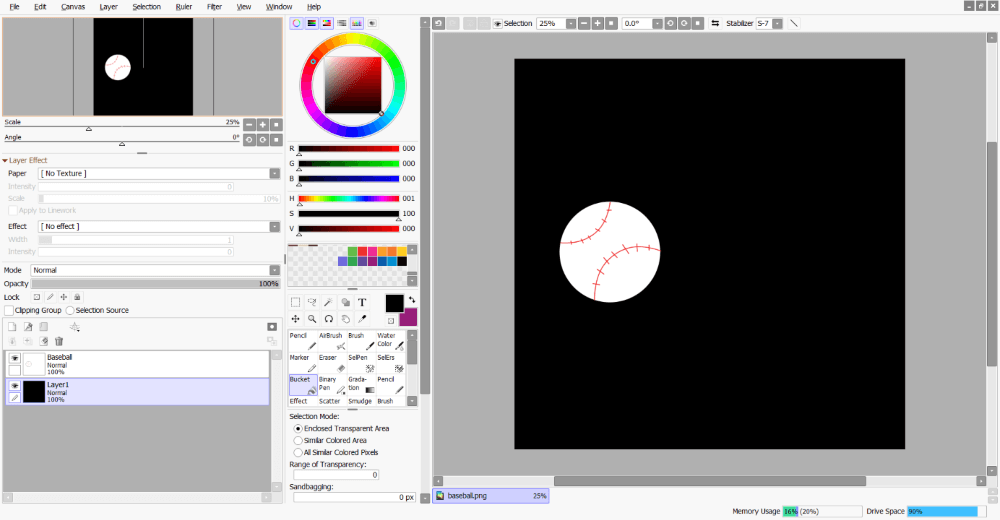
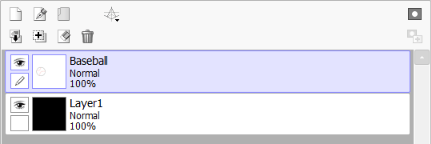
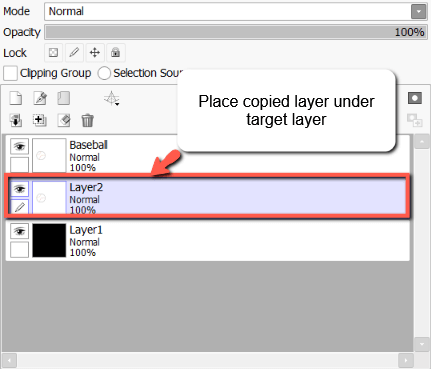
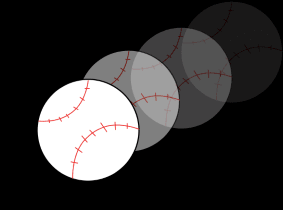
Step 2: Select the target layer you would like to create a motion blur with. In this example, I am using a Baseball.
Step 3: Copy and Paste the layer.
Step 4: Place your copied layer UNDER your target layer.
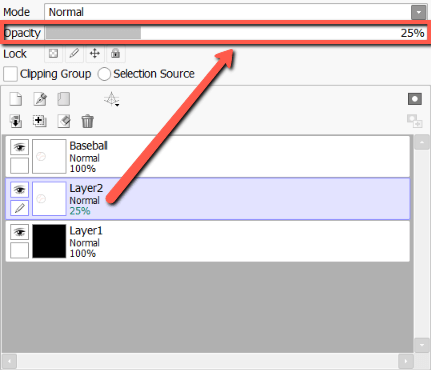
Step 5: Change the opacity of the layer to 25%.
Step 6: Reposition the layer so it slightly offsets the target layer.
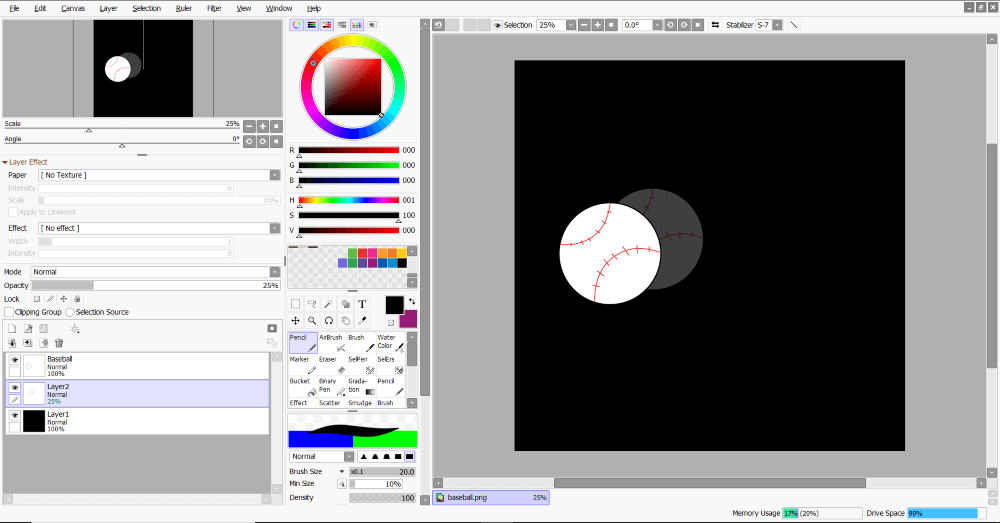
Step 7: Repeat these steps as many times as required, adjusting the opacities of your layers as needed to get your desired motion blur effect.

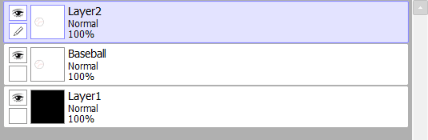
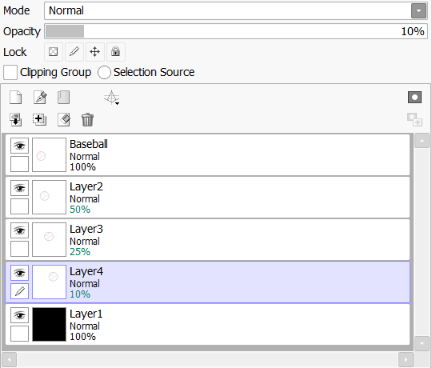
Here is a close-up of my final layers and their opacities.
Enjoy!
Method 3: Adding Blur with the Blur Tool
The Blur tool was a featured tool in PaintTool SAI version 1. Unfortunately, this tool was not integrated with Version 2, but the good news is you can recreate it!
Watch the video below to learn how to recreate the Blur Tool in PaintTool SAI Version 2.
Final Thoughts
Adding Blur in PaintTool Sai is easy, but limited. As a primary drawing software, PaintTool SAI prioritizes drawing features over effects. If you are looking for a variety of blur options, a program like Photoshop will be more suited for this purpose. I personally save my illustrations in SAI as a .psd and then add effects like Blur in Photoshop afterward.
How do you create blur effects? Do you prefer PaintTool SAI, Photoshop, or another software? Tell me in the comments below!