
Creating a design for print can be intimidating if you don’t know how to set up your document correctly. For example, when you send your design to print, in most cases, you’ll need to add bleeds. Thankfully, adding bleed in Adobe Illustrator is easy with Document Setup.
My name is Elianna. I have a Bachelor of Fine Arts in Illustration and have used Adobe Illustrator for over six years. In my role as an art director, I use bleed to ensure that designs are printer-ready.
In this post, I will show you how to add bleed in Adobe Illustrator so you can send your designs to the printer with confidence. I will also show you how to view your designs in Trim mode, so you can proof your work after adding bleeds.
Let’s get into it!
Table of Contents
Key Takeaways
- Bleed refers to the amount of artwork that falls outside of the canvas/artboard.
- You can find the options for bleed in the Bleed sections of File > New and File > Document Setup.
- A Press Bleed should be at least 18 points or 1/8th of an inch.
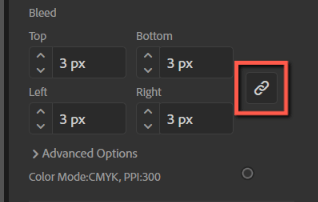
- To add bleed to only one or two sides of your document, click on the link icon to turn it off.
- To view what your designs will look like after they have been trimmed, use View > Trim View.
What is Bleed in Adobe Illustrator and Why Use Bleed
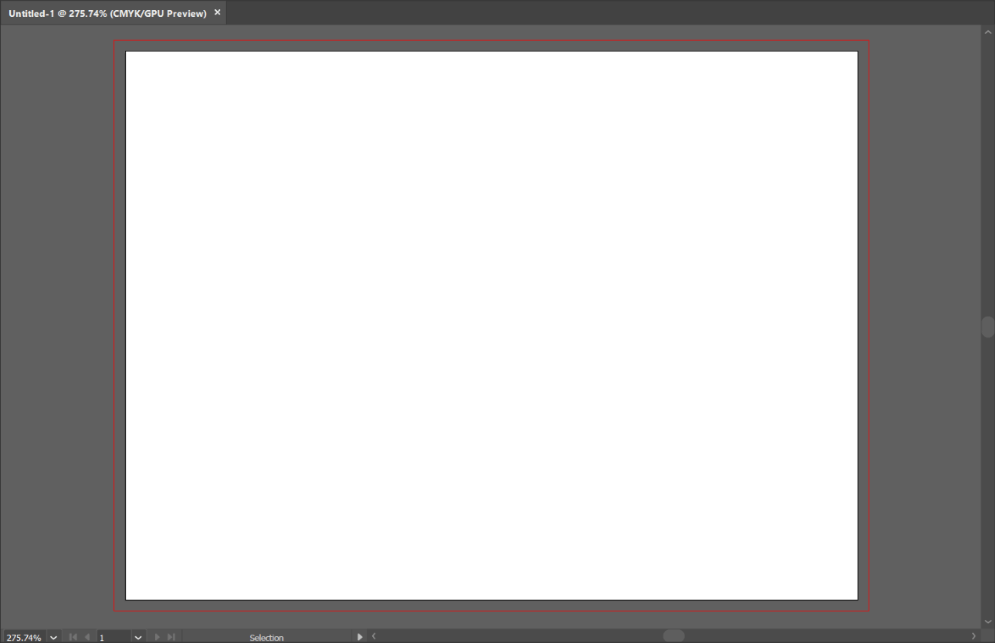
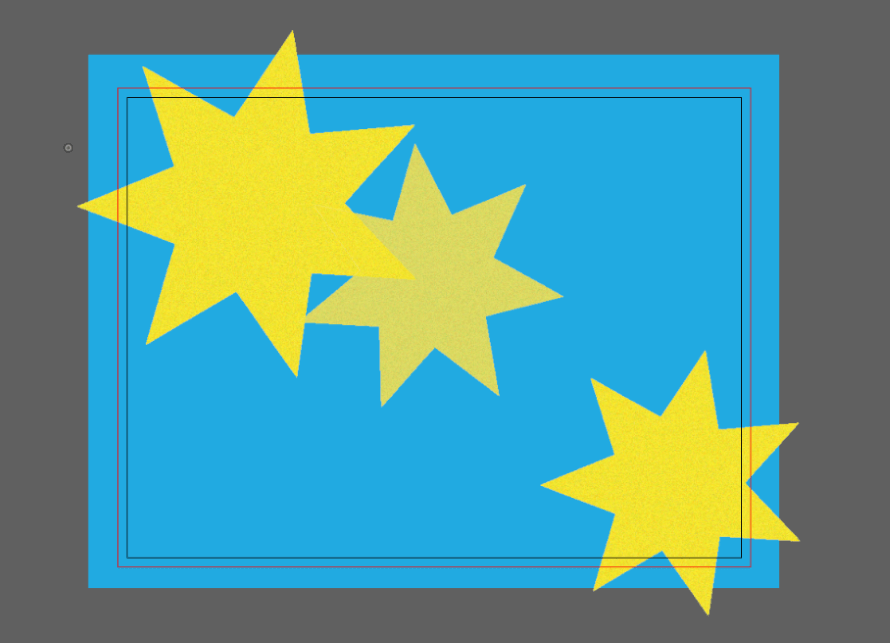
Bleed in Adobe Illustrator is represented by a red line outside of the artboard. Bleeds are included as a margin-or-error to ensure that ink is printed to the edge of the page in the event that the page is trimmed, or if it is required to be stripped into a keyline.
A Keyline is a boundary line that separates different colored areas of printing on a page. The keyline usually consists of a thin black or other dark color and provides an area for colors to be printed with variation in registration. The keyline helps to keep the type clean when printed.
Bleeds and Keylines help increase printer quality control. Increasing the bleed on a document makes Adobe Illustrator print more of your artwork beyond the trim line (the boundary where a printed page will be trimmed). It is important to note that increasing bleed will not increase, or change the boundary of trim lines.
The size of the bleed you select for your document will depend heavily on its purpose. Here are some considerations for bleed:
- Press Bleed: This is a bleed for an image that extends past the edge of a page. A press bleed should be at least 18 points or 1/8th of an inch.
- For a Keyline: bleed need not be more than 2 or 3 points.
The bleed for your document will depend on your product, the printer it’s printed with, and other factors. Consult your print shop for bleed requirements.
How to Add Bleed to a New Document in Adobe Illustrator
You can easily add: Bleed to new documents in Adobe Illustrator. Here’s how:
Step 1: Open Adobe Illustrator and click File > New.
Step 2: Input your desired document specs and select your measurement unit.
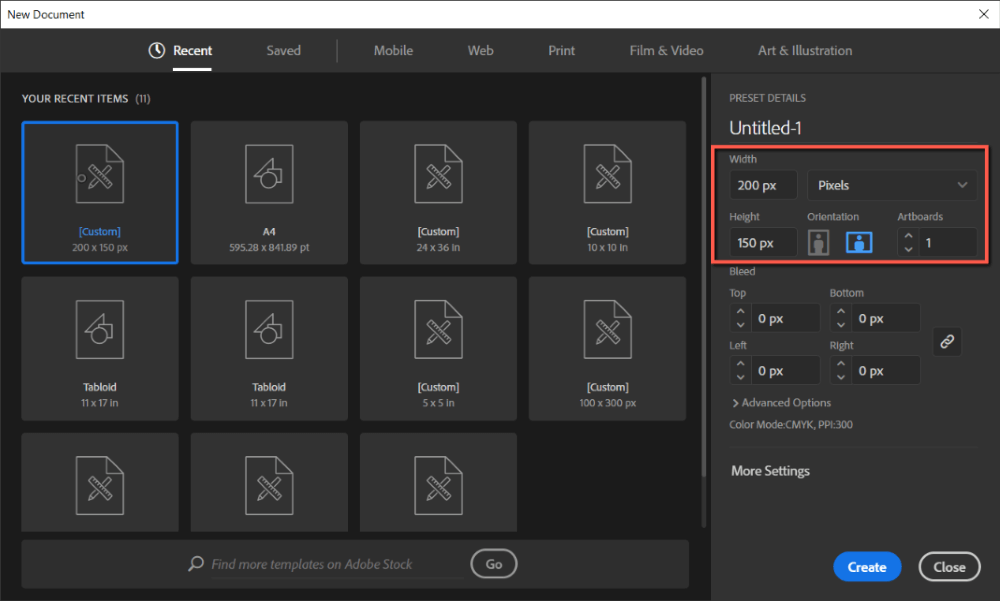
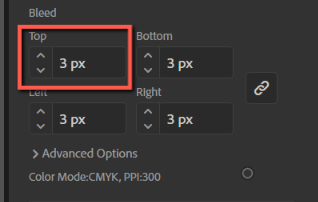
Step 3: Locate the Bleed section and input the bleed value. In Top, click the arrow up to add the bleed you desire. This will apply the bleed to all sides of the document.
If you want to add bleed to only one or two sides of your document, click on the link icon to turn it off. Now you can input bleed values on each side separately.
When you are satisfied with your bleed click Create and your new document will be created with bleed.

Your bleed will now appear as a red line around the sides of your artboard.
How to Add Bleed To an Existing Document in Adobe Illustrator
If you already have a design your would like to add bleed to. Don’t worry. You can add bleed to an existing document in the Document Setup menu. Here’s how:
Step 1: Open your document in Adobe Illustrator and click File > Document Setup.
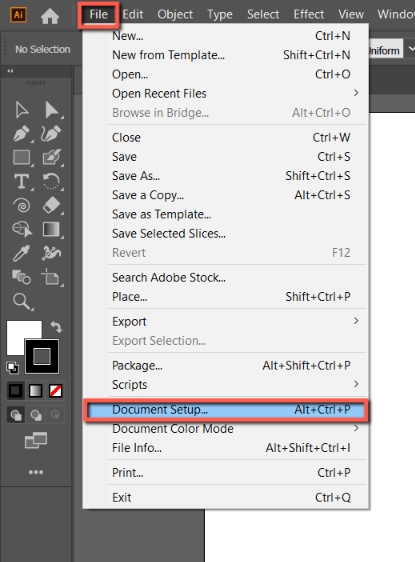
Step 2: Locate the Bleed Section and input the bleed value.
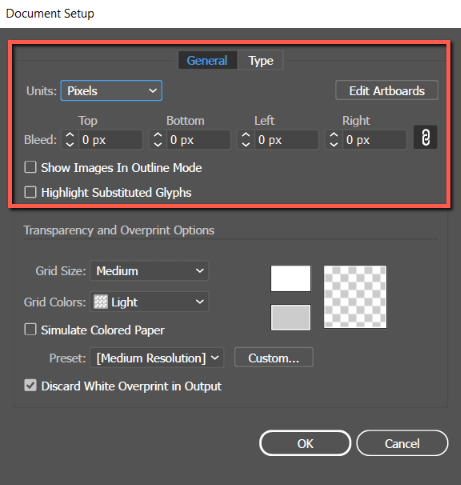
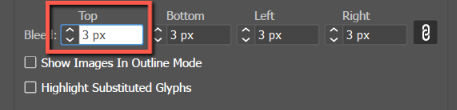
Following the same process as adding bleed to a new document, in Top, click the arrow up to add the bleed you desire. This will apply the bleed to all sides of the document.
Similar to the New Document settings, all bleed values are linked by default. To adjust bleed values separately, click on the link icon to turn it off.

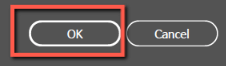
When you are satisfied with your bleed click OK.
Your bleed will now appear as a red line around the sides of your artboard.
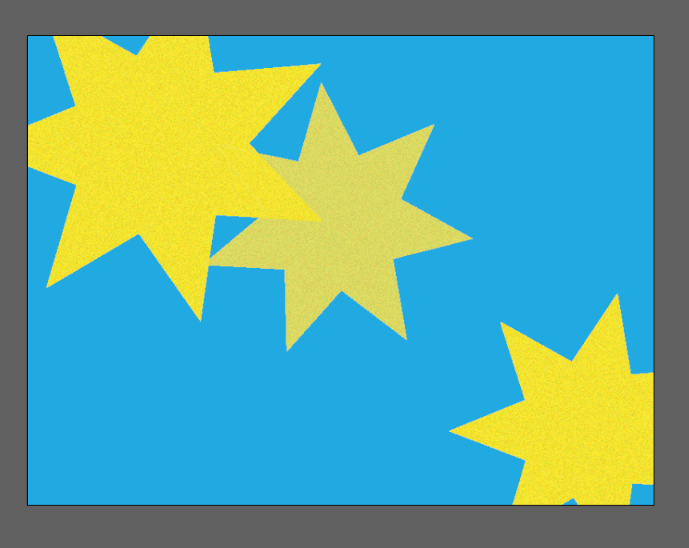
How to View Designs in Trim View in Adobe Illustrator
After adding bleed to your documents and finalizing your designs, you may want to check how the artwork will look after it’s been trimmed to further prove your work. You can do so with Trim View. Here’s how:
Step 1: Open your Adobe Illustrator Document with bleed.
Step 2: Click on View > Trim View.
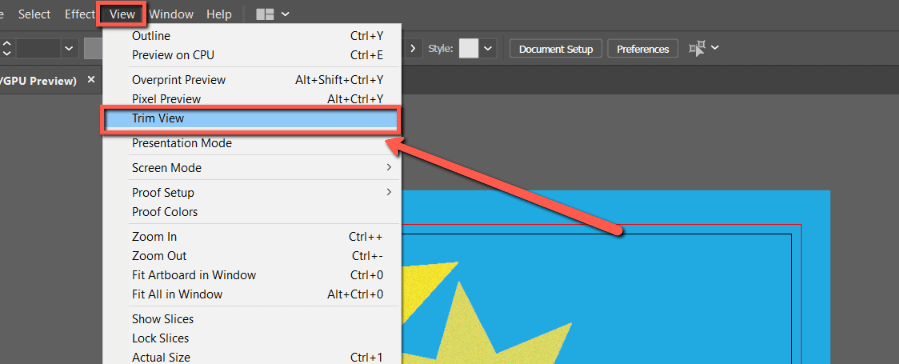
You will now be able to see how your designs will look after they have been trimmed with bleed.
Final Thoughts
You can add or modify bleed from the New Document and Document Setup menu in Adobe Illustrator. Just remember to uncheck the link icon if you want to manually adjust the bleed on various sides of your artboard.
To further proof your work and see how your designs will look after they have been trimmed, use Trim View. Knowing how these tools operate and their importance is essential for any Graphic Designer or Illustrator that aims for quality control in their work.
Did you add bleed to your document? Let me know in the comments below!