
3D models are one of Clip Studio’s standout features. They’re easy to pose and help create accurate, dynamic perspectives and poses. Plus, they aid in planning compositions and making creative choices even before sketching begins.
Hello, I’m Zoe, a freelance illustrator. One tool I absolutely love in Clip Studio Paint is 3D models. They make drawing practically any scene possible. I use them to maintain character consistency in stories, show unique perspectives, and achieve dramatic shading.
Using 3D is like learning from live models but in a modern and convenient way. Knowing how to use them can open up exciting possibilities and give you the confidence to tackle projects that once seemed overwhelming.
In this post, we’ll cover everything you need to know about working with 3D models, including how to use the position gizmo, camera settings, advanced sub-tool options, and customizing and posing 3D characters. I’ll also show you the full process of using 3D models to build a complete illustration, offering tips and tricks along the way.
Let’s dive in!
Table of Contents
Key Takeaways
- 3D models speed up sketching by instantly visualizing how your drawing fills the canvas.
- Download a variety of 3D models, characters, backgrounds, and poses on Clip Studio Assets, available in both free and paid options.
- Drag and drop external 3D models onto your canvas, provided they’re in .obj or .fbx format. Convert using software like Blender if needed.
- With Clip Studio Paint EX, effortlessly convert 3D models into lines and tones, with both raster and vector choices available.
Here’s the comprehensive guide to manipulating 3D objects in Clip Studio Paint and using them as models in your artwork.
3D Object Basics in Clip Studio Paint
Before we jump into the nitty-gritty of Clip Studio Paint’s 3D features, let’s begin by understanding how to place and move a 3D object on your canvas.
Position Gizmo
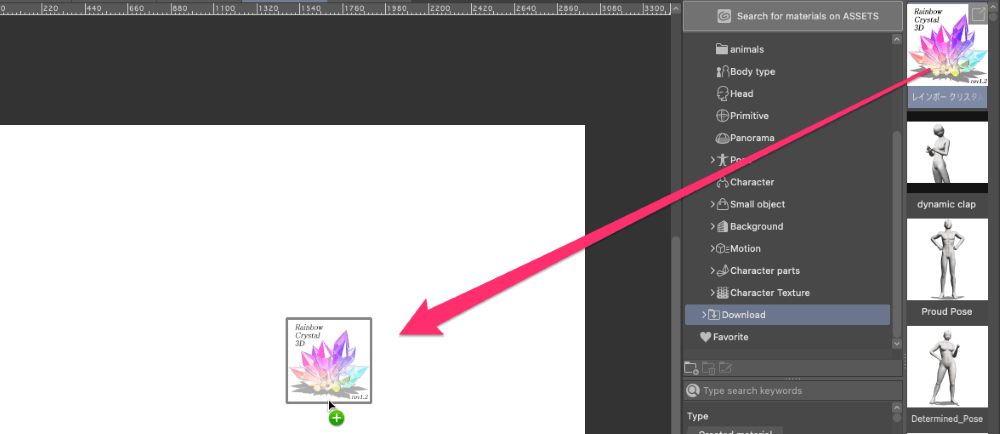
Step 1: To bring a 3D object into your artwork, just drag it from your computer or the Materials Library onto your canvas.
Step 2: Select the 3D layer containing your object.
Step 3: Click on the Operations Tool icon from the tools palette. A round controller with arrows and icons will appear above your 3D object.
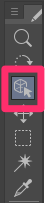
Let’s take a look at some of the options you now have access to with the gizmo:
- Grey Circle with Four Arrows: Adjust the size of your object to make it bigger or smaller.
- Arrows: Move your object across the canvas.
- Rotation Handles: These three circular lines allow you to rotate your object.
- Squares: Resize your object without proportion constraints.
Camera Settings
The Camera Icons enable you to adjust your view and explore your 3D object from different angles without making any changes to the object itself.

When you’re working with multiple objects, these camera controls influence the entire scene, unlike the position controls we discussed earlier, which target individual objects.
There are three camera options that you can maneuver:
- Rotate Camera: This lets you spin the camera around your object. Click and drag to rotate your view left or right, up or down.
- Pan Camera: Click and drag to glide your view horizontally or vertically.
- Zoom Camera: This icon controls your camera’s proximity to the object. Click and drag up to zoom in for a closer look or down to zoom out for a broader view.
3D Sub Tool Options in Clip Studio Paint
Even if the gizmo makes things intuitive, sometimes the basic controls aren’t enough. Let’s explore how you can achieve more precise adjustments.
Step 1: With your 3D layer selected, click on the Operations Tool.
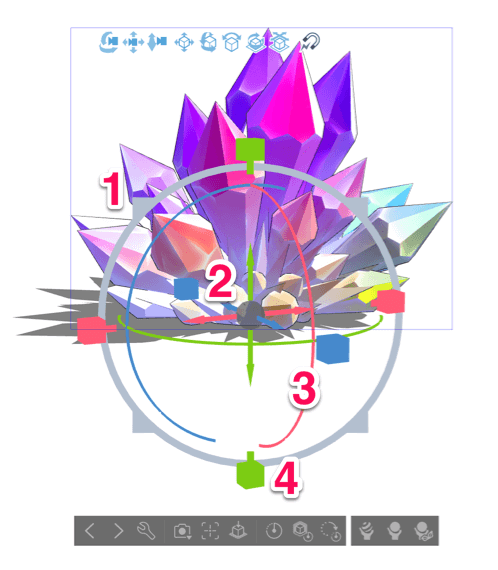
Step 2: Underneath your 3D model, click on the Wrench Icon. This opens up the 3D object Sub Tool Detail window, offering a range of advanced options.
Now, while we won’t venture into each and every option (since there’s quite a bit), let’s explore the ones you’re likely to find most useful:
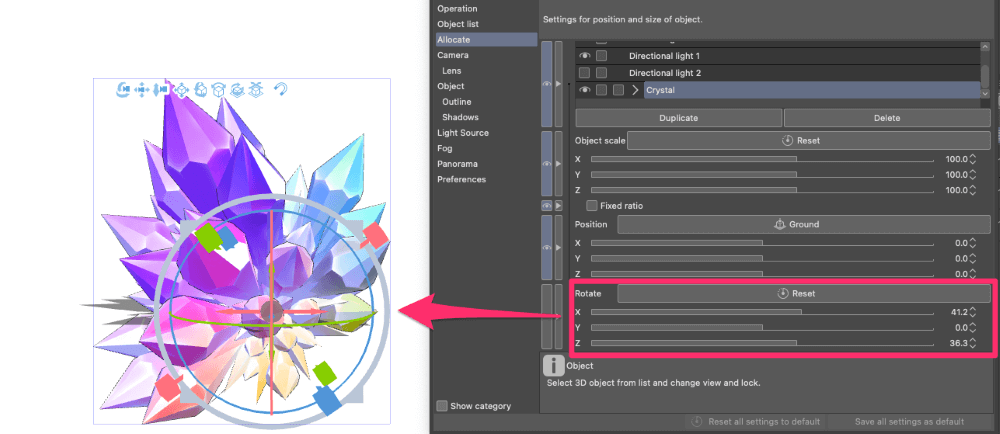
Allocate options:
This section offers a more detailed version of the options available on the gizmo. Here’s what you’ll find:
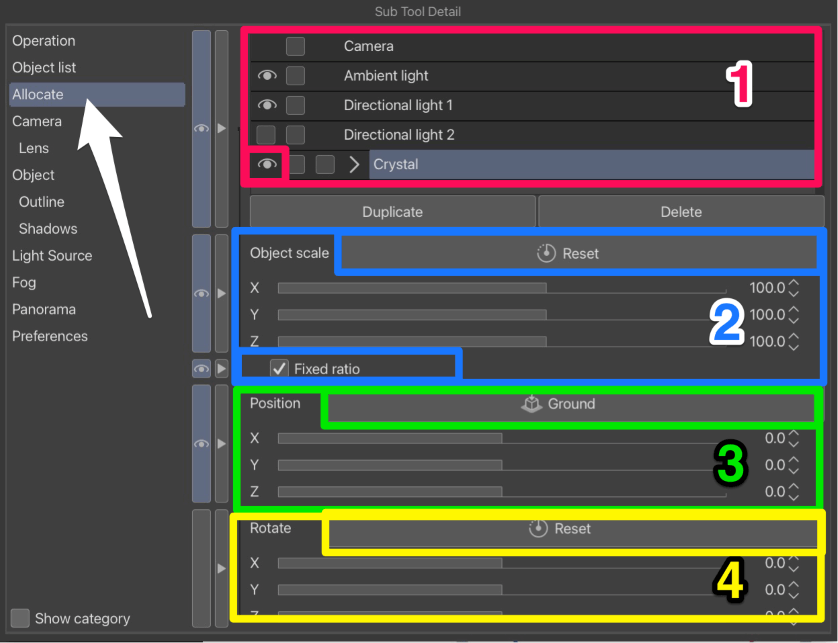
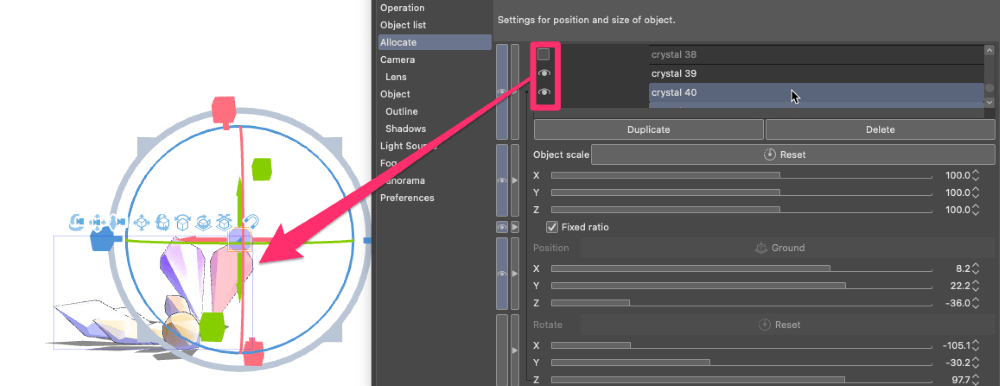
Object list: Use the object list to select the model you want to alter. Click the Eye Icon to hide or show models in your scene.
Object Scale lets you change the size of objects. It’s particularly helpful when objects you add to your canvas don’t quite match the right proportions.
What’s more, you can toggle the Fixed Ratio option. This works like the squares on the gizmo. Turning this off lets you freely change the dimensions without being stuck to the object’s original proportions.
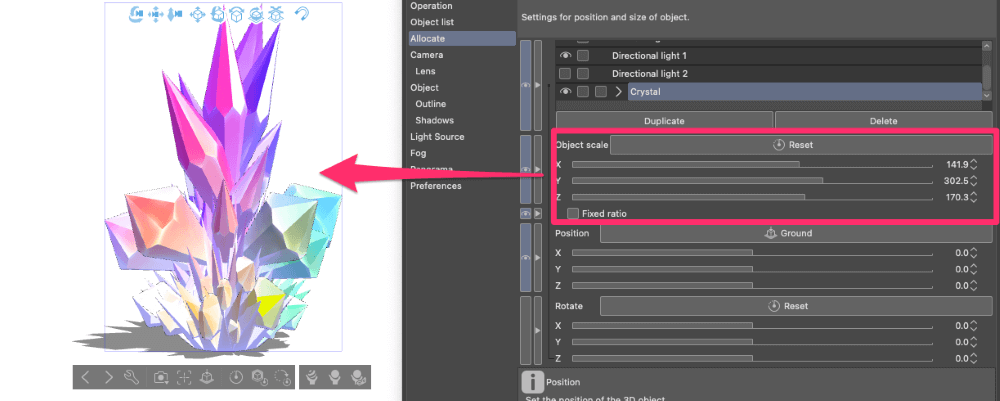
It’s always possible to revert to the object’s initial proportions with the reset button.
Position uses the arrows to shift things around, this feature lets you precisely position objects along the XYZ axes.
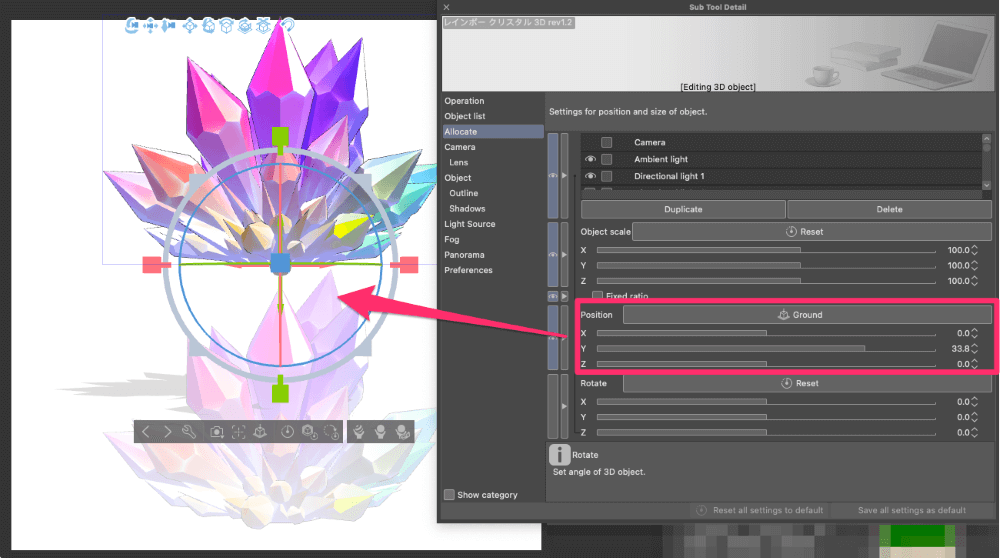
You also have the option to set your selected object upon your scene’s ground.
A quick reminder: X stands for horizontal, Y for vertical, and Z for depth or height.
Rotate: Just as you did with the rotation handles, these sliders allow you to pivot around the X, Y, and Z axes. If things get wonky, there’s a reset option.
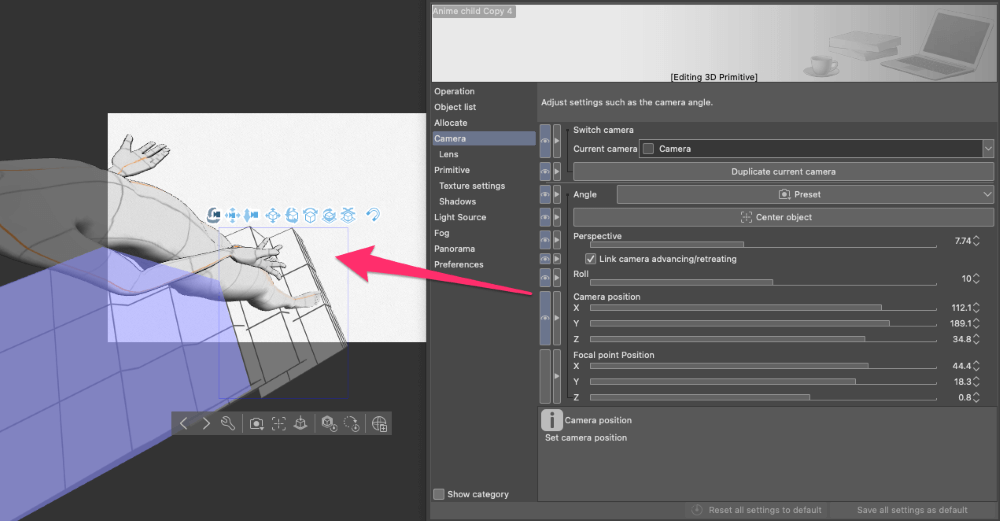
Camera Options
These settings are like tools in a photographer’s kit. They help you capture your scene just the way you want, whether it’s emphasizing details, changing angles, or adding a touch of excitement.
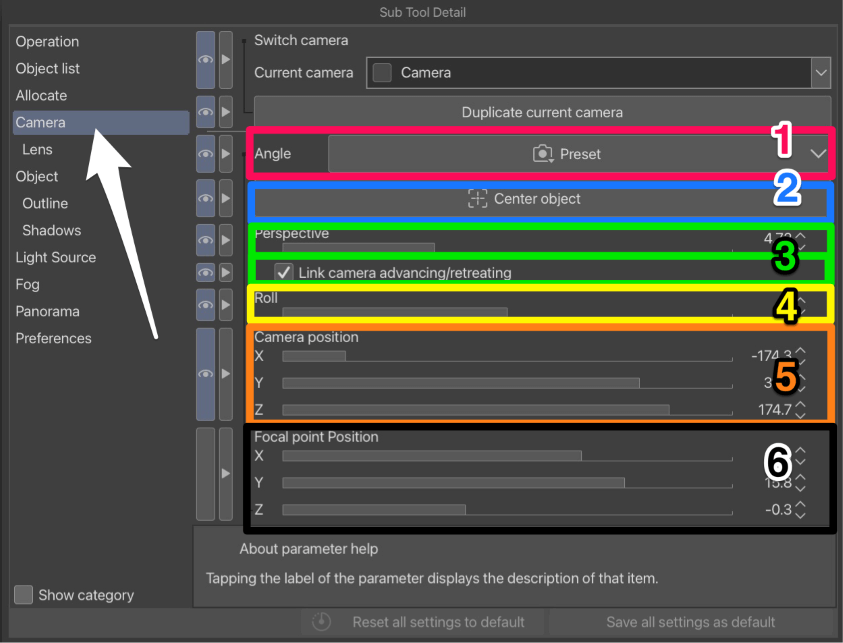
Angle: Clicking here reveals a list of pre-made camera views. Choose how to see your 3D objects, like from the front or the side.
This can be especially useful for webtoons, where different frames occur in the same setting. By picking a preset angle while selecting your character(s), you can swiftly switch views. It’s perfect for animating dialogue scenes without manually navigating through the entire scene each time.
Center Object ensures the object you’re focusing on lands right in the center of your view.
Perspective: This slider changes how far things seem in your scene. If you slide it to bigger values, it makes the scene seem deeper. If you slide it to smaller values, things look less deep and closer together.
If you’re after a dynamic scene, sliding it up can make things pop with exaggerated perspectives.
Note: With 3D drawing figures, you can enhance this effect by navigating to Manga Perspective, ticking the checkbox, and adjusting the slider.

With the Link Camera Advancing/Retreating option switched on, when you adjust the perspective, the camera moves too. When it’s off, you can change the values independently.
Camera Roll: Tilt the camera to show things at a slant. It can add a sense of dynamism to your scene and is particularly handy when you want to show something from an unusual angle.
Camera Position: Imagine there’s a cameraman in your scene. This is your way of picking where they stand to see things. Adjust the X, Y, and Z sliders to shift your viewpoint.
Focal Point Position controls where your camera is looking. If we go back to our cameraman, shifting these sliders means they’re staying in one place, but changing where they aim their camera.
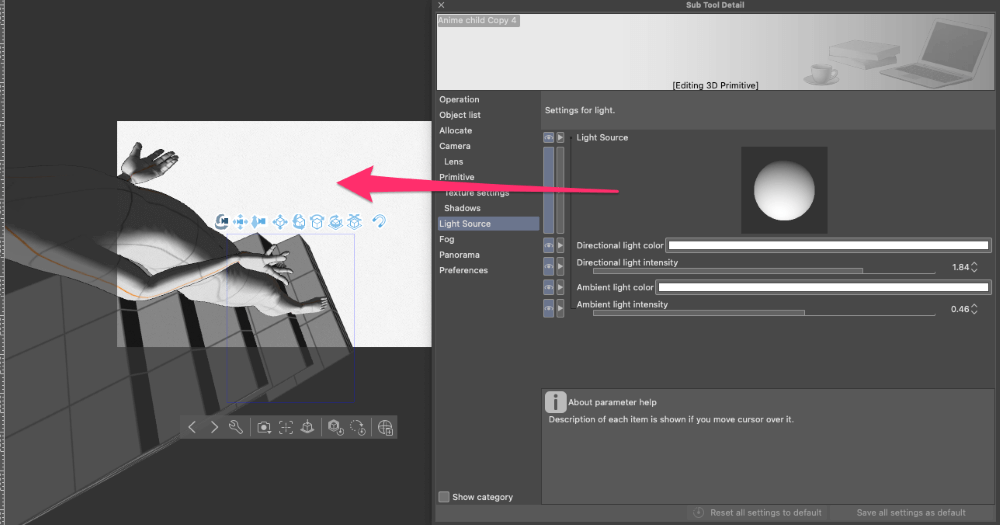
Light Source
Under Light Source, you’ll find a shaded sphere that you can move around, shifting the way highlights and shadows fall. As you experiment, you’ll instantly see these changes come to life in your 3D scene.
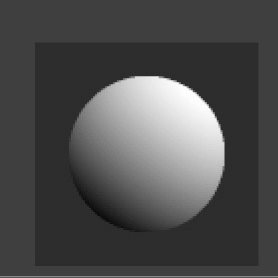
Shading isn’t just about making things look 3D; it also sets the mood in your art. This tool lets you see how different shading angles and strengths affect your scene. For instance, shining light from below can create a mysterious ambiance, while soft side shading gives a gentle touch.
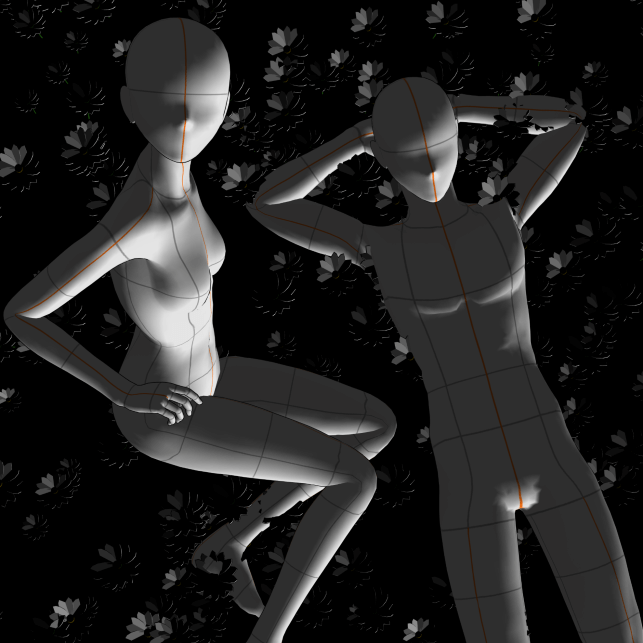
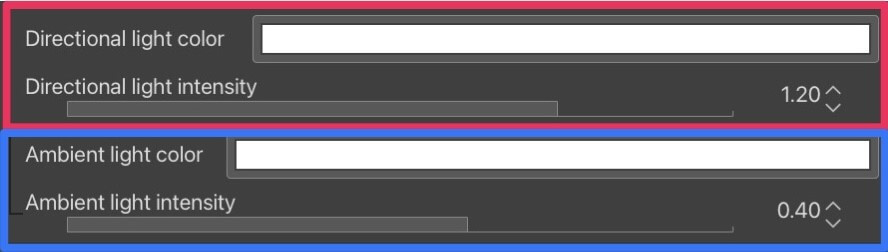
You’ll also come across a couple of sliders:
- Directional Light Intensity: Think of it as shining a spotlight. This slider controls how strong that light shines. You can even tweak its color.
- Ambient Light Intensity: This is the overall lighting that fills your scene. You can also set its color.
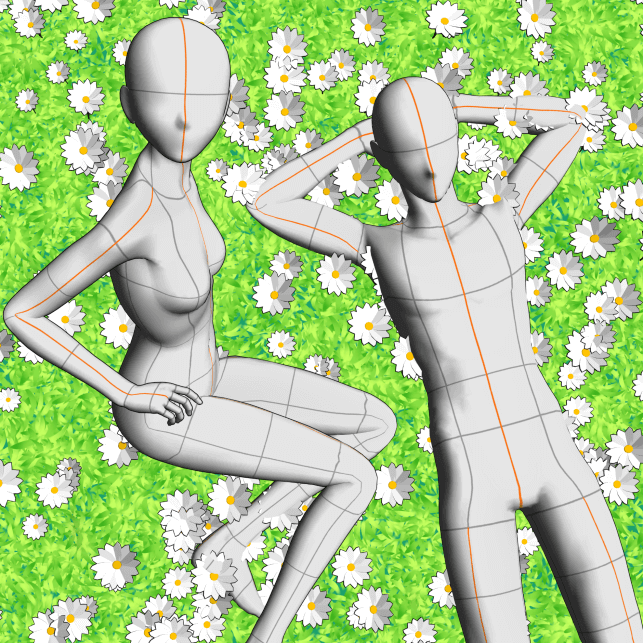
Customizing and Posing 3D characters in Clip Studio Paint
Now that we’ve got the hang of working with 3D objects, let’s dive into something many digital artists look forward to working with 3D drawing figures in Clip Studio Paint.
Manipulating 3D character models in Clip Studio Paint involves using the same options we discussed earlier but with some additional options tailored to drawing figures.
Changing Body Type
Clip Studio’s default models are very versatile. You’ll find both realistic and manga-style figures in your Materials Folder. Here’s how to adjust their body types:
Step 1: Find the default drawing figures in the Materials Folder under 3D > Body Type.
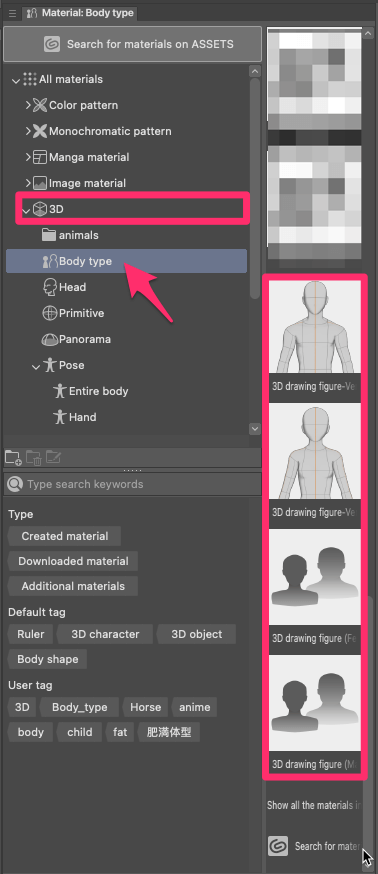
Step 2: Drag and drop the 3D drawing figure onto your canvas.
Step 3: Select the layer containing the 3D drawing figure, go to Operations, and choose the Wrench Tool.

Step 4: Choose 3D Drawing Figure from the menu.
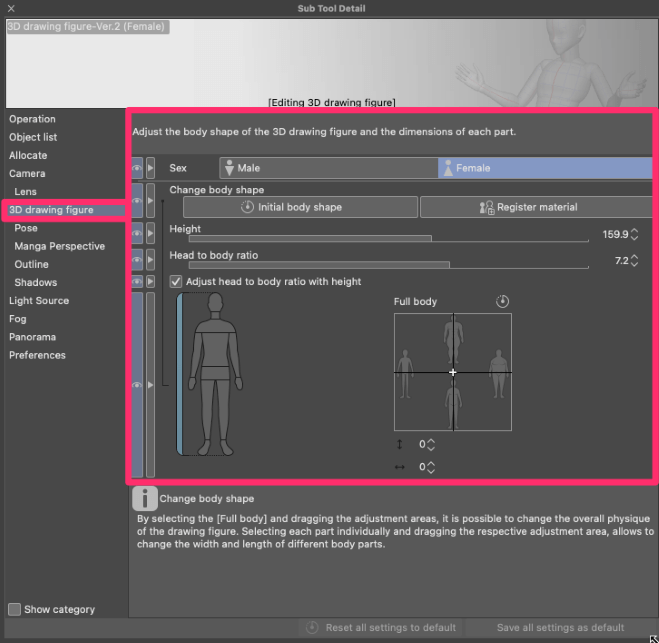
Now, here are the options at your disposal:
- Sex: Choose your character’s gender, shaping their form.
- Change Body Shape: Restore the original proportions or save the altered body shape for later use.
- Height: Set your character’s size in real-world units (cm or inches).
- Head-to-Body Ratio: Adjust the head size; lower values make the head larger.
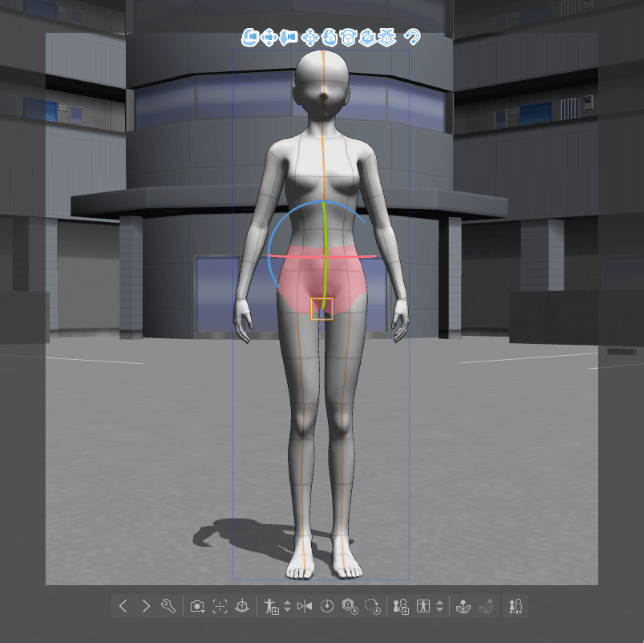
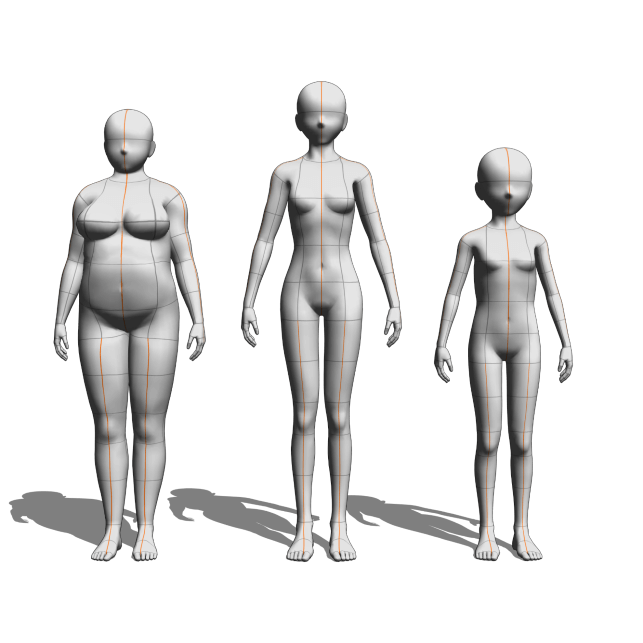
Most importantly, you’ll see a body diagram. This lets you morph your character in real-time:
- The long bar on the left alters the overall body shape.
- Moving the pointer on the graph on the right adjusts height, width, and thickness.
- Click specific body parts on the diagram to modify them individually, like arms or neck.
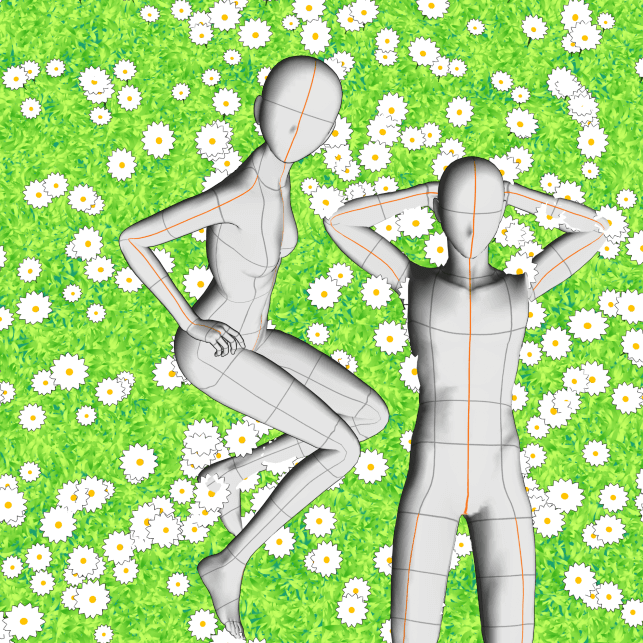
Poses
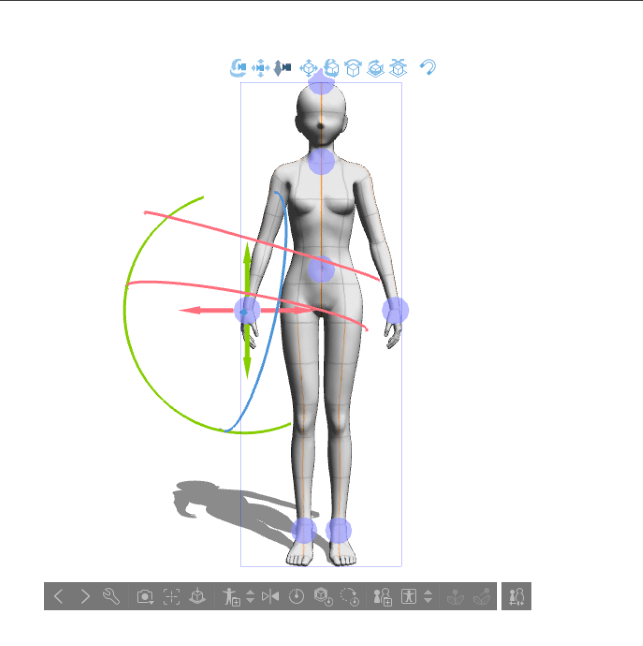
Now, let’s get into the action! Clicking on your 3D character with the Operations Tool opens up the gizmo we explored earlier. You can adjust position, and camera settings, and fine-tune further in the sub-tool window.
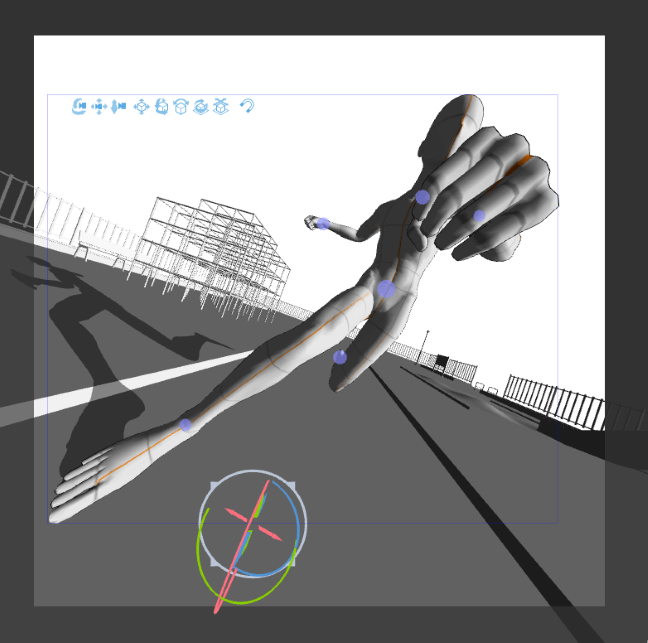
However, 3D drawing figures offer a unique capability: you can pose them like puppets. Click and drag any body part to see your character move accordingly. Every movable body part, down to the fingers, can be manipulated.
Click the model again to reveal smaller blue spheres which represent joints. Clicking a blue circle gives access to a joint-specific gizmo, particularly handy for smaller body parts like wrists or ankles.
Creating poses from scratch can be challenging, so take advantage of pre-made poses!
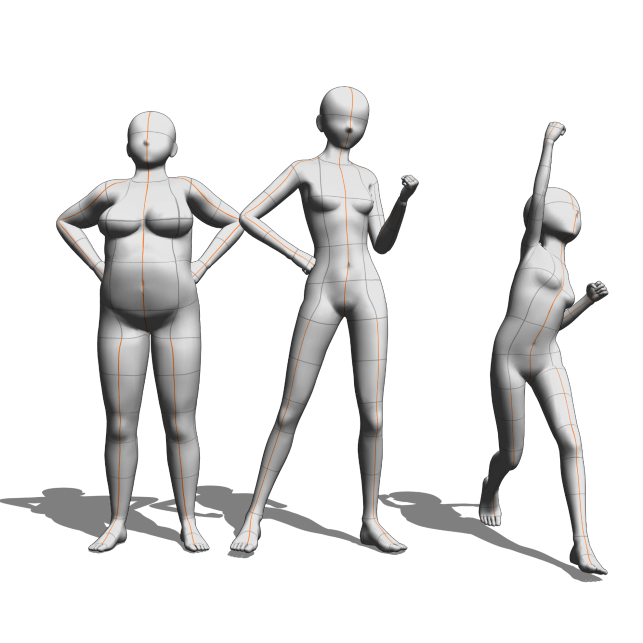
In your Materials Catalog, head to the Pose folder. You’ll find an array of poses for full bodies or specifically for hands, simply drag and drop onto your character.
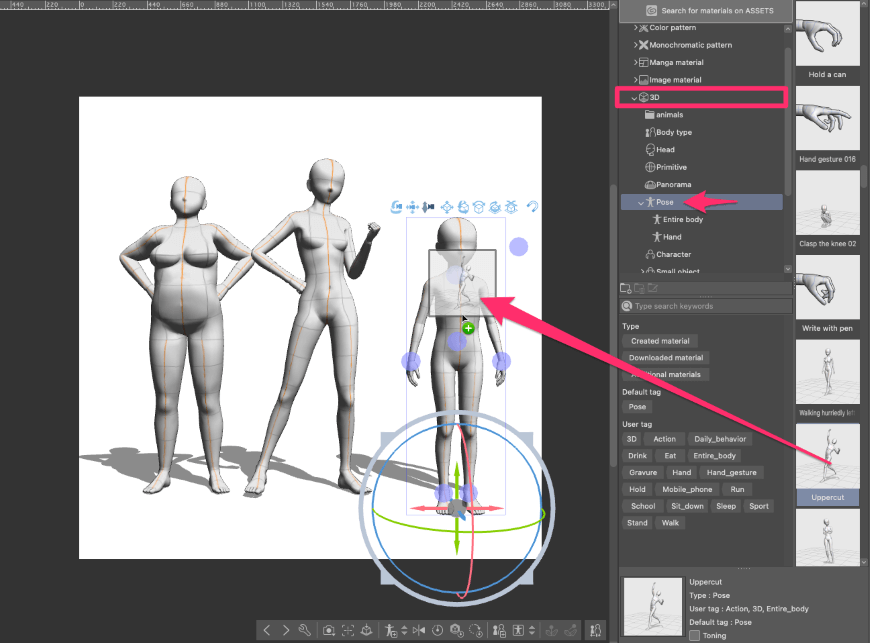
Users also frequently share poses in Assets. You can search for poses, download, and apply them to your character. Adjustments may be needed for different heights and body types.
Hand Poses
Fingers can be tricky to adjust using the dragging method. Clip Studio has a solution for this:
Step 1: Select your model using the Operations Tool and click the Wrench Icon for the sub-tool window.
Step 2: Choose Pose from the menu. You’ll see a hand diagram for tweaking, much like adjusting body shapes.
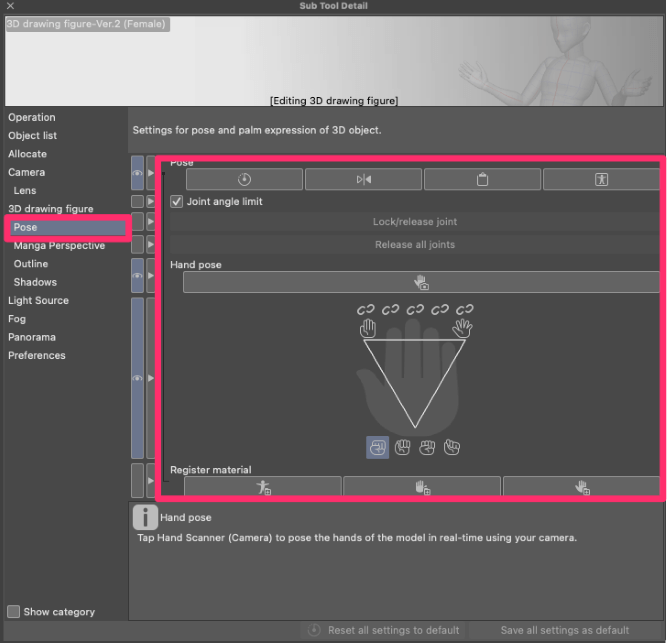
Note: A new and exciting feature is the ability to position a character’s hands using your webcam. If you have a webcam, simply click the button to capture your hand’s real-life position.
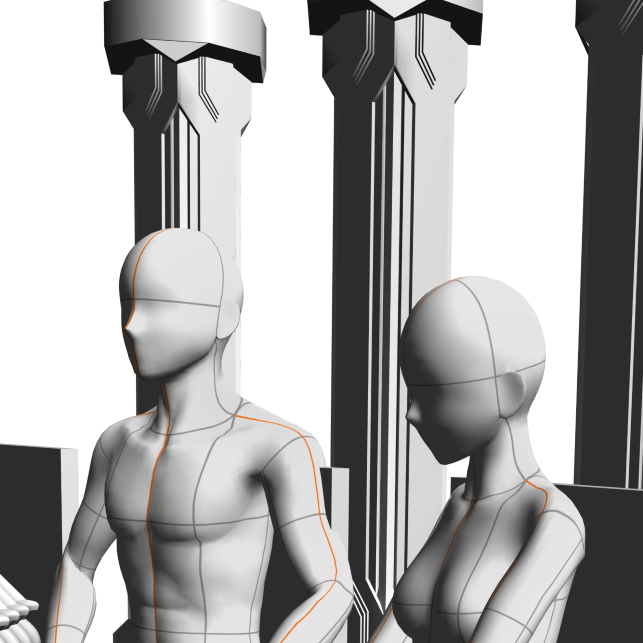
3D heads in Clip Studio Paint
When using 3D drawing figures, you’ll notice that you can’t change their facial features. These models are mainly intended for poses and actions, rather than creating unique characters.
However, with the introduction of Version 2.0, Clip Studio Paint now offers 3D heads. Here’s how to make the most of this feature:
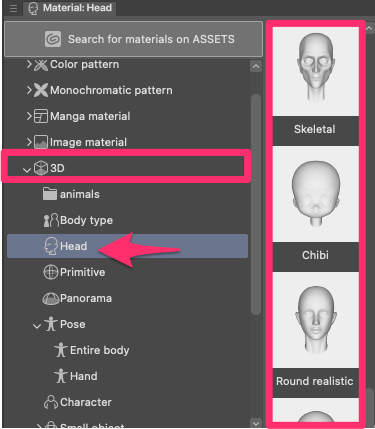
Step 1: Open the Material Palette and select 3D > Head. Drag the chosen head onto your canvas.
Step 2: Click the Wrench Icon using the Operations Tool to access settings.
Step 3: Navigate to the Head Model section. Within the Face Mixer, you’ll see your model surrounded by various face options, each with a number indicating its influence.
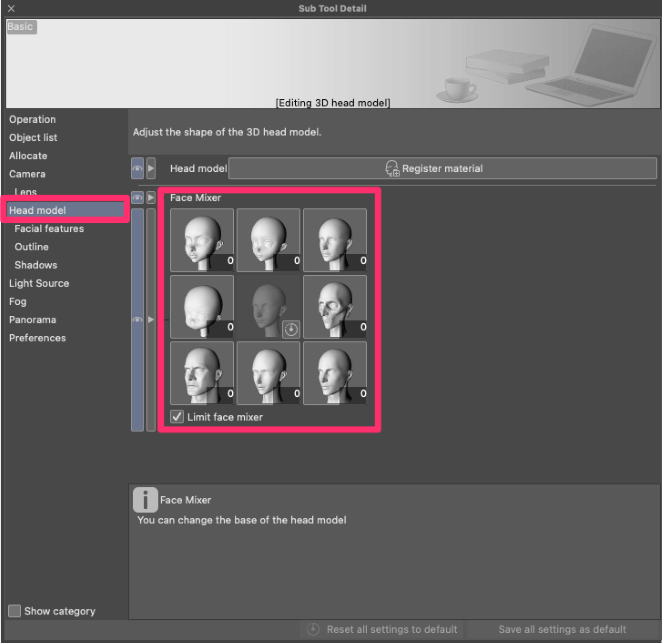
This allows you to combine different faces to create a unique head model.
- Tap a face thumbnail to adjust its influence with sliders.
- Higher values make the selected face more pronounced.
- If you set one face to 100 and others to 0, your model will have 100 faces.
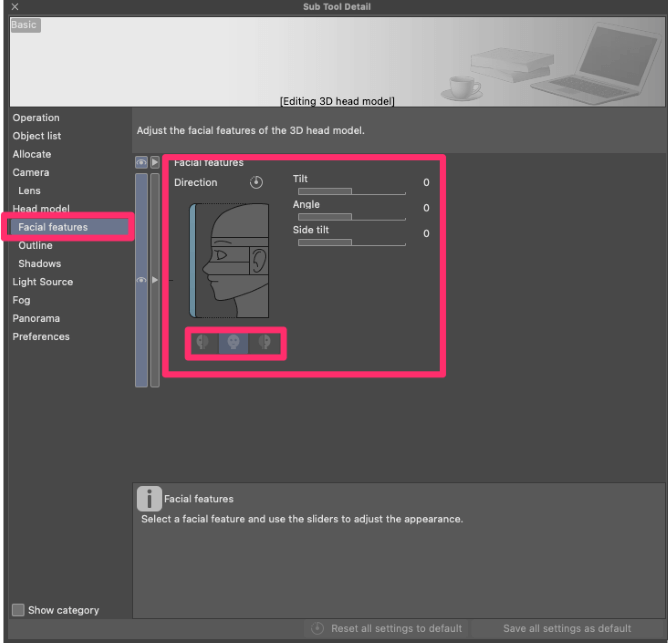
Step 4: For more adjustments, go to Facial Features. This functions similarly to altering the body shapes of drawing figures.
- The left bar lets you change the overall tilt and angle of your head model.
- Click different parts of the head to modify features with separate sliders.
- The icons at the bottom control if changes are symmetrical or asymmetrical.
Pro Tip: Creating Art with 3D Models
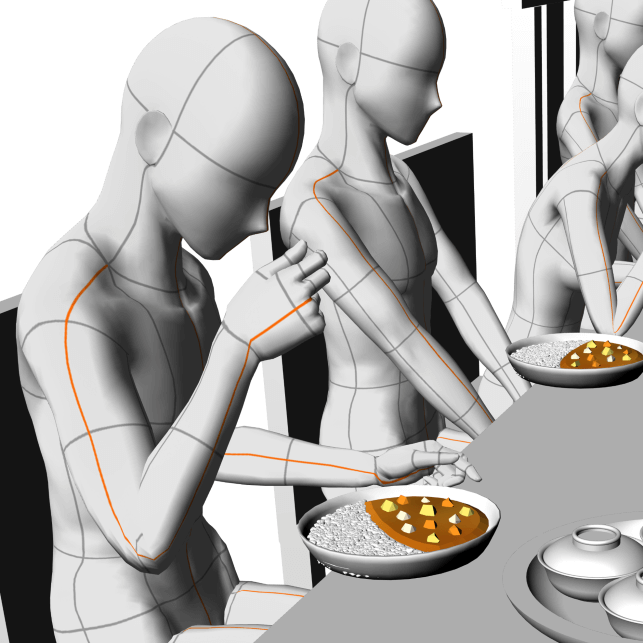
By now, you’ve learned the ins and outs of manipulating various 3D objects in Clip Studio Paint. Let’s bring it all together with a step-by-step example of creating an illustration using 3D models as a foundation.
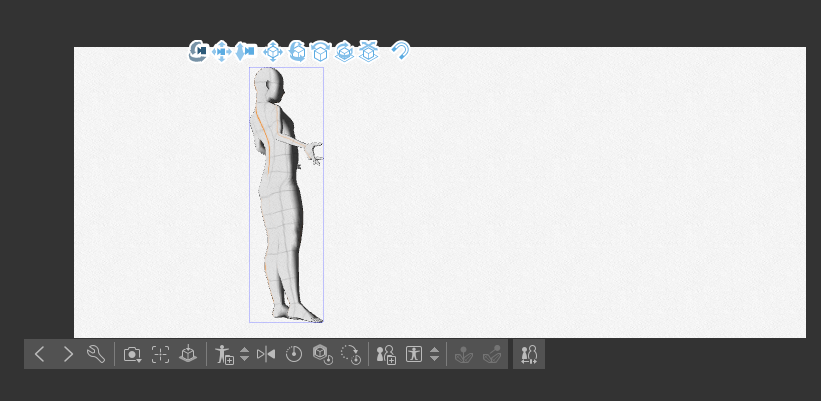
Step 1: I begin by adding an adult drawing figure to my canvas and adjusting the pose.
Step 2: Next, I want stairs in my drawing, but I need specific sizes that pre-made models don’t offer. Clip Studio has basic 3D shapes that you can easily manipulate.
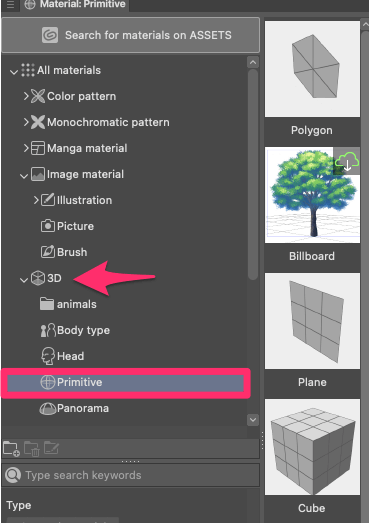
To find them, head to All Materials > 3D > Primitive, and drag them onto your canvas.
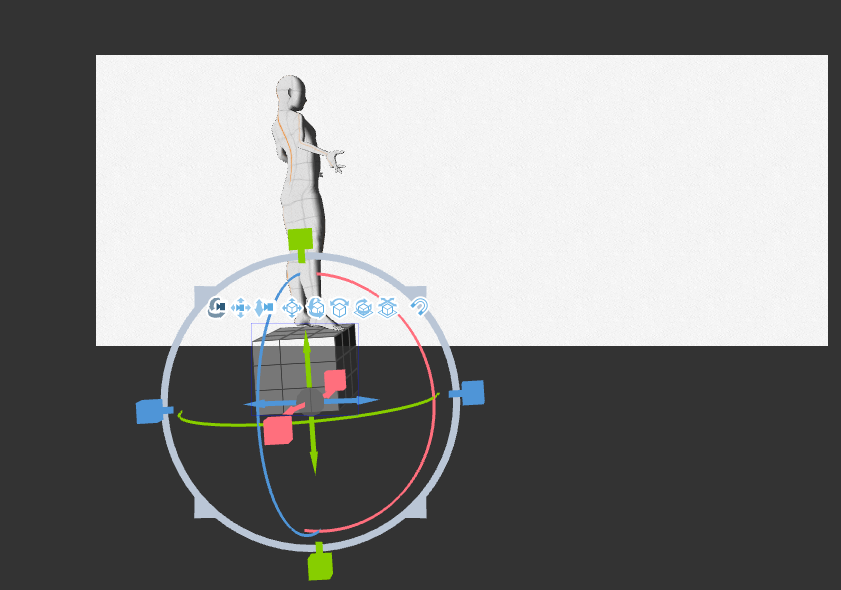
Step 3: By adjusting the square handles, you can stretch the model to your preference. In this case, I’m using several stretched cubes to create a staircase-like structure.
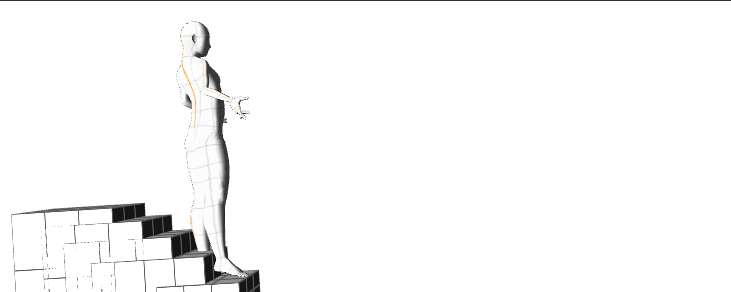
Step 4: I want the adult character to look tall and imposing, so I use the Camera Settings to adjust the angle and perspective. Since the character and stairs are in the same scene, it’s easy to make them match even if the angle is unusual.
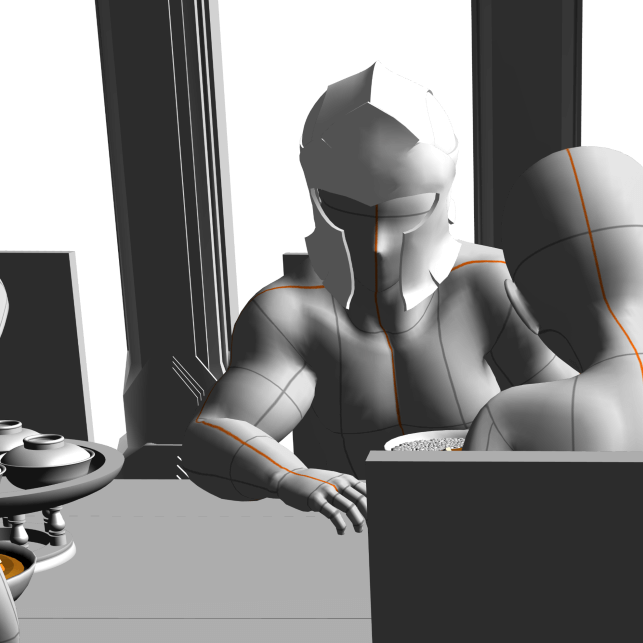
Step 5: I enhance the drama by adjusting shading through the Light Source Settings, selectively illuminating parts of the character.
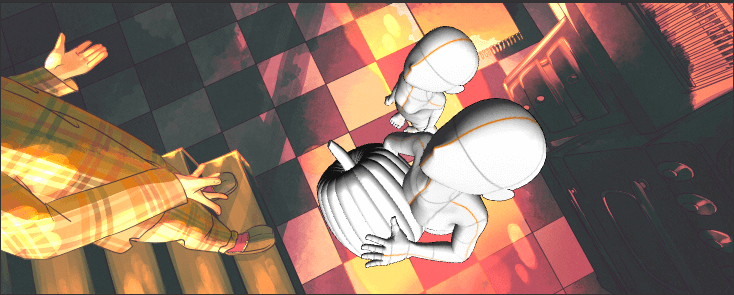
Step 6: Moving forward, I use the 3D model and shading as a guide to drawing the scene. I also add additional characters, using body shape adjustments and posing to get them just right.
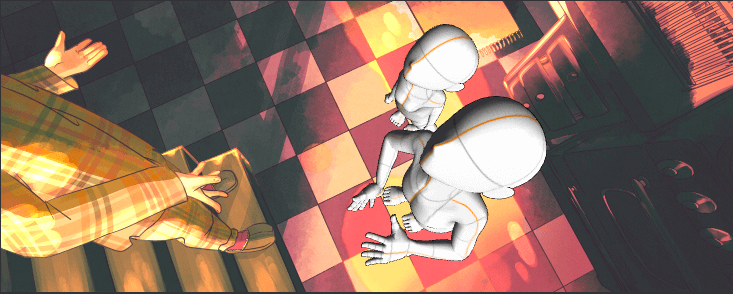
Step 7: In this scene, one of the child characters needs to hold a pumpkin. But the 3D pumpkin models in Clip Studio Assets don’t fit my needs.
However, you’re not limited to the 3D models within Assets. You can create your own models or download them in .obj or .fbx format.
A helpful source for free 3D models is sketchfab. There, you can find a wide range of assets to choose from. Just ensure you select the Downloadable option in your search.
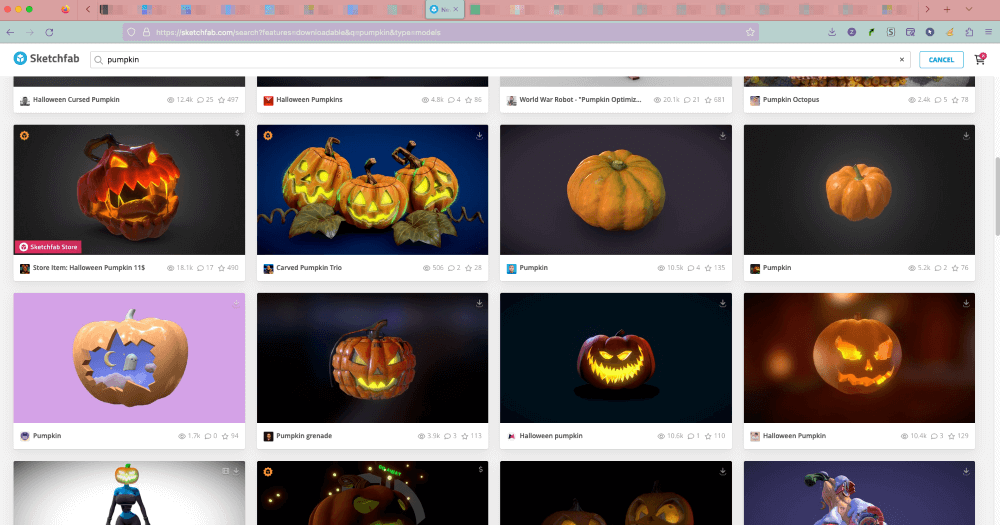
If the model isn’t in .obj or .fbx format, you can convert it using a free 3D program like Blender. No need to know much about 3D software.
In Blender, bring in your 3D object by selecting File > Import [choose the format that matches your 3D model]. Afterward, navigate to File > Export and select either .obj or .fbx.
Once your 3D model is ready, drag it from your computer to your Clip Studio Paint canvas and adjust its position as needed.
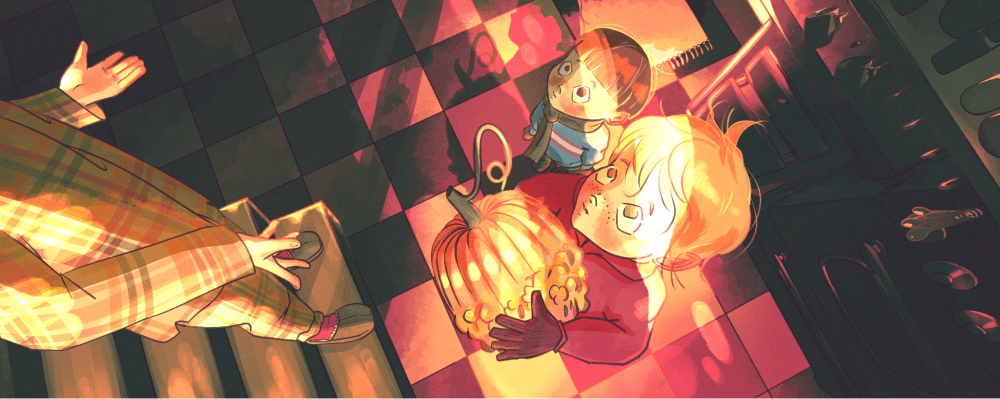
Step 8: Thanks to Clip Studio’s 3D models’ help with perspective and shading, creating dynamic scenes with accurate yet unique angles becomes much simpler. After adding the finishing touches, the scene is complete!
Final Thoughts
3D models come in handy for everything from dynamic action scenes, maintaining character coherence, and intricate backgrounds to setting a mood through shading, honing anatomy skills, and even simple sketching.
Exploring the features might seem extensive, but using 3D models is actually straightforward: drag and position your object on the canvas with the user-friendly gizmo. Even newcomers can easily start by placing models on their canvas and experimenting with 3D.
If you have any experience with using 3D models in Clip Studio Paint, I’d love to hear your thoughts and any tips you’ve discovered along the way! Feel free to leave a comment below.