
To vectorize an image in Inkscape, you need to import a PNG or BMP file into your canvas. Then click on the Path menu in the upper toolbar. In the drop-down menu, select Trace Bitmap. Adjust the settings and then click Apply to confirm your changes.
I’m Carolyn and I’ve been using design apps like Inkscape to run my digital illustration business for over three years now. Because Inkscape is an incredible photo editing app, I frequently use it to convert images to graphics.
Even though Inkscape is a vector-based graphics program, it offers a unique feature that allows its users to transform images within the app and then export them as vector files which is quite an elaborate tool when it comes to free and open-sourced design programs.
In this article, I’m going to show you how to vectorize an image in Inkscape, from start to finish.
Table of Contents
Key Takeaways
- Make sure the image you are using is either PNG or BMP.
- You can adjust the Bitmap settings to suit your needs.
- After changing the settings, you can preview the image in the window.
- You can also transform your image into pixel art with this method.
How to Import an Image in Inkscape
Before you can vectorize your image in Inkscape, you need to add the image to your canvas first. You will need to make sure that the file type you are using is PNG or BMP only and is saved to your device. Then follow these steps to import it to the app:
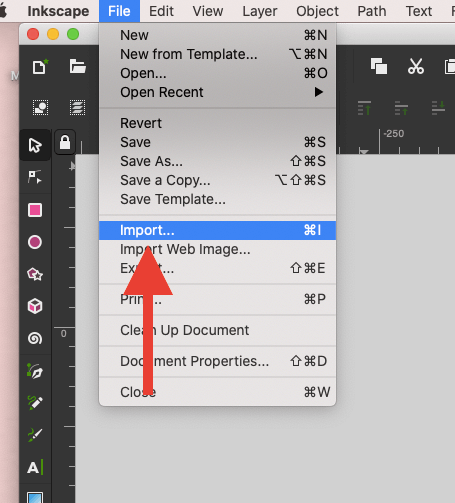
Step 1: Open your fresh canvas and select the File menu in the top left-hand corner of your screen. In the drop-down menu, tap on the Import option.
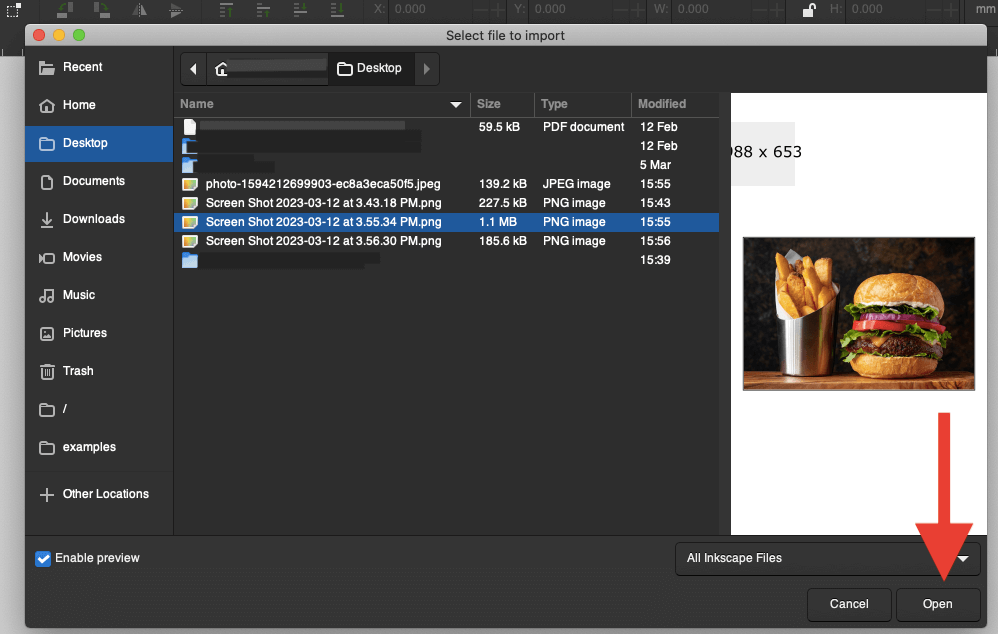
Step 2: In the pop-up window, open the location where your image is stored on your device. Choose your image and then click on Open.
Step 3: A small window will appear to prompt you into choosing image settings. You can choose the default settings which should be Embed, From File, and None. Once you have selected these, click on the OK button. Your image will now be on your canvas.
Pro Tip: If you’re getting your images online, you can add PNG or BMP to your search words to bring up compatible file types.
How to Vectorize an Image in Inkscape
Now that you have your PNG/BMP file imported into your canvas, you can begin to vectorize it. Here’s how:
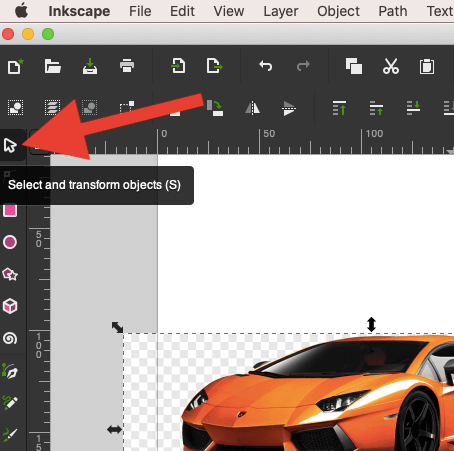
Step 1: Select your image by clicking on the cursor icon in the top left hand toolbar of your workspace. Then click on your image until the black arrows appear, this means the image is selected.
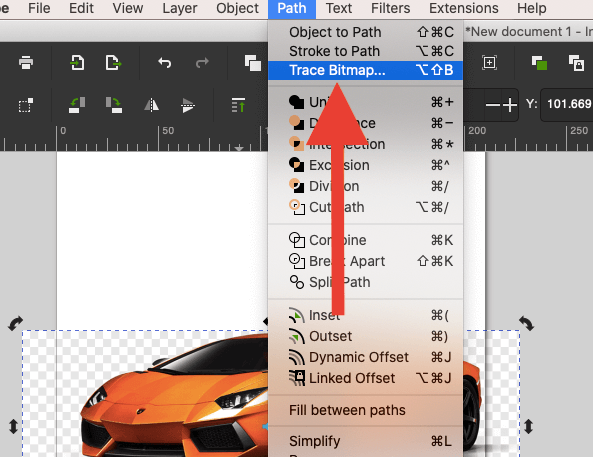
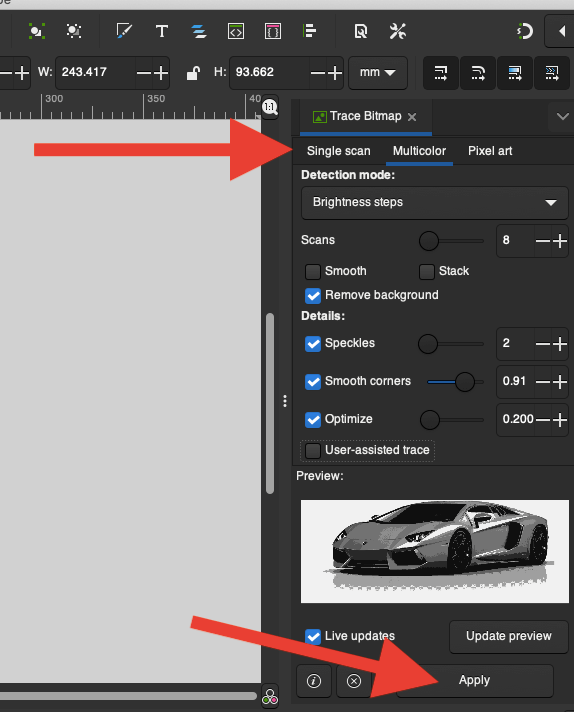
Step 2: In the upper toolbar, click on the Path menu. In the dropdown menu, select the Trace Bitmap action.
Step 3: On the right-hand side, a settings window will appear. Here you will be able to adjust your settings and preview what the image will look like by clicking on the Update Preview button.
You can also remove the background, reduce or increase scans and transform your image into pixel art from this menu. Once you are happy with your changes, click on the Apply button in the bottom right-hand corner.
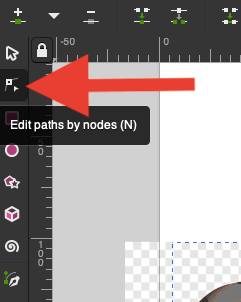
Step 4: Once your image has been vectorized, you can now activate the Edit Paths tool by clicking on the icon with the cursor pointing towards a node.
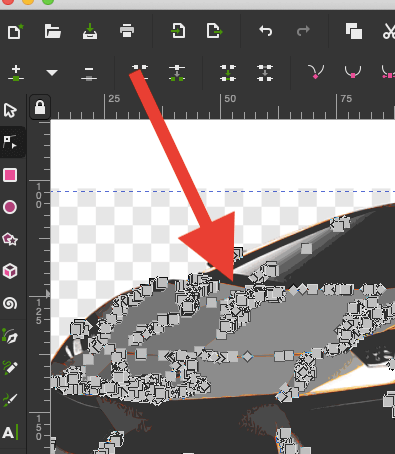
Step 5: Now click on your image and your nodes will appear. You can adjust them or just observe how they will come out when they are exported.
Pro Tip: You can remove the background during the vectorization process by ticking the box that says Remove Background. You can test this by previewing the file in the bottom window.
How to Export/Save a Vectorized Image in Inkscape
Now that you have vectorized your image, you’re going to want to export it and save it to your device so that you can use it or send it somewhere else. Here’s how:
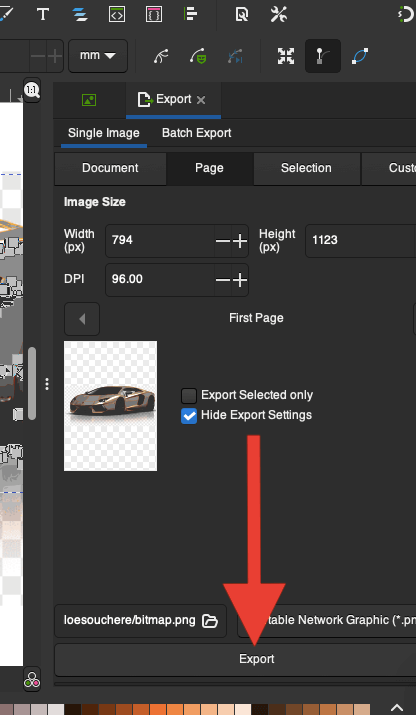
Step 1: When you are ready to export your image, click on File in the upper toolbar. In the dropdown menu, click on the Export option.
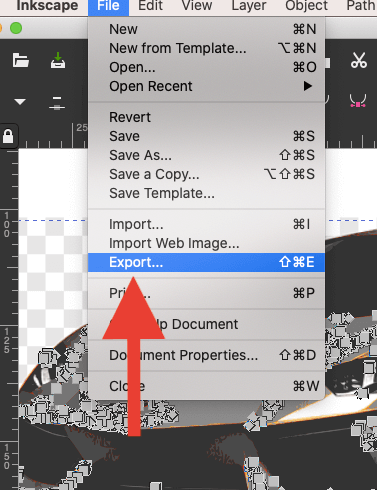
Step 2: The export settings window will appear to the right of your canvas. You can adjust the settings to whatever you need. You can change the DPI, the dimensions, and the file type here. Once you’re happy with your settings, click on the Export button.
Your image will now be exported and you can save it anywhere on your device.
Difference Between PNG and BMP
Both the PNG and Bitmap file types are compatible with the vectorization method. However, they are slightly different file types and I’m going to explain how:
PNG
This stands for Portable Networks Graphics and is a compressed file type that doesn’t lose any quality. It is ideal for high-quality graphics that will be viewed online and also allows for transparent backgrounds.
BMP
This stands for Bitmap and is an uncompressed file type that doesn’t lose quality but tends to be quite a large file size. It’s best for use with Windows operating systems and for online and printable graphics.
FAQs
Here is a selection of your frequently asked questions about vectorizing an image in Inkscape.
Why is Inkscape trace Bitmap not working?
This may be because you imported the wrong file type or your app has a glitch. Double-check that you’re using a PNG or BMP image and if it still isn’t working, turn your Inkscape app on and off again to restart the system.
How to vectorize text in Inkscape?
You can do this by changing the path of your text in the path drop-down menu in your upper toolbar. Select the Line to Path option in the drop-down menu.
How to convert a JPEG to a vector in Inkscape?
You must first convert your JPEG image to a compatible file type like PNG. You can do this with third-party websites or apps. Once you have converted your image to PNG, follow the steps shown above.
Conclusion
Vectorizing an image in Inkscape is quite a quick process unless you make any severe changes that drastically differ from the default settings offered to you. Vectorizing an image allows you to play around with the size of your images without sacrificing any of their detail or quality of them in the meantime.
Have you vectorized an image in Inkscape? Leave your feedback in the comments section below.