
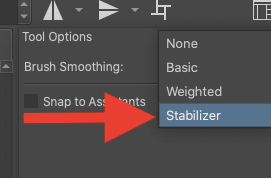
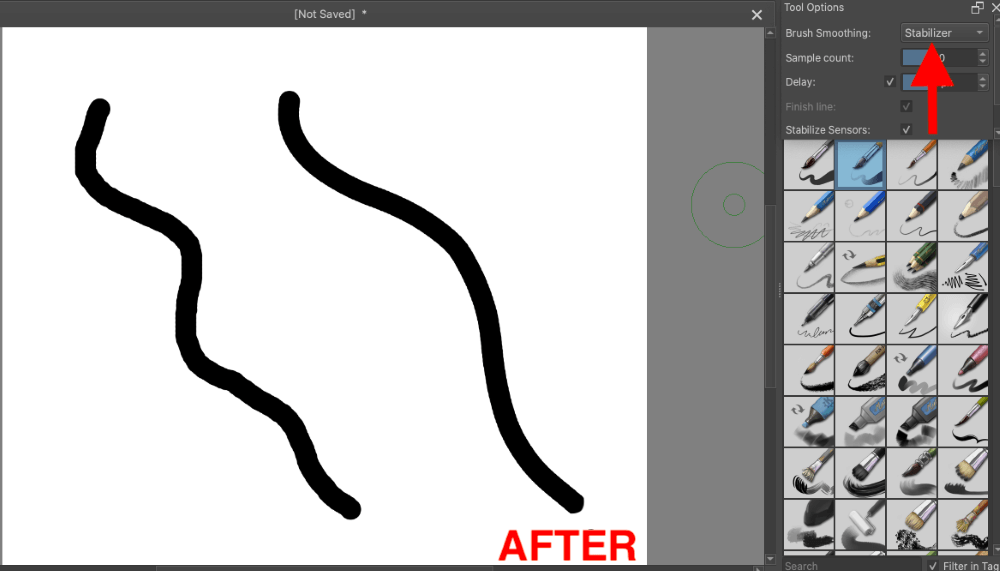
The stabilizer in Krita can be found in the “Tool Options” docker to the right of your workspace. In the “Brush Smoothing” drop-down menu, you will have four options; None, Basic, Weighted, and Stabilizer. Select the “Stabilizer” option to activate it.
I’m Carolyn and I’ve been using apps like Krita to run my digital illustration business for over three years. This digital drawing program is ideal for artists who want to create digital drawings, graphic designs, or animations without having to pay for an app.
As Krita is an awesome app to use for digital drawing, it comes with some very useful drawing tools and features. One of the most commonly used drawing tools is the Stabilizer as it helps to create smooth and even lines.
In this article, I’m going to show you where to find the Stabilizer tool in Krita and how you can use it to improve your digital drawing.
Table of Contents
Key Takeaways
- You need to activate your Tool Options dock before having access to the Stabilizer.
- The Stabilizer tool is available under the Brush Smoothing tool and needs to be activated.
- There are four different modes to the Brush Smoothing tool.
- You can manually change the settings of the Brush Smoothing tool depending on what you need it for.
Where is the Stabilizer in Krita and How to Activate It
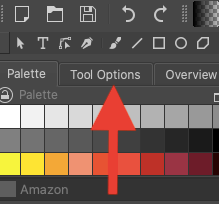
First things first, the Stabilizer tool is not automatically visible on the Krita workspace so you need to activate the docker in order to access it. Here’s how:
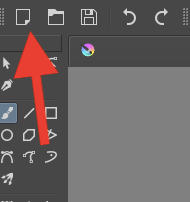
Step 1: Open a new project by clicking on the paper icon in the top left-hand corner of your workspace.
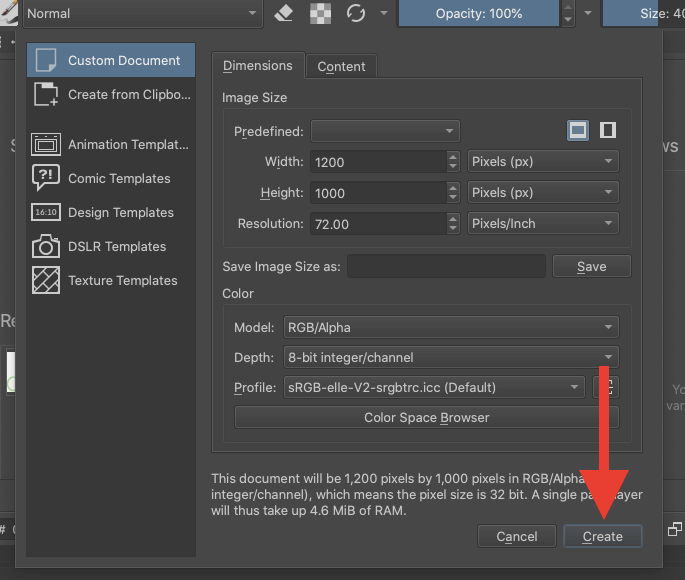
Step 2: Create a custom document of whatever dimensions you need. Once you have chosen the dimensions, tap on the Create button in the bottom right corner of the window.
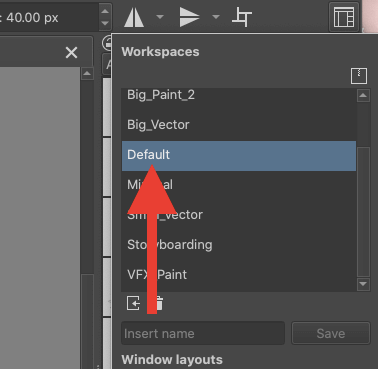
Step 3: Ensure your Workspace is set to Default. You can do this by clicking on the icon that looks like a square filled with boxes in the top right-hand corner of the screen. In the drop-down menu, select Default.
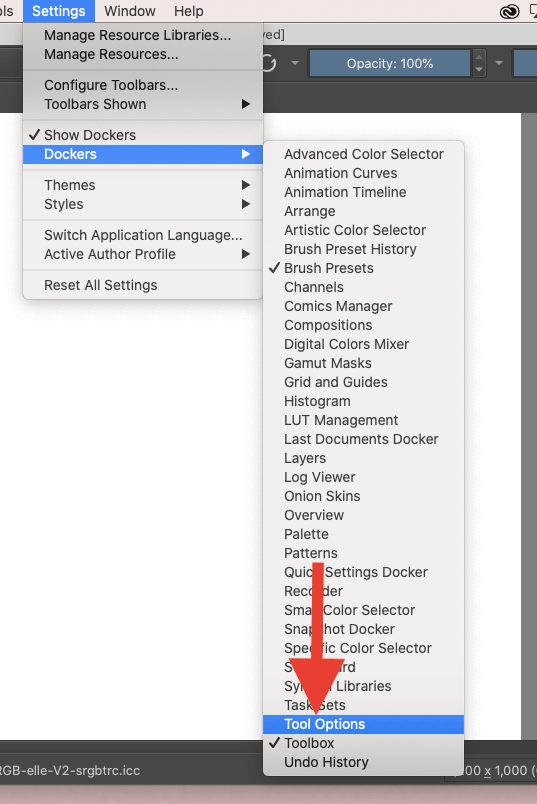
Step 4: Go to Settings and open the Dockers drop-down menu. Click on Tool Options to activate this docker on your workspace.
How to Use the Stabilizer in Krita
To use the Stabilizer tool, all you have to do is activate it on your workspace by following the steps below:
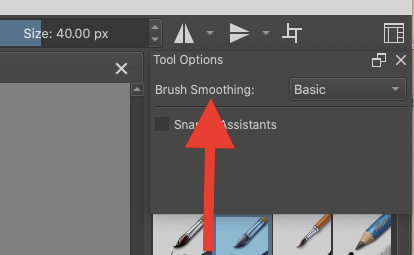
Step 1: In the right-hand corner of your workspace, tap on the Tool Options menu.
Step 2: In the Tool Options menu, the Brush Smoothing setting will automatically be set to Basic. This means when you draw on the canvas it will create a line exactly how you draw it without controlling the outcome at all.
Step 3: Click on where it says Basic. In the drop-down menu, you will have four options: None, Basic, Weight, and Stabilizer. Click to select the Stabilizer option.
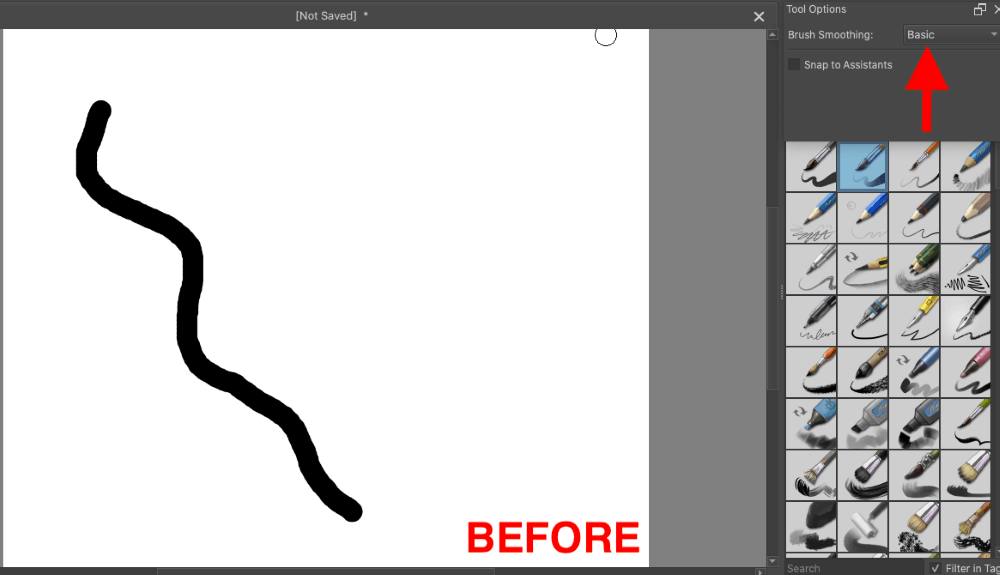
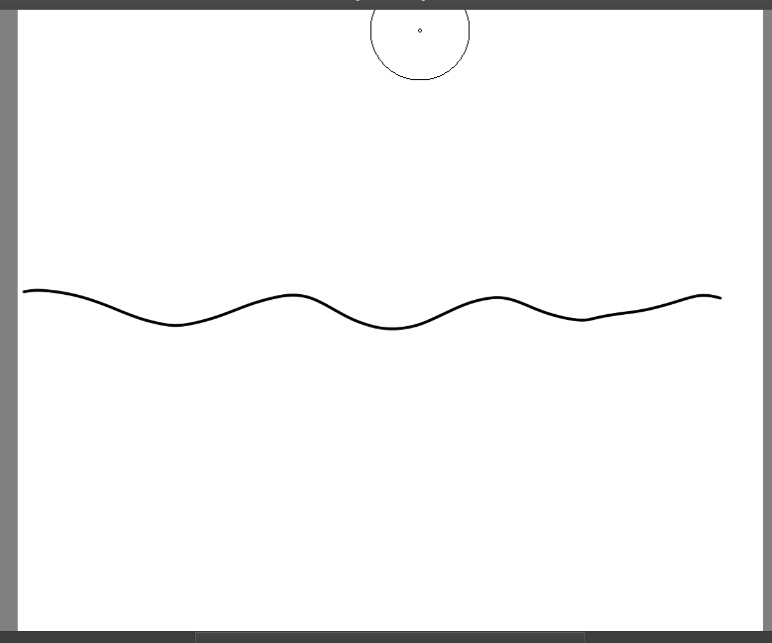
That’s it! You can now begin drawing and your brush strokes will now be stabilized. Below is an example of a line before and after activating the Stabilizer.
Understanding Brush Smoothing Options
There are four different options in the Brush Smoothing menu and they each offer something different. Here is a breakdown of each setting and how it affects your brush stroke:
None
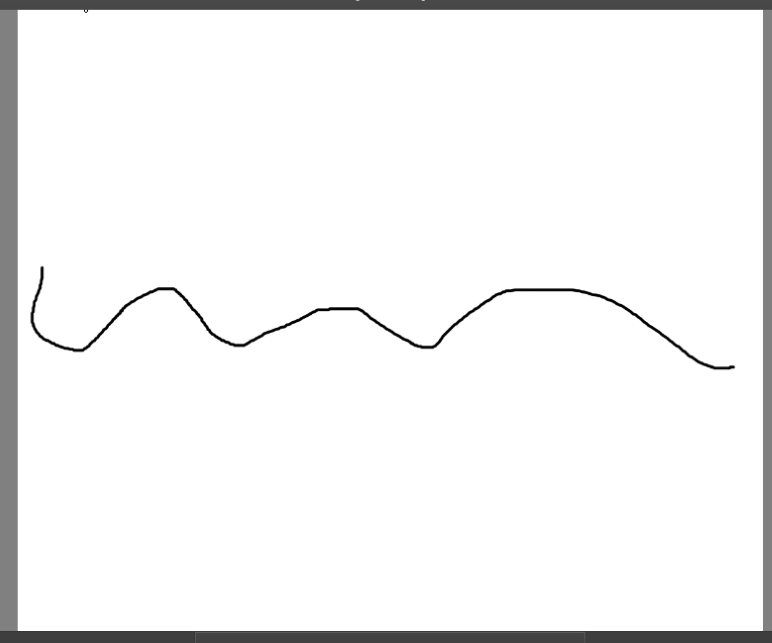
This will not smooth your brushstroke at all. Your brush stroke will resemble exactly how you draw your line including any shakiness from your hand or uneven movement during the drawing process.
Basic
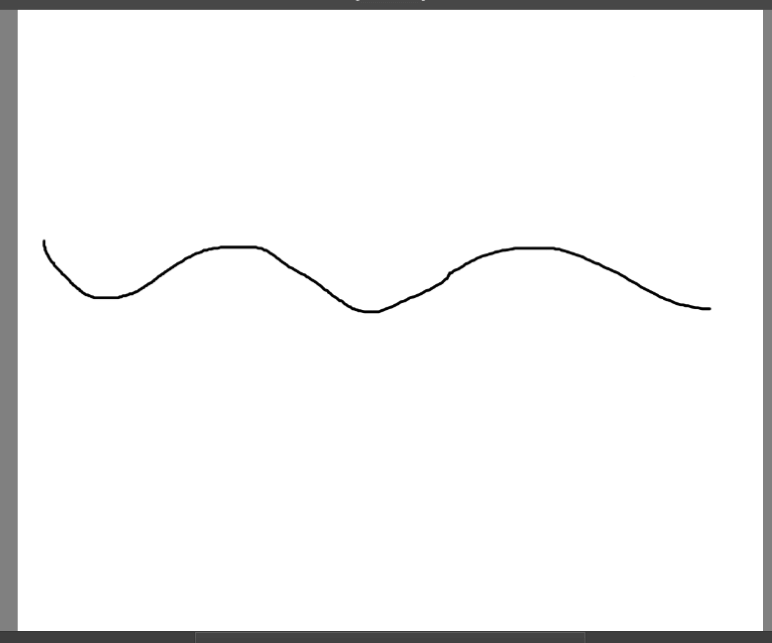
This will ever so slightly give you a smoother and more consistent line. This option is best to use if you are drawing on the mouse pad rather than using a stylus but still want to achieve a hand-drawn effect.
Weighted
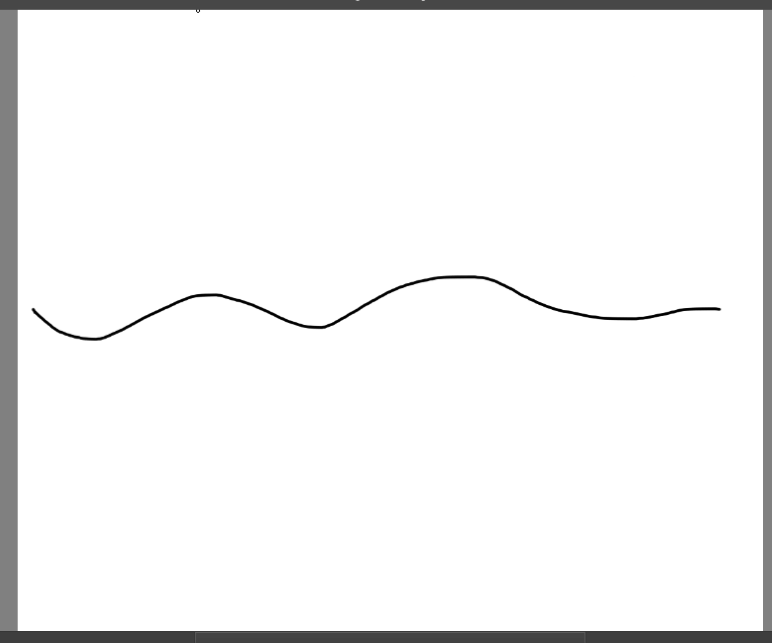
When the Weighted setting is active, this will keep your lines smoother the faster you draw and put pressure on the stylus if you are using one. This is a great option if you want subtle support in creating smoother and more consistent lines.
Stabilizer
The Stabilizer completely stabilizes and supports your brush stroke. It will keep your line smooth and steady even if you stop midway through a line, which the other three settings will not do.
FAQs
Below is a selection of your frequently asked questions about using the Stabilizer tool in Krita. I have briefly answered them for you:
When to use the stabilizer in Krita?
You should use the stabilizer in Krita when you are drawing and want to achieve smooth and seamless lines without having to worry about an unsteady hand. This is particularly useful to use if you are drawing without a stylus.
How to turn off the stabilizer in Krita?
You can turn off the stabilizer in Krita by changing the Brush Smoothing setting back to Normal in the Tool Options docker in the top right-hand corner of the workspace.
What is the best stabilizer setting for Krita?
This depends on what you are hoping to achieve however I usually just use the default settings of 50% Sample and 50% Delay with no Snapping Assistant activated.
What’s the keyboard shortcut for the Krita stabilizer?
You can create your own keyboard shortcut to quickly access the Stabilizer option. In the toolbar of the app, click on Krita and then select Preferences. This will open your Configurations window. Then on the left select Keyboard Shortcuts.
Conclusion
The Stabilizer tool in Krita is one of the most important drawing tools that the app has to offer. This allows you to draw confident and smooth freehand brush strokes without having to worry about minor details, bumps, or jagged edges ruining your final result in your workspace.
I personally like to keep this tool activated almost all of the time as it dramatically improves the quality of my drawing. I recommend spending some time today experimenting with this tool so you can see how much the extra support can improve your quality of drawing too.
Do you use the stabilizer function in Krita? Leave your answers in the comments section below.