
It gets very frustrating when you’re working online and trying to describe what you’re doing, but the other person can’t visualize what you’re telling them.
That’s what Skype’s screen sharing function is great for. It lets you share your screen rather than trying to verbally explain what’s happening on your computer screen.
Share Screen is a function that allows all participants in a Skype conference to view one person’s screen in real-time. This helps put everyone on the same page faster and disseminates information in a more efficient manner.
However, if you’ve never used this feature, you may not know how to get started. I am going to show you three simple steps for screen-sharing on Skype for Mac.
Note: Share Screen can only be initiated from a desktop or laptop computer. Mobile users can view the shared screen but are unable to initiate it with others.
Table of Contents
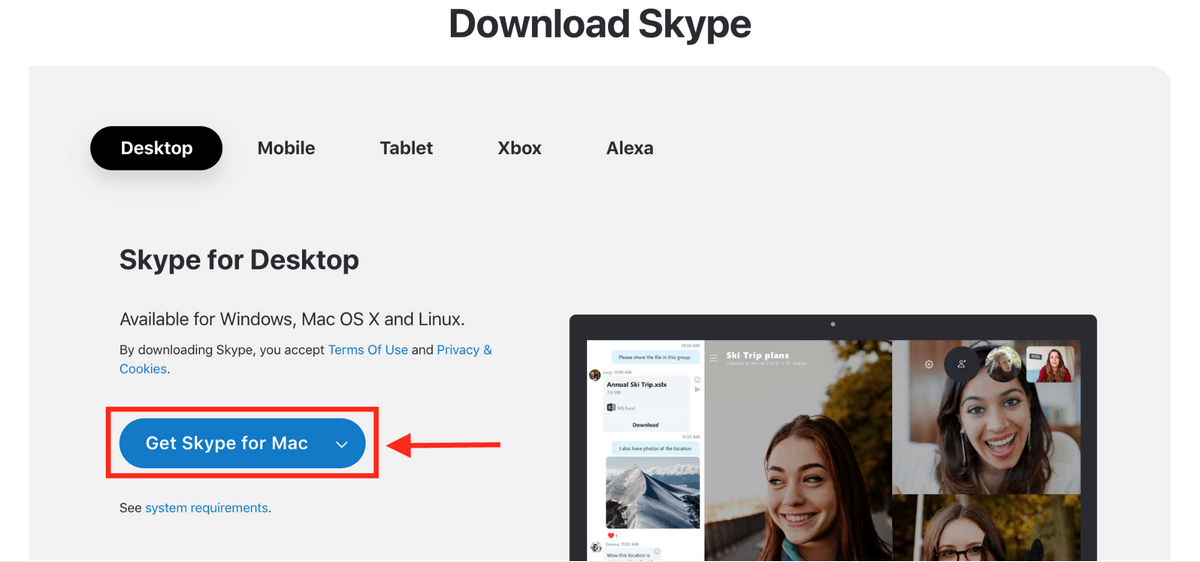
Step 1: Download Skype
I’m stating the obvious here, but you need to have the Skype application on your Mac before you do anything else. If you don’t already have it, head on to https://www.skype.com/en/get-skype/ to get the download. Make sure that you select the Mac version of Skype.
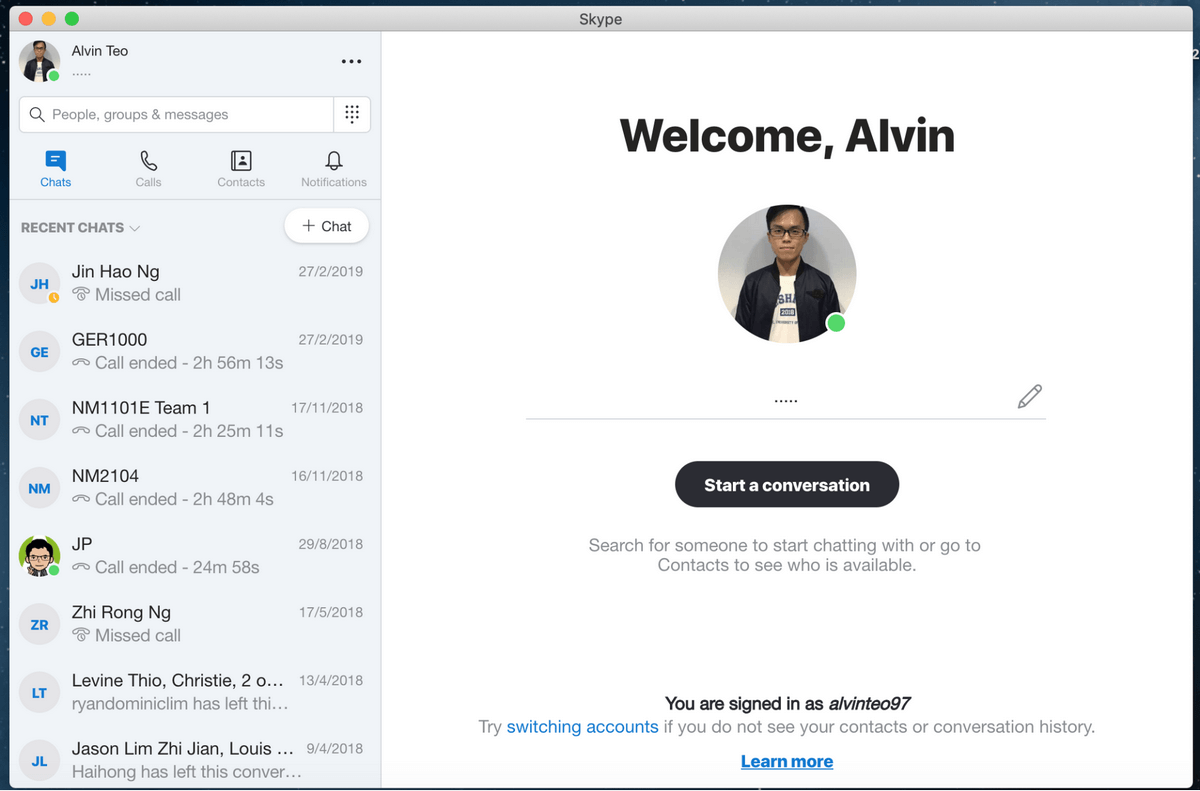
Step 2: Launch Skype
After downloading, launch the Skype application. Sign in — or if you don’t have an account yet, make one. You will be directed to an interface that lists all of your contacts.
After initiating a conversation with a contact, you should see many different icons hovering at the bottom of the conference window. The Share Screen function is the icon where the square box partly overlaps another square box. It’s shown in the image below.
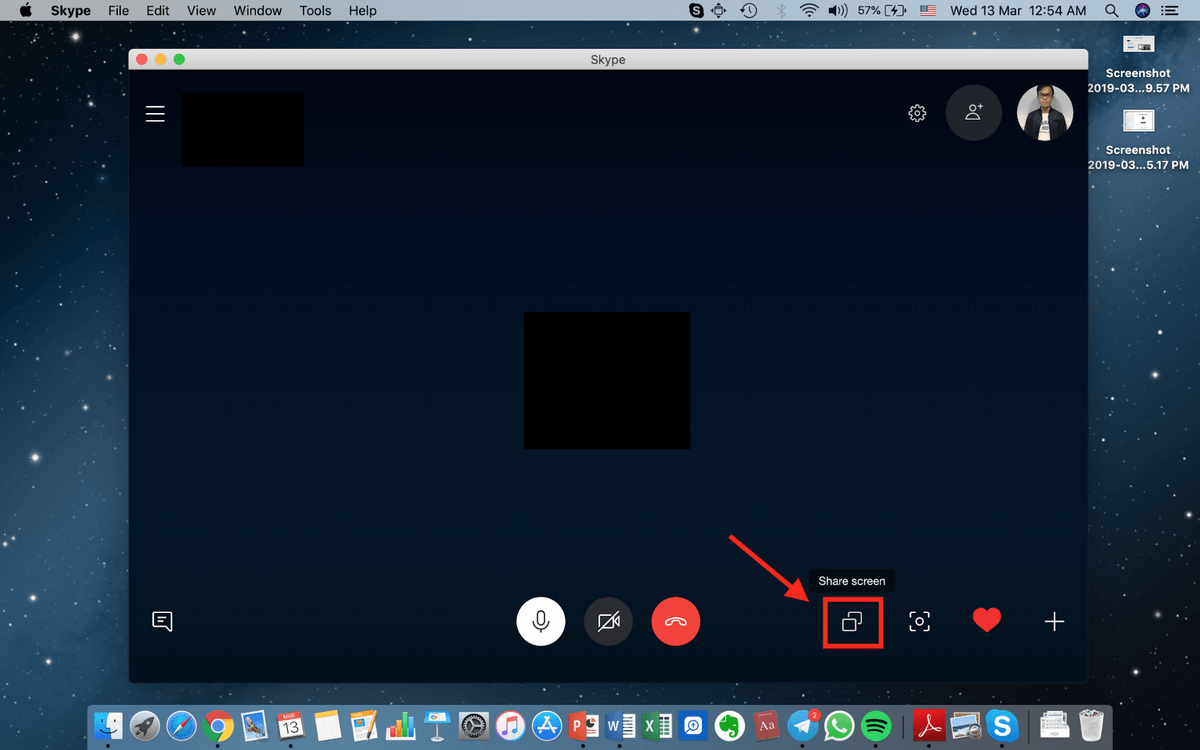
Hit that icon and you will be prompted once to share your screen. Simply hit Start Sharing and your screen will be displayed for everyone in the conference.

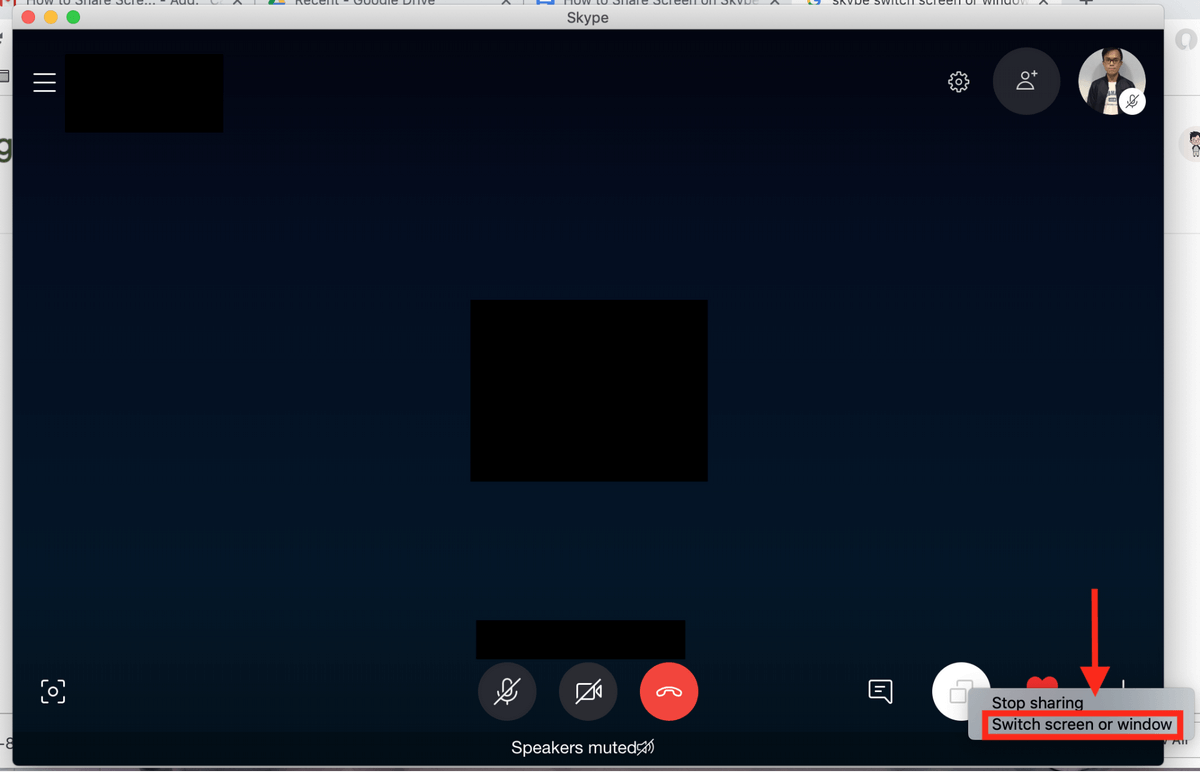
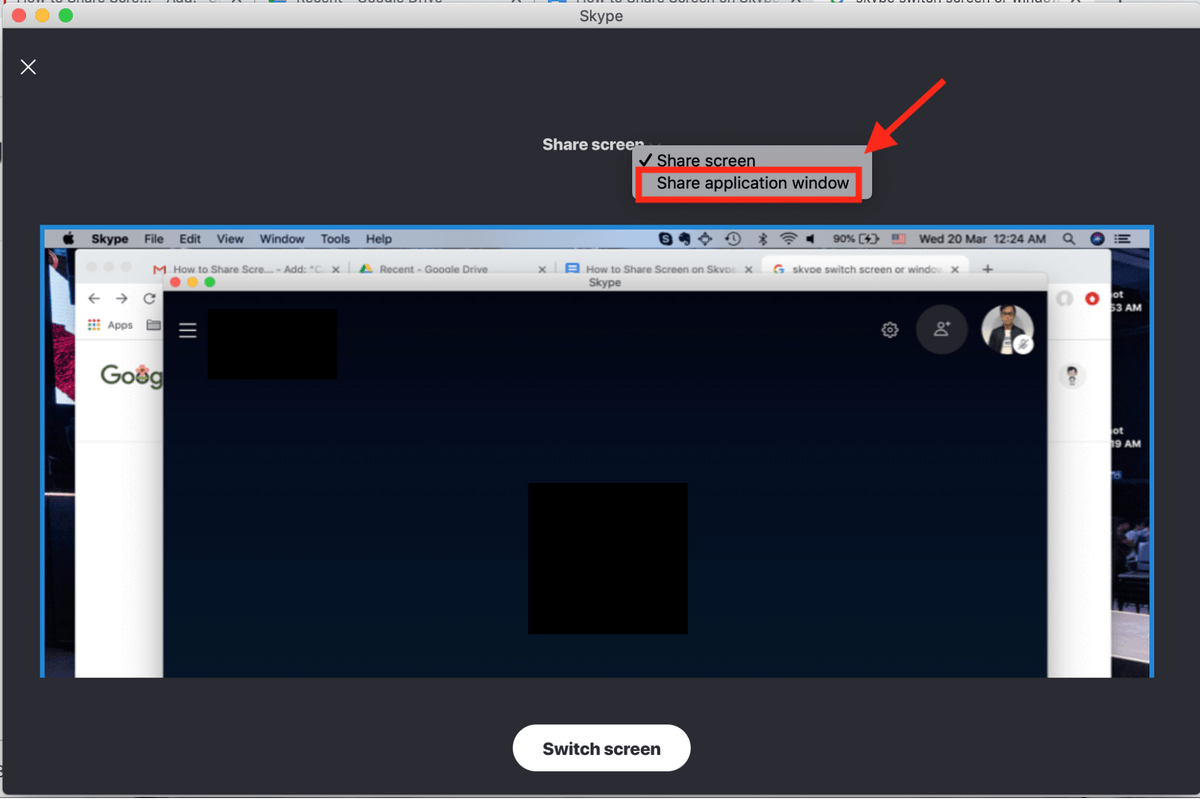
You can also switch screens to share an application window instead of your entire screen. This limits the individual you’re sharing your screen with to only seeing what’s going on in the application. To do this, click on the same icon. You should see Switch Screen or Window.
You will be shown what the receiver is currently seeing. Select Share Application Window.
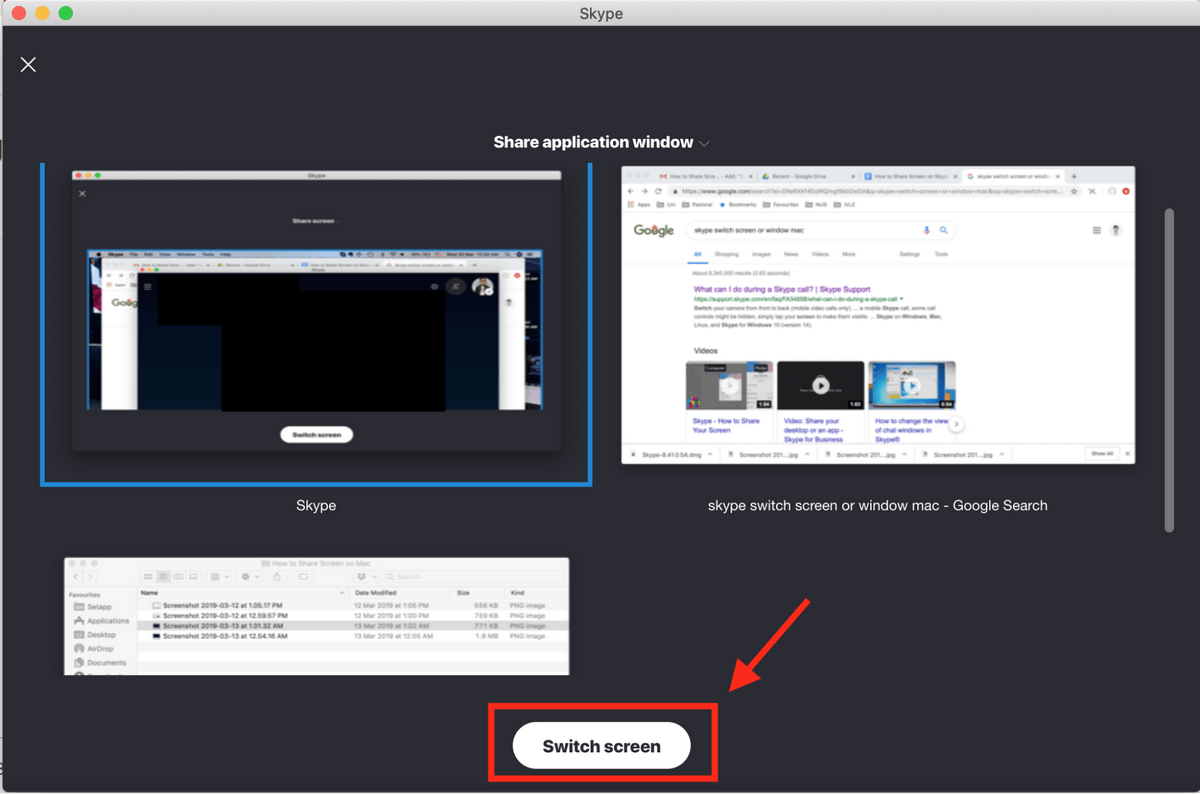
Next, choose the application window you want to share and click Switch Screen.
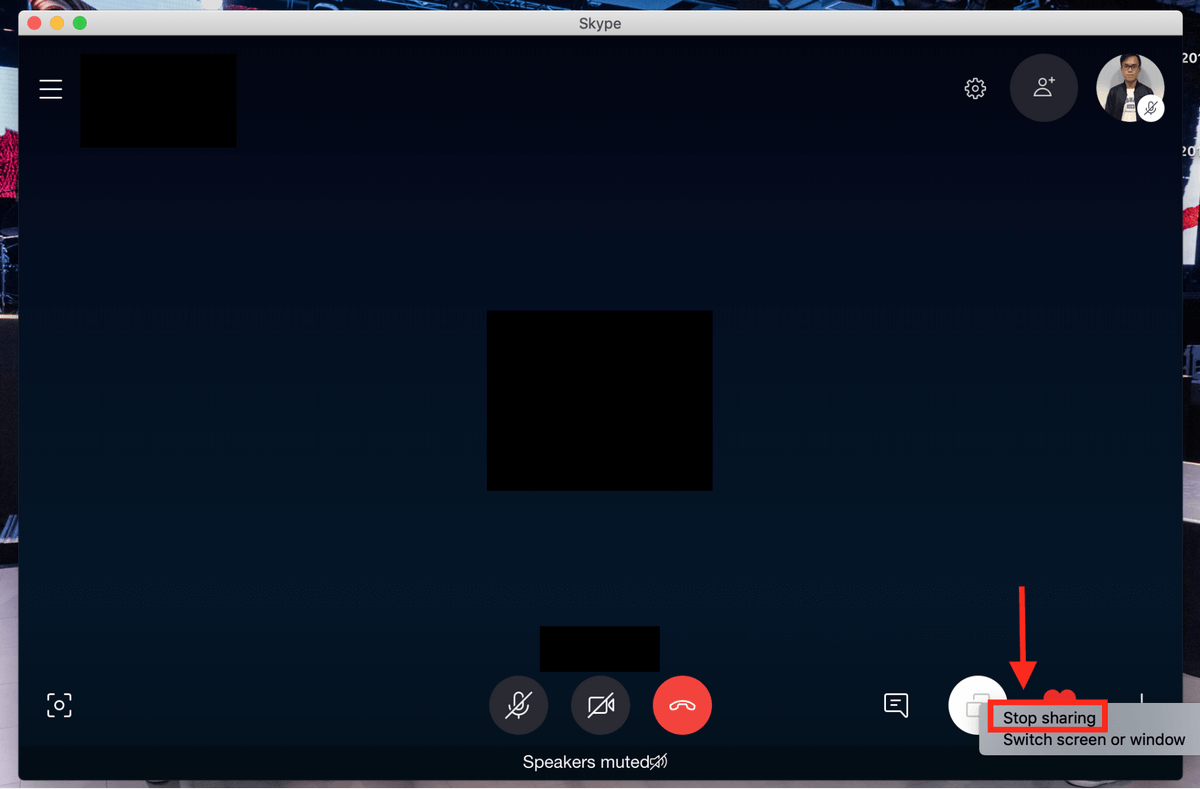
When you want to stop sharing your screen, click on the same icon and click Stop Sharing as shown below.
Now you no longer have to waste time describing what is on your screen, nor do your friends need to endlessly attempt to visualize what you’re saying.
Feel free to drop a comment if you have any further questions.
The only screen I can share is my desktop
I have that same icon for screen sharing however though I click it, still nothing happens. I cannot share screen. I don’t know what to do.
The screen share button does not show up- even if it shows up, it is gray and is inactive. This problem occurred after Skype update to the latest version. I am using mac with Safari. Thank you.
The screen sharing icon does not appear on my 1Mac screen, running Mac OS Catalina
Tks for information. I have tried to do so, but how to share a pptx file and see at the same time the Skype Chat on the right side bar. Is it possible?
Many thanks!
how to share screen using skype web only?
very helpful. thank you.
I was not able to handle my problem and was charged for a person with whom I could not talk.
While i am sharing my mac book screen on skype,only my wall paper is being displayed and not the files.
Earlier i was able to share my file on screen