
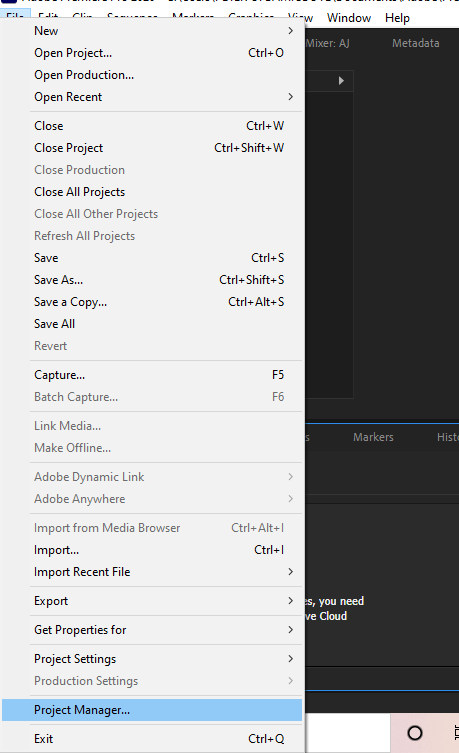
Select “Project Manager” from the file menu to share a project in Adobe Premiere Pro. A menu will appear; select Collect files and copy to a new location. After that, navigate to the location and share it with anyone you want to share it with.
I am David, a professional video editor, using Adobe Premiere Pro for the past few years. I use Windows PC. As such, the steps below are for Windows OS, but I believe it’s the same process for MAC users.
In this article, I will explain how to share projects, consolidate projects, transfer projects, and edit remotely with Premiere Pro.
Table of Contents
To share a project in Adobe Premiere Pro, navigate to File > Project Manager, then wait for a new window to appear.
If it is a single-sequence project, just go directly to “Collect Files and Copy to New Location,” but for projects with multiple sequences, select each to copy under “Sequences.”
Then, scroll down and select “Collect Files and Copy to New Location.”
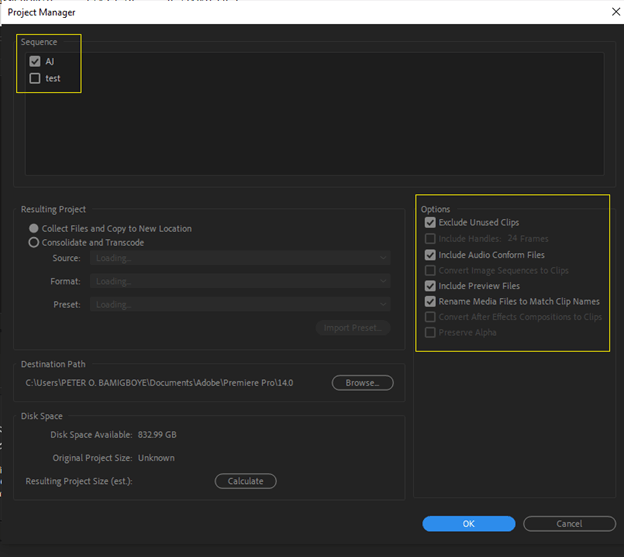
Options on the right side of the window include:
Exclude unused clips: this implies that unused clips from the project will not copy (not recommended).
Include the following audio conform files: To save space, uncheck the box. When you reopen the project, Premiere will automatically re-confirm the files.
Include preview files: Uncheck this to save space. Adobe Premiere Pro will automatically create new previews.
Rename media files to match clip names: If the clips are to be renamed in the project, the media files will be renamed to match.
Click “Browse” under “Destination Path.” Name the folder (whatever you want) and select a storage location (for example, directly to a flash drive or any other storage drive). Once you finish with that, click “OK.”
Adobe Premiere Pro will create a folder and move (copy) all project-related files into that folder. This folder can be saved to a cloud storage service like Google Drive or transferred to a flash drive without re-linking issues.
How to Consolidate a Project in Adobe Premiere Pro
In Premiere Pro, there are two ways to create a collaborative project, each with its benefits and disadvantages.
The first option is to work on a team project. This is an excellent option for remote teams, but it is sometimes the best. It has issues with large amounts of data and when different users have different file paths for their source files.
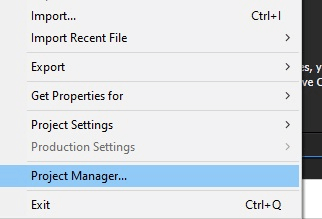
It is, however, very good at resolving conflicts when multiple users make updates. To do this, go to File > Project Manager. Selecting “Collect Files and Copy to New Location” will allow you to upload or copy to any drive. Then other editors can access it.
The other collaboration tool is shared projects, best used when a team works in the exact location and local network. This method has advantages. If you are sourcing the files from a central location, media added to the project by one person will be available to everyone.
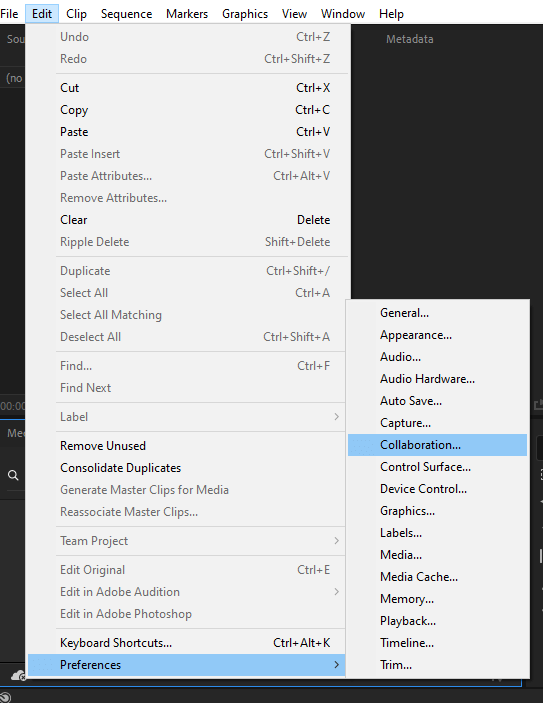
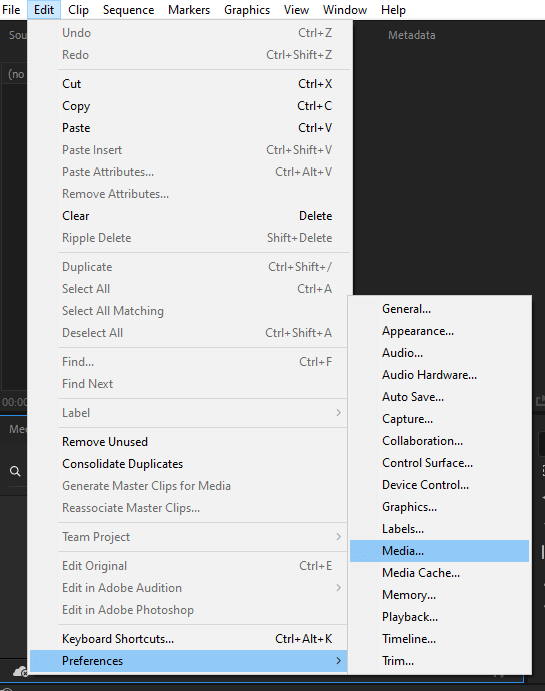
However, it is critical to lock your project to prevent other editors from overwriting or interfering with your editing process. To do this, go to Edit > Preferences, click Collaboration, enable Project Locking, and create a username.
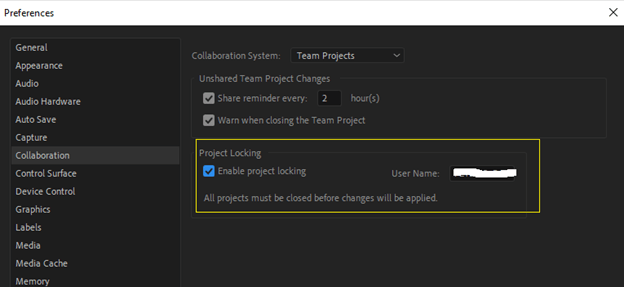
This isn’t specific to your project; you’ll only need to do it once. You can now use project locking and appear as your chosen username in all collaborative projects.
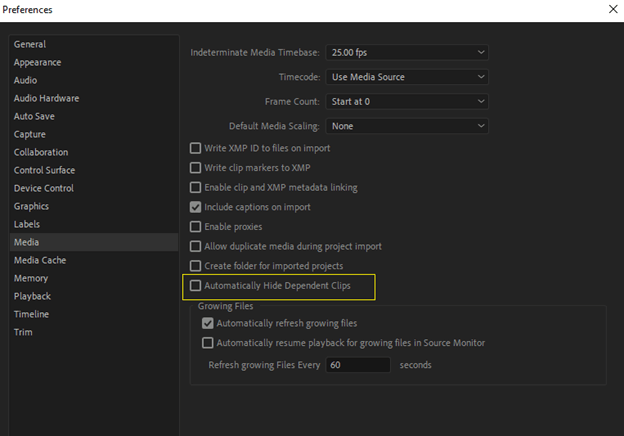
The next thing you should do is change a setting in preferences, but this time in the Media tab.
Check the “Automatically hide dependent clips” box. This setting helps avoid the mess referenced files can cause by hiding reference clips from other projects and only showing original files.
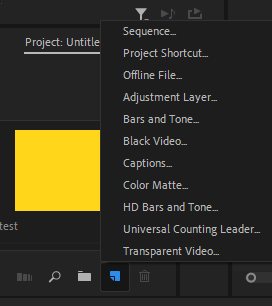
To make your first shared project, go to the project panel’s new item button and select Project Shortcut.
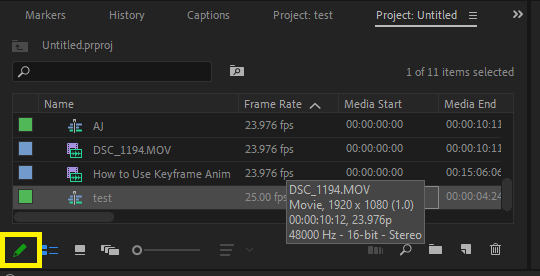
Set the master project to read-only once your shared projects are complete. Click on the green pencil icon in the bottom left corner of the screen to do so. This will activate the lock, preventing other users from adding or removing projects.
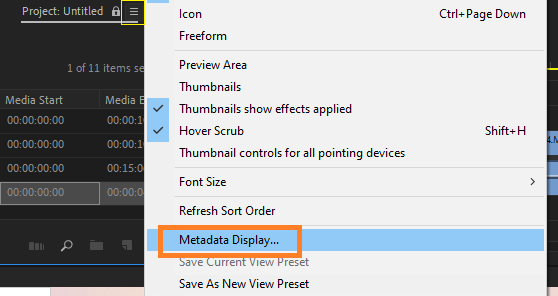
Select Project Locked from the Metadata Display options in the project panel. You can also lock and unlock each shared project by opening it and then clicking the pencil button. Enabling this prevents anyone else from making changes to a shared project while you’re working on it.
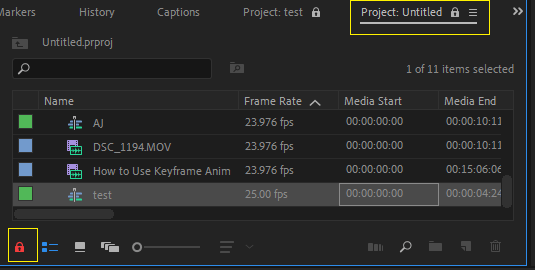
The “Project Locked” column will show who has it open, making it easier to know who to contact if you need to edit something in that project yourself. However, each workstation should have a different name.
If a project folder has a green pencil symbol next to it, it means you have read and write permissions and can edit it normally. When editing a project, lock it before making any changes so that no one else can access it, and save the project when you’re finished.
One of the best aspects of organizing collaborative projects is that nothing is set in stone. You can easily manage projects in whatever way works best for your team.
However, it is best to keep your master project free of sequences and files and instead use shared project folders to better organize your assets and specific projects.
Conclusion
If you need someone to help you with your project or video editing, you don’t need to stress yourself; all you need to do is use shared projects. To review, go to the file menu and choose “project manager.” A menu will appear; select Collect files and copy to a new location.
This guide has helped show you how to share projects in Adobe Premiere Pro. If you need any additional help, don’t hesitate to contact me by dropping your question in the comment box below.