
The process of selecting multiple layers in Procreate is easy, if not intuitive. Like many tasks on Procreate, there’s a learning curve even if you’re familiar with other drawing software. This process will work the same on every version of Procreate.
With regular use selecting and working with multiple layers will become instinctual as you design. In my years of experience as an illustrator, I’ve come to use this simple tool very frequently to make quick changes to my work.
In this tutorial, I’m going to show you how to select multiple layers in Procreate along with some tips on working with layers.
Table of Contents
Quick Steps to Select Multiple Layers in Procreate
Selecting multiple layers will allow you to save time by editing all the necessary components of your artwork at once. Being able to work with multiple layers simultaneously is a necessity for any digital artist. You’ll learn to quickly experiment with compositions and make detailed edits.
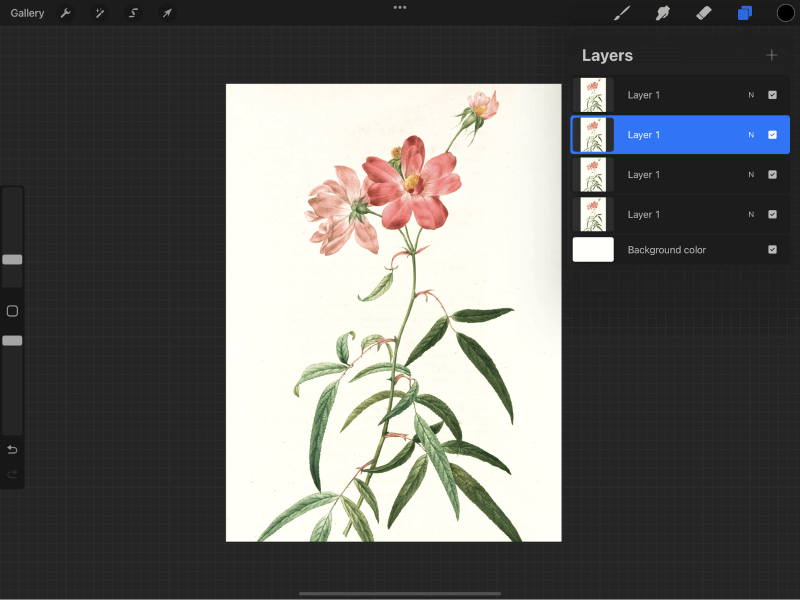
Locate the layers menu – the second icon to the top right of your screen and look like two overlapping squares. Open the menu by selecting this icon. Whichever layer is currently selected will be highlighted with blue.
Step 2: Select layers by dragging to the right
Simply put your finger or pen on the desired layer and slide it toward the right. Don’t click and release or you will deselect the other layers.
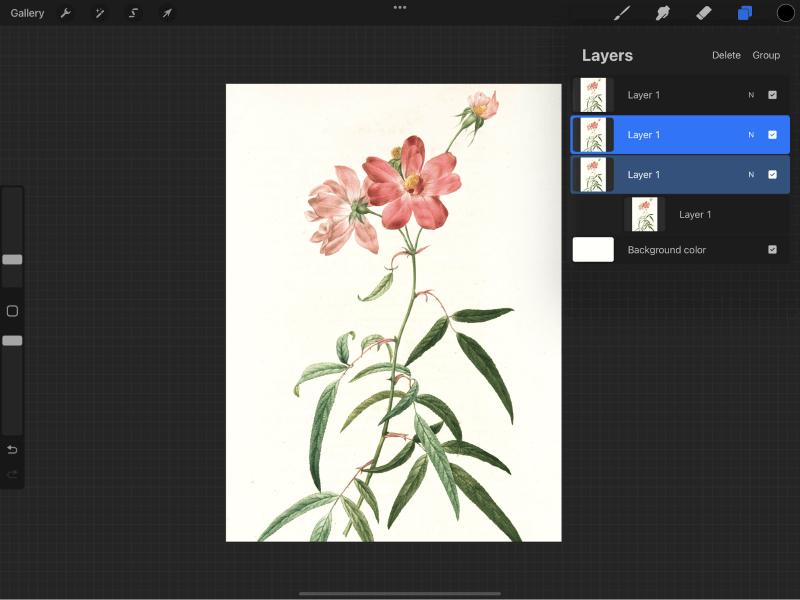
Each additional layer selected will be highlighted with a muted blue. The primary layer will remain the original vibrant blue.

That’s it! If you just selected unwanted layers, you can deselect them.
How to Deselect Layers in Procreate
When you need to deselect, there are two options available to you. You may tap on the one layer you wish to work on, which will deselect every other layer.
Or If you want to keep more than one layer selected, deselect a single layer by dragging to the right again.
Working with Multiple Layers Selected in Procreate
Of course, only certain tools will be available when working on multiple layers. Drawings will go to the primary layer, while the tools at the top left will edit all the selected layers.
Under the adjustments menu, indicated by a magic wand, you will be able to use liquify to quickly make changes to your artwork. None of the other adjustments will be available.
You’ll also be able to use the selection tool, indicated by a ribbon in an S shape, to make selections as you would with a single layer.
Only the color fill option will not be available. Copy and Paste will copy only from the primary layer.
The move tool, indicated by a cursor icon, is very useful if you wish to move multiple layers.
You may also group the layers together for more convenient editing, or delete them all. These options are found under the layers menu at the top right.
Conclusion
By using the simple trick of selecting multiple layers, you’ll be able to quickly transform your work. Remember that any drawing done before deselecting will go to the primary layer. Be sure to deselect the layers first as it’s easy to accidentally draw on the wrong layer.
Have you found this technique useful? Did you find it intuitive compared with other drawing software? Let me know if this article was helpful to you, and feel free to leave a comment if you need any clarification.