
iMovie makes it easy to rotate any videos or pictures that, when imported, have the wrong orientation for your movie.
It is not unusual to have video footage that was filmed in a vertical – even upside down – orientation and you need to rotate it in your iMovie project.
Even after a decade of shooting video and editing both home movies and commercial projects in professional video editing software, I still seem to flub my filming and need to fix it in the video editing program.
But iMovie makes fixing it easy, so no worries, and below I will show you how to rotate any image or videos that need it, and – if necessary – how to crop the resulting image to make it fit better in your screen.
Table of Contents
How to Rotate Videos (or Photos) in iMovie Mac
If you import a video or photo that was shot with your camera at the wrong angle (upside down happens for me all the time when I am shooting on an iPhone), it will look similar to the screenshot below, where my picture of a Dashing T-Shirt Model is laying on the side.
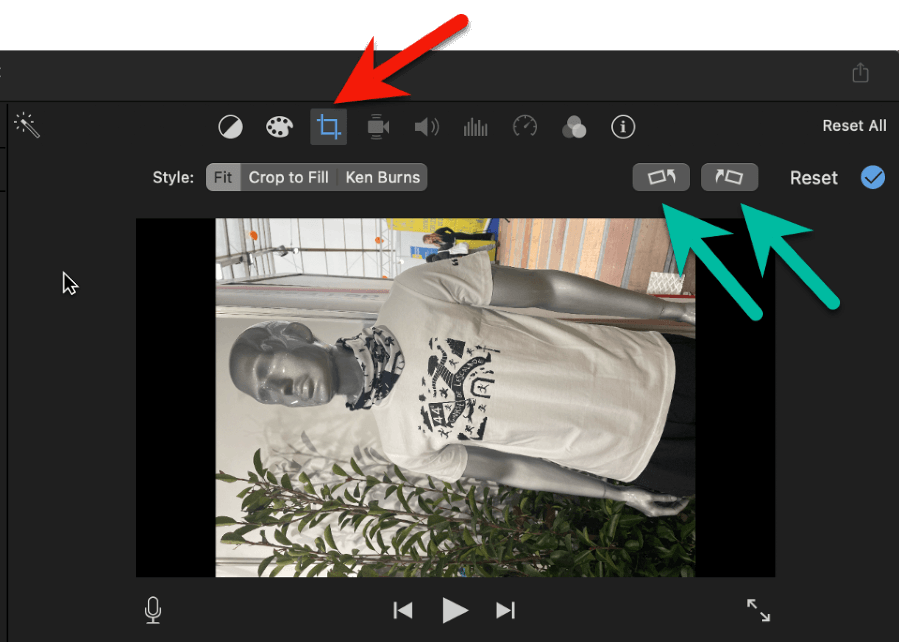
But the fix is easy. Just select the clip in your timeline and click the cropping tool icon (highlighted by the red arrow in the screenshot above) in iMovie’s Viewer window (which is in the top right portion of the iMovie application.)
Clicking the icon reveals a row of cropping tools just above your video in the Viewer. We will get to the Style options later, but to rotate you use the two icons highlighted by the green arrows in the screenshot above.
Each button turns your image 90 degrees, clockwise if you click the right button and counterclockwise if you click the left button.
Note that you can keep clicking either button until you get the image right. For example, if your video was imported upside down, clicking either button twice will bring it round.
How to Crop your Videos (or Photo) if Necessary
After rotating your image, it is likely to look like the screenshot below, where my Dashing T-Shirt Model is now orientated right, but is only filling about a third of the movie screen.
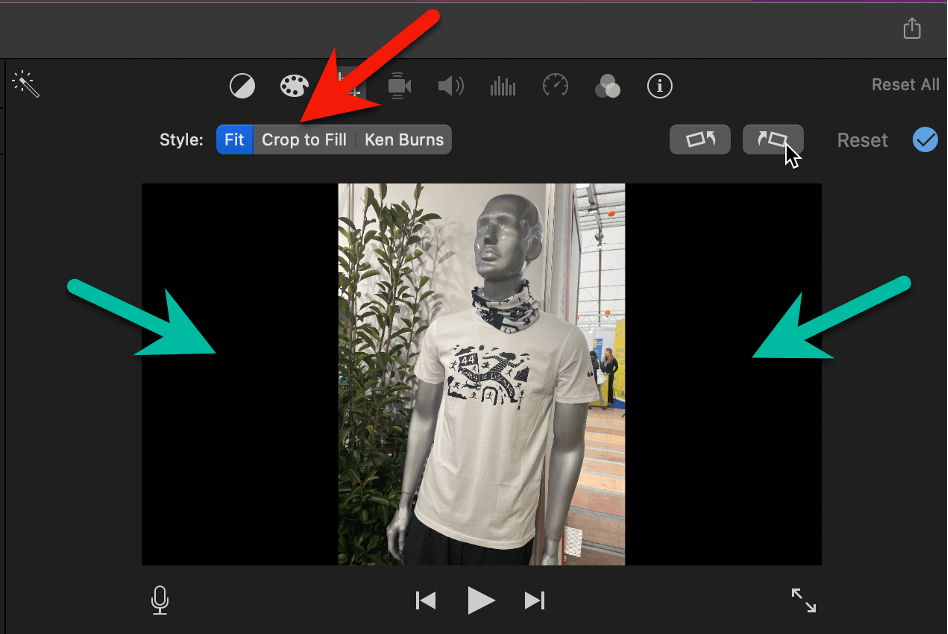
If you look carefully at the screenshot above, you can see there are dark black bars on either side of my photo, identified by the green arrows in the screenshot. And notice that this black is darker than the gray-black color that makes up the background of the Viewer.
While the different shades of black can be an (annoyingly) subtle difference, the difference in how your movie looks is significant. The (dark) black areas mean that iMovie will show black in these spots when your movie is played.
This can be quite jarring. Just imagine watching a movie on your TV and for one scene your TV suddenly shrinks from a horizontal rectangle to a vertical one, then goes back to normal. Yeah, it’s not good.
But if you select the Crop to Fill button (highlighted by the red arrow in the screenshot above) in the Style section of the cropping tools you will see something like the screenshot below:
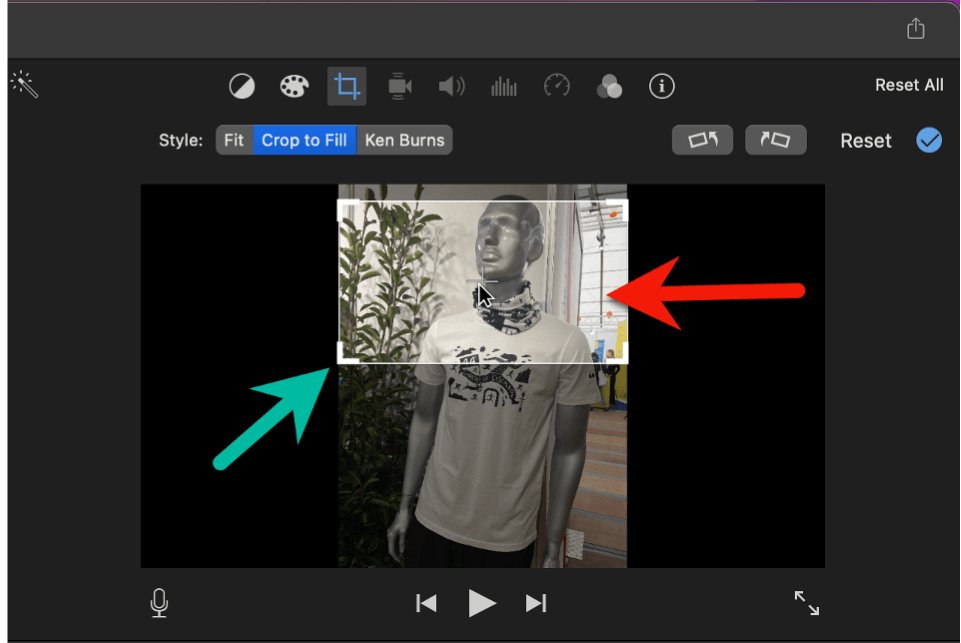
Now, what is inside the white box (highlighted by the red arrow) will, when your movie plays, be zoomed in to fill the entire movie screen while everything outside of the white box will be cropped out.
Put differently, the white box “crops” to “fill” the screen, and thus the name of the tool.
And the tool is very flexible. You can drag the white box around to have it focus on whatever you like – in the example above, I have positioned it to capture the Dashing T-Shirt Model’s face, with just a hint of the logo on his T-Shirt.
If you want less of his T-Shirt in the shot, click anywhere in the white box, hold, and drag it up. If you wanted just the logo on his chest, click, hold, and drag the box down. Easy peasy.
While you can’t change the dimensions of the white box (they remain fixed to the size of your movie screen), you can zoom in. Just grab one of the white box’s corner handles (the green arrow in the screenshot above is pointing at one) and drag it toward the center of the image.
This will shrink the white box, creating more of a close-up shot when your movie is played. But, shrinking the box usually moves its center so you will probably have to then move the white box a bit to recenter it on what you want to show.
Pro Tip: Next to the Crop to Fill button in the row of cropping tools is a Ken Burns button. This is an interesting tool where you can position two boxes that both Crop to Fill – one where the clip will start and the other where it will end. With this tool, iMovie will pan or zoom or whatever is needed to have the clip evolve from the first box to the second. A very powerful feature…
Final Swiveling Thoughts
I hope you’ve seen how easy it is to fix any wrongly oriented footage, and how to crop out any irritating black bars that may appear as a result.
But, please, if you are confused about anything or just have questions, don’t hesitate to let me know in the comments section below. It is important to me that you rotate and crop your clips to your heart’s content. Thank you.