
When editing a movie in Final Cut Pro, it is likely you will want to rotate a video clip. It might be because the clip was recorded on a mobile phone in landscape or portrait mode and when imported to Final Cut Pro it is off by ninety degrees.
Or perhaps the horizon in a particular shot isn’t as level as you would like, and you want to tweak it a few degrees. Regardless of the reason, rotating a video in Final Cut Pro is both easy and can help your videos look professional.
In this article, I will show you how to do it in a few ways so that you both have all the information you may need, and can choose the method that works best for you.
Table of Contents
Key Takeaways
- You can quickly rotate an image using the Transform tool.
- You can also rotate images by adjusting the Transform settings in the Inspector.
- After rotating an image you will often need to enlarge your video (by zooming in) to eliminate any blank spaces rotation has created.
Method 1: Rotate Video Using the Transform Tool
Step 1: Activate the Transform Tool.
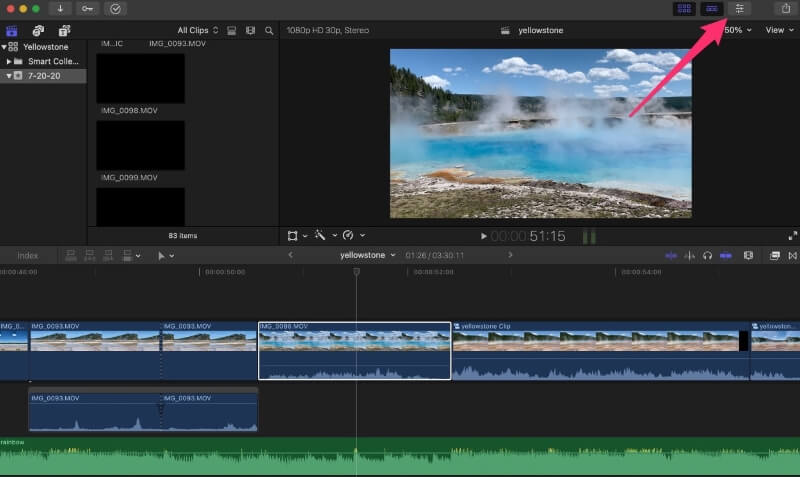
Click on the video clip you want to rotate and then select the Transform tool by clicking on the small square in the bottom right corner of the viewer pane, where the red arrow is pointing in the screenshot below.
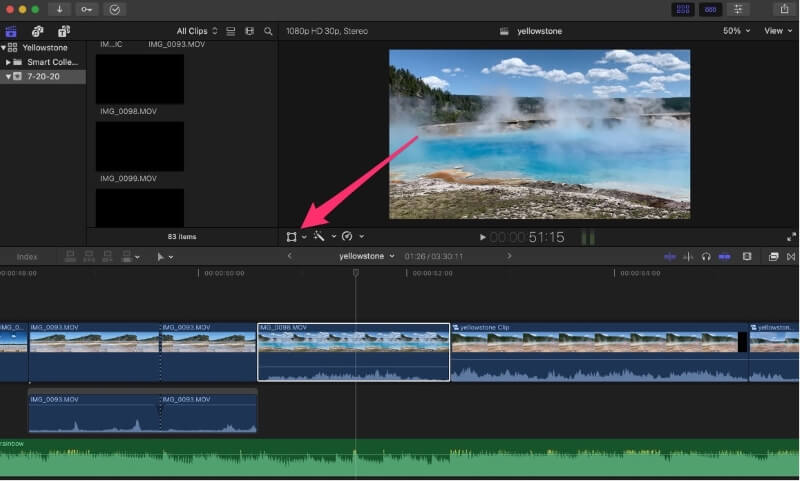
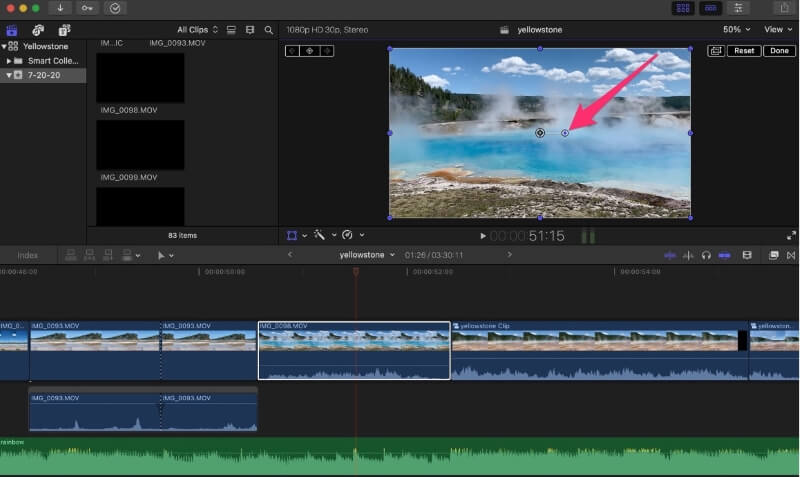
Once selected, the Transform tool’s icon will turn from white to blue and you will see some controls have appeared on the image in the viewer, as shown in the image below.
In the center of the image, where the red arrow in the screenshot is pointing, is the rotation handle which allows you to easily rotate the image.
Note also the blue dots that now appear around your image. These are handles that allow you to zoom the image in and out, or stretch it up/down and sideways.
Step 2: Rotate your image.
To rotate the image, simply click – and hold — on the blue dot where the red arrow is pointing in the above screenshot. Now drag your mouse or move your fingers across your trackpad and you will see the image rotate in the viewer pane.
When you have the angle you want, simply let go of your mouse button or take your fingers off your trackpad.
Step 3: Clean up your image, if necessary.
It is not unusual for a video that has been rotated to leave a few blank spaces. In the example shown in the screenshot below, the video was filmed with the camera a bit titled. So I rotated the clip clockwise a few degrees to make it look more level.
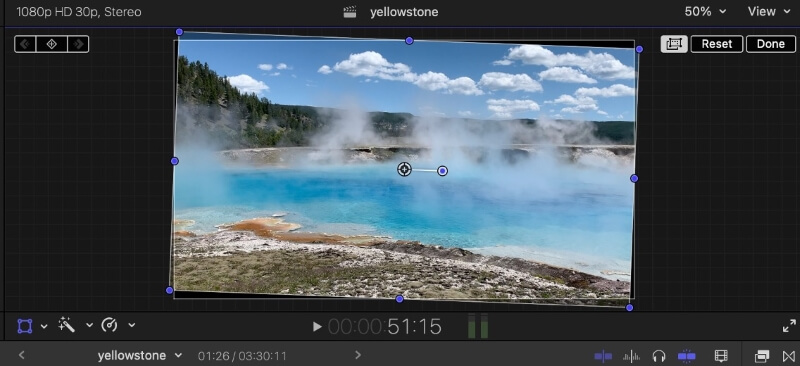
But this rotation resulted in some very visible blank spaces, particularly in the top right and bottom left areas of the screen. The easiest way to fix these is to zoom in (enlarge) your video until these spaces disappear.
You can zoom in by clicking on any of the blue handles and dragging away from the center of the picture. You’ll see your image grow to fill the gaps and when you are satisfied with the look, you can let go.
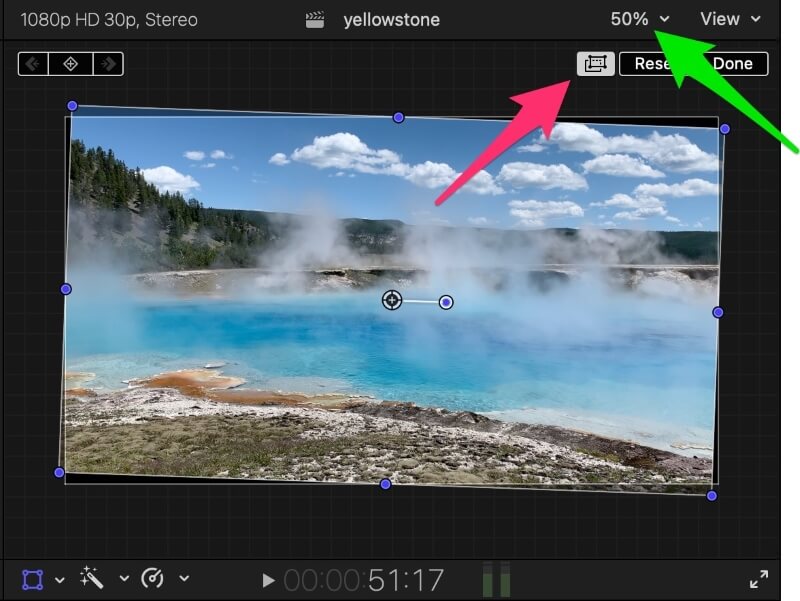
Tip: If it is hard to see the blue handles needed to zoom your image it can help to shrink the image within your workspace. You can do this by clicking on the scale setting where the green arrow in the below screenshot is pointing. Simply clicking that number and selecting a smaller percentage will shrink your image in the viewing area allowing you to see any control handles that may have been off screen.
Pro Tip: If it just isn’t very clear if there are any blank spaces after rotating, clicking the viewer toggle (where the red arrow is pointing) will toggle on/off the helpful white box (shown in the screenshots above and below) that can help reveal where any blank spaces may be.
When you are satisfied with the rotation of your video and any necessary cleanup, I recommend turning off the Transform tool so the controls disappear and won’t distract you as you go about your editing of other clips.
To turn off the Transform tool, just click the (now blue) square again and it will turn back to white and the Transform controls will disappear.
Method 2: Rotate Video Using the Inspector
Step 1: Open the inspector.
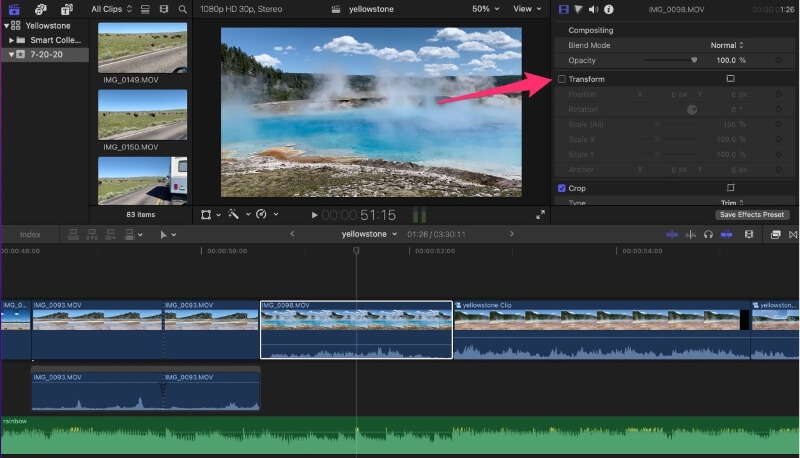
The inspector is a popup window containing various settings depending on what kind of clip you have selected. It can be opened and closed by clicking on the Inspector icon – which the red arrow in the screenshot below is pointing to.
Step 2: Activate the Transform setting.
While there are tons of fun and useful controls in the Inspector, today we are just concerned with the Transform section.
If the white box to the left of the word Transform (which the red arrow in the screenshot below is pointing to) is unchecked, click it. Now all the Transform controls will go from gray to white and you can start adjusting them.
Step 3: Change your video’s rotation.
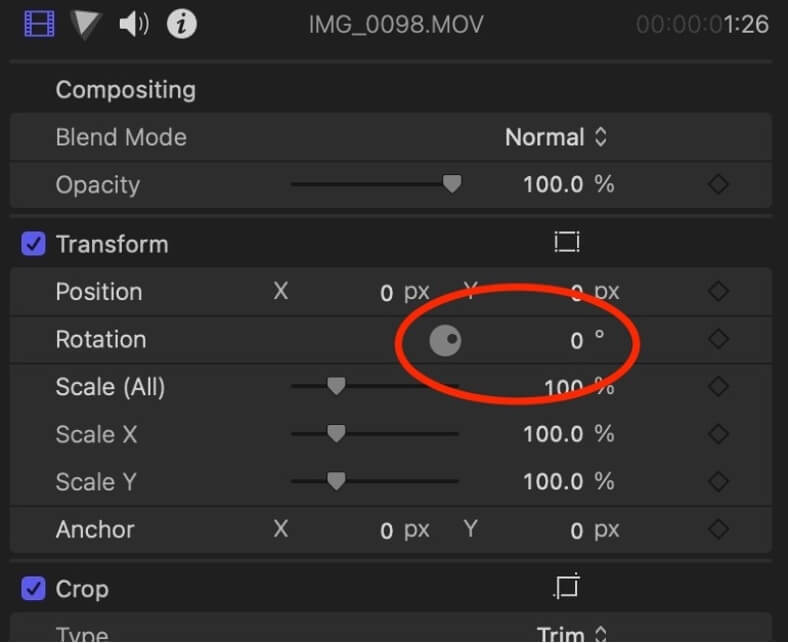
In the screenshot below, the red oval highlights two ways to rotate a video in the Inspector.
On the left side of the highlighted oval is a gray circle with a black dot. This is a “wheel” that you can click on and drag around to rotate the image much like you did with the Transform tool.
More helpful, in my opinion, is the number on the right side of the red oval. Here you can enter any number you like and your video will rotate to exactly that degree.
If you want to rotate your video up and to the left, enter a positive number. If you want to rotate down and to the right, enter a negative number.
As you play with these controls you will get a feel for them, but it may be easier to use the “wheel” on the left to rotate the image to roughly where you want it and then raise or lower the number on right to get the rotation exactly where you want it.
Tip: You can enter partial degrees. So, if you are trying to level a picture with a clear horizon but 2 degrees is too little and 3 degrees is too much, you can adjust by 1/10th of a degree by including a decimal point, such as 2.5. And as far as I know, there is no limit on the number of decimal places Final Cut Pro will accept. If 2.0000005 degrees is just the amount you need to rotate, no problem!
Finally, you will probably have some of the same issues with blank space using the Inspector that you had using the Transform tool.
You can fix those easily in the inspector by increasing the Scale (which is just below the Rotation controls we’ve been discussing). This tool does exactly the same thing as zooming in or out using the handles provided by the Transform tool. Raise the number to increase the scale (zoom in) or lower it to decrease the scale (zoom out).
Final (Transformative) Thoughts
While the Transform tool is fast (just click the Transform button and start dragging handles) the Inspector allows more precision.
And sometimes being able to see the exact number of degrees that you rotated an image, or the exact percentage of zooming that you used to remove any blank spaces, can help you get just the right amounts for another image you want to rotate.
But which tool works best for you is a matter of personal preference, so I encourage you to try both and see what you like and don’t like about the different approaches.