
You can resize an image on your Mac using Preview, the Photos app, the Pages app, and various other applications.
I’m Jon, a Mac expert, and owner of a 2019 MacBook Pro. I frequently resize images on my Mac and made this guide to show you how.
Sometimes, an image might be too big or too small to fit in your presentation, send over email, or fit into your ever-growing photo library. This guide reviews the easiest ways to resize images on your Mac, so continue reading to learn more!
Table of Contents
Method 1: Adjust Using Preview
Preview is Apple’s built-in image editing software that allows users to easily edit and resize images from their Macs.
Follow these steps to adjust the size of your photo using Preview:
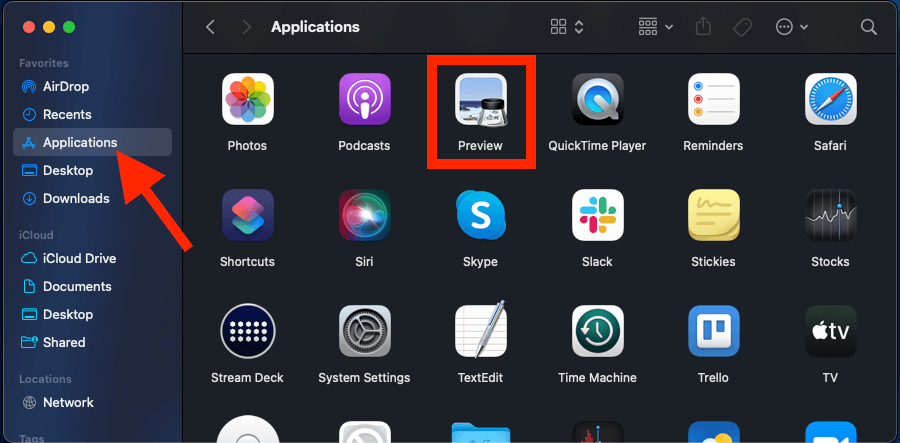
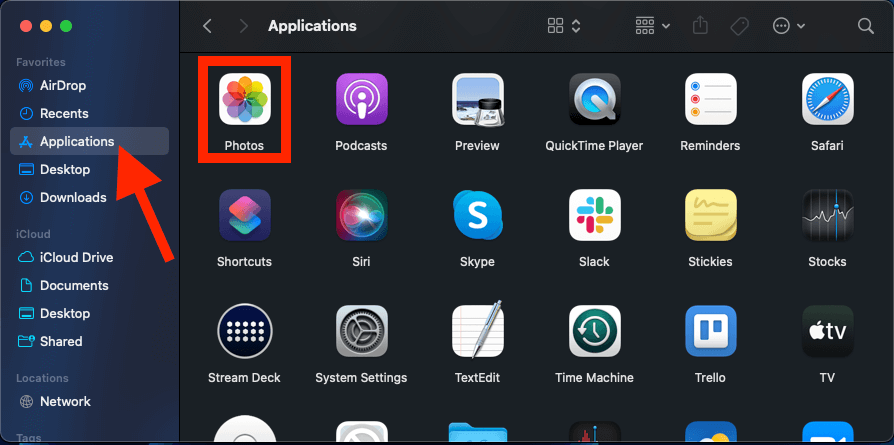
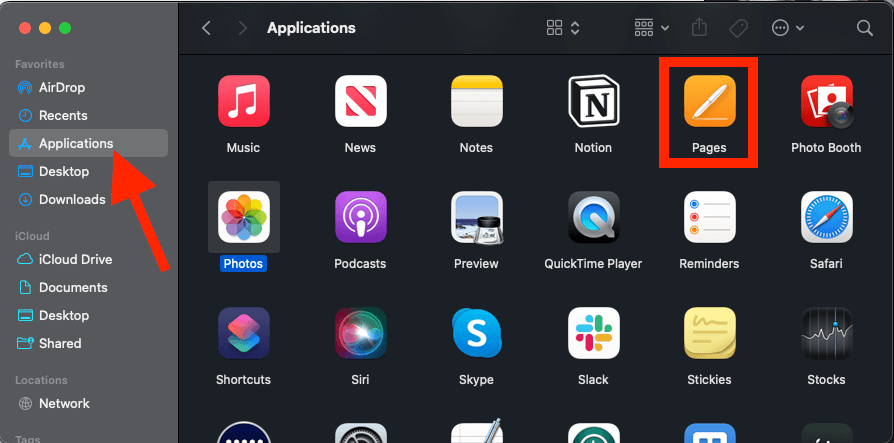
Step 1: Open Finder, then click on “Applications.” Scroll through the app options, then click on “Preview.”
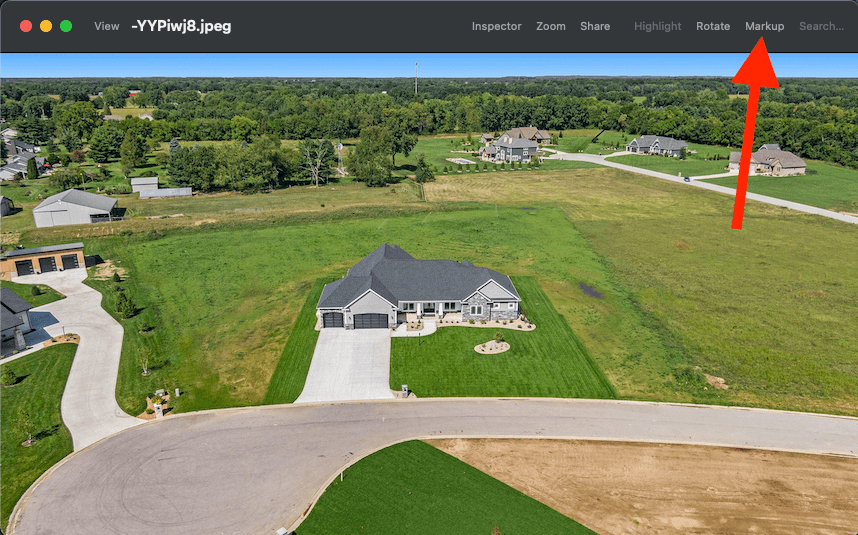
Step 2: In Preview, find the image you want to work with. Double-click on the photo to open it. Find and click on the “Markup” icon in the toolbar at the top of the Preview window.
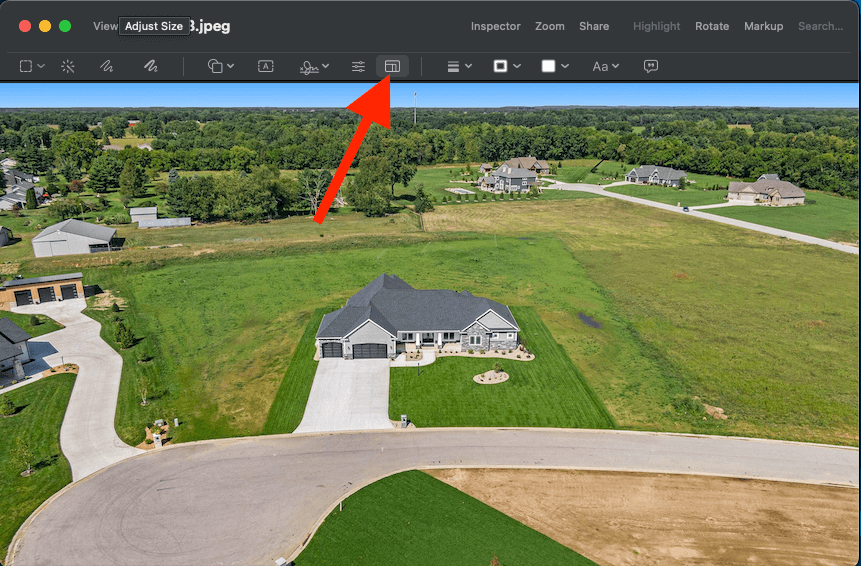
Step 3: Once you open “Markup” mode, choose the “Adjust Size” icon.
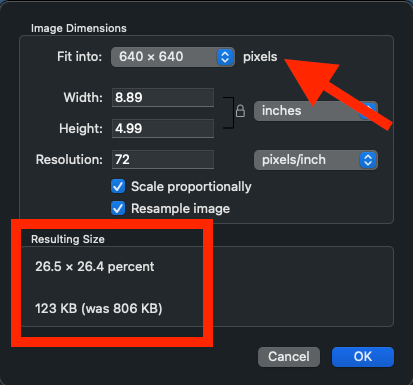
Step 4: A window will pop up with various settings, including “Fit into.” After you make a size change selection, the window will tell you the “Resulting Size.” Adjust your desired image dimensions on this screen, then click “OK” once you’re done.
Note: If you want to keep the original file, be sure to save your new changes to the file as an Export. Otherwise, Preview will save your recent edits in the existing file.
Method 2: Use Mac’s Photos App
Mac’s Photos application is another option for adjusting photo sizing. Here’s how to change the size of your image in Photos:
Step 1: Open the iPhotos/Photos app.
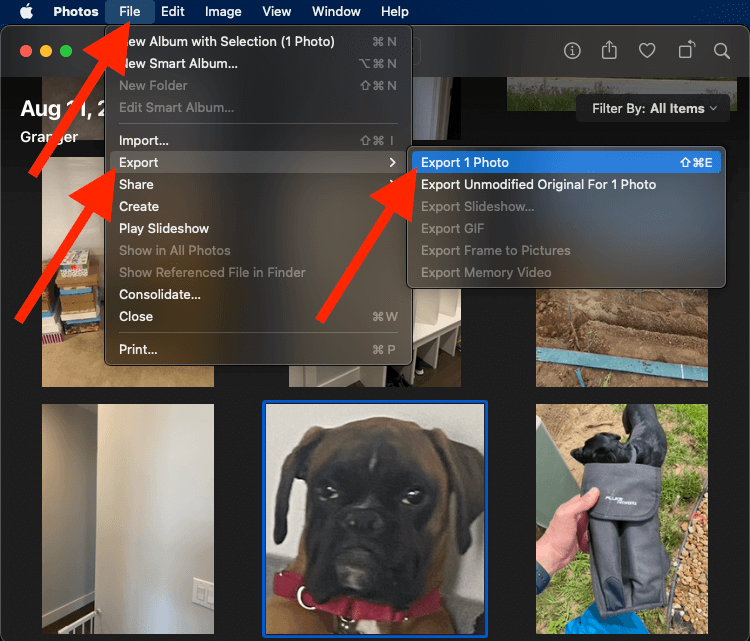
Step 2: Find and select the image you want to resize. In the upper toolbar, choose File > Export > Export 1 Photo.
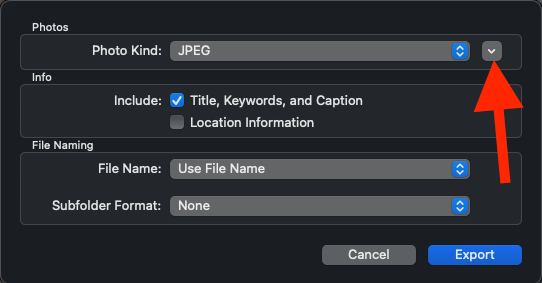
Step 3: A new window will appear on the screen. In this window, click the down arrow next to “Photo Kind.”
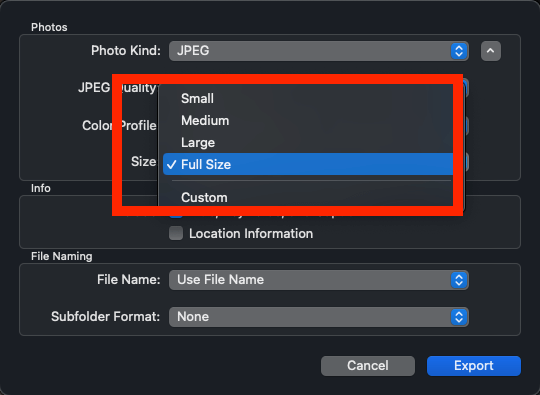
Step 4: Click the “Size” drop-down.
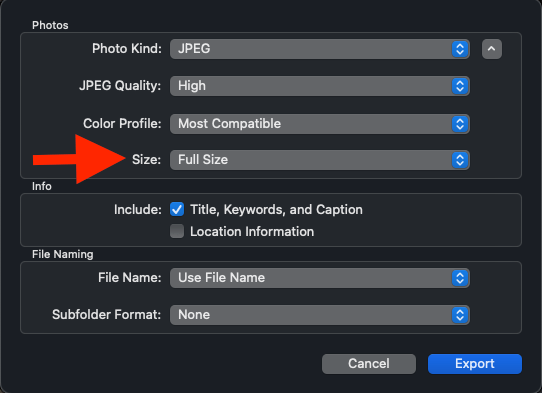
Step 5: Choose your desired size between Small, Medium, Large, Full Size, and Custom.
Step 6: Lastly, click on “Export” in the bottom right and choose a location to save it.
Method 3: Use Pages on Mac
Mac’s native text editor, Pages, is another easy way to manipulate the sizing of your photo. If you regularly use it, you likely know your way around it, but did you know you can use it to resize images?
Here’s how to do it:
Step 1: Open Pages.
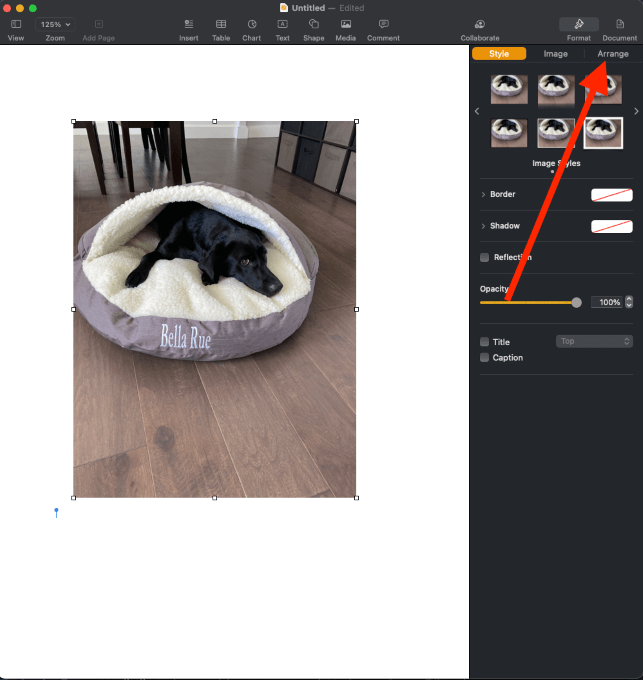
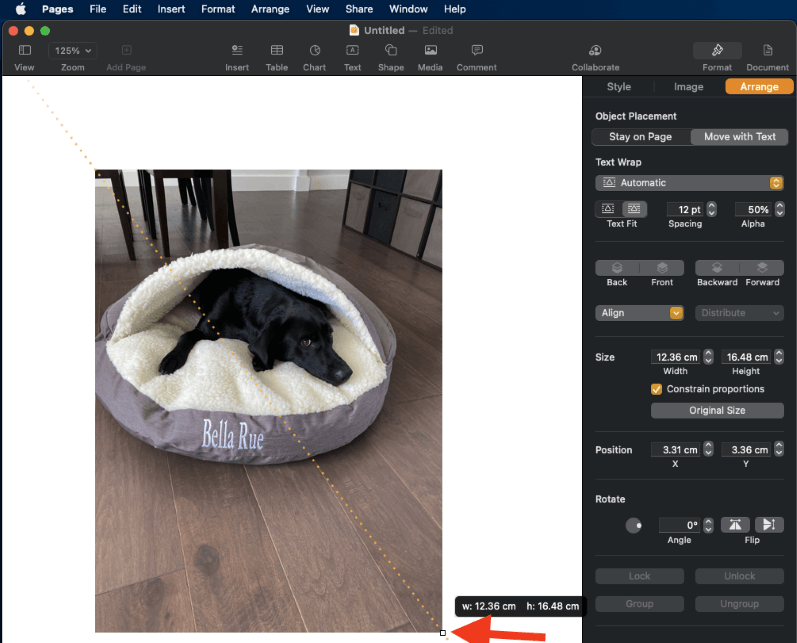
Step 2: Paste the image you want to work within your document. Select “Arrange” from the window’s toolbar on the right side.
Step 3: In the “Arrange” window, choose the correct height and width for your photo. If the “Constrain proportion” checkbox is marked, change the height or width, and the other measurement will adjust accordingly.
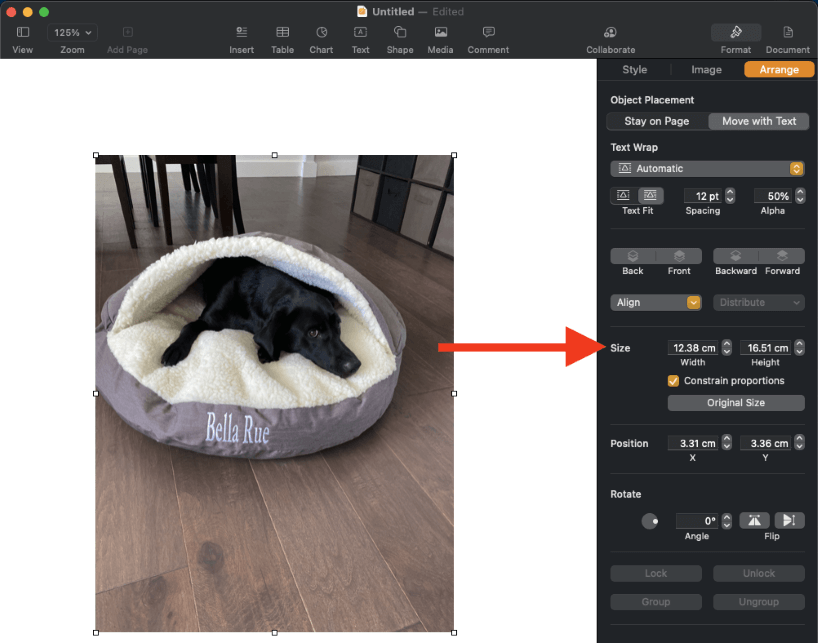
Step 4: Alternatively, manually resize your images by clicking on the photo and dragging its edges.
Method 4: Resize Batches of Photos
There’s no need to meticulously resize each photo in your collection, as you can easily resize a batch of images at once.
Apple’s Preview app allows users to resize images in batches, which saves time.
Here’s how:
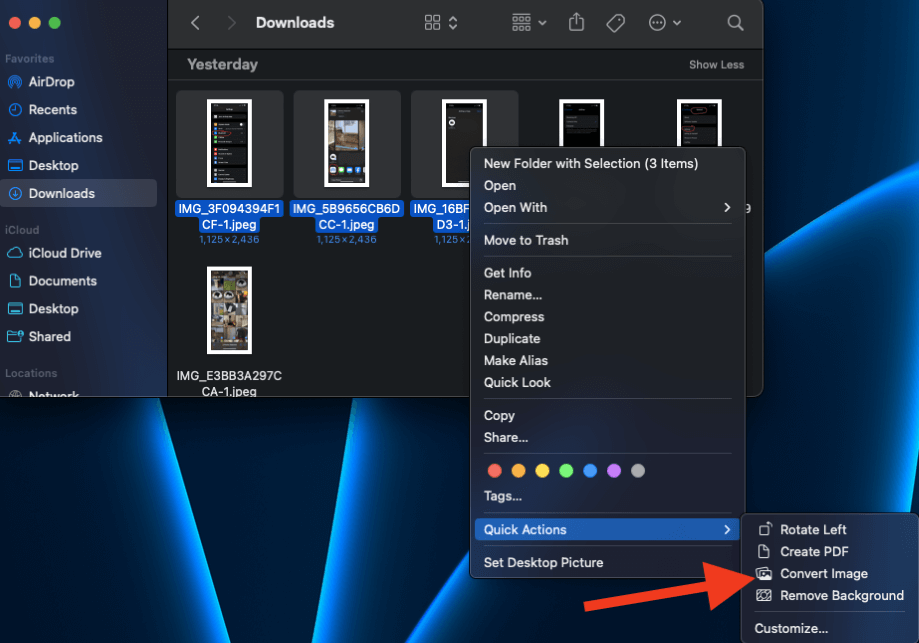
Step 1: Open Finder. Select all of the images you want to resize in a Finder folder by using Command + Click or clicking and dragging over multiple images.
Step 2: Once you select the images, right-click on one of them. In the menu that appears, select “Open With…” and choose “Quick Actions” and “Covert Image.”
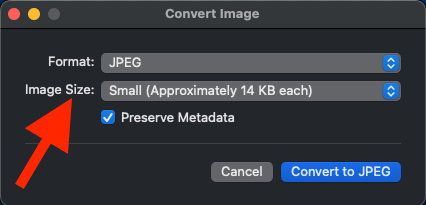
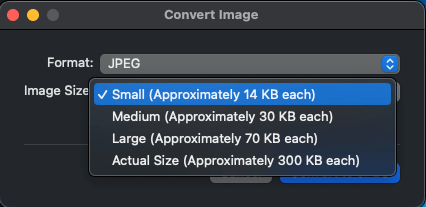
Step 3: After a new window appears, click the “Image Size” dropdown and select small, medium, large, or actual size.
FAQs
Here are some of the most common questions we get about resizing photos on Macs.
How Do You Resize an Image without Losing Quality?
Reducing the size of your photos can lead to poorer quality images, which can deter downsizing. However, you can resize the image but retain the quality with a simple trick. All you need to do is determine the exact size you need for your project or purpose.
For instance, if you’re using the image in the corner of a presentation, simply resize it to fit your dimensions. Avoid enlarging smaller images, as this can result in a poor-quality, pixelated photo.
Depending on where you adjust the sizing of your photo, you may or may not get a quality slider on the resizing option. If you do, ensure you move the slider toward the “Best” side of the slider to get a better-quality photo.
How Do You Resize an Image for Mac Wallpaper?
Setting one of your photos as your Mac’s wallpaper is an excellent way to add a personalized touch to your device. However, sometimes the photo might not fit the screen properly, making it seem disproportionate or off-kilter.
To adjust the sizing for your desktop wallpaper, open System Settings > Wallpaper. Scroll through the options until your find “Pictures,” then select the image you want to use. In the available options, choose “Fit to Screen,” “Fill Screen,” or “Stretch to Fit.” You can see a live preview before choosing, which will help you decide the best fit.
Conclusion
Large photo files consume a considerable amount of space on your Mac, so compressing the files is necessary from time to time, especially if you need to send the photo via email.
You can use several methods to resize photos on your Mac, including the Photos, Preview, and Pages apps. But the process is straightforward regardless of which option you choose.
What is your go-to method for resizing images on your Mac?