
To remove background noise in Audacity, use the Noise Reduction effect. Select a few seconds of audio containing only noise, then click on Effect > Noise Removal and Repair > Noise Reduction… from the menu bar. Click Get Noise Profile. Select your entire track, return to the Noise Reduction window, and click OK.
Hello, I’m Andrew Gilmore, a long-time Audacity user. In this article, we’ll look closer at the Noise Reduction effect and other tools at your disposal for removing background noise in Audacity.
Ultimately, I’ll answer some frequently asked questions about background noise removal. Let’s get started.
Table of Contents
Use Noise Reduction to Remove Background Noise from an Audio Recording
Before attempting any type of noise removal from your audio, be sure to create a copy of your original file. Audacity’s changes are destructive, so keeping the source file intact is essential in case you need to start over.
Audacity’s Noise Reduction effect is a great way to reduce the amount of background noise in your track. Here’s how to use the effect:
- Select a few seconds of audio containing only noise.
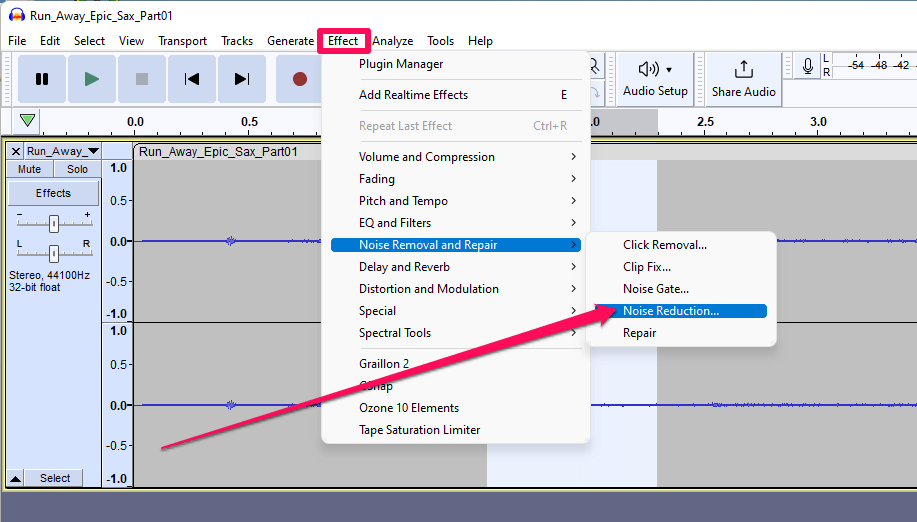
- Click Effect > Noise Removal and Repair > Noise Reduction… from the menu bar.
- Click the Get Noise Profile button.
This action tells Audacity which sounds are noise.
- Select your entire audio track (or tracks) and return to the Noise Reduction effect screen.
- Leave the default settings as they are now, but click on the Residue radio button, then click Preview.
Residue is what will be removed, so if you hear quite a bit of non-noise sounds in the preview, you will need to adjust your settings.
- If the preview sounds okay, click Reduce and OK to apply the effect.
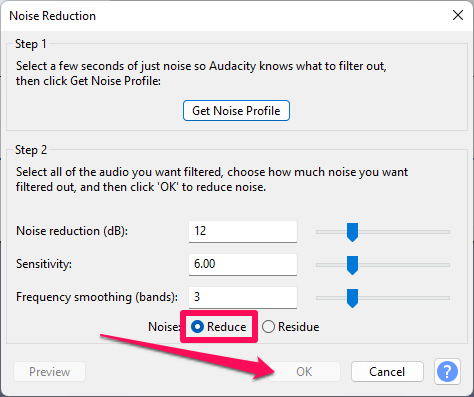
If the default settings don’t give you the best results, you can adjust each of the three parameters.
First is Noise reduction (dB) which determines the degree of volume reduction the effect will apply to identified noise. Keep this setting as low as possible while still filtering out the noise. Higher dB decreases will eliminate more noise but at the cost of some signal.
Next is the Sensitivity setting. This parameter determines how much audio Audacity will identify as noise on a scale from 0 (no noise) to 24 (maximum noise, very aggressive). Because higher sensitivity levels will also filter out signal, start low and work your way up as necessary.
Last is the Frequency smoothing (bands) setting. Frequency smoothing spreads noise reduction to neighboring frequencies to prevent noise artifacts–random bits of tones left over from incomplete noise removal.
This setting will filter out some of your signal, but it can be worth it if it means eliminating artifacts. Nevertheless, if there is a large gap in frequency between your noise and signal, you might not need this feature at all. If so, set the parameter to 0.
While Noise Reduction can be very effective, it isn’t always perfect. Remember, Audacity calls the effect Noise Reduction, not Noise Removal. If the frequencies and volume of your noise and signal are similar, Audacity can have difficulty removing one but not the other.
Noise reduction usually results in some amount of distortion, and the effect works best with constant noise rather than one-time interruptions like a car horn or dog bark. Keep reading for a couple of alternative solutions for noise reduction.
Notch Filter
If your noise is a consistent hum, buzz, or other types of sound, the Notch Filter effect might be a better alternative or complement to Noise Reduction. If using both effects, I would recommend using Notch Filter first.
Notch Filter cuts a frequency “notch” out of your audio, removing all sound at the specified number of hertz.
Therefore, if your background noise is a constant tone, it can be easy to identify and remove the sound. To use Notch Filter, you must identify the frequency of your noise.
- Select a section of audio containing the sound to remove.
- Click on Analyze > Plot Spectrum…
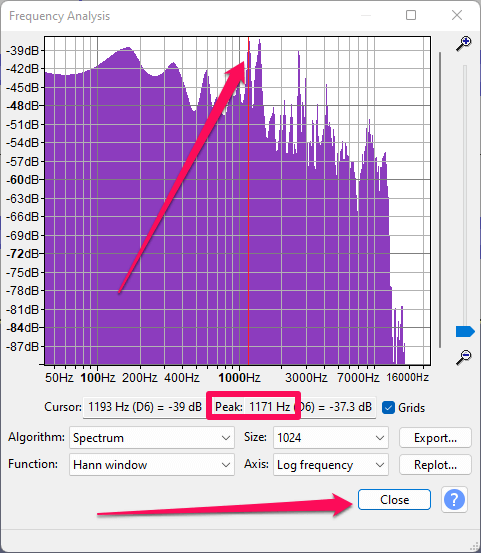
- On the resulting graph, look for sharp peaks outside of the normal frequency curve.
- Hover your cursor over the spikes and look for the number of hertz listed as the Peak.
- Click Close.
- Select all of your audio containing the noise.
- Click Notch Filter.. from the Effect > EQ and Filters menu.
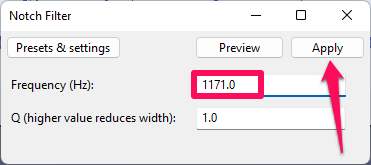
- Enter the peak number from the spectrum analysis in the Frequency (Hz) field.
- Leave Q value at 1.
- Click Apply.
A higher Q value reduces the width of the notch, so you can increase or decrease this setting if necessary to achieve the balance of filtering out just the noise but not leaving behind artifacts.
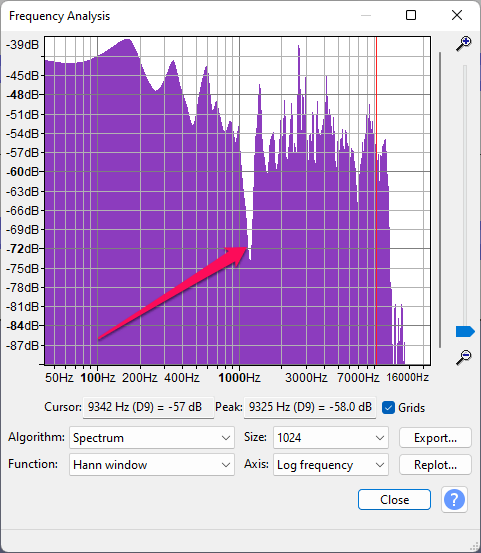
If you go back to the spectrum analysis for that section of audio, now you’ll see Audacity has removed everything in the specified frequency band:
Click Removal
If your audio has clicks or pops, the Click Removal effect might help. To use this feature:
- Select your audio containing clicks.
- Select Click Removal from the Effect > Noise Removal and Repair menu.
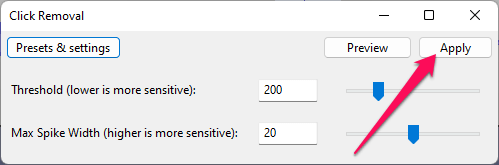
- Keep the default settings and click Apply.
For individual clicks, you can also try the Repair effect.
FAQs
Here are some other questions regarding background noise removal in Audacity.
Is Audacity good for removing background noise?
Audacity has several built-in noise-reducing effects, which makes it an excellent tool for identifying and filtering out noise in your audio. Nevertheless, professional digital audio workstations (DAWs) like Adobe Audition are better suited for more advanced noise reduction techniques.
How do you keep voice but remove background noise and music from a recording?
Audacity includes a vocal isolation effect to assist in this regard. Check out SoftwareHow’s guide to isolate vocals from a song using Audacity.
How do you remove a specific sound from audio in Audacity?
Your best bet for removing a specific sound is to perform a spectrum analysis to identify the sound’s frequency. Then use the Notch Filter or other EQ-modifying effects to filter out the sound.
How to Remove Background Noise from Audio in Audacity
As you can see, eliminating noise from audio can be a complex operation, but to remove background noise in Audacity, your best bet is to start with the Noise Reduction effect.
Select a sample of your noise, then click the Get Noise Profile button to teach Audacity what sounds should be considered noise. Select all your audio, return to the Noise Reduction effect, and click OK.
In general, the greater the contrast both in amplitude and frequency of your noise from your signal, the easier it is to remove. Nevertheless, with some patience and additional tools like the Notch Filter and Click Removal, you should be able to clean up some noise that Noise Reduction misses.
I’ll turn it over to you now. Do you have any tips for removing background noise in Audacity?