
To record audio or do a voiceover in Adobe Premiere Pro, set the playhead where you want to start the recording. Then, click the “Voice-over Record” button in the audio track’s header.
My name is David, and I am a video editor. I have worked with many known brands taking several movie and audio projects. I use Adobe Premiere Pro for all my projects, and I’ve been doing this for the past ten years.
In this article, I will show you how to record audio directly into Adobe Premiere Pro, make your audio sound better, and make your audio sound like a telephone voice.
Table of Contents
How to Record Audio or Do a Voiceover in Premiere Pro
Having a high-quality audio recording is essential for any audio or video production. Many video content creators nowadays like to make videos with voiceovers in the background. Which makes the producers personalize their content and provide more in-depth information.
Recording audio in Adobe Premiere Pro can give you more control over the sound of your video. You can adjust the levels and add effects to ensure the audio is balanced and sounds as professional as possible. It also allows you to ensure that the audio is in sync with the video clip.
Just import the video clip to which you wish to add voiceover and then move it to the timeline. If the original video included sound, remove or mute it to avoid distraction while recording.
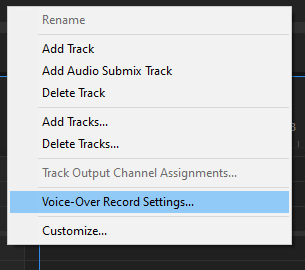
Now, add a new audio track. Simply right-click the timeline header and select “Add tracks.” You will see a voice-over record icon in your timeline in the audio track header.
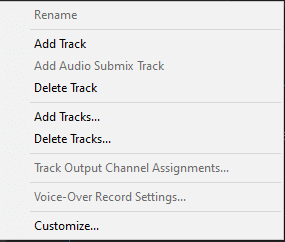
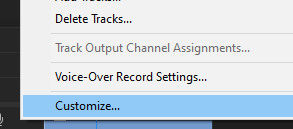
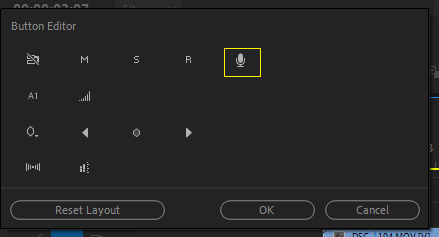
If not, right-click the header, pick “Customize…” and select the voice-over record symbol.
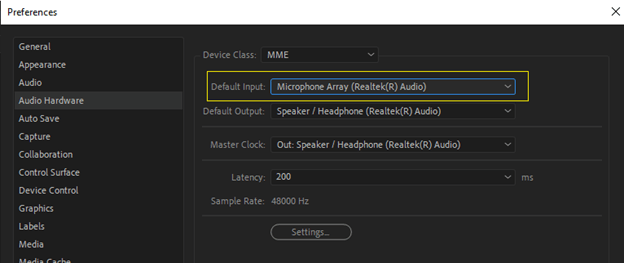
Go to Edit menu > Preferences > Audio Hardware and then check the default input. Ensure that you have the correct microphone selected. If you have an external sound card installed, select it.
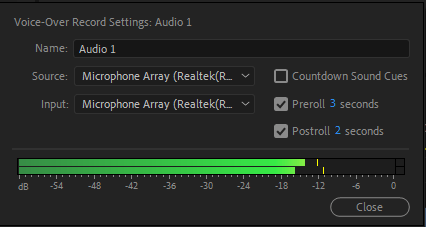
Set the playhead to the location where you wish to begin recording. Right-click the header again and select “Voice-over record-setting,” You will see a live tracking of how your voice sounds, allowing you to confirm that your audio input is quite okay.
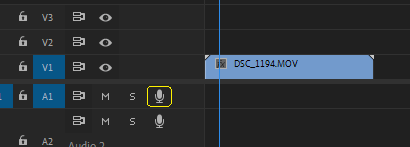
To begin recording, click the Voice-over Record button in the audio track’s header.
The status message “Recording...” displays in the program to show that recording is active.
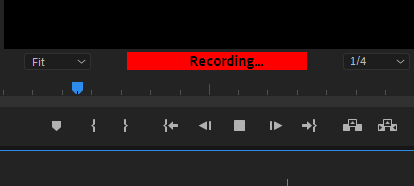
Complete the recording and, when finished, click the stop recording button; you may alternatively accomplish this by using the space bar.
This file may now be put beside the video clip and played simultaneously. Adobe Premiere Pro will also connect these two.
How to Make Voice Sound Better in Premiere Pro
Go to the Audio tab to see the Essential Audio panel. When you choose your audio clip on your timeline, you will find four sound-type options. For voice-over, select Dialogue.
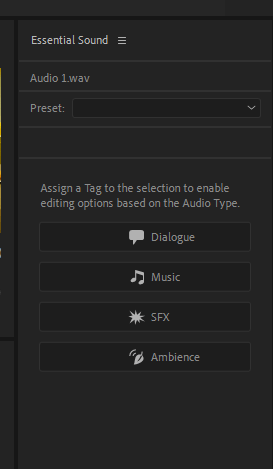
When you pick the “Dialogue” option, you will see many effects and settings that you may now apply to your audio clip. I recommend leaving the preset at “Default.”
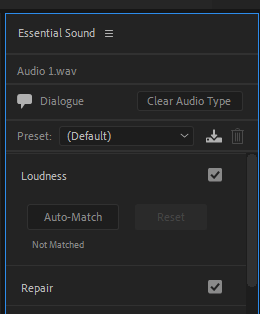
Select Auto Match under Loudness to set the volume to a balanced level. To enable it, tick the “Dynamics” option. Now, under Clarity, you’ll see the three essential effects you’ll need to improve your voice in your audio clip.
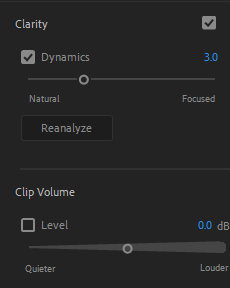
Adjust it to your satisfaction with the slider. The more you go from natural to focused, the more your voice will level out and sound better.
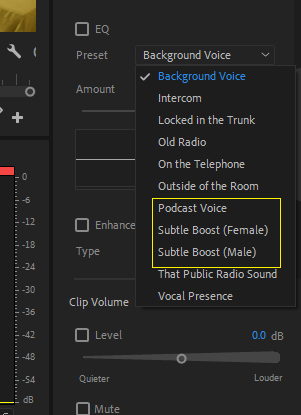
I recommend you choose one of the Subtle Boost or Podcast Voice settings under EQ > Presets. However, you may also select voice presence.
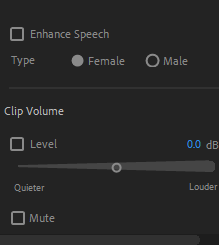
Finally, you may change the Enhance Speech setting. Choose a high or low tone depending on whether you’re working with a female or male voice. I do recommend that people keep low tones for masculine voices.
How to Make Audio Sound Like a Telephone Voice in Premiere Pro
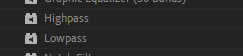
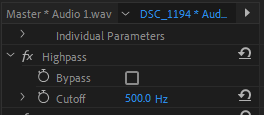
First, open your audio file in Adobe Premiere Pro’s sequence timeline. Then, go to the Effects panel and search for “highpass” and “lowpass.” Drag these two effects onto your audio clip.
Now, navigate to the effect control panel and set the highpass cutoff between 400.0 Hz and 700.0 Hz.
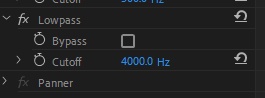
And the lowpass cutoff to 4000.0 Hz. After that, play back the audio to hear the changes.
One thing about these effects is that the high-pass effect produces a higher-pitched, tiny sound. The low-pass effect has a muted sound.
Conclusion
Recording audio or voiceover in Adobe Premiere Pro is easy. With a few simple steps, you can capture high-quality audio from a microphone or other sound source and add it to your project.
Whether you are creating a video, podcast, or audio track, Adobe Premiere Pro is a great tool to use to record and edit your audio. With its powerful audio recording and editing capabilities, Adobe Premiere Pro makes it easy to create professional-sounding projects.
Are you finding it challenging? Don’t be dejected; just drop a question for me in the comment section below.