
You can record voiceovers or anything you like directly into Final Cut Pro with four simple steps.
In fact, I found it simple enough that it was one of the first “advanced” features I used as a novice editor. And, today, in my work as a professional editor, I still use the feature all the time to make notes to myself, add commentary, or just dub over dialogue when I think the writers should consider alternate lines!
But however experienced you are with Final Cut Pro, and regardless of whether you are editing movies for commercial or personal use, knowing how to record audio directly into your movie can open up a world of possibilities for creative ways to tell your story.
Table of Contents
Key Takeaways
- You can start recording audio by selecting Record Voiceover from the Windows menu.
- Your new audio clip will be recorded wherever you last placed your Playhead.
- The “advanced” options in the Record Voiceover popup window can give you greater control over your recording.
Recording a Voiceover in Four Simple Steps
Step 1: Move your Playhead to the spot in your timeline where you want the recording to start. For example, where the blue arrow is pointing in the screenshot below.
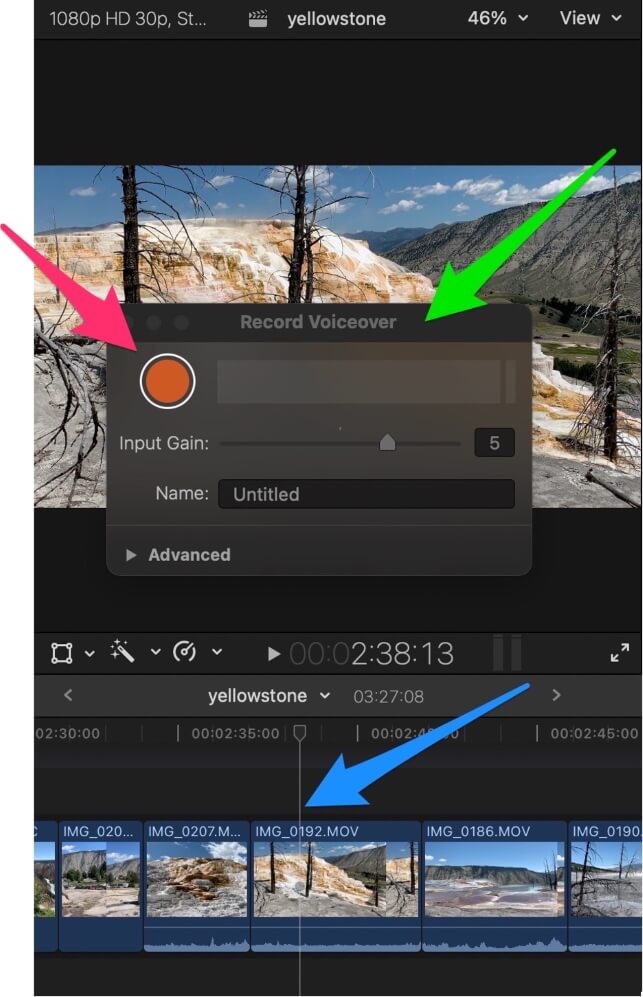
Step 2: Select Record Voiceover from the Window menu.
A dialogue box pops up with the title “Record Voiceover” as highlighted by the green arrow in the screenshot above.
Step 3: To start recording, press the round orange button highlighted by the red arrow in the screenshot above.
When pressed, the orange button will change to a square shape (to signify that pressing it again will stop the recording) and Final Cut Pro will start a beeping countdown. After the third beep, Final Cut Pro will begin recording.
As you record, a new audio clip will appear where your Playhead was, and will lengthen as your recording progresses.
Step 4: When you are done talking, press the orange button (now a square) again.
Congratulations! You now have recorded some live audio directly into your movie’s timeline!
Tip: There is a keyboard shortcut to start recording audio but using it starts the countdown immediately (no pressing of the orange button required), so be ready to record when you press Option-Shift-A!
Playing with the Recording Settings
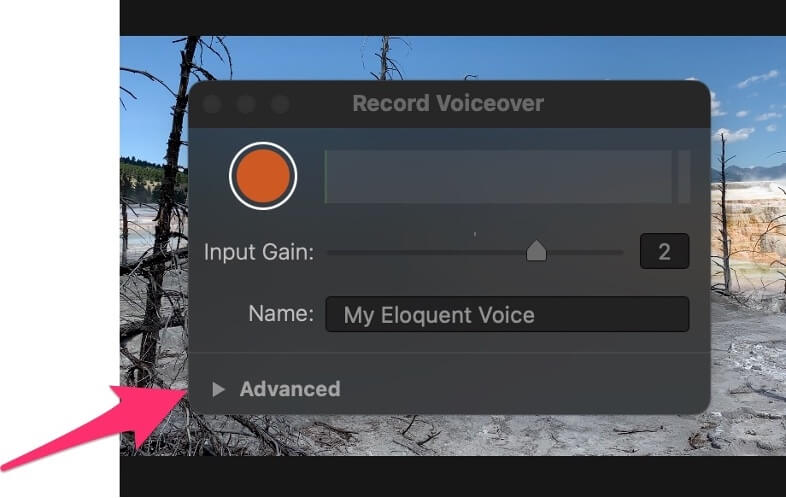
The Record Voiceover window allows you to change the “gain” (how loud to make the recording) and gives you the option to give the new audio clip a name.
But clicking on the Advanced dropdown menu (highlighted by the red arrow in the screenshot below) gives you a lot more options to tweak what and how you record.
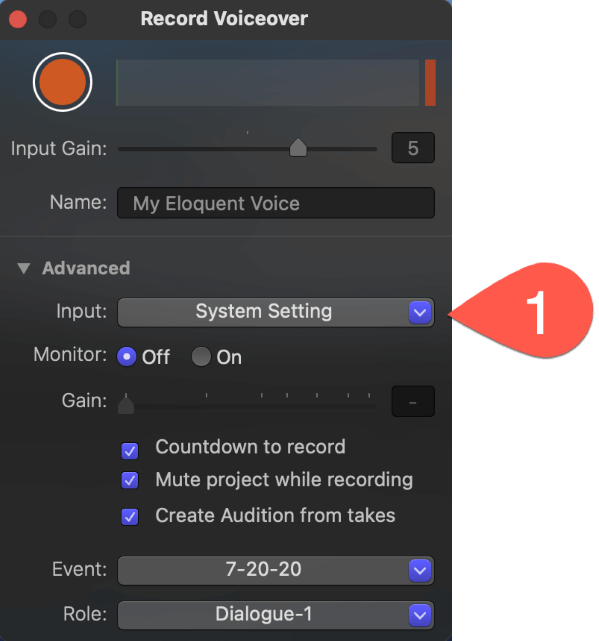
When you have clicked the Advanced menu, the Record Voiceover window should expand and look like the screenshot below:
Settings Part 1: Changing the Input
By default, Final Cut Pro assumes the input for recording sound is whatever your Mac currently defaults to. If you click on the little blue dropdown arrow next to System Setting (see the red #1 tab in the screenshot above), you will see something like the screenshot below:
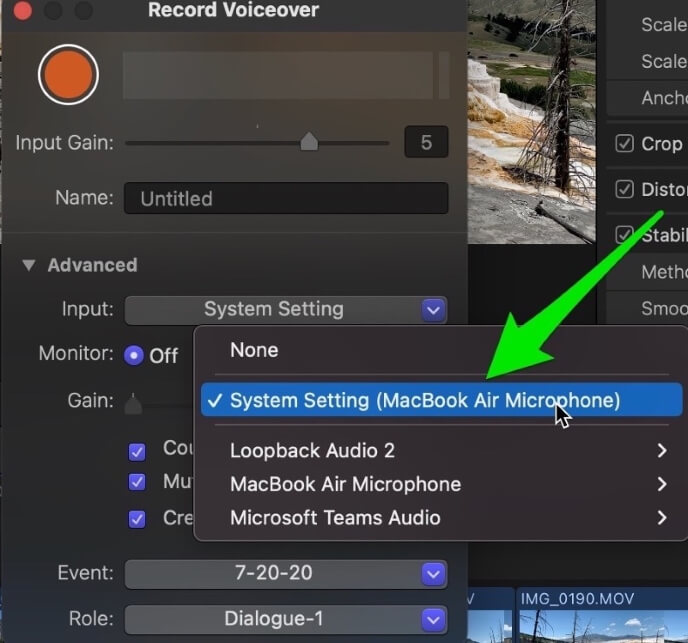
The green arrow in the screenshot above is pointing to the current setting, which is indeed the System Setting and it helpfully clarifies that my MacBook Air’s current system setting is the laptop’s own microphone.
Digression: Now that you know what kind of computer I am using to write about Final Cut Pro, I hope this assures you that you can happily run Final Cut Pro on a MacBook Air. Well, at least an M1 MacBook Air. Seriously, the M1 is much faster than previous versions, but it runs Final Cut Pro like a champ. Enjoy!
Now, the various options you will have below the default “System Setting” will vary depending on how your computer is setup.
But in the list that appears on your computer, you should find any external microphones you’ve installed, or other software/hardware that you may want to use as inputs for your recording.
Another Digression: My list shows “Loopback Audio 2” as an option because that is a piece of software that allows you to record audio directly from other applications, which is pretty handy, and is made by a great company called Rogue Amoeba.
Settings Part 2: Miscellaneous Recording Options
In the screenshot below, highlighted by the red #2 tab, there are three checkboxes that may be self explanatory, but we will briefly explain them:
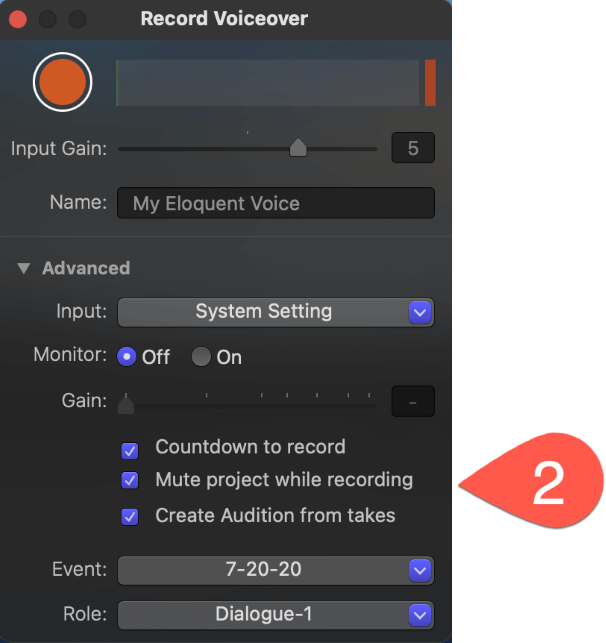
Countdown to record: This toggles on/off Final Cut Pro’s 3-second countdown. Some love it, some find it annoying.
Mute project while recording: This can be handy when you want to record yourself talking over your movie’s sound while it is playing. Granted, you are unlikely to want to use the clip in the same place as you recorded it otherwise the movie’s sound will play twice, but it can be very useful if you intend to move the clip to another project.
Create Audition from takes: This is a somewhat advanced Final Cut Pro feature, which I encourage you to learn more about. But the short explanation is: If this box is check, Final Cut Pro will put each recording you make into the same audio clip. Then when you go to play them back you can choose which one you like the best.
Settings Part 3: Saving and Organizing Your Recordings
In the screenshot below, highlighted by the red #3 tab, there are two options to set the Event and the Role.
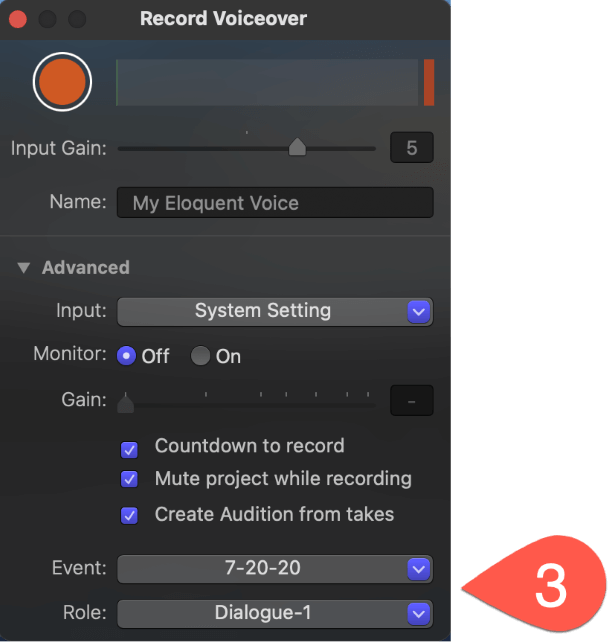
While we know your audio clip will appear in your timeline near your Playhead, Final Cut Pro also wants to store the file somewhere in your Library.
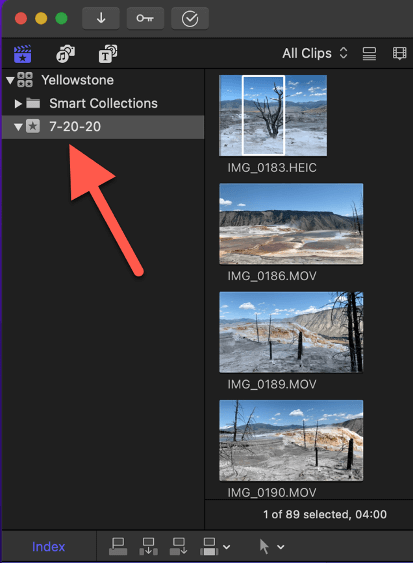
In our example, the Event is “7-20-20” so the clip will be stored in the Event with that name in your Sidebar (highlighted by the red arrow in the screenshot below)
By changing the Event with this setting, you can choose where in your library the audio clip will be stored if you want to access it later.
Finally, the ability to choose a Role for your audio clip may be a bit advanced for many casual Final Cut Pro users, so if you are not familiar with Roles, best to just leave this on its default setting.
But for those who are curious, a Role can be thought of as a type of clip, such as videos, music, titles, or effects. By selecting a Role for your audio recordings you can ensure all of them will be on the same row in your timeline, and you can use the Index functions to mute them, enlarge them, and so on.
Final Thoughts
There are really just three steps to recording your own audio: Choose where you want it to appear by moving your Playhead there, selecting Record Voiceover from the Windows menu, and pressing the big orange button.
The fourth step, pressing stop, is (I hope) kind of obvious.
But I hope this article has given you a good feel for the less obvious “advanced” settings that allow alternative sources for your audio, let you adjust how the audio gets recorded, and be more organized about where your new audio clips will be stored.
Now, have fun recording and, please, do let me know in the comments below if this article has helped you, if you have additional questions about recording audio, or if you have any suggestions about how I could make the article better. Thank you.