
Did you know that you can convert raster images into vector objects in Adobe Illustrator? With Image Trace you can create a variety of effects and simplify your design workflow in a few clicks.
My name is Elianna. I have a Bachelor of Fine Arts in Illustration and have been using Adobe Illustrator for over six years. I use Adobe Illustrator to create posters, illustrators, business cards, and more.
In this article, I will explain how Image Trace works and how you can use it to create vector artwork in your designs.
Let’s get into it!
Table of Contents
Key Takeaways
- Image Trace has six presets including Auto-Color, High-Color, Low-Color, Black and White, Grayscale, and Outlines with more in the Presets tab.
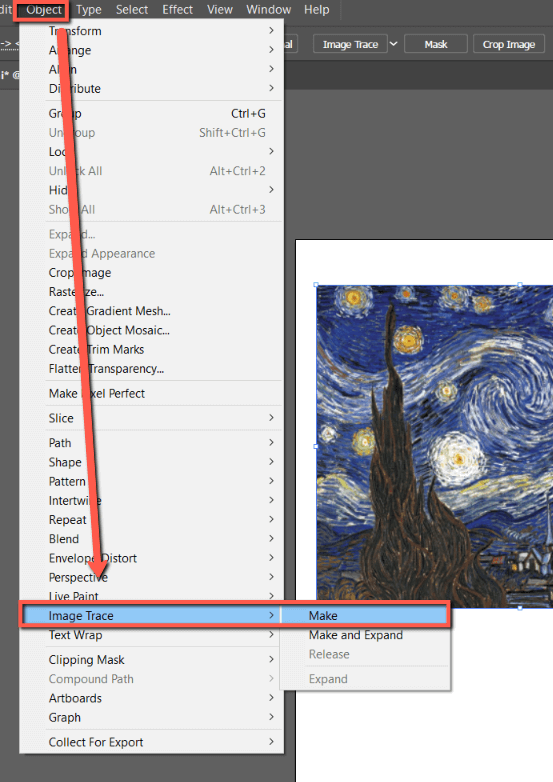
- Use Object > Image Trace > Make to trace your image.
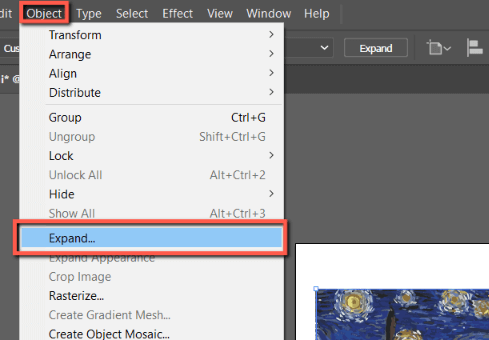
- Use Object > Expand to expand your tracing result.
Image Trace Options in Illustrator
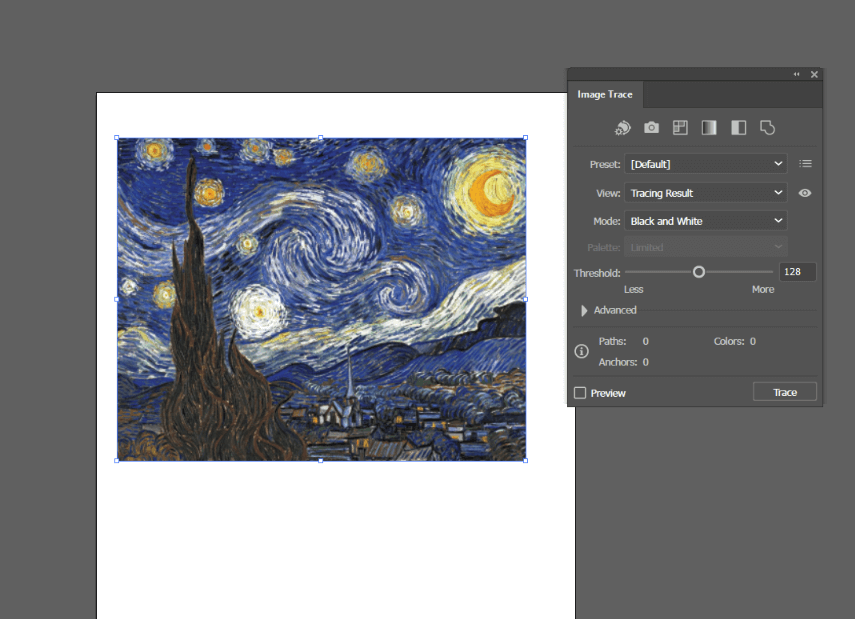
Adobe Illustrator’s Image Trace offers users a powerful tool to vectorize an image. Here is an overview of the Image Trace menu, with a description of the functions.

On the top of the Image Trace panel are six default image trace options which mainly affect the color. Here is what they do:

| Auto-Color | Produces a posterized vector image |
| High Color | Produces a photorealistic image |
| Low Color | Produces a simplified image |
| Grayscale | Produces artwork with shades of gray |
| Black and White | Produces a black-and-white image |
| Outlines | Produces an image with black outlines |
Preset defines the style of the end result of your image trace and includes the following options. You can also save your own presets in this menu.
| Default | The default image trace preset |
| High-Fidelity Photo | Produces an artwork as close to the original as possible |
| Low-Fidelity Photo | Produces a low-fidelity artwork |
| 3 Colors | Produces an image trace with a vector image consisting of three colors |
| 6 Colors | Produces an image trace with a vector image consisting of six colors |
| 16 Colors | Produces an image trace with a vector image consisting of sixteen colors |
| Shades of Gray | Converts the image to an artwork consisting of swatches with only shades of gray |
| Logo | Best for tracing logos. |
| Sketched Art | Produces black and white artwork with strokes and filled areas. |
| Silhouettes | Produces a black and white artwork with strokes and fills. |
| Lineart | Simplifies the images to black outlined strokes. |
| Technical Drawing | Simple images to outline strokes, similar to Lineart, but more refined. |
View species the view of the traced object between the two components (source image and tracing result). There are five view options including Source Image, Tracing Result with Outlines, Outlines, Outlines with Source Image, and Source Image.
Mode allows you to toggle the color mode of the tracing result with three options: Color, Grayscale, and Black and White.
Palette changes depending on the Mode selected and includes Automatic, Limited, Full Tone, and Document Library. Is used in tandem with the Colors slider.
How to Live Trace in Illustrator
Live Tracing is easy and can be done in a few clicks. However, before we begin it is important to set up our workspace correctly by opening the Image Trace menu. Go to the overhead menu and choose Window > Image Trace.
Once you have opened the Image Trace menu you can begin with the tutorial.
Step 1: Paste an image you would like the trace in Illustrator and select it.
Step 2: Go to Object > Image Trace > Make.
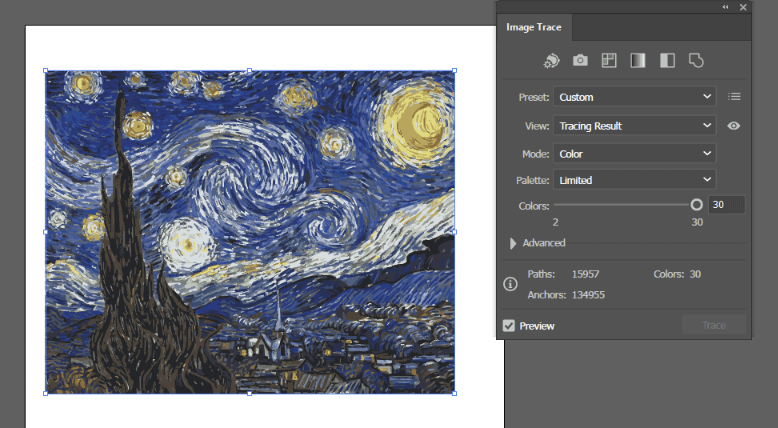
Step 3: Edit your traced result in the Image Trace menu.
Step 4: When you are done, use Object > Expand to expand your tracing result for editing.
Final Thoughts
Image Trace is a powerful tool that can be accessed with Object > Image Trace and allows you to bring in a variety of assets to use in your Illustrator document. Experimenting with image trace presets can produce a broad range of effects. Explore Advanced options for even more features.
What presets do you use most with Image Trace? Tell me in the comments below!